
Related Manuals for Kenwood K25JSS11


Summary of Contents for Kenwood K25JSS11
- Page 1 25 Litre Stainless Steel Microwave K25JSS11 instruction manual microwave potato auto reheat weight/time defrost clock/pre-set stop/clear start +30sec/confirm...
-
Page 3: Table Of Contents
contents unpacking ..........................4 getting ready ........................5 introducing microwave cooking ..................6 cooking with a microwave ........................6 checking your cooking utensils ......................7 using aluminium foil in your microwave ...................7 microwave heating categories ......................8 steam ...............................9 condensation ...........................9 product overview ......................10 the main unit ..........................10 the control panel ..........................10 checking your microwave....................11... -
Page 4: Unpacking
Thank you for purchasing your new Kenwood Microwave. These operating instructions will help you use it properly and safely. We recommend that you spend some time reading this instruction manual in order that you fully understand all the operational features it offers. -
Page 5: Getting Ready
getting ready This microwave is designed for domestic use. It should not be used for commercial catering. 1. After unpacking your microwave, check that it has not been damaged whilst in the box. Make sure there are no dents on the microwave, and the door closes properly. A dented or damaged microwave could allow microwave energy to escape. -
Page 6: Introducing Microwave Cooking
introducing microwave cooking Always remember the basic safeguards you would follow when using any cooking equipment or handling hot food. See below for basic guidelines in microwave cooking. If you are unfamiliar with using a microwave, refer to the back of this instruction booklet for more information. -
Page 7: Checking Your Cooking Utensils
checking your cooking utensils Most heat-resistant, non-metallic cooking utensils are safe to use in your microwave. If you are not sure you can use a utensil in your microwave, follow this simple test: 1. Put the utensil into the microwave next to a cup of water – use a cup that you know is microwave safe. -
Page 8: Microwave Heating Categories
microwave heating categories Your microwave has been tested and labelled to meet the UK government’s voluntary agreement on the reheating of pre-cooked food. The heating characteristics and output power levels of microwaves are usually calculated using a relatively large portion of food (a 1000 gram load, IEC 60705) but many packs of pre-cooked food are sold in smaller packs, often about 350 grams. -
Page 9: Steam
steam When you microwave food, steam is created as water in the food heats up and evaporates. The steam formed during microwave cooking is entirely safe. It has to escape from the microwave to prevent pressure from building up inside the microwave. It does this through the vents on the back of the microwave and from around the door. -
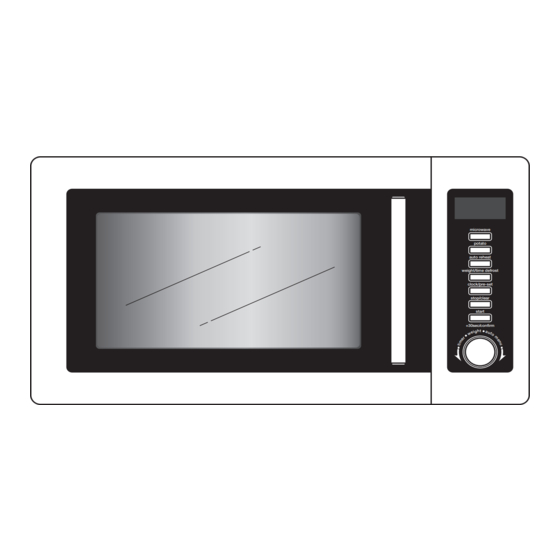
Page 10: Product Overview
product overview the main unit control panel microwave potato auto reheat weight/time defrost clock/pre-set stop/clear start +30sec/confirm door handle the control panel LED display Shows the clock, cooking time and setting. microwave microwave button Use this button to select the potato potato button microwave function. -
Page 11: Checking Your Microwave
checking your microwave Check your microwave after unpacking. For your safety, the microwave stops if the door is opened during cooking. Close the door and press the start/+30sec/confirm button to continue the cooking cycle. 1. Pull the handle to open the door. 2. -
Page 12: Clock Setting
clock setting When the microwave is connected to the mains power, the LED display will show “0:00”, and the microwave will sound once. Please ensure that you have set the clock prior to use. Please follow the steps below to set the clock. 1. -
Page 13: Setting The Child Lock
setting the child lock This feature prevents the electronic operation of the microwave by locking the operation of the control panel until you have cancelled it. Please follow the steps below to set the child lock. 1. Press the stop/cancel button for 5 seconds and a long tone will sound. -
Page 14: Microwave Cooking
microwave cooking For simple microwave cooking, follow the steps below. For instance: If you want to use 80% microwave power to cook for 20 minutes. 1. Press the microwave button once and the LED display will show “P100”. Press the microwave button repeatedly until the LED display shows “P80”. -
Page 15: Two-Stage Cooking
two-stage cooking For two-stage cooking, please follow the steps below. For instance: If you want to defrost your food for 5 minutes and then to cook it with 80% microwave power for 7 minutes. You can set a maximum of 2 stages for two-stage cooking. If defrosting is among one of the stages, then it will be set as the first stage. -
Page 16: Delay Start Cooking (Programme Set In Advance)
delay start cooking (programme set in advance) For delay start cooking, please follow the steps below. For instance: If the current time is 12 o’clock (noon) and you want to cook it with 80% microwave power for 5 minutes at 1:30 o’clock in the afternoon. You can set a maximum of 2 stages for delay start cooking, defrost cannot be set as one of those stages. -
Page 17: Auto Cooking
auto cooking This feature allows you to cook most of your food based on the food category and the weight. Select the category and choose the weight of your food. For quick reference of the cooking time and the weight, please refer to the auto menu table. auto menu 1. -
Page 18: Auto Menu Table
The density and thickness of food can affect its cooking time. Ensure all food is piping hot and cooked thoroughly before serving. It is essential that food is checked during and after the recommended cooking time, even if auto menu was used. auto menu table Cooking Menu... -
Page 19: Auto Reheat
auto reheat This feature allows you to quickly reheat your food based on the weight with 100% microwave power. Please follow the steps below. 1. Press the auto reheat button once, and the LED display will show “200”. Press the auto reheat button again to increase by another 200g. -
Page 20: Potato Cooking
potato cooking This feature allows you to cook potatoes based on their weight. Please follow the steps below. 1. Press the potato button once, and the LED display will show “200”. Press the potato button again to increase by another 200g. You may increase the cooking weight up to 600g. -
Page 21: Defrosting
defrosting This feature allows you to defrost your frozen foods simply by entering the weight or time. defrost by weight 1. Press the weight/time defrost button once and the LED display will show “dEF1”. 2. Turn the timer/weight/auto menu dial to adjust the weight of your food. -
Page 22: Quick Start Cooking
quick start cooking This feature allows you to quickly cook your food for 30 seconds with 100% microwave power. Please follow the steps below. 1. Press the start/+30sec/confirm button to start the quick start cooking. Press the start/+30sec/confirm button again to increase by another 30 seconds. -
Page 23: Querying The Cooking Function
querying the cooking function This feature allows you to check and view the current cooking settings. to find out the current cooking setting 1. Press the microwave button once and the LED display will show the current cooking power while the microwave is in microwave, cooking. -
Page 24: Cleaning Your Microwave
cleaning your microwave Cleaning your microwave each time you use it will help to prevent a build up of stubborn marks that can be difficult to clean. Unplug your microwave from the mains and wait for it to completely cool down before cleaning. On the right hand side wall of the cavity is the wave guide cover. -
Page 25: Frequently Asked Questions
frequently asked questions If a problem does occur, it may often be due to something very minor. The following Q & A may be able to resolve the problem. Questions Answers Why doesn’t the food seem to Check that: cook? •... -
Page 26: Specification
Model K25JSS11 Input 230 - 240V~ 50Hz Microwave Output 850 - 900 Watts Microwave Frequency 2450MHz Outside Dimensions 513mm x 425mm x 305mm (width x deep x height) Power consumption Microwave Input 1400 - 1450 Watts Complies with EC directives 2004/108/EC and 2006/95/EC. -
Page 27: Safety Warnings
safety warnings general safety • Switch off and unplug before fitting or removing tools/attachments, after use and before cleaning. • Keep your fingers away from moving parts and fitted attachments. • Never use a damaged appliance. • Never operate the appliance when it is empty. •... - Page 28 cooking use • As the power of different microwaves can vary considerably, care must be taken when first using this microwave as it may cook faster than expected. • Do not leave the microwave unattended during use. • Take care when cooking food with a high sugar or fat content, such as Christmas pudding or fruitcake.
-
Page 29: Earthing Instructions
containers warning : Pressure will build up in sealed containers and can cause them to explode. Therefore, do not use the following in your microwave: - Sealed containers - Capped bottles - Vacuum containers - Sealed jars - Hard-boiled eggs - Eggs in their shells - Nuts •... - Page 32 NOTE: If you require a replacement for any of the items listed below, please quote their corresponding part numbers: Replacement Part Part Number Glass Turntable Plate 252100500013 Turntable Support 262200200007 Visit Partmaster.co.uk today for the easiest way to buy electrical spares and accessories. With over 1 million spares and accessories available we can deliver direct to your door the very next day.
Need help?
Do you have a question about the K25JSS11 and is the answer not in the manual?
Questions and answers