Amica AWC600 Installation, Use And Maintenance Manual
Hide thumbs
Also See for AWC600:
- Use and maintenance (28 pages) ,
- Directions for installation, use and maintenance (28 pages) ,
- Installation, use and maintenance manual (24 pages)

Related Manuals for Amica AWC600


Summary of Contents for Amica AWC600
- Page 1 AWC300 & AWC600 Wine Coolers Installation, use and maintenance www.amica-international.co.uk...
-
Page 2: Table Of Contents
Contents: Important Before first use Notes on use Use and controls Locking and unlocking the control panel Switching the power on and off Changing the temperature Changing the temperature reading (°C/°F) Optimal temperatures for different wines Using the internal lighting 9 - 11 Temperature display (set and real) Quiet mode... -
Page 3: Important
Important Amica cannot be held responsible for injuries or losses caused by incorrect use or installation of this product. Please note that Amica reserve the right to invalidate the guarantee supplied with this product following incorrect installation or misuse of the appliance or use in a commercial environment. - Page 4 Appliance information: Please enter the details on the appliance rating plate below for reference, to assist Amica Customer Care in the event of a fault with your appliance and to register your appliance for guarantee purposes. Appliance Model Serial Number...
-
Page 5: Before First Use
Before first use You must allow the appliance to settle for at least twenty four hours prior to switching the power on. It is recommended that you remove all internal and external packaging and clean the interior of the appliance prior to first use. We recommend that you use a solution of bicarbonate of soda and warm water and then thoroughly dry the interior. - Page 6 • Only store wine in sealed containers. • Do not overload the cabinet. • Only open the door when necessary. • Do not cover the shelves with aluminium foil or anything else that will prevent air from circulating around the cabinet. •...
-
Page 7: Use And Controls
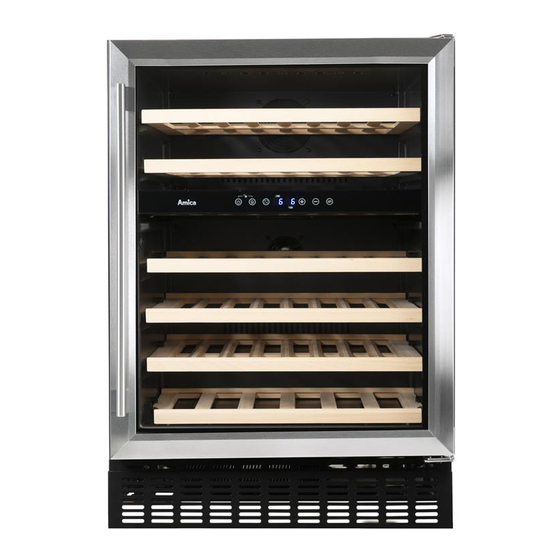
Use and controls AWC300 Key: 1 – Power button 2 – Light button 3 – "+" button 4 – "-" button AWC600 Key: 1 – Power button 2 – Light button 3 - Temperature display button 4 – "+" button 5 –... - Page 8 • What the wine cooler display does next is dependent upon what temperature display you have active (see pages 9-10). To change the zone control - AWC600 • Unlock the control panel, if necessary. •...
-
Page 9: Temperature Display (Set And Real)
Optimal temperature selection Below is a table showing the recommended storage temperatures for different types of wine. These are also the ideal drinking temperatures for most types. Wine Type Red Wine 15 - 18ºC (59ºF-64ºF) Dry ⁄ White Wine 9 - 14ºC (48ºF-57ºF) Rosé... - Page 10 • A decimal point '.' next to the temperature signifies that the wine cooler is working to achieve the set temperature. When the decimal point disappears, or if it is not present, the cooler's sensor has detected that the set temperature has been reached. The decimal point may reappear periodically when the cooling system kicks in to maintain the temperature.
-
Page 11: Quiet Mode
• Use the button to switch between '02' and '01'. '02' is the Set temperature display mode and '01' is the Real temperature display mode. Once the mode you desire is shown on the display, touch nothing for approximately 5 seconds. The appliance should beep and switch to the new display mode. -
Page 12: Removing The Shelves
Removing the shelves • To remove a shelf from the wine cooler, first remove all bottles from the shelf, then pull the shelf forwards until the groove on either side of the shelf is level with the plastic peg on either side of the cabinet (as shown in Fig 2). -
Page 13: Temperature Alarm
6 hours of the alarm tripping. The warnings will continue however. Troubleshooting If you have any problems with your appliance, you should check the troubleshooting guide prior to calling Amica Customer Care. If the appliance is not working, check • There is power to the appliance •... - Page 14 The appliance is working, but not very well, check • The appliance is not overloaded. • The thermostat is set to an appropriate temperature. • The door is closing properly. • The door gasket is sealing properly • There is enough ventilation at the side and rear walls. •...
- Page 15 The minimum space required is: AWC300 – 300mm W x 570mm D x 830/890mm H AWC600 – 600mm W x 570mm D x 830/890mm H Please note: When the product is installed, there should be a small ventilation gap between the top of the unit and the underside of the worktop (6 mm or ¼”)
- Page 16 These products should not be installed: 1. In direct sunlight. 2. Adjacent to a heat source (oven or radiator). 3. Below a hob unit. 4. In a damp or wet environment Where a continuous plinth is to be used, it is necessary to cut a section out so that the ventilation slots at the front of the appliance are not obstructed in any way as per Fig 3.
-
Page 17: Reversing The Door
1. Peel back the door seal from the glass side to expose the screw holes, as per Fig. 4. Place a screwdriver against the screw and hold it in position. 2. Carefully locate the handle over the fixing screw. 3. Using a screwdriver, tighten the securing screw to fix the handle. Repeat with the remaining handle fixing screw. - Page 18 1. With the help of another, open the door and support it. Loosen and remove the two screws from the pivot plate of the lower right hinge, Door as per Fig. 6. 2. Move the door away from the wine cooler slightly and remove the pivot plate from the bottom of the door as per Fig.
- Page 19 6. Turn the door around by 180° (upside down) so that the handle is now on the right (Fig. 11). Insert the pivot plate into the now-bottom of Upper Left Hinge the door as per Fig. 12. Bottom Left Hinge 7.
-
Page 20: Adjusting The Plinth
Bottom left hinge Pivot plate Screws (2pcs) Fig. 13 Adjusting the plinth The pre-fitted plinth/grille for this appliance comes with an adjustable section. The process for adjusting the plinth trim is simple and is achieved by following the steps below. 1. -
Page 21: Electrical Information
Electrical information Warning! This appliance must be earthed. Green and yellow to Earth Brown to Live 13 Amp fuse Cord clamp Blue to Neutral Fig. 14 The mains lead of this appliance has been fitted with a BS 1363A 13 amp fused plug. - Page 22 How to connect an alternative plug If the fitted plug is not suitable for your socket outlet, then it should be cut off and disposed of safely to avoid possible shock hazard. A suitable alternative plug of at least 13 Amp rating to BS 1363 should be used.
-
Page 23: Energy Efficiency Information
18 [lowest temperature] °C and 38 [highest temperature] °C Airborne Acoustic Noise dB(A) Emissions Installation Type Built-under Built-under E & O E. All instructions, dimensions and illustrations are provided for guidance only. Amica reserve the right to change specifications without prior notice. - Page 24 For more information please contact: The Sales Department on 01949 862 010 Customer Care Department: Amica CCD, The CDA Group Building, Harby Road, Langar, Nottinghamshire, NG13 9HY T: 01949 862012 F: 01949 862003 E: customercare@amica-international.co.uk www.amica-international.co.uk...
Need help?
Do you have a question about the AWC600 and is the answer not in the manual?
Questions and answers