
Related Manuals for Belkin F1DC108V


Summary of Contents for Belkin F1DC108V
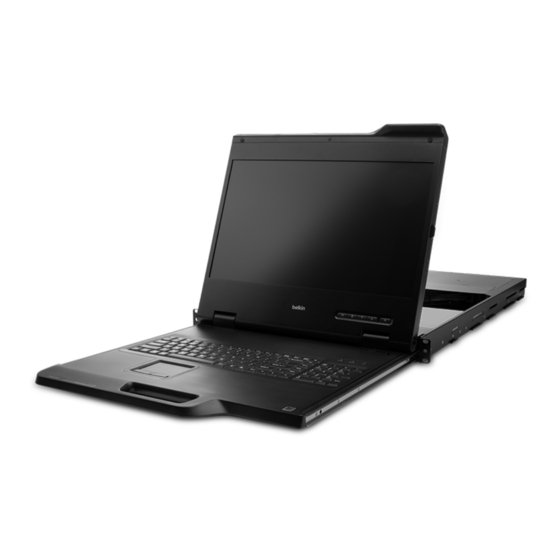
- Page 1 18.5" Widescreen Rack-Mount Console with Built-In PRO3 KVM Switch User Manual 8820-02661 Rev. A00 F1DC108V/F1DC116V...
- Page 2 TABLE OF CONTENTS SECTIONS Table of Contents 1 Introduction ..........1 4 Using your Rack-Mount Console .
- Page 3 Congratulations on your purchase of the Belkin 18.5-inch Widescreen • Free technical support Rack-Mount Console with Built-In PRO3 KVM Switch (the Rack-Mount Console). Our diverse line of KVM solutions exemplifies the Belkin • 18.5-inch Widescreen LCD commitment to delivering high-quality, durable products at an affordable price.
-
Page 4: Package Contents
Thank you for purchasing the Belkin Rack-Mount Console with Built-In PRO3 KVM Switch. We appreciate your business and have confidence that you will soon see for yourself why Belkin is the number-one-selling 18.5” Widescreen 2 Brackets 1 Cable Kit* brand in KVM switches worldwide. -
Page 5: Feature Overview
Rack-Mount Console and can be Security downloaded from Belkin’s support website at www.belkin.com/support. Allows you to specify user names and passwords to prevent unauthorized users from accessing the OSD and KVM Switch. -
Page 6: Equipment Requirements
SECTIONS Table of Contents Equipment Requirements: Cables: Hot-key functionality allows you to select a desired port using designated Connecting the Rack-Mount Console to a server requires a Belkin Dual- Port Micro-Cable Kit. Belkin Dual-Port Micro-Cable Kits: F1D9400-XX (PS/2-style) F1D9401-XX (USB-style) -
Page 7: System Requirements
F1D108-CBL-XX • PS/2-compatible • USB-compatible • Supports 101-/102-/104-key keyboards Belkin Daisy-Chain Cable: F1D108-CBL-XX Mice (-XX denotes length in feet) • PS/2- and USB-compatible mice having 2, 3, 4, or 5 buttons Note: Product codes and availability may vary. • PS/2- and USB-compatible wireless or optical mice... -
Page 8: Unit Display Diagrams
OVERVIEW SECTIONS Table of Contents Unit Display Diagrams Back View of the Widescreen Rack-Mount Console with Built-In PRO3 KVM Switch: Front View of the Widescreen Rack-Mount Console with Built-In PRO3 KVM Switch: Handle Console: VGA, PS/2 mouse/keyboard ports, USB mouse/keyboard ports TFT/LCD Active-Matrix LCD Front-Panel... -
Page 9: Specifications
OVERVIEW SECTIONS Table of Contents Specifications Part No.: F1DC108V, F1DC116V Daisy-Chain Ports: DB25 female Daisy-Chain: Maximum of 16 OmniView KVM Switches Flash-Upgrade Port: RJ11 No. of Servers Supported: 8 and 16 respectively for 8- and 16-port Operating Temp: 32° to 104° F (0~40° C) models (256 servers max. -
Page 10: Installation
Console and the connected servers does not exceed 25 feet (7.6m). cables while servers are powered on may cause irreversible damage of the servers and/or the Rack-Mount Console. Belkin is not responsible for damage caused in this way. You are now ready to begin installation of your Rack-Mount Console. - Page 11 (PS/2 Connection): Step 1 Make sure your server is powered off. Step 2 Using the Belkin Dual-Port Micro-Cable Kit for PS/2 (F1D9400-XX), connect the VGA connector to the monitor port on your server. (Refer to diagram on the right.) Step 3 Connect the PS/2 mouse and keyboard connectors to the mouse and keyboard ports on the server.
- Page 12 INSTALLATION SECTIONS Table of Contents Step 4 Connect the Belkin Dual-Port Micro-Cable Kit for PS/2 to the desired host ports on the PRO3 KVM Switch. (Refer to diagram on the right.) Step 5 Power up your server. Step 6 Repeat Steps 1 through 5 for each additional PS/2 server you wish to connect.
- Page 13 Console (USB Connection): Step 1 Make sure your server is powered off. Step 2 Using the Belkin Dual-Port Micro-Cable Kit for USB (F1D9401-XX), connect the VGA connector to the monitor port on your server. (Refer to diagram on the right.) Step 3 Connect the USB connector to an available USB port on the server.
- Page 14 Table of Contents Step 4 Connect the Belkin Dual-Port Micro-Cable Kit for USB to the desired host ports on the PRO3 KVM Switch. (Refer to diagram on the left.) Your server should recognize the KVM-Switch connection and automatically install the HID USB driver, if necessary.
- Page 15 KVM switch. Refer to the diagram on the right. cable 3 Note: A Daisy-Chain Cable (F1D108-CBL) is required to daisy-chain each PRO3 KVM Switch and is available through your Belkin reseller, or online Secondary unit (BANK 03) at www.belkin.com.
- Page 16 INSTALLATION SECTIONS Table of Contents How to Assign a BANK Address DIP SWITCH# BANK ADDRESS All PRO3 KVM Switches feature a “BANK DIP” switch. The “BANK DIP” switch is used to assign the proper BANK address to each PRO3 BANK PRIMARY (default) KVM Switch.
- Page 17 INSTALLATION SECTIONS Table of Contents Example of Daisy-Chain Configuration Getting Started Primary unit ( B ANK 00) cable 1 Step 1: Make sure that all servers, Rack-Mount Console, and PRO3 KVM Switches are powered off and that each PRO3 KVM Switch has been assigned a unique BANK address.
- Page 18 INSTALLATION SECTIONS Table of Contents Connecting the Primary and Secondary KVM Switches: Connecting the Servers: Step 1 Step 1: Using the Daisy-Chain Cable (F1D108-CBL), connect one end to the Connect all servers to the primary and secondary KVM switches. Refer to “Daisy-Chain In”...
-
Page 19: Powering Up The Systems
INSTALLATION SECTIONS Table of Contents Powering Up the Systems Verify that all servers connected to the PRO3 KVM Switch are powered on. If any connected servers have not been powered on, it is okay to do so at this time (servers can be powered on simultaneously). The PRO3 KVM Switch emulates both a mouse and keyboard on each port and allows your server to boot normally. -
Page 20: Selecting A Server Or Bank Using Hot-Key Commands
USING YOUR R UNT CONSOLE SECTIONS Table of Contents Selecting a Server or BANK Using Hot-Key Commands Now that you have connected your console and servers to your Rack- Mount Console, it is ready for use. Select connected servers through the On-Screen Display;... - Page 21 USING YOUR R UNT CONSOLE SECTIONS Table of Contents With a single-switch configuration (no daisy-chained KVM switches), you can switch directly to any port by entering the 2-digit number of the port you wish to access. For example, if you press “Scroll Lock”, “Scroll Lock”, “02”, the PRO3 KVM Switch will switch to the server on Port 2 located on BANK 00.
- Page 22 USING YOUR R UNT CONSOLE SECTIONS Table of Contents With a daisy-chain switch configuration, you can switch between BANKs (KVM switches) by pressing “Scroll Lock”, “Scroll Lock”, “Page Up”, to switch to the previous BANK. Press “Scroll Lock”, “Scroll Lock”, “Page Page Page Down...
-
Page 23: Autoscan Mode
USING YOUR R UNT CONSOLE SECTIONS Table of Contents AutoScan Mode On-Screen Display (OSD) The AutoScan feature allows you to set your Rack-Mount Console to scan The OSD allows you to switch servers, assign names to your servers, and monitor the activities of all connected servers one by one. The Rack- start and stop the AutoScan feature, set the desired scan-time interval for Mount Console remains on one server for a preset number of seconds, AutoScan, enable the password security feature, and program hot keys. - Page 24 USING YOUR R UNT CONSOLE SECTIONS Table of Contents Main OSD Page The main OSD menu displays the current selected BANK and connected servers to that BANK. If you have only the Rack-Mount Console in your configuration, the OSD menu will display “BANK 00”. A “*” symbol indicates that the connected server is powered up.
-
Page 25: Main Menu Page
USING YOUR R UNT CONSOLE SECTIONS Table of Contents Main Menu Page The following “Main Menu” options are available only to the administrator. The “Main Menu” page allows you to: • 01 - Set the language for the OSD • 02 - Edit the naming of individual ports •... -
Page 26: Port Name Edit
USING YOUR R UNT CONSOLE SECTIONS Table of Contents Main-Menu-Page Keyboard Commands Port Name Edit ): Navigate to the next field This option allows you to name each port with up to 10 characters. To name the (Enter): To select an option port, use the arrow keys to navigate to the desired server port, and then press (F3): Return to the main OSD menu “Enter”... -
Page 27: User Setting
The default administrator name and password are: Note: User name and password fields cannot be left blank. If two identical user names are entered, the first user-name password will apply. Username: admin Password: belkin 18.5” Widescreen Rack-Mount Console with Built-In PRO3 KVM Switch... - Page 28 USING YOUR R UNT CONSOLE SECTIONS Table of Contents Hot Key AutoScan Time This allows you to select which key will be used to initiate hot-key This specifies the amount of time the Rack-Mount Console remains on a commands. You have nine key options to choose from: server before switching to the next server while in AutoScan mode.
-
Page 29: Keyboard Hot-Key-Command Shortcuts
USING YOUR R UNT CONSOLE SECTIONS Table of Contents Keyboard Hot-Key-Command Shortcuts Command Function Space Bar Activate OSD To the right is a complete list of hot-key commands that can be used for your Previous host Rack-Mount Console: Next host Note: You will have approximately three seconds to complete each [01,02.,,,16] port Non-daisy-chain KVM switch... -
Page 30: Sun Combo And Mac ® Key Mapping
USING YOUR R UNT CONSOLE SECTIONS Table of Contents Sun Combo and Mac Key Mapping ® Windows Sun Micro USB Keyboard USB Keyboard USB Keyboard The keyboard does not support the Sun keypad to perform special functions in the Caps Lock & L_Alt Stop Sun operating-system environment. -
Page 31: Updating Firmware
Firmware upgrades are free for the life of your Rack-Mount Console. To update your firmware, download the appropriate firmware file and utility from www.belkin.com/support/. The utility will guide you through the process of updating the firmware on your Rack-Mount Console. DB9-to-RJ11... -
Page 32: Frequently Asked Questions
FREQUENTLY ASKED QUESTIONS SECTIONS Table of Contents Q: Which operating systems does the Rack-Mount Q: How does the Rack-Mount Console allow the user to switch Console support? between ports? A: The Rack-Mount Console will support any operating system that runs A: The Rack-Mount Console supports two methods of port selection. - Page 33 Simply connect all your servers to the A: Yes, the Rack-Mount Console works with any USB-capable server. Belkin KVM Cable Kits and it is ready for use. Q: D oes the Rack-Mount Console support Linux?
-
Page 34: Troubleshooting
TROUBLESHOOTING SECTIONS Table of Contents My server does not boot up when connected to the Rack-Mount I am getting a black screen on my monitor. Console, but works fine when I connect the keyboard, video, and • Check that all video cables are inserted properly. mouse directly to the server. - Page 35 TROUBLESHOOTING SECTIONS Table of Contents The mouse is lost when I switch to a different port. The server boots up, but the mouse does not work. • Tighten any loose cable connections. • Try booting the problem computer while the port is selected and wait until the operating system loads before switching away to another •...
- Page 36 TROUBLESHOOTING SECTIONS Table of Contents I am connecting the USB Cable Kit to a USB server, and my keyboard and mouse do not work. • Prior to connecting the Rack-Mount Console, make sure that the HID USB driver is installed on each server. (To install the HID USB driver, connect a USB mouse and USB keyboard to the server.
- Page 37 GLOSSARY SECTIONS Table of Contents The following definitions are used throughout this User Manual. Daisy-Chain: A configuration of multiple KVM switches that are connected AutoScan: A mode of operation where the KVM switch scans from one port to another, on an ongoing basis, as configured by the user. one to another in a series.
- Page 38 GLOSSARY SECTIONS Table of Contents KVM Switch: A device that allows a user to access and control multiple servers from a single console. It has at least one console port and multiple server ports. OSD: On-Screen Display, a Graphical User Interface that can be used to control and configure the KVM switch.
- Page 39 E LECTROMAGNETIC COMPATIBILITY This Class A digital apparatus complies with CAN ICES-3(A). We, Belkin Intemational, Inc., of 12045 E. Waterfront Drive,Playa Vista,CA 90094, declare under Cet appareil numérique de la classe A est conforme á la norme NMB-003(A) du Canada.
-
Page 40: Belkin International, Inc., Limited 2-Year Product Warranty
Belkin product that the product shall be free of defects in design, In the event that Belkin is unable to repair or replace the product (for assembly, material, or workmanship. - Page 41 What is not covered by this warranty? How to get service. All above warranties are null and void if the Belkin product is not provided To get service for your Belkin product you must take the following steps: to Belkin for inspection upon Belkin’s request at the sole expense of 1.
- Page 42 INFORMATION SECTIONS Table of Contents Belkin reserves the right to review the damaged Belkin product. All costs How state law relates to the warranty. of shipping the Belkin product to Belkin for inspection shall be borne THIS WARRANTY CONTAINS THE SOLE WARRANTY OF BELKIN.
- Page 43 Germany http://www.belkin.com/fr/support http://www.belkin.com/de/support Australia http://www.belkin.com/au/support © 2017 Belkin International, Inc. All rights © 2017 Belkin International, Inc. Tous droits © 2017 Belkin International, Inc. Alle Rechte reserved. All trade names are registered réservés. Toutes les raisons commerciales vorbehalten. Alle Produktnamen sind trademarks of respective manufacturers sont des marques déposées de leurs...
Need help?
Do you have a question about the F1DC108V and is the answer not in the manual?
Questions and answers