
Related Manuals for Exsys EX-45032


Summary of Contents for Exsys EX-45032
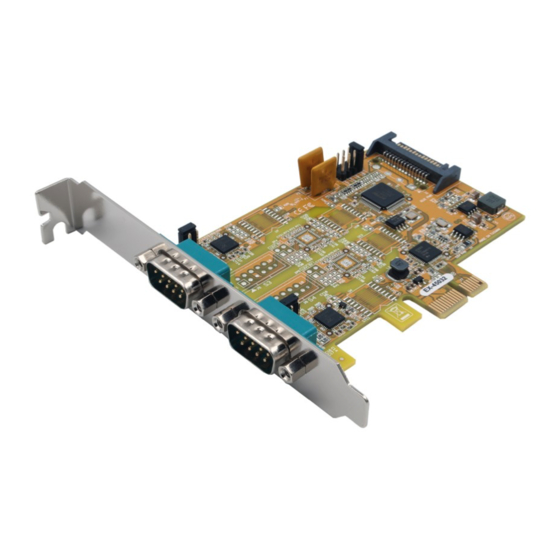
- Page 1 Anleitung EX-45032 RS-232/422/485 PCI-Express Karte mit 2 x 9 Pin Anschluss RS-232/422/485 PCI-Express Card with 2 x 9 Pin Connector Vers. 1.0 / 10.01.20 Manual...
-
Page 2: Table Of Contents
3.2 Connections ························································································ 13-14 Switch and Jumper Settings ····························································· 14-17 4.1 Switch Settings ···················································································· 14-17 Jumper Settings ························································································ 17 Hardware Installation ··········································································· 18 Driver Installation ··········································································· 18-20 Technical Information ·········································································· 20 © Copyright 2020 by EXSYS Vertriebs GmbH. All Rights Reserved... -
Page 3: Beschreibung
RS-232, RS-422, 2 Draht RS-485 und 4 Draht RS-485 • Windows 200x/ XP/ Vista/ 7/ 8.x/ 10/ Server 20xx/ Linux/ Mac OS • Zertifiziert für 2. Lieferumfang Bevor Sie die EX-45032 in Ihren PC installieren, überprüfen Sie bitte zuerst den Inhalt der Lieferung: • EX-45032 • Treiber CD •... -
Page 4: Aufbau Und Anschlüsse
4 DTR 3 RXD+ 3 RXD+ 5 GND 5 GND 4 RXD- 4 RXD- 6 DSR 6 DSR 5 GND 5 GND 7 RTS 7 RTS 8 CTS 8 CTS © Copyright 2020 by EXSYS Vertriebs GmbH. All Rights Reserved... -
Page 5: Switch Und Jumper Einstellungen
4. Switch und Jumper Einstellungen 4.1 Switch Einstellungen Es gibt zwei 8-Pin DIP-Schalter auf der Rückseite der Platine der EX-45032. Für jeden Port gibt es einen separaten DIP-Schalter. Die 8-Pin DIP-Schalter sind für den Mode (RS-232, RS-422, RS-485 2-Draht oder RS-485 4-Draht) und die Terminierung der Signale RX+, RX-, TX+ und TX- zuständig (siehe Bild auf Seite 6). - Page 6 4. Switch und Jumper Einstellungen 4.1 Switch Einstellungen Mode & Terminator Switch (S1 & S2_Mode) Modes RS-232 RS-422 RS-485 2-Draht RS-485 4-Draht Port 1 Port 2 Resistoren Off Resistoren On Terminator Off Terminator On © Copyright 2020 by EXSYS Vertriebs GmbH. All Rights Reserved...
- Page 7 EX-45032 Deutsch 4. Switch und Jumper Einstellungen 4.1 Switch Einstellungen Resistoren für RS-422, RS-485 2-Draht und RS-485 4-Draht Mode: © Copyright 2020 by EXSYS Vertriebs GmbH. All Rights Reserved...
-
Page 8: Jumper Einstellungen
P12V (Achtung! Anschluss J4 muss mit dem PC-Netzteil verbunden sein!) X12V = 5Volt vom PC-Netzteil (Werkseinstellung) = 5Volt vom Mainboard X12V = 12Volt vom PC-Netzteil P12V = 12Volt vom Mainboard © Copyright 2020 by EXSYS Vertriebs GmbH. All Rights Reserved... -
Page 9: Hardware Installation
Wenn Sie die Karte installieren, beachten Sie bitte die folgenden Hinweise. Da es große Unterschiede zwischen PC‘s gibt, können wir Ihnen nur eine generelle Anleitung zum Einbau der EX-45032 geben. Bei Unklarheiten halten Sie sich bitte an die Bedienungsan- leitung Ihres Computersystems. - Page 10 ÄNDERN DER PORT NUMMER Sie können auch die Port Nummer ändern, indem Sie im Gerätemanager z.B. „COM3“ „Anschlusseinstellung“ und „Erweitert“ öffnen. Nun können Sie dann zwischen COM3 bis COM256 wählen! © Copyright 2020 by EXSYS Vertriebs GmbH. All Rights Reserved...
-
Page 11: Technische Daten
0° bis 55° Celsius Lagertemperatur: -40° bis 75° Celsius Rel. Luftfeuchtigkeit: 5% bis 95% Stromversorgung: 5V oder 12V über PCI-Express Slot oder SATA Stromanschluss Abmessung: 112,30 x 120,00 mm Gewicht: 200g © Copyright 2020 by EXSYS Vertriebs GmbH. All Rights Reserved... -
Page 12: Description
• Windows 200x/ XP/ Vista/ 7/ 8.x/ 10/ Server 20xx/ Linux/ Mac OS • Certificate for 2. Extent of Delivery Before you install the EX-45032 in your PC, you should first check the contents of the delivery: • EX-45032 •... -
Page 13: Layout And Connections
4 DTR 3 RXD+ 3 RXD+ 5 GND 5 GND 4 RXD- 4 RXD- 6 DSR 6 DSR 5 GND 5 GND 7 RTS 7 RTS 8 CTS 8 CTS © Copyright 2020 by EXSYS Vertriebs GmbH. All Rights Reserved... -
Page 14: Switch And Jumper Settings
4. Switch and Jumper Settings 4.1 Switch Settings There are two 8-pin DIP-switches on the backside of the board at the EX-45032. For each port there is a separate DIP-switch. The 8-pin DIP-switches are for the modes (RS -232, RS-422, RS-485 2-wire or RS-485 4-wire) and for the signal termination for RX+, RX-, TX+ and TX- (see picture on page 15). - Page 15 4. Switch and Jumper Settings 4.1 Switch Settings Mode & Terminator Switch (S1 & S2_Mode) Modes RS-232 RS-422 RS-485 2-wire RS-485 4-wire Port 1 Port 2 Resistor Off Resistor On Terminator Off Terminator On © Copyright 2020 by EXSYS Vertriebs GmbH. All Rights Reserved...
- Page 16 English EX-45032 4. Switch and Jumper Settings 4.1 Switch Settings Resistors for RS-422, RS-485 2-wire and RS-485 4-wire mode: © Copyright 2020 by EXSYS Vertriebs GmbH. All Rights Reserved...
-
Page 17: Jumper Settings
(Attention! Connector J4 must be connected to the power supply!) X12V = 5Volt from PC Power Supply (Factory Setting) = 5Volt from Mainboard X12V = 12Volt from PC Power Supply P12V = 12Volt from Mainboard © Copyright 2020 by EXSYS Vertriebs GmbH. All Rights Reserved... -
Page 18: Hardware Installation
If you are ready with the jumper settings, please proceed with the following installation instructions. Because there are large differences between PC’s, we can give you only a general installation guide for the EX-45032. Please refer to your computer’s reference manual whenever in doubt. - Page 19 If you like to change the port number for example COM3 to COM5, open the „Device Manager” click at „COM3”, „Settings” and then „Advance”. There you can change be- tween COM3 till COM256. © Copyright 2020 by EXSYS Vertriebs GmbH. All Rights Reserved...
-
Page 20: Technical Information
32°F to 55°Fahrenheit Storage Temperature: -40°F to 167°Fahrenheit Rel. Humidity: 5% to 95% Power: 5V or 12V via PCI-Express Slot or SATA Power Connector Size: 112,30 x 120,00 mm Weight: 200g © Copyright 2020 by EXSYS Vertriebs GmbH. All Rights Reserved...
Need help?
Do you have a question about the EX-45032 and is the answer not in the manual?
Questions and answers