Table of Contents
Advertisement
Quick Links
Advertisement
Table of Contents

Subscribe to Our Youtube Channel
Related Manuals for Gestetner DSm7110


Summary of Contents for Gestetner DSm7110
-
Page 1: Operating Instructions
Read this manual carefully before you use this machine and keep it handy for future reference. For safe and correct use, be sure to read the Safety Information before using the machine. About This Machine Getting Started Entering Text Appendix Operating Instructions... - Page 2 (For details, see p.9 “Machine Type”.) • Type 1: 8090/DSm790/LD190/Aficio MP 9000 • Type 2: 8110/DSm7110/LD1110/Aficio MP 1100 • Type 3: 8135/DSm7135/LD1135/Aficio MP 1350 Certain types might not be available in some countries. For details, please contact your local dealer.
-
Page 3: Manuals For This Machine
Also refer to this manual for the procedures for registering administrators, as well as setting user and administrator authentication. ❖ Copy/Document Server Reference Explains Copier and Document Server functions and operations. Also refer to this manual for explanations on how to place originals. ❖ Printer Reference Explains Printer functions and operations. - Page 4 ❖ Other manuals • PostScript3 Supplement • UNIX Supplement • Manuals for DeskTopBinder Lite • DeskTopBinder Lite Setup Guide • DeskTopBinder Introduction Guide • Auto Document Link Guide Note ❒ Manuals provided are specific to machine types. ❒ Adobe Acrobat Reader/Adobe Reader must be installed in order to view the manuals as PDF files.
-
Page 5: What You Can Do With This Machine
Reference p.13 “Options” Copier, Printer, and Scanner Functions This machine provides copier, printer (optional), and scanner (optional) functions. • You can make copies of originals. With a finisher (optional), you can sort and staple copies. See Copy/Document Server Reference. • You can print documents created in applications. See Printer Reference. -
Page 6: Utilizing Stored Documents
• With DeskTopBinder, you can search, check, print and delete stored docu- ments from your computer. • You can also retrieve stored documents scanned in scanner mode. • You can retrieve documents scanned in copier mode, if the Printer/Scanner unit is installed. For details, see Scanner Reference. -
Page 7: Connecting Two Machines For Copying
Connecting Two Machines for Copying You can connect two machines together with Copy Connector (optional). When you set up a copy job on one machine (the main machine), data is transferred to the other (the sub-machine) so that copies can be made on both machines simul- taneously (Connect Copy). -
Page 8: Using The Scanner In A Network Environment
Using the Scanner in a Network Environment You can use a scanner over the network. • You can send scanned documents to other network computers using e-mail (Sending stored scan file by e-mail). See “Sending Scan Files by E-mail”, Scan- ner Reference. -
Page 9: Administrating The Machine/Protecting Documents (Security Functions)
Administrating the Machine/Protecting Documents (Security Functions) You can prevent information leakage by managing the machine and protecting documents. • You can protect documents from unauthorized access and stop them from be- ing copied without permission. See Security Reference. • You can control the use of the machine, as well as prevent machine settings from being changed without authorization. -
Page 10: Monitoring The Machine Via Computer
Monitoring the Machine Via Computer You can monitor machine status and change settings using a computer. • Using SmartDeviceMonitor for Admin, SmartDeviceMonitor for Client, or a Web browser, you can use a computer to view the machine's status, such as checking on paper quantities, or misfeeds. -
Page 11: Preventing An Unauthorized Copy
Preventing an Unauthorized Copy You can embed a pattern in the printed document to prevent it from being copied. • Using the printer driver, you can embed a pattern in the printed document. If the document is copied on a machine with the Copy Data Security Unit (op- tional), protected pages are grayed out in the copy, preventing confidential information from being copied. -
Page 12: Table Of Contents
TABLE OF CONTENTS Manuals for This Machine ...i What You Can Do with This Machine...iii Copier, Printer, and Scanner Functions ... iii Utilizing Stored Documents... iv Connecting Two Machines for Copying ... v Using the Scanner in a Network Environment ... vi Administrating the Machine/Protecting Documents (Security Functions) ... - Page 13 2. Entering Text Entering Text ...29 Available Characters ...29 Keys ...30 How to Enter Text ...31 3. Appendix Dos and Don'ts...33 Software and Utilities Included on the CD-ROM ...34 Viewing the contents of the CD-ROM ...35 Printer Drivers for This Printer...35 TWAIN Driver ...36 DeskTopBinder Lite...37 SmartDeviceMonitor for Admin ...38...
-
Page 15: Notice
Notice Notice To Wireless LAN Interface (optional) Users Notes to users It is strictly forbidden to use antenna(s) except designated. The antenna(s) of this device must not be co-located or operating in conjunc- tion with any other antenna or transmitter. This equipment complies with FCC RF radiation exposure limits set forth for an uncontrolled environment. - Page 16 Note to users in Canada Note: This Class B digital apparatus complies with Canadian ICES-003. Operation is subject to the following two conditions: (1) This device may not cause interference, and (2) this device must accept any interference, including interference that may cause undesired operation of the device. IEEE 802.11b Interface Unit Type H: This device complies with RSS-210 of Industry Canada.
-
Page 17: How To Read This Manual
How to Read This Manual Symbols This manual uses the following symbols: Indicates important safety notes. Ignoring these notes could result in serious injury or death. Be sure to read these notes. They can be found in the “Safety Information” section of this manual. Indicates important safety notes. -
Page 18: Safety Information
Safety Information When using this machine, the following safety precautions should always be followed. Safety During Operation In this manual, the following important symbols are used: Indicates a potentially hazardous situation which, if instructions are not followed, could result in death or serious injury. Indicates a potentially hazardous situation which, if instructions are not followed, may result in minor or moderate injury or damage to property. - Page 19 R CAUTION: • When loading paper, take care not to trap or injure your fingers. • Our products are engineered to meet high standards of quality and function- ality, and we recommend that you use only the expendable supplies avail- able at an authorized dealer.
- Page 20 R CAUTION: • For environmental reasons, do not dispose of the machine or expended supply waste at household waste collection points. Disposal can take place at an authorized dealer. • The inside of the machine could be very hot. Do not touch any parts other than specified in this document when removing misfed paper.
-
Page 21: Positions Of Rwarning And Rcaution Labels
Positions of RWARNING and RCAUTION labels This machine has labels for RWARNING and RCAUTION at the positions shown below. For safety, please follow the instructions and handle the machine as indicated. APG007S... -
Page 22: Energy Star Program
Printing is still possible in Low Power Mode, but if you wish to make copies first press the {Energy Saver} key. ❖ Off Mode (Copier only) To conserve energy, this product automatically turns off 90 minutes (Type 2, 3: 120 minutes) after the last copying or printing job has been completed. -
Page 23: Recycled Paper
For details about how to change the default interval, see “Timer Settings”, General Settings Guide. To change the settings of the Duplex Priority mode, see “User Tools Menu (Copier and Document Server Features)”, Copy/Document Server Reference. Recycled Paper In accordance with the ENERGY STAR Program, we recommend use of recycled paper which is environmentally friendly. -
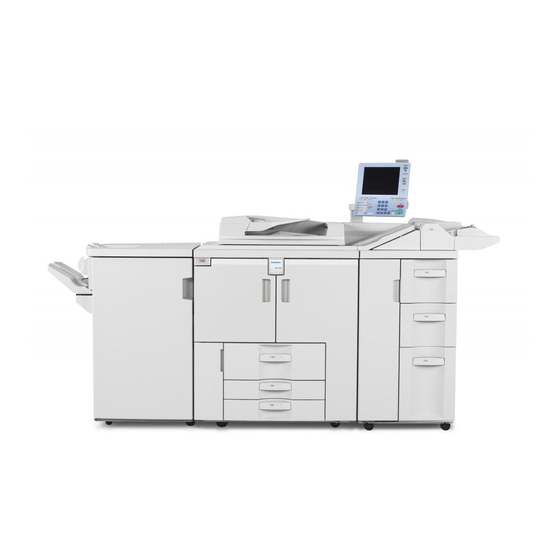
Page 25: Getting Started
This section describes how to start using this machine. Guide to Components This section introduces the names and functions of the components. Exposure glass Place originals face down here. Auto Document Feeder (ADF) Load a stack of originals here. They will be fed automatically one by one. - Page 26 Getting Started Ventilation holes Prevent overheating. Do not obstruct the ventilation holes by placing an object near it or leaning things against it. If the machine overheats, a fault might occur. Note ❒ There is an earth leakage circuit breaker located toward the lower rear of the right end of the main machine to protect users from electric shock.
-
Page 27: Options
Options This section introduces the names and functions of main optional parts. External Options This section provides explanations about external options. Finisher SR5000 Sorts, stacks, staples and punches copies. *1: Finisher upper tray *2: Finisher shift tray Booklet Finisher BK5000 The saddle stitch function can staple the copies in the center and fold them into booklets. - Page 28 • IEEE 802.11b Interface Unit Allows you to install a wireless LAN interface. • File Format Converter Allows you to download documents from the Document Server stored by copier and printer functions. See “Downloading Stored Documents”, Copy/Document Server Reference. • Bluetooth Allows you to expand the interface.
-
Page 29: Control Panel
Control Panel This section introduces the names and functions of the components on the con- trol panel. This illustration shows the control panel of the machine with options fully installed. Status indicator Machine status is described by this indicator. By default, this indicator is turned off. You can select the status indicator lit or not. - Page 30 Press to shift to and from Low Power mode. See “Saving Energy”. {Clear Modes} key Press to clear previously entered copy job settings. {Program} key (copier and scanner mode) Press to register frequently used settings, or to recall registered settings. {Stop} key Press to stop a job in progress.
- Page 31 Note ❒ You can adjust the angle of the control panel. Reference p.28 “Saving Energy” p.25 “Turning On the Power” p.19 “Simplified Display” p.24 “Changing Modes” “Interrupt Copy”, Copy/Document Server Reference “Sample copy”, Copy/Document Server Reference “Counter”, General Settings Guide “Accessing User Tools (System Settings)”, General Settings Guide APF059S APF060S...
-
Page 32: Display Panel
Getting Started Display Panel The display panel shows machine status, error messages and function menus. The function items displayed serve as selector keys. You can select or specify an item by lightly pressing them. When you select or specify an item on the display panel, it is highlighted like . -
Page 33: Simplified Display
Simplified Display This section explains how to switch to the simplified display. When you press the {Simplified Display} key, the screen changes from the initial display to the simplified display. Letters and keys are displayed at a larger size, making operations easier. ❖... -
Page 34: When The Authentication Screen Is Displayed
Getting Started When the Authentication Screen is Displayed When Basic Authentication, Windows Authentication, LDAP Authentication, or Integration Server Authentication is set, the Authentication Screen appears on the screen. Unless a valid user name and password are entered, operations are not possible with the machine. Important ❒... -
Page 35: User Code Authentication (Using A Printer Driver)
User Code Authentication (Using a Printer Driver) When User Code Authentication is set, specify the user code in the printer prop- erties of the printer driver. For details, see the printer driver Help. Login (Using the Control Panel) Follow the procedure below to log on when Basic Authentication, Windows Au- thentication, LDAP Authentication, or Integration Server Authentication is set. -
Page 36: Log Off (Using The Control Panel)
Getting Started Log Off (Using the Control Panel) Follow the procedure below to log off when Basic Authentication, Windows Au- thentication, LDAP Authentication, or Integration Server Authentication is set. Press the {Login/Logout} key. Press [Yes]. Login (Using a Printer Driver) When Basic Authentication, Windows Authentication, LDAP Authentication, or Integration Server Authentication is set, make encryption settings in the printer properties of the printer driver, and then specify a login user name and pass-... -
Page 37: Login (Using Web Image Monitor)
Login (Using Web Image Monitor) This section explains how to log onto the machine via Web Image Monitor. Click [Login]. Enter a login user name and password, and then click [Login]. Note ❒ For user code authentication, enter a user code in [User Name], and then click [OK]. -
Page 38: Changing Modes
Getting Started Changing Modes Note ❒ You cannot switch modes during interrupt copying or initial setup. ❒ The copying screen is displayed as default after power on. You can change this default setting. For the setting procedure, see “General Features”, Gener- al Settings Guide. -
Page 39: Turning On The Power
Turning On the Power This section discusses how to turn on/off the power. ❖ Power supply This machine has two power switches: Operation switch and main power switch. • Operation switch (right side of the control panel) Press to activate the machine. When the machine has finished warming up, you can make copies. -
Page 40: Turning On The Power
Getting Started Turning On the Power Turn on the power as follows: Press the Operation switch. The On indicator lights up. Note ❒ If the power is not turned on when the operation switch is pressed, check if the main power switch is on. If not, turn it on. Turning Off the Power Turn off the power as follows: Press the Operation switch. -
Page 41: Turning Off The Main Power
Turning Off the Main Power Turn off the main power as follows: Important ❒ Do not turn off the main power switch when the On indicator is lit or blink- ing. Failure to observe this may result in damage to the hard disk or memory, leading to malfunction. -
Page 42: Saving Energy
Getting Started Saving Energy This machine has the following two energy saving functions. ❖ Energy Saver If you do not use the machine for a certain period after an operation, or when you press the {Energy Saver} key, the display disappears and the machine goes into Energy Saver mode. -
Page 43: Entering Text
This section describes how to enter characters. Entering Text When you enter a character, it is shown at the position of the cursor. If there is a character already at the cursor position, the entered character is shown before that character. Available Characters You can enter the following characters: •... -
Page 44: Keys
Entering Text Keys You can change the entry screen using the keys below. Note ❒ When entering uppercase or lowercase letters continuously, use [Shift Lock] to lock the case. APG016S... -
Page 45: How To Enter Text
How to Enter Text You can enter text as described below. Press [Shift] to switch between uppercase and lowercase. Press the letters you want to enter. Deleting Characters Press [Backspace] or [Delete All] to delete characters. Entering Symbols Press [Symbol Entry] to enter into the Symbols mode. Press the symbols you want to enter. - Page 46 Entering Text Selecting a User Text You can select and use a User Text that is registered in [Program / Change / Delete User Text]. For details about registering User Texts, see “General Features”, General Set- tings Guide. Press [User Text]. Select the User Text you want to use.
-
Page 47: Appendix
This section describes Dos and Don'ts, key accessories, copy paper, and consum- ables. Dos and Don'ts The following items should be followed during use of this machine. R WARNING: • Keep the machine away from flammable liquids, gases, and aerosols. A fire or an electric shock might occur. -
Page 48: Software And Utilities Included On The Cd-Rom
Appendix Software and Utilities Included on the CD- Three CD-ROMs come with this machine: “Printer Drivers and Utilities”, “Scan- ner/PostScript Drivers and Utilities”, and “Manuals”. PS Driver is stored in “Scanner/PostScript Drivers and Utilities”. In “Manuals”, manuals are stored in PDF format. -
Page 49: Viewing The Contents Of The Cd-Rom
Viewing the contents of the CD-ROM Follow the procedure below to view the contents of the CD-ROMs. Insert the CD-ROM into the CD-ROM drive. The installer starts. Click [Browse This CD-ROM]. Explorer starts and displays the contents of the CD-ROM. Printer Drivers for This Printer Printing requires installation of a printer driver for your operating system. -
Page 50: Twain Driver
Appendix The PostScript Printer Description (PPD) files are included on the CD-ROM labeled “Scanner/PostScript Drivers and Utilities”. The Adobe PostScript Printer Description (PPD) installer is included on the CD- ROM labeled “Scanner/PostScript Drivers and Utilities”. ❖ PCL printer drivers Two kinds of PCL printer driver (PCL 5e and PCL 6) are included on the CD- ROM that comes with this machine. -
Page 51: Desktopbinder Lite
❖ System requirements • Hardware PC/AT-compatible machines that support the following operating system properly Under Windows NT with RISC-based processors (MIPS R series, Alpha AXP, or PowerPC), this driver is not supported. • Operating system Microsoft Windows 95/98/Me Microsoft Windows 2000/XP Microsoft Windows NT 4.0 Microsoft Windows Server 2003 •... -
Page 52: Smartdevicemonitor For Admin
Appendix SmartDeviceMonitor for Admin SmartDeviceMonitor for Admin is an application that uses TCP/IP and IPX/SPX to monitor network printers. It can monitor multiple network printers using IP address. We recommend that network administrators use this application. ❖ File path SmartDeviceMonitor for Admin is stored in the following folder in the CD- ROM labeled “Printer Drivers and Utilities”: NETWORK\DEVMON\ADMIN\DISK1 Operating system... -
Page 53: Desktopbinder-Smartdevicemonitor For Client
DeskTopBinder-SmartDeviceMonitor for Client DeskTopBinder-SmartDeviceMonitor for Client allows you to manage and print various data such as files created with an application, images scanned with a scanner, and existing images as one document. ❖ File path DeskTopBinder-SmartDeviceMonitor for Client is stored in the following folder on the CD-ROM labeled “Printer Drivers and Utilities”: NETWORK\DEVMON\CLIENT\DISK1 ❖... -
Page 54: Installing The Operating Instructions
Appendix Installing the Operating Instructions The supplied “Manuals” CD-ROM contains HTML-format manuals. Install the manuals you want to use. Important ❒ The system requirements for installing the manuals are as follows: • Operating System: Windows 95/98/Me, Windows 2000/XP, Windows Server 2003, or Windows NT4.0 •... -
Page 55: Pdf Manuals
PDF Manuals The supplied CD-ROM contains PDF versions of the HTML user manuals. ❖ File path The PDF manuals are in the following folders on the CD-ROM: • About This Machine PDF MANUAL\US_ENG\INTRO • General Settings Guide PDF MANUAL\US_ENG\USERTOOL • Troubleshooting PDF MANUAL\US_ENG\TROUBLE •... -
Page 56: Opening The Installed Operating Instructions
Appendix Opening the Installed Operating Instructions This section explains how to open installed manuals. Opening from the Icon This section explains how to open a manual using its desktop icon. Double-click the icon on your desktop. The browser opens and the manual appears. Opening from the [Start] Menu This section explains how to open a manual from the [Start] menu. -
Page 57: Opening From The Cd-Rom
Opening from the CD-ROM This section explains how to open a manual from a supplied CD-ROM. Click [Read manuals]. Click the title of the manual you want to view. The browser opens, and then manual appears. Opening the Installed Operating Instructions... -
Page 58: Copy Paper
Appendix Copy Paper This section describes recommended paper sizes and types, unusable paper, and paper storage. Recommended Paper Sizes and Types The following table shows recommended types, sizes, and capacity of copy pa- per loadable in each tray. Important ❒ If you use damp or curled paper, a staple clogging or paper jam may occur. ❖... - Page 59 ❖ Multi Bypass Tray (tray 7) Paper Type and Metric Version Weight 52.3-216 g/m (14-57.6 lb.) A3L, B4 JISL, A4KL, B5 JIS K, A5KL, A6L, 11" × 17"L, 8 " × 8 8" × 13"L B5 JIS L, B6 JIS L, "...
- Page 60 Appendix ❖ Wide Large Capacity Tray (Wide LCT) (optional) Tray 4, 5, 6 Paper Type and Metric Version Weight 52 - 216 g/m (14 - 57.6 lb.) A3L, B4 JISL, A4KL, B5 JIS K, A5KL, 11" × 17"L, 8 8" × 13"L B5 JIS L, B6 JIS L, A6L, 11"...
- Page 61 Note ❒ When loading paper in the paper trays 1-3, place the copy side face down. ❒ When loading paper in the multi bypass tray, the Large Capacity Tray (LCT) or Wide Large Capacity Tray (Wide LCT), place the copy side face down. ❒...
- Page 62 Appendix ❒ If you want to set 20 lbs, 80g/m the following illustration. Direction of paper grain How to set the copy paper in the paper tray ❒ If you load recycled or special paper in the paper trays and use the Tray Paper Settings, this function is not available with these trays unless their settings are identical.
-
Page 63: Unusable Paper
Unusable Paper This section describes paper unusable on this machine. R CAUTION: • Do not use aluminum foil, carbon paper, or similar conductive paper to avoid a fire or machine failure. Important ❒ Do not use any of the following kinds of paper or a fault might occur: •... -
Page 64: Paper Storage
Appendix Paper Storage This section describes how to store paper. • When storing paper, the following precautions should always be followed: • Do not store paper where it will be exposed to direct sunlight. • Avoid storing paper in humid areas (humidity: 70% or less). •... -
Page 65: Index
Booklet Finisher BK5000 CAUTION labels CD-ROM Changing Modes Character Clear key Clear Modes key Components Connect Copy Control panel Copier functions Copy Connector Copy Data Security Unit Copy paper Counter key Data In indicator DataOverWriteSecurity Unit Delete DeskTopBinder Lite DeskTopBinder-SmartDeviceMonitor for... - Page 66 Name Names of the components New Job key Notice Number keys Off Mode Opening from the CD-ROM Opening from the Icon Opening from the Start Menu Opening the Installed Operating Instructions Operation switch Option Other Function key Paper Paper size Paper type PDF Manuals Power...
- Page 67 In accordance with IEC 60417, this machine uses the following symbols for the main power switch: a means POWER ON. b means POWER OFF. c means STAND BY. Trademarks ® ® Microsoft , Windows and Windows NT United States and/or other countries. ®...
- Page 68 EN USA B235-7787...
Need help?
Do you have a question about the DSm7110 and is the answer not in the manual?
Questions and answers