Table of Contents
Advertisement
WARNING
FOR YOUR SAFETY
1. Do not store or use gasoline or other
flammable vapors and liquids in the
vicinity of this or any other appliance.
2. An LP tank not connected for use
shall not be stored in the vicinity of
this or any other appliance.
FOR YOUR SAFETY
If you smell gas:
1. Shut off gas to the appliance.
2. Extinguish any open flame.
3. Open lid.
4. If odor continues, immediately call your
gas supplier or your fire department.
06601295
ASSEMBLY/USE & CARE
MANUAL
FOR OUTDOOR HOUSEHOLD USE ONLY.
DO NOT USE INDOORS OR
FOR COMMERCIAL COOKING.
INSTALLER/ASSEMBLER: Leave these instructions with
consumer.
CONSUMER: Keep this manual for future reference.
WARNING
Read this manual before cooking on grill. Failure to follow
all manufacturers' instructions could result in serious
personal injury and/or property damage.
Combustion by-products produced when using this product
contain chemicals known to the State of California to cause
cancer, birth defects, or other reproductive harm.
CAUTION
Read and follow all safety statements, assembly
instructions and Use and Care directions before attempting
to assemble and cook.
Some parts may contain sharp edges — especially as
noted in the manual! Wear protective gloves if necessary.
If you have any questions or need assistance during
assembly, please call 1-800-241-7548.
Visit us on the web at: www.charbroil.com
C O L U M B U S , G A
06601295_42804181 (05-30-07)
Advertisement
Table of Contents

Related Manuals for Char-Broil Patio Caddie 06601295


Summary of Contents for Char-Broil Patio Caddie 06601295
- Page 1 WARNING FOR YOUR SAFETY 1. Do not store or use gasoline or other flammable vapors and liquids in the vicinity of this or any other appliance. 2. An LP tank not connected for use shall not be stored in the vicinity of this or any other appliance.
-
Page 2: Register Your Grill
• Do not use charcoal or ceramic briquets in a gas grill. (Unless briquets are supplied with your grill). • Use grill at least 3 ft. from any wall or surface. -
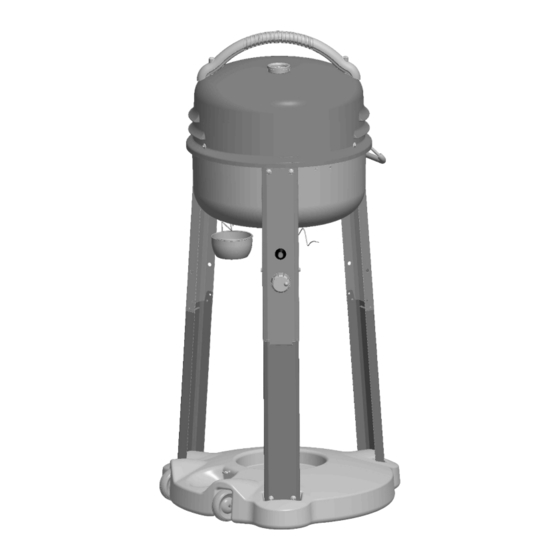
Page 3: Parts List & View
Parts List Key Qty. Description A...1 ...Base Assy ..29001148 B...1 ...Control Panel Leg Kit ... 55710172 C ...2 ...Cart Leg ...55710167 D ...1 ...Spark Generator ...29101267 E...1 ...HVR Assembly..29101005 F...1 ...Porcelain Bottom Kit...55710173 G ...1 ...Burner...29101009 H ...1 ...Medallion ...29101010 I ...1 ...Control Knob...29101011 J ...1 ...Porcelain Top Kit... -
Page 4: Lp Tank Removal, Transport And Storage
Use & Care LP Tank (LP Gas Supply Cylinder) • The LP tank used with your grill must meet the following requirements. • LP tank designed for use with your grill measures 12” (diameter) x 12-1/2” (tall) with 14 lb. capacity maximum. LP tank which measures 12”... - Page 5 LP Tank Exchange • Many retailers that sell grills offer you the option of replacing your empty LP tank through an exchange service. Use only those reputable exchange companies that inspect, precision fill, test and certify their cylinders. Exchange your tank only for an OPD safety feature-equipped tank as described in the "LP Tank"...
-
Page 6: Lighting
WARNING • Never attempt to attach this grill to the self-contained LP gas system of a camper trailer or motor home. • Do not use grill until leak-tested. Safety Tips Before opening LP tank valve, check the coupling nut for tightness. -
Page 7: Cleaning
Match Lighting Do not lean over grill while lighting. 1. Open lid. Turn gas on at LP tank. 2. Place lit long-stem match into one of three large match lighting holes around burner tube from beneath grill. 3. Push in and turn control knob to HIGH. Be sure burner lights and stays lit. -
Page 8: Assembly
Before Beginning Assembly • Remove all contents from box. Lay cardboard on the ground when unpacking, assemble grill parts on the cardboard to avoid scratching surfaces. • Carefully read and follow all assembly instructions, paying particular attention to parts orientation. •... - Page 9 Items to Assemble 2 Plain Legs 4 #10-24x1”Machine Screws 4 #10-24 Lock Nuts (keps) 4 T-Nuts 4 #10-24x3/8" Self-Tap Screws #10-24 Lock Nuts Qty: 4 #10-24x1” Machine Screws Qty:4 Plain Leg A Unfold legs. Fasten each leg using (2) #10-24x3/8” self-tap screws. B Attach leg handle onto one leg with machine screws and hex nuts.
- Page 10 Items to Assemble: 1 Base 6 #10-24x1”Machine Screws 6 Lock Nuts (#10-24) #10-24 Lock Nuts Qty: 6 Base #10-24x1” Machine Screws Qty:6 10-24x1” Machine Screws Handle Items to Assemble: 1 Valve/Hose/Regulator 2 #6-32x3/8” Machine Screws A Insert valve stem into opening on control leg, attach with machine screws.
- Page 11 Items to Assemble: 1 Burner 2 #10-24x3/8” Machine Screws 2 Lock Nuts (#10-24) 1 Valve Cover 2 #10x3/8” Self-tap Screw 1 Control Knob Burner Control Knob A Insert burner tube into center hole through grill bottom. B Then insert burner tube through hole in valve cover, making sure flanges are facing towards control panel leg.
- Page 12 Items to Assemble: 4 Lock Nuts (#10-24) 3 #10-24x2” Machine Screw 3 Spacers 1 Electrode 1 #10-24x3/8” Machine Screw Items to Assemble 1 Ignitor Wire 1 Heat Plate 3 Acorn Nuts 12 • 06601295 A Place the 2” machine screw from under grill bottom. Slide a spacer onto screw, attach with hex nut.
- Page 13 Items to Assemble 1 Grease Clip 1 Grease Cup Items to Assemble: 1 Cooking Grate A Cooking grate rests on T-nuts. A Thread end of grease wire through hole from inside grill bottom. B Place curved end of grease clip into other hole. C Shows grease clip correctly assembled from inside grill bottom.
- Page 14 Items to Assemble: 1 Lid Handle 2 Machine Screw 2 Lock Nuts (#10-24) (keps) 1 Temperature Gauge w/Wing Nut A Attach lid handle to lid with machine screws and hex nuts. Tighten the screws not the hex nuts. B Remove wing nut from thermometer. Place thermometer into lid and reattach the wing nut Lid Handle #10-24...
-
Page 15: Cooking Chart
Cooking Chart Cooking times and temperatures may vary according to specific recipes, cooking conditions or barbecue equipment used. Take this into consideration to insure best results. Temperatures: High = 500-650°F / Medium = 350-450°F / Low = 200-300°F. Item Size/Qty. Temperature Beef Steak 1 inch... -
Page 16: Troubleshooting
Company. Thermos® is a registered trademark of the Thermos Company and its affiliates. Artisan Collectiion by Char-Broil™, C3 and Design™, Char-Broil and Design™, Flame Design™, FlavorTents™, Grill 2 Go™, Grillin’ Stick™, Keeper of the Flame™, Keepers of the Flame™, Natural Grip™, Outdoor Cooking Collection and Design™, Patio Bistro™, PrecisionFlame™, Pro-Check™, QuickSet Grills and Design™, SmokerTents™, The Big Easy™. -
Page 17: Limited Warranty
Consumer returns will not be accepted unless a valid Return Authorization is first acquired by calling 1-800-241-7548 and then clearly marked on the outside of the package and the package is shipped freight/postage pre-paid to the address above. 90 Days LIMITED warranty Char-Broil Consumer Relations P. O. Box 1240 Columbus, GA 31902-1240... - Page 18 Please register your grill online at: WWW.GRILLREGISTRATION.COM (If you register online, you do not need to send in this registration card.) 18 • 06601295...
- Page 19 Page intentionally blank 06601295 • 19...
- Page 20 Char-Broil, LLC • Columbus, GA 31902 • Assembly Instructions ©2006...
Need help?
Do you have a question about the Patio Caddie 06601295 and is the answer not in the manual?
Questions and answers
What replacement briquettes can I use for the Patio Caddie
The compatible replacement briquettes for the Char-Broil Patio Caddie 06601295 are Char-Broil (Gas Grill Briquettes)® and Char-Diamonds®.
This answer is automatically generated