Table of Contents
Advertisement
Quick Links
Wet/Dry Vacuum
Operator's Manual
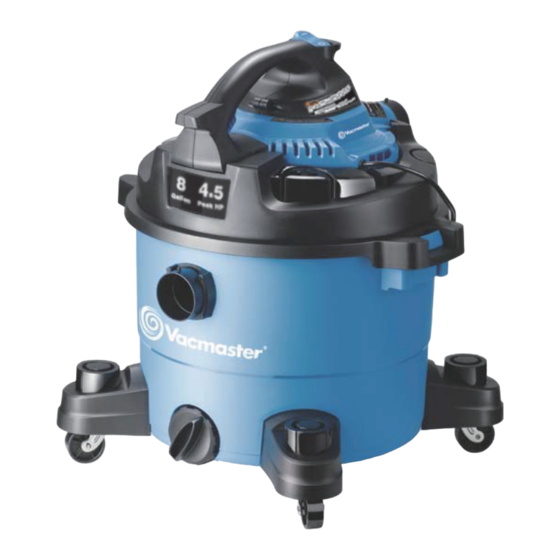
8 Gallon
Model No.
VBV809PF
FOR YOUR SAFETY
Read and understand this manual before use.
Keep this manual for future reference.
Distributed By
Replacement Filters &
Cleva North America, Inc.
601 Regent Park Court
Accessories available at:
Greenville, SC 29607
Vacmaster.com
Advertisement
Table of Contents

Related Manuals for Vacmaster VBV809PF


Summary of Contents for Vacmaster VBV809PF
- Page 1 Wet/Dry Vacuum Operator’s Manual 8 Gallon Model No. VBV809PF FOR YOUR SAFETY Read and understand this manual before use. Keep this manual for future reference. Distributed By Replacement Filters & Cleva North America, Inc. 601 Regent Park Court Accessories available at: Greenville, SC 29607 Vacmaster.com...
-
Page 2: Warranty
FOR YOUR SAFETY: CAREFULLY READ AND UNDERSTAND ALL INSTRUCTIONS. WARRANTY ® We take pride in producing a high quality, durable product. This Vacmaster product carries a limited two (2) year warranty against defects in workmanship and materials from date of purchase under normal household use. -
Page 3: Important Safety Instructions
IMPORTANT SAFETY INSTRUCTIONS READ AND UNDERSTAND ALL INSTRUCTIONS BEFORE USING THIS VACUUM. Read and understand this operator’s manual and all labels on the Wet/Dry Vacuum cleaner before operating. Safety is a combination of common sense, staying alert and knowing how your vacuum works. -
Page 4: Double Insulation Instructions
When using as blower: • Direct air discharge only at work area. • Do not use Wet/Dry Vacuum as a sprayer. • Do not direct air at bystanders. • Keep children away when blowing. • Wear safety goggles. SAVE THESE INSTRUCTIONS DOUBLE INSULATION INSTRUCTIONS This Wet/Dry Vacuum is double-insulated, eliminating the need for a separate grounding system. -
Page 5: Extension Cords
EXTENSION CORDS When using an extension cord with your Wet/Dry Vacuum refer to the following table to determine the required A.W.G. wire size. Before using the cleaner make sure the power cord and extension cord are in good working condition. Make repairs or replacements before using the vacuum cleaner. - Page 6 UNPACKING & CHECKING CARTON CONTENTS Remove all contents from the box. Remove the power head and take out any contents inside the collection tank. Check each item against the carton contents list. Carton Contents List: Description ..…………..……….…..Qty. Vacuum Assembly……………….…….. Extension Wand….…………….....
- Page 7 GENERAL ASSEMBLY INSTRUCTIONS A Philips head screw driver is required. WARNING: DO NOT PLUG THE POWER CORD INTO A POWER OUTLET. MAKE SURE THE PLUG IS DISCONNECTED BEFORE ASSEMBLING THE WET/DRY VACUUM. TO REDUCE THE RISK OF ELECTRIC SHOCK, DO NOT EXPOSE TO RAIN. UNPACKING YOUR WET/DRY VACUUM &...
-
Page 8: Dry Vacuum Operation
DRY VACUUM OPERATION DRY VACUUMING WARNING: BE SURE TO READ, UNDERSTAND, AND APPLY INFORMATION ENTITLED “IMPORTANT SAFETY INSTRUCTIONS”. DO NOT VACUUM IN AREAS WITH FLAMMABLE GASES, VAPORS, OR EXPLOSIVE DUSTS IN THE AIR. FLAMMABLE GASES OR VAPORS INCLUDE BUT ARE NOT LIMITED TO: LIGHTER FLUID, SOLVENT TYPE CLEANERS, OIL- BASED PAINTS, GASOLINE, ALCOHOL, OR AEROSOL SPRAYS. -
Page 9: Liquid Vacuum Operation
9. Turn the motor on by flipping the switch to the ‘I’ ON position and begin vacuuming (Fig. 10). 10. Once you have completed vacuuming, flip the switch to the ‘O’ OFF position and unplug the power cord from the outlet. O = OFF I = ON DO NOT USE THE CARTRIDGE FILTER FOR LIQUID VACUUMING. - Page 10 5. Turn the motor on by flipping the switch to the ‘I’ ON position (Fig. 6). 6. Once you have completed vacuuming, flip the switch to the 'O' OFF position and unplug the power cord from the outlet. 7. After use, empty the collection tank by unscrewing the drain cap. Drain liquids into a suitable receptacle or drain.
-
Page 11: Blower Operation
BLOWER OPERATION This Wet/Dry vacuum converts to a detachable blower that can be used for leaf blowing in yards, decks and patios. To use the detachable blower feature follow the instructions listed. WARNING: ALWAYS WEAR SAFETY GOGGLES COMPLYING WITH ANSI Z87.1 (OR IN CANADA, CSAZ94.3) BEFORE USING BLOWER. -
Page 12: Maintenance
MAINTENANCE EMPTYING THE COLLECTION TANK WARNING: ALWAYS DISCONNECT THE PLUG FROM THE POWER OUTLET BEFORE REMOVING THE POWER HEAD FROM COLLECTION TANK. 1. Verify that the power cord is disconnected from the outlet (Fig. 1). 2. Disconnect the hose from the vacuum (Fig. 2). 3. -
Page 13: Installing & Cleaning Cartridge Filter
1. Verify that the power cord is disconnected from the outlet. 2. Remove the four screws holding the intake shield and lift off the shield (Fig. 2). 3. Remove the foam pad from the blower and clean the foam pad with soapy water and allow to dry (Fig. -
Page 14: Troubleshooting
INSTALLING & CLEANING FOAM WET FILTER INSTALLING FOAM WET FILTER 1. Verify that the power cord is disconnected from the outlet (Fig. 1). 2. Remove the power head and place in an upside down position. Follow instructions to remove the cartridge filter on page 13. 3. -
Page 15: Exploded View
EXPLODED VIEW... -
Page 16: Parts List
PARTS LIST Part Drawing Number Description Quantity Power Head Assembly 551002142 Collection Tank Lid Assembly 551008115 Float 551019117 Filter Cage Collection Tank 551002112 Vacuum Port Assembly 551002110 Drain Cap With Gasket 551002111 Caster Foot Assembly 551090104 Hose 551004117 Extension Wand 551002116 Blower Wand 551003111...
Need help?
Do you have a question about the VBV809PF and is the answer not in the manual?
Questions and answers