Table of Contents
Advertisement
Quick Links
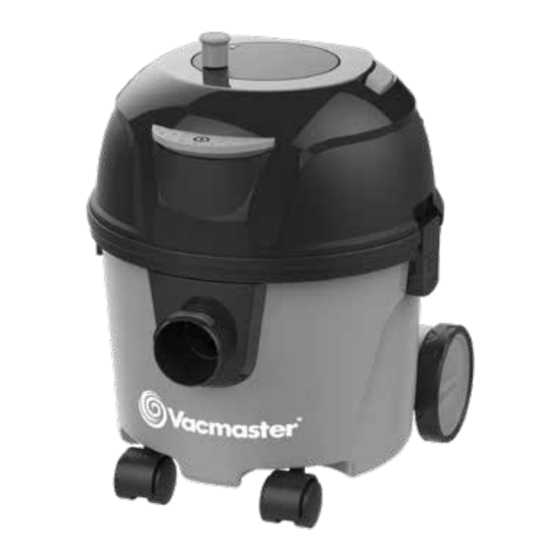
Dry Vacuum
Operator's Manual
3 Gallon
Model No.
VZA306P 1101
FOR YOUR SAFETY
Read and understand this manual before use.
Keep this manual for future reference.
Replacement Filters &
Suzhou Cleva Electric Appliance Co., Ltd.
Accessories available at:
NO.8 Ting Rong Street 215122 Suzhou, China
Vacmaster.com
Advertisement
Table of Contents

Summary of Contents for Vacmaster VZA306P 1101
- Page 1 Dry Vacuum Operator’s Manual 3 Gallon Model No. VZA306P 1101 FOR YOUR SAFETY Read and understand this manual before use. Keep this manual for future reference. Replacement Filters & Suzhou Cleva Electric Appliance Co., Ltd. Accessories available at: NO.8 Ting Rong Street 215122 Suzhou, China...
-
Page 2: Table Of Contents
FOR YOUR SAFETY: CAREFULLY READ AND UNDERSTAND ALL INSTRUCTIONS. WARRANTY ® We take pride in producing a high quality, durable product. This Vacmaster product carries a limited two (2) year warranty against defects in workmanship and materials from date of purchase under normal household use. -
Page 3: Important Safety Instructions
IMPORTANT SAFETY INSTRUCTIONS When using an electrical appliance, basic precautions should always be followed, including the following: READ ALL INSTRUCTIONS BEFORE USING THIS VACUUM CLEANER. Failure to follow the warnings and instructions may result in electric shock, fire and/or serious injury. WARNING: TO REDUCE THE RISK OF FIRE, ELECTRIC SHOCK, OR INJURY: •... -
Page 4: Extension Cords
EXTENSION CORDS When using an extension cord with your Dry Vacuum refer to the following table to determine the required A.W.G. wire size. Before using the cleaner make sure the power cord and extension cord are in good working condition. Make repairs or replacements before using the vacuum cleaner. Only use extension cords that are rated for outdoor use. -
Page 5: Unpacking & Checking Carton Contents
UNPACKING & CHECKING CARTON CONTENTS Remove all contents from the box. Remove the power head and take out any contents inside the collection tank. Check each item against the carton contents list. Carton Contents List Description........Qty. Vacuum........1 Hose..........1 Extension Wand......2 Pre-filter........1 Dust Collection Bag......1 Multi-Surface Floor Nozzle.....1... -
Page 6: General Assembly Instructions
GENERAL ASSEMBLY INSTRUCTIONS Ⅱ Ⅰ Ⅰ Ⅱ WARNING: DO NOT PLUG POWER CORD INTO POWER OUTLET. MAKE SURE PLUG IS DISCONNECTED BEFORE ASSEMBLING THE VACUUM. TO REDUCE THE RISK OF ELECTRIC SHOCK, DO NOT EXPOSE TO RAIN. UNPACKING YOUR DRY VACUUM & GENERAL ASSEMBLY 1. -
Page 7: Dry Vacuum Operation
DRY VACUUM OPERATION - ﹢ DRY VACUUMING WARNING: BE SURE TO READ, UNDERSTAND, AND APPLY INFORMATION ENTITLED “IMPORTANT SAFETY INSTRUCTIONS”. DO NOT VACUUM IN AREAS WITH FLAMMABLE GASES, VAPORS, OR EXPLOSIVE DUSTS IN THE AIR. FLAMMABLE GASES OR VAPORS INCLUDE BUT ARE NOT LIMITED TO: LIGHTER FLUID, SOLVENT TYPE CLEANERS, OIL-BASED PAINTS, GASOLINE, ALCOHOL, OR AEROSOL SPRAYS. - Page 8 DRY VACUUM OPERATION 8. Pull out the power cord slowly (Fig. 7). 9. Plug the power cord into the outlet, turn on the dry vacuum by pressing the On/Off switch once (Fig. 8 & 9). 10.Once you have finished vacuuming, press the power switch again to turn the vacuum off and unplug the cord from the power outlet.
-
Page 9: Maintenance
MAINTENANCE EMPTYING THE COLLECTION TANK WARNING: ALWAYS DISCONNECT THE PLUG FROM THE POWER OUTLET BEFORE REMOVING THE POWER HEAD FROM COLLECTION TANK. 1. Verify that the power cord is disconnected from the outlet (Fig. 1). 2. Disconnect the hose from the vacuum by turning counter-clockwise (Fig. 2). 3. - Page 10 MAINTENANCE REMOVING & CLEANING EXHAUST FILTER 1. Verify that the power cord is disconnected from the outlet. 2. Unlock the exhaust filter door by lifting both of the locking tabs upwards and pull the door out (Fig. 7 & 8). 3.
-
Page 11: Troubleshooting
TROUBLESHOOTING WARNING: TO REDUCE THE RISK OF ELECTRIC SHOCK, UNPLUG BEFORE TROUBLESHOOTING. PROBLEM POSSIBLE CAUSE SOLUTION The socket is damaged. Check if the socket has power. Insert the plug into the power The plug is not plugged into the source and press the on/off switch wall outlet tightly. -
Page 12: Exploded View
EXPLODED VIEW... -
Page 13: Parts List
PARTS LIST Part Drawing Number Description Quantity 551590101 Exhaust Filter Door 551590102 HEPA filter Power Head Assembly 551590104 Latch assembly 551590105 Pre-Filter Assembly 551590106 Rear Wheel Assembly Collection Tank 551590108 Vacuum Port Assembly 551137124 Caster 551590109 Hose 551590110 Multi-Surface Floor Nozzle 551004116 Round Dust Brush 551121144...


Need help?
Do you have a question about the VZA306P 1101 and is the answer not in the manual?
Questions and answers