Table of Contents
Advertisement
Quick Links
FIELD MEMORY RECORDER
Model
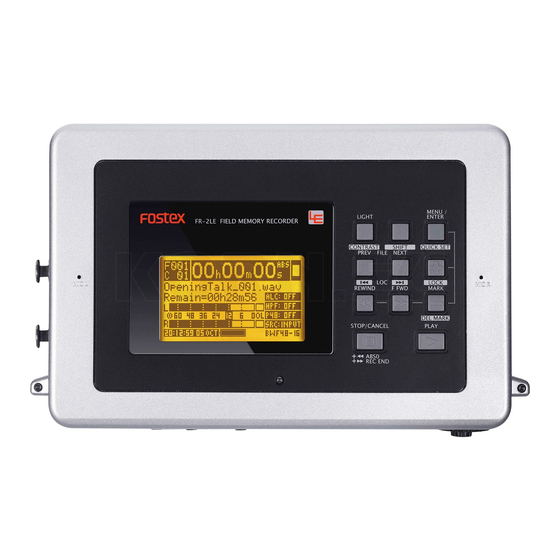
FR-2LE FIELD MEMORY RECORDER
MIC L
L
MIC TRIM
R
Owner's Manual
FR-2LE
LIGHT
CONTRAST
PREV
REWIND
STOP/CANCEL
L
MIC PEAK
48
24
R
REC STBY
MONITOR
MENU /
ENTER
QUICK SET
SHIFT
NEXT
FILE
LOC
LOCK
MIC R
F FWD
MARK
DEL MARK
PLAY
ABS0
REC END
L
12
6
3
OL
dB
L
R
R
REC
8588 080 000
(445480)
Advertisement
Table of Contents

Related Manuals for Fostex FR-2LE


Summary of Contents for Fostex FR-2LE
- Page 1 FIELD MEMORY RECORDER FR-2LE Model FR-2LE FIELD MEMORY RECORDER MIC L MONITOR MIC TRIM Owner’s Manual MENU / LIGHT ENTER CONTRAST QUICK SET SHIFT NEXT PREV FILE LOCK MIC R REWIND F FWD MARK DEL MARK STOP/CANCEL PLAY ABS0 REC END...
-
Page 2: Safety Instructions
FR-2LE Field Memory Recorder CAUTION RISK OF ELECTRIC SHOCK DO NOT OPEN CAUTION: TO REDUCE THE RISK OF ELECTRIC SHOCK, DO NOT REMOVE COVER (OR BACK). NO USER - SERVICEABLE PARTS INSIDE. REFER SERVICING TO QUALIFIED SERVICE PERSONNEL. "WARNING" "TO REDUCE THE RISK OF FIRE OR ELECTRIC SHOCK, DO NOT EXPOSE THIS APPLIANCE TO RAIN OR MOISTURE."... -
Page 3: Important Safety Instructions
Protect the power cord from being walked on or pinched particularly at plugs, convenience receptacles, and the point where they exit from the apparatus. FR-2LE Field Memory Recorder Only use attachments/accessories specified by the manufacturer. Use only with the cart, stand, tripod, bracket, or table specified by the manufacturer, or sold with the apparatus. -
Page 4: Table Of Contents
About software update ...18 Chapter 2: Before using the FR-2LE ...19 About power supply ...20 Operating the FR-2LE on the AC adaptor ...20 Connecting the AC adaptor ...20 Operating with batteries ...21 Inserting four size AA batteries to the battery case ...21 Setting the battery case (or a Tamiya battery) to the unit ...22... - Page 5 Connecting to an external microphone ...50 Connecting to the line outputs of an external audio device ...50 Connecting to a monitor system ...51 Connecting to headphones ...51 Other connections ...52 Connecting to a PC ...52 Connecting to the remote controller ...52 FR-2LE Field Memory Recorder...
- Page 6 FR-2LE Field Memory Recorder Chapter 5: Recording / playback ...53 About recording system ...54 Setup before you start recording ...55 Setup in quick setup mode ...55 How to make setting in the quick setup mode ...56 ALC (Auto Level Control) setting (if needed) ...57 HPF (High Pass Filter ) on/off setting (if needed) ...57...
- Page 7 Chapter 6: Exporting audio files to a PC ...69 Connecting the FR-2LE to a PC ...70 USB connection between the FR-2LE to a PC ...71 Copying an audio file to a PC hard disk ...72 Copying a file from a PC to a memory card ...72 Example of exporting audio data to a PC software application ...73...
- Page 8 FR-2LE Field Memory Recorder Selecting the take number ...100 Renaming the scene name ...100 Making the edited file name (scene name + take number) effective ...101 Resetting a default file name ...101 Enabling or disabling the pre record function (Pre Rec) ...102 Selecting the time display mode (Time Disp) ...103...
-
Page 9: About This Manual
About this manual This manual covers all about how to use the Fostex FR-2LE Field Memory Recorder. Its explanations assume that you have basic knowledge and experience of professional digital recording. To understand the FR-2LE features and learn how to use the FR-2LE quickly and roughly, we recommend reading "Chapter 1: Introduction"... -
Page 10: Mp3 (Mpeg Layer-3)
Should water enter the inside of the unit, turn off the power, unplug the AC adaptor and remove batteries, and consult your dealer or the nearest FOSTEX service station. Do not drop the unit or give it a strong shock. -
Page 11: Precautions On Installation
In such a case, leave the unit for a while until it warms up and evaporates any moisture. Brief guide to this manual This manual is intended to be used as a guidebook for using the Fostex FR- 2LE Field Memory Recorder. The manual is divided into Chapters. Each Chapter covers instructions for a specific subject or feature of the FR-2LE which you should know for using the unit, as well as safety instructions, precautions, etc. - Page 12 FR-2LE functions by looking through this chapter. Chapter 4: Basic connection This chapter describes basic connection between the FR-2LE and external devices. It includes details about how to connect analog audio signals, as well as how to connect a PC to the unit via [USB] connector.
- Page 13 3) Setup menu (See page 91 for details.) Includes 19 menu items for FR-2LE preferences, etc. Used to enable or disable the auto level control or the limiter. Used to enable or disable the high pass filter. Def. FS/BIT Used to set recording format (Fs/bit) of a memory card.
-
Page 14: Manual Conventions
The following abbreviations are sometimes used. <Examples> CompactFlash Sampling frequency Realtime clock Personal computer The names of keys, switches and connectors of the FR-2LE used in this manual match their labels on the panel. <Examples> Playback key Power switch Analog input connectors The on-screen messages and switch position names are surrounded by "... -
Page 15: Chapter 1: Product Overview
Field Memory Recorder (Chapter 1: Product overview) FR-2LE Chapter 1: Product overview This chapter describes the product overview, main features/functions, supplied accessories and how to update the software. -
Page 16: Overview
FR-2LE with batteries or on the supplied AC adaptor. The FR-2LE provides of USB port for PC connection. By making PC connection, you can easily transfer audio files from the FR-2LE to a PC and edit the files on it. Main features Provides a card slot for Type 2 CompactFlash •... -
Page 17: Supplied Accessories
Soft case (pouch) <Note>: No batteries or USB cable comes with the FR-2LE. Get commercially available batteries or a USB cable if necessary. When oper- ating the unit with batteries, use alkaline, Ni-Cd, Ni-MH batteries, or the Tamiya (7.2V) battery. -
Page 18: About Software Update
FR-2LE by following the procedure below (see the reference pages for details). <Note>: If you cannot download the software from the Fostex web site, ask your local Fostex dealer or service station. Access the Fostex web site (http://www.fostexinternational.com) and download the updated software for the FR-2LE to your personal computer. -
Page 19: Chapter 2: Before Using The Fr-2Le
About memory cards ...32 Inserting/removing a memory card ...32 Removing a memory card ...33 Inserting a memory card ...34 How to attach the shoulder belt to the unit ...36 Field Memory Recorder (Chapter 2: Before using the FR-2LE) <Table of contents>... -
Page 20: About Power Supply
• Connecting the AC adaptor While the [POWER] switch of the FR-2LE is set to "OFF", connect the AC adaptor to the [DC IN] jack on the left side panel of the FR-2LE, and then to the AC main outlet. -
Page 21: Operating With Batteries
<Important! (Do not forget to make the following setting.)> After setting (or replacing) AA batteries and turning on the FR-2LE, be sure to select the battery type (Ni-MH, Ni-Cd, Alkaline or Tamiya battery) to match the batteries inserted using the "Battery Type"... -
Page 22: Setting The Battery Case (Or A Tamiya Battery) To The Unit
Field Memory Recorder (Chapter 2: Before using the FR-2LE) FR-2LE Setting the battery case (or a Tamiya battery) to the unit Remove the compartment cover on the bottom panel of the FR-2LE. Pull the hook in the arrow direction and lift the cover. - Page 23 Field Memory Recorder (Chapter 2: Before using the FR-2LE) FR-2LE Connect the cable of the battery case (or a Tamiya battery) to the connector of the FR-2LE. After making cable connection, insert the battery case (or a Tamiya battery) to the compartment.
-
Page 24: Reducing The Battery Power Consumption
The FR-2LE can indicate remaining battery life, as well as can generate the error tone when the power voltage drops down to the specific level. See "Battery remain- ing indication"... -
Page 25: Turning On The Power
Field Memory Recorder (Chapter 2: Before using the FR-2LE) FR-2LE Turning on the power By setting the [POWER] switch to "ON" after inserting batteries or connecting the AC adaptor, the unit starts up. The following is assumed that a CompactFlash card is set to the card slot as when the unit is shipped. -
Page 26: Battery Remaining Indication
FR-2LE Battery remaining indication When the FR-2LE operates with batteries, you can roughly know the battery condi- tion via the battery indicator at the bottom of the display. We recommend paying attention to the battery indicator in order not to miss the timing of battery change. -
Page 27: Formatting A Memory Card
FR-2LE Formatting a memory card The FR-2LE accommodates memory cards formatted with the FAT32 file system. When you use an unformatted memory card or a card which is formatted with a file system other than FAT32, format it by the following procedure. - Page 28 Field Memory Recorder (Chapter 2: Before using the FR-2LE) FR-2LE BWF44/16 44.1kHz/16 bit, BWF file mode. BWF44/24 44.1kHz/24 bit, BWF file mode. BWF48/16 48kHz/16 bit, BWF file mode. BWF48/24 48kHz/24 bit, BWF file mode. BWF88/24 88.2kHz/24 bit, BWF file mode.
-
Page 29: Setting The Display Backlight/Contrast
"Remain Display" menu item on the Setup menu in the MENU mode (see page 104 for details). You can now make recording to the formatted memory card using the FR-2LE. For details, see "Chapter 5: Recording/playback" starting from 53 pages. -
Page 30: Adjusting The Display Contrast
Field Memory Recorder (Chapter 2: Before using the FR-2LE) FR-2LE Adjusting the display contrast You can adjust the display contrast by following the procedure below. [LIGHT / CONTRAST MIC L When the recorder is stopped, press the [LIGHT / the [SHIFT] key. -
Page 31: About The Internal Realtime Clock
FR-2LE About the internal realtime clock The FR-2LE offers the internal realtime clock. The current time data of the realtime clock is shown on the display. The time data of the realtime clock can be used as a file name when a new audio file is created on the card (i.e. -
Page 32: About Memory Card
Also be sure to insert a card in the correct direction and side. Note that Fostex is not responsible for any damage of a card caused by incorrect card handling. Eject button... -
Page 33: Removing A Card
Field Memory Recorder (Chapter 2: Before using the FR-2LE) FR-2LE • Removing a card The following describes how to remove a memory card from the slot. It is assumed that a memory card (regardless of whether it is the supplied memory card or another one) is inserted to the slot. -
Page 34: Inserting A Card
Field Memory Recorder (Chapter 2: Before using the FR-2LE) FR-2LE • Inserting a card The following describes how to insert a memory card to the slot. In the following description, it is assumed that the unit is powered off. If you set a card while the eject button is in the up position, you cannot close <Note>:... - Page 35 "<<No Audio Files>>", as the screen example above. If any data is recorded on the card, the remaining space which can be used for recording by the FR-2LE may be smaller. Therefore, we recommend formatting the card using the "For- mat"...
-
Page 36: How To Attach The Shoulder Belt To The Unit
Field Memory Recorder (Chapter 2: Before using the FR-2LE) FR-2LE How to attach the shoulder belt to the unit The supplied shoulder belt should be attached to the unit correctly as shown below. Otherwise, the unit may fall down, resulting in human injury or damage of the unit. -
Page 37: Chapter 3: Names And Functions
FR-2LE Chapter 3: Names and functions Front panel ...38 Top panel ...39 Left side panel ...41 Right side panel ...42 Back panel ...42 Bottom panel ...43 Details about screens ...44 Home screen ...44 When no memory card is set ...44 When a formatted blank memory card is set ...44... -
Page 38: Front Panel
Field Memory Recorder (Chapter 3: Names and functions) FR-2LE Slot protection cover Card slot and Eject button You can insert a compact flash card To remove the card, press the eject button. See "About memory cards" on page 32 for details. -
Page 39: Top Panel
You can adjust the display contrast by pressing this key while holding down the [SHIFT] key. See "Adjusting the display contrast" on page 30 for details. Top panel 11 12 13 14 LIGHT FR-2LE FIELD MEMORY RECORDER CONTRAST SHIFT PREV FILE... - Page 40 Field Memory Recorder (Chapter 3: Names and functions) FR-2LE [FILE NEXT] / [LOC When more than one audio file exists on the card, pressing this key switches the current file to the next entry in the list. If any cue points (CUE 01 through 99) are stored in the current file, pressing this key while holding down the [SHIFT] key skips forwards to the next cue point.
-
Page 41: Left Side Panel
Field Memory Recorder (Chapter 3: Names and functions) FR-2LE [F FWD] key While stopped, pressing this key fast-forwards the transport. During playback, pressing this key cues the transport in the forward direction at up to double speed. By pressing this key while holding down the [STOP/CANCEL] key locates the record end point (REC END) of the file. -
Page 42: Right Side Panel
Field Memory Recorder (Chapter 3: Names and functions) FR-2LE [POWER] switch Turns on or off the unit's power. To turn off the power, hold the switch up for two seconds. [USB] port (PC ONLY) This port is exclusively used for connecting a PC. By connecting a PC to this port, you can transfer audio files between the unit and PC. -
Page 43: Bottom Panel
Field Memory Recorder (Chapter 3: Names and functions) FR-2LE Internal monitor speaker This speaker is used for monitoring. You can control the monitor level using the [MONITOR] control. When a headphones plug is inserted to the [PHONES] jack or during input <Note>:... -
Page 44: Details About Screens
Field Memory Recorder (Chapter 3: Names and functions) FR-2LE Details about screens The FR-2LE features 132 x 64 dot LCD display for showing record/playback levels, file information, card remaining time, battery information, setting information, realtime clock information, etc. Home screen After the unit is turned on and starts up, the "Home screen"... - Page 45 Field Memory Recorder (Chapter 3: Names and functions) FR-2LE On the Home screen, you can see the following information. File number / Cue information Time counter Transport status Quick setup mode settings Recording format Battery (BATT) indicator Realtime clock indicator...
-
Page 46: Menu Mode Screens
This message appears when the battery for operating the in- ternal realtime clock is exhausted. This message appears when turning on the power. Ask your local Fostex dealer or sales office for replacing the battery. This message appears when the memory card inserted to the slot has a problem. - Page 47 Field Memory Recorder (Chapter 3: Names and functions) FR-2LE This message appears when you cannot create an audio file to the current memory card any more. To create a new audio file, delete an unnecessary file or re- place the card to another one.
- Page 48 Field Memory Recorder (Chapter 3: Names and functions) FR-2LE...
-
Page 49: Chapter 4: Basic Connections
Chapter 4: Basic connections This chapter describes basic connections of the FR-2LE. Audio connections ...50 Connecting to an external microphone ...50 Connecting to the line outputs of an external audio device ...50 Connecting to a monitor system ...51 Connecting to headphones ...51 Other connections ...52... -
Page 50: Audio Connections
Field Memory Recorder (Chapter 4: Basic connections) FR-2LE The [ANALOG IN] section of the FR-2LE provides combo type balanced connectors which combine XLR-3-31 (pin 2=hot) and TS phone jacks. These connectors accept a wide range of inputs from microphone level to line level. -
Page 51: Connecting To A Monitor System
FR-2LE Connecting to a monitor system Use the [MONITOR OUT] jacks (RCA pin jacks) on the right side panel to connect to external monitoring equipment. You can adjust the monitor level using the [MONI- TOR] control. When a headphone plug is plugged into the [PHONES] jack, no audio signal is <Note>:... -
Page 52: Other Connections
The FR-2LE provides the [USB] connector which is used for directly connecting to a PC. By connecting the FR-2LE to a PC via this connector, you can control the current memory card of the FR-2LE from the PC and transfer audio files to the PC. -
Page 53: Chapter 5: Recording/Playback
Skip/Locate functions ...66 Skipping by file ...66 Skipping by cue point ...66 Locating to the beginning (ABS 0) of a file ...67 Locating to the end (REC END) of a file ...67 Field Memory Recorder (Chapter 5: Recording/playback) FR-2LE <Table of contents>... -
Page 54: About Recording System
BWF (Broadcast Wave File) and MP3 (MPEG-1 Audio Layer3) file formats. You can make recording in stereo (L/R). The FR-2LE uses the "1 take - 1 file" system. With this system, Each time you make recording, a BWF or MP3 file is automatically created and a pair of L and R audio signals is stored to it. -
Page 55: Setup Before You Start Recording
FR-2LE Setup before you start recording Before you start recording, set up the following items. You can set them up using the "Setup" menu in the MENU mode, however, you can also set up the first four items below using the quick setup mode. -
Page 56: How To Make Setting In The Quick Setup Mode
After you complete setting, press the [STOP/CANCEL] key to exit the quick setup mode. See the following pages for details about each item. MENU / ENTER SHIFT QUICK SET MENU / LIGHT ENTER FR-2LE FIELD MEMORY RECORDER CONTRAST SHIFT QUICK SET PREV FILE NEXT LOCK REWIND... -
Page 57: Alc (Auto Level Control) Setting (If Needed)
FR-2LE ALC (Auto Level Control) setting (if needed) The "ALC" item in the quick setup mode allows you to enable the auto level control function or the limiter When you record a microphone signal, use of the limiter func- tion will help prevent clipping audio and keep the appropriate recording signal level. -
Page 58: Using The Menu Mode
Field Memory Recorder (Chapter 5: Recording/playback) FR-2LE You can make setting of the following preference items other than the four items in the quick setup mode using the "Setup" menu in the MENU mode. Default file name setting (if needed) When you starts recording, an audio file is newly created on the memory card and its file name is automatically given. -
Page 59: Maximum File Size Setting (If Needed)
FR-2LE Maximum file size setting (if needed) The maximum size of an audio file is set to "2 GB" by default. We recommend you to set the maximum file size depending on the file size your personal computer can import. -
Page 60: Recording Audio
Field Memory Recorder (Chapter 5: Recording/playback) FR-2LE In the following description, it is assumed that the necessary settings for recording are made using the quick setup mode or MENU mode and no audio is recorded to the memory card ("<<No Audio Files>>" is shown on the screen). -
Page 61: Adjusting The Internal Microphone Level
"12" of the onscreen meter is labeled in inverse video, showing that it is the reference position. LED level meters On screen level meters Field Memory Recorder (Chapter 5: Recording/playback) LIGHT FR-2LE FIELD MEMORY RECORDER CONTRAST PREV REWIND STOP/CANCEL ABS0... -
Page 62: Starting Recording
Field Memory Recorder (Chapter 5: Recording/playback) FR-2LE After adjusting the recording level appropriately, you are now ready to start recording. Each time the unit makes recording, it creates an audio file on the memory card. Note that the unit cannot make additional recording to an existing audio file. -
Page 63: Setting Cue Points
FR-2LE The FR-2LE can store cue points, which can be used as markers. You can manually set and store a cue point at the desired position during recording (or while stopped). Setting a cue point on-the-fly You can set a "cue point" at the position you press the [MARK] / ing/playback or while stopped. -
Page 64: Deleting A Cue Point In Realtime
[SHIFT] key deletes the cue point before the current recorder position in realtime. For example, if the cue point information on the Home screen shows "C 03" as below, oper- ating as above deletes cue 03. FR-2LE FIELD MEMORY RECORDER MIC L key while holding down... -
Page 65: Playback
FR-2LE In the following description, it is assumed that more than one audio file is recorded to the card and the recorder is stopped at the beginning of the first created audio file. Press the [PLAY] key to start playback. -
Page 66: Cueing Playback
Skip/locate functions The FR-2LE offers comprehensive locate functions. When more than one audio file is created on a memory card, you can immediately skip to the beginning (ABS 0) of a desired track. -
Page 67: Locating To The Beginning (Abs 0) Of A File
When there is more than one audio file, the unit locates the last recording <Note>: position of the most recently recorded audio file. MIC L Field Memory Recorder (Chapter 5: Recording/playback) FR-2LE FIELD MEMORY RECORDER MIC L STOP/CANCEL LIGHT FR-2LE FIELD MEMORY RECORDER... - Page 68 Field Memory Recorder (Chapter 5: Recording/playback) FR-2LE...
-
Page 69: Chapter 6: Exporting Audio Files To A Pc
FR-2LE Chapter 6: Exporting audio files to a PC This chapter describes how to export audio files created by the FR-2LE to your PC. Connecting the FR-2LE to a PC ...70 USB connection between the FR-2LE to a PC ...71 Copying an audio file to a PC hard disk ...72... -
Page 70: Connecting The Fr-2Le To A Pc
USB connection between the FR-2LE and your PC allows you to transfer audio (BWF) files created by the FR-2LE. FR-2LE audio data can be copied to a hard disk on your PC, or exported to a computer application such as Digidesign Pro Tools. -
Page 71: Usb Connection Between The Fr-2Le To A Pc
Use the [ - ] key to select "USB Device Mode >" at the bottom and press the [MENU/ENTER] key. The FR-2LE enters the USB mode and the display shows the screen on the right below. While this screen is shown, you can transfer data between the FR-2LE and the PC. -
Page 72: Copying An Audio File To A Pc Hard Disk
This function is useful when upgrading the FR-2LE. In such a case, download the file for upgrading the FR-2LE from the Fostex web site to your PC, and copy it to a memory card. In the following procedure, it is assumed that the file for upgrading the FR-2LE has been already downloaded to your PC (see page 111 for details about upgrading the software). -
Page 73: Example Of Exporting Audio Data To A Pc Software Application
Field Memory Recorder (Chapter 6: Exporting audio files to a PC) Example of exporting audio data to a PC software application The following procedure example shows how to export FR-2LE audio data to Digidesign Pro Tools for Windows. For details about instructions of Pro Tools, see the instruction manual supplied with Pro Tools. - Page 74 FR-2LE Field Memory Recorder (Chapter 6: Exporting audio files to a PC) Select a desired audio file in the "bwff" directory on the card (see arrow 4 below). The selected audio file is shown in "Region in current file". Click on "Convert ->", followed by "Done" (see arrow 5 below).
- Page 75 FR-2LE Field Memory Recorder (Chapter 6: Exporting audio files to a PC) Enable "Spot" and drag & drop the audio region list to the track area (see arrow 8). The "Spot Dialog" window appears. Click on " " in the "Spot Dialog" window, followed by "OK" (see arrow 9 below).
-
Page 76: Protecting A Memory Card
USB mode. There may be a risk of destroying audio files on the FR-2LE by copying file data from a PC to the FR-2LE by mistake. To prevent this kind of an accident, we recommend pro- tecting a memory card in use. -
Page 77: Chapter 7: Menu Mode
FR-2LE Chapter 7: MENU mode How to operate in the MENU mode ...78 Menu items ...79 File menu ...80 Selecting an audio file to be played back (Select) ...80 Renaming the file name of the selected file (Rename) ...81 Removing a file from the ADL (Remove) ...83 Restoring a removed file to the ADL (Prev.Insert/Next Insert) ...84... -
Page 78: How To Operate In The Menu Mode
3) brings up the screen for selecting the menu item. When you select the File menu in step 2), executing step 3) brings up the screen for selecting an audio file in the ADL. See "File menu" described later for details. MENU / LIGHT ENTER FR-2LE FIELD MEMORY RECORDER CONTRAST SHIFT QUICK SET PREV FILE... -
Page 79: Menu Items
Field Memory Recorder (Chapter 7: MENU mode/File menu) FR-2LE Menu items Menu item File menu item Disk menu item Setup menu item USB mode menu item Function • Locates the beginning of the selected file. • Renames the file name of a selected file. -
Page 80: File Menu
Locating the beginning of the selected file (Locate) You can locate the beginning of a desired audio file in the ADL. In the following description, it is assumed that the FR-2LE is in the MENU mode and the main menu screen is shown ("File >" is highlighted). -
Page 81: Renaming The File Name Of The Selected File (Rename)
Renaming the file name of the selected file (Rename) You can rename an audio file in the ADL. In the following description, it is assumed that the FR-2LE is in the MENU mode and the main menu screen is shown ("File >" is highlighted). - Page 82 Field Memory Recorder (Chapter 7: MENU mode/File menu) FR-2LE <How to enter a file name> The cursor in [ ] at the top on the editing screen is called "file name cursor", while the cursor in the character selection area is called "character selection cursor".
-
Page 83: Removing A File From The Adl (Remove)
Removing a file from the ADL (Remove) You can remove (delete) an audio file from the ADL. In the following description, it is assumed that the FR-2LE is in the MENU mode and the main menu screen is shown ("File >" is highlighted). -
Page 84: Restoring A Removed File To The Adl (Prev. Insert/Next Insert)
ADL. The restored audio file can be played back, as well as its file name can be edited. In the following description, it is assumed that: • the FR-2LE is in the MENU mode and the main menu screen is shown ("File >" is highlighted). - Page 85 Field Memory Recorder (Chapter 7: MENU mode/File menu) FR-2LE Use the [+] or [-] key to select "Prev. Insert" or "Next Insert", and press the [MENU/ENTER] key. If you attempt to insert a free file to the previous position of the audio file selected in step 2), select "Prev.
-
Page 86: Disk Menu
The FR-2LE can format the current memory card with the FAT32 (File Allocation Table 32) file system. In the following description, it is assumed that the FR-2LE is in the MENU mode and the main menu screen is shown ("File >" is highlighted). - Page 87 Field Memory Recorder (Chapter 7: MENU mode/Disk menu) FR-2LE <How to enter a reel number> The cursor in [ ] at the top on the editing screen is called "reel number cursor", while the cursor in the character options is called "character selection cursor".
- Page 88 Field Memory Recorder (Chapter 7: MENU mode/Disk menu) FR-2LE Press the [-] key to highlight "FS/BIT Mode" and press the [MENU/ENTER] key. Now you can select the FS/BIT mode. Use the [+] or [-] key to select the desired FS/BIT mode and press the [MENU/ENTER] key.
-
Page 89: Editing A Reel Number Of A Memory Card (Reel No)
You can edit the default reel number which is given when a memory card is formatted. In the following description, it is assumed that the FR-2LE is in the MENU mode and the main menu screen is shown ("File >" is highlighted). -
Page 90: Enabling Or Disabling Resume Function (Resume)
By default, the resume function is disabled. In the following description, it is assumed that the FR-2LE is in the MENU mode and the main menu screen is shown ("File >" is highlighted). -
Page 91: Setup Menu
Enabling or disabling the auto level control and limiter functions (ALC) The "ALC" item enables or disables the auto level control and limiter functions. In the following description, it is assumed that the FR-2LE is in the MENU mode and the main menu screen is shown ("File >" is highlighted). -
Page 92: Enabling Or Disabling The High Pass Filter (Hpf)
Enabling or disabling the high pass filter (HPF) This item enables or disables the high pass filter. In the following description, it is assumed that the FR-2LE is in the MENU mode and the main menu screen is shown ("File >" is highlighted). -
Page 93: Selecting The Default Recording Format (Def.fs/Bit)
This item selects the default audio format of a memory card when it is formatted. In the following description, it is assumed that the FR-2LE is in the MENU mode and the main menu screen is shown ("File >" is highlighted). -
Page 94: Selecting The Recording Source (Source Sel)
Selecting the recording sources (Source Sel) This item selects the recording sources between the internal microphones and external sources. In the following description, it is assumed that the FR-2LE is in the MENU mode and the main menu screen is shown ("File >" is highlighted). -
Page 95: Turning The Phantom Power On Or Off (Phantom)
When you use a microphone which requires the phantom power, use this menu item to turn the phantom power on. In the following description, it is assumed that the FR-2LE is in the MENU mode and the main menu screen is shown ("File >" is highlighted). -
Page 96: Selecting The Monitor Mode (Monitor Mode)
This item selects whether the unit outputs signals from the [MONITOR OUT] connectors, [PHONES] jack and internal speaker in stereo or mono. In the following description, it is assumed that the FR-2LE is in the MENU mode and the main menu screen is shown ("File >" is highlighted). -
Page 97: Enabling Or Disabling The Internal Speaker (Speaker Out)
In the following description, it is assumed that the FR-2LE is in the MENU mode and the main menu screen is shown ("File >" is highlighted). -
Page 98: Selecting The Default File Name Type (File Name Mode)
This menu item selects the default file name type from among the creation date/time, "scene name + take number" and "reel number + File number". In the following description, it is assumed that the FR-2LE is in the MENU mode and the main menu screen is shown ("File >" is highlighted). -
Page 99: Setting The Default File Name (Default File Name)
This item sets the scene name and take number which are used in a file name when the file name mode is set to "Take" (see the previous page). In the following description, it is assumed that the FR-2LE is in the MENU mode and the main menu screen is shown ("File >" is highlighted). -
Page 100: Selecting The Take Number
• Selecting the take number Use the [+] or [-] key to select "Take No.:***" and press the [MENU/ENTER] key. The take number currently set starts flashing (by default, "001"). Use the [+] or [-] key to select the desired take number and press the [MENU/ENTER] key. You can set the take number between 001 and 999. -
Page 101: Making The Edited File Name (Scene Name + Take Number) Effective
After you complete editing, press the [MENU/ENTER] key. The renamed scene name is confirmed and the display returns to the previous screen (In the example below, "Original Name" is set). • Making the edited file name (scene name + take number) effective Use the [+] or [-] key to select "Select >"... -
Page 102: Enabling Or Disabling The Pre Record Function (Pre Rec)
When the pre record function is enabled, recording starts with 2 seconds of audio data stored in the buffer. This prevents missing the start of important recording. In the following description, it is assumed that the FR-2LE is in the MENU mode and the main menu screen is shown ("File >" is highlighted). -
Page 103: Selecting The Time Display Mode (Time Disp)
The time display mode can be set by the "Time Display" menu item on the "Setup" menu in the MENU mode (the default time display mode is "ABS"). In the following description, it is assumed that the FR-2LE is in the MENU mode and the main menu screen is shown ("File >" is highlighted). -
Page 104: Selecting The Remaining Display Mode (Remain Display)
This item selects whether the remaining card space is displayed in time or Mbytes. In the following description, it is assumed that the FR-2LE is in the MENU mode and the main menu screen is shown ("File >" is highlighted). -
Page 105: Setting The Maximum File Size (Max File Size)
This item selects the maximum audio file size between 2 GB and 4 GB (the default is 2 GB). In the following description, it is assumed that the FR-2LE is in the MENU mode and the main menu screen is shown ("File >" is highlighted). -
Page 106: Selecting The Internal Battery Type (Battery Type)
This item selects the battery type when you operate the unit with batteries (Ni-MH, Ni-Cd, alkaline or Tamiya). In the following description, it is assumed that the FR-2LE is in the MENU mode and the main menu screen is shown ("File >" is highlighted). -
Page 107: Enabling Or Disabling The Error Tone Function (Error Tone)
(see the bottom of this page for details). In the following description, it is assumed that the FR-2LE is in the MENU mode and the main menu screen is shown ("File >" is highlighted). -
Page 108: Adjusting The Real Time Clock (Adjust Real Time Clock)
Time data can be used for the file name or file creation date of an audio file, time stamp of a BWF file, etc. In the following description, it is assumed that the FR-2LE is in the MENU mode and the main menu screen is shown ("File >" is highlighted). -
Page 109: Showing The Rom Version (Version)
Showing the ROM version (Version) This item is used for showing the ROM version of the unit. In the following description, it is assumed that the FR-2LE is in the MENU mode and the main menu screen is shown ("File >" is highlighted). -
Page 110: Initializing The Setup Menu Settings (Initial Setup)
This menu item is used for initializing all settings of the Setup menu to the factory-preset condition. In the following description, it is assumed that the FR-2LE is in the MENU mode and the main menu screen is shown ("File >" is highlighted). -
Page 111: Update The Software (Version Up)
Fostex web site (or supplied by Fostex dealer or service station) and copied to the memory card which is currently set to the FR-2LE, while the FR-2LE is in the MENU mode and the main menu screen is shown ("File >" is highlighted). - Page 112 Field Memory Recorder (Chapter 7: MENU mode/Setup menu) FR-2LE...
-
Page 113: Chapter 8: Main Specifications
FR-2LE Chapter 8: Main specifications *0 dBu=0.775 Vrms, 0 dBV=1 Vrms. ANALOG IN [L, R] Connectors <LINE input> Connectors Input impedance Nominal input level Maximum input level <MIC input> Connectors Input impedance Nominal input level Maximum input level Phantom power... -
Page 114: General
Field Memory Recorder (Chapter 8: Main specifications) FR-2LE Quantization and Sampling Frequency Recording tracks Record/Playback frequency response Signal to Noise Ratio (between ADC and DAC, 24-bit,, 48 kHz FS) Line Mic (MIC TRIM max.) Dynamic Range (between ADC and DAC, 24-bit, 48 kHz FS) T.H.D. -
Page 115: Physical Dimensions
Field Memory Recorder (Chapter 8: Main specifications) FR-2LE Physical dimensions FR-2LE FIELD MEMORY RECORDER MIC L MIC PEAK REC STBY MIC TRIM MONITOR MENU / LIGHT ENTER CONTRAST SHIFT QUICK SET PREV FILE NEXT LOCK MIC R REWIND F FWD... -
Page 116: Declaration Of Ec Directive
In the electrical fast transient/burst requirements, surge, conducted disturbances by radio-frequency fields, power frequency magnetic field, radiate electromagnetic field requirements and static electricity discharging environment, this could be affected by generation of noise in some cases. FOSTEX DISTRIBUTORS LIST IN EUROPE <AUSTRIA> NAME: ATEC Audio-u. Videogeraete VertriebsgesmbH. - Page 117 (180) days. Fostex America will repair and / or replace parts during the term of this warranty. Labor costs are also covered by Fostex America for one (1) year from the date of original purchase. Except as specified below, this warranty covers all defects in material and workmanship in this product.
- Page 118 Fostex America's liability for any defect product is expressly limited to repair or replacement of the product, at the sole discretion and / or option of Fostex America. Fostex America shall not under any circumstances be liable for: Damaged based on inconvenience, loss of use of the product, loss of time, interrupted operation or commercial loss, OR;...
- Page 120 FOSTEX CO. 3-2-35, Musashino, Akishima-shi, Tokyo, Japan 196-0021 FOSTEX AMERICA 13701, Cimarron Avenue, Gardena, CA 90249, U. S. A. © PRINTED IN CHINA JANUARY 2007 8588 080 000 FX (445480)
Need help?
Do you have a question about the FR-2LE and is the answer not in the manual?
Questions and answers