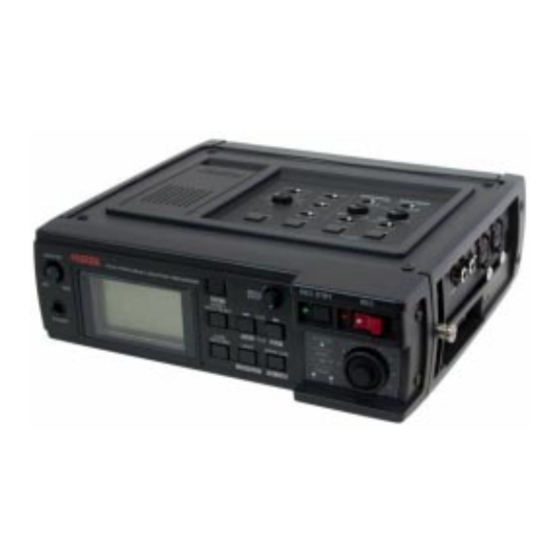
Fostex FR-2 Owner's Manual
Fostex field memory recorder model fr-2 owner's manual
Hide thumbs
Also See for FR-2:
- Owner's manual (20 pages) ,
- Specifications (2 pages) ,
- Software update procedure (1 page)
Table of Contents
Advertisement
Quick Links
Advertisement
Table of Contents

Related Manuals for Fostex FR-2


Summary of Contents for Fostex FR-2
- Page 1 8588 029 000 (390172) FR-2 Model FIELD MEMORY RECORDER Owner’s Manual...
-
Page 3: Safety Instructions
9. Heat - The appliance should be situated away from heat sources such as radiators, heat registers, stoves, or other appliances (including amplifiers) that produce heat. FR-2 Field Memory Recorder CAUTION: TO PREVENT ELECTRIC SHOCK, MATCH WIDE BLADE OF PLUG TO WIDE SLOT, FULLY INSERT. -
Page 4: Table Of Contents
Chapter 1: Product overview ...13 Overview ...14 Main features ...14 What is in the box ...15 FR-2 options and related Fostex products ...15 Chapter 2: Before using the FR-2 ...17 About power supply ...18 Operating on batteries ...18 Inserting batteries ...18 Reducing battery power consumption ...19... - Page 5 Analog audio output connection ...45 Digital audio output connection ...45 PC/Keyboard connection ...46 Connecting the FR-2 to a PC ...46 Connecting the FR-2 to a USB keyboard ...46 Chapter 5: Recording / playback ...47 About recording system ...48 Recording analog audio ...49 Selecting the input source ...49...
- Page 6 Initializing settings of the Setup menu (Init Setup) ...95 Chapter 7: Exporting audio files to a PC ...97 Connecting the FR-2 to a PC ...98 Connecting the FR-2 to a PC ...99 Exporting audio data to a computer application (example) ...100 Chapter 8: Main specifications ...103...
-
Page 7: About This Manual
About this manual This manual covers all about how to use the Fostex FR-2 Field Memory Re- corder. Its explanations assume that you have basic knowledge and experience of professional digital recording. To understand the FR-2 features and learn how to use the FR-2 quickly and roughly, we recommend reading "Chapter 1: Introduction"... -
Page 8: Precautions On Installation
Should water enter the inside of the unit, turn off the power, unplug the AC adaptor and remove batteries, and consult your dealer or the nearest FOSTEX service station. Do not drop the unit or give it a strong shock. The internal circuits, display, panels may be damaged. -
Page 9: Brief Guide To This Manual
FR-2 Field Memory Recorder Brief guide to this manual This manual is intended to be used as a guidebook for using the Fostex FR-2 Field Memory Recorder. The manual is divided into Chapters. Each Chapter covers instructions for a specific subject or feature of the FR-2 which you should know for using the unit, as well as safety instructions, precautions, etc. - Page 10 3) Disk menu (including menu items regarding a memory card) Select Optimize Format Volume Label Disk Info. 4) Setup menu (including menu items for FR-2 preferences, etc.) File Name Mode Default Scene Name Adjust Real Time Clock Speaker Mute Error Tone...
-
Page 11: Manual Conventions
CompactFlash card Flash ATA Card Sampling frequency Realtime clock Personal computer The names of keys, switches and connectors of the FR-2 used in this manual match their labels on the panel. <Examples> Playback key Sampling frequency select switch -> Analog input connectors The on-screen messages and switch position names are surrounded by "... - Page 12 FR-2 Field Memory Recorder Memo...
-
Page 13: Chapter 1: Product Overview
FR-2 Field Memory Recorder (Chapter 1: Product overview) Chapter 1: Product overview This chapter describes the product overview as well as main features/functions, etc. -
Page 14: Overview
You can oper- ate the FR-2 on batteries or on the optional AC adaptor. The FR-2 provides two types of USB ports, allowing PC and USB keyboard connection. By making PC connection, you can easily transfer audio files from the FR-2 to a PC and edit the files on it. -
Page 15: What Is In The Box
Fostex dealer. <Note> No power supply (batteries or the AC adaptor) for operating the FR-2 is supplied. To operate the unit on batteries, use alkaline, Ni-Cd, or Ni-MH batteries . To operate the unit on AC adaptor, use the optional Fostex AC adaptor (Model AD12-1300). - Page 16 FR-2 Field Memory Recorder (Chapter 1: Product overview) Memo...
-
Page 17: Chapter 2: Before Using The Fr-2
About the realtime clock ...23 About memory cards ...24 Inserting/removing a memory card ...24 Inserting a memory card ...25 Removing a memory card ...27 Initial format of a memory card ...28 FR-2 Field Memory Recorder (Chapter 2: Before using the FR-2) <Table of contents>... -
Page 18: About Power Supply
Operating on batteries Batteries are not supplied with the FR-2, therefore, if you wish to operate the FR-2 on batteries, purchase appropriate batteries. <Notes on using batteries>... -
Page 19: Reducing Battery Power Consumption
The lower the output level of headphones or internal monitor speaker, the • less power consumption. If you do not use the FR-2 for a long period of time, you should remove • batteries (when batteries are inserted, the FR-2 consumes little power even though the [POWER] switch is set to "OFF"). -
Page 20: Operating On Ac Adaptor
• Connecting the AC adaptor While the [POWER] switch of the FR-2 is set to "OFF", connect the AC adaptor to the [DC IN] jack on the left side panel of the FR-2, and then to the AC main outlet. AC outlet <Note>:... -
Page 21: About Power Supply Voltage
[POWER] switch to "ON" again. If the FR-2 does not return to the normal condition after carrying out the procedure above, there may be some trouble inside the circuit. In such a case, consult your local Fostex dealer or service station. -
Page 22: Setting The Display Backlight/Contrast
While the unit is stopped, you can adjust the display contrast by following the procedure below. When the FR-2 is stopped, press the [LIGHT] key while holding down the [SHIFT] key. The current contrast value is shown at the position where the current file name is usually shown (pointed by the arrow below). -
Page 23: About The Realtime Clock
FR-2 Field Memory Recorder (Chapter 2: Before using the FR-2) Setting the realtime clock The FR-2 offers the realtime clock and the time data is shown on the display . Realtime clock data itself can be used as a file name when a new audio file is created on the card (i.e. -
Page 24: About Memory Cards
You can remove or insert a card regardless of whether the power is on or off, however, never remove a card while the FR-2 is writing data to the card or reading data from the card. When you remove or insert a card when the power is on, follow the appropriate procedures described from the next page. -
Page 25: Inserting A Card
For details, see "Chapter 5: Recording/playback" from 47 pages. If you load a memory card on which any audio files created by the FR-2 are stored, the first file in the entry list (“File001”) automatically is selected and the recorder locates the beginning of that file, while the display shows the Home screen of the file. - Page 26 FR-2 Field Memory Recorder (Chapter 2: Before using the FR-2) * How to switch the current card when inserting a card to the other slot While a card is inserted in either of the card slots, you can insert another card to the unused card slot and switch the current card.
-
Page 27: Removing A Card
FR-2 Field Memory Recorder (Chapter 2: Before using the FR-2) • Removing a card The following describes how to remove a memory card from the slot, assuming that a CFC is inserted to the appropriate slot. While the recorder is stopped, press the [CARD RELEASE] key. - Page 28 FR-2 Field Memory Recorder (Chapter 2: Before using the FR-2) <Notes on ejecting a card when both CFC and ATA are inserted> When both CFC and ATA are inserted to slots (1) and (2) respectively, pressing the [CARD RELEASE] key brings up the screen as shown below.
-
Page 29: Initial Format Of A Memory Card
Format!"). While the warning message is shown, press the [ENTER] key. The FR-2 goes to the "Format" menu item and the display now shows the caution with flashing "Are you sure?", as shown below. If you are sure, press the [ENTER] key again. - Page 30 FR-2 Field Memory Recorder (Chapter 2: Before using the FR-2) Memo...
-
Page 31: Chapter 3: Names And Functions
FR-2 Field Memory Recorder (Chapter 3: Names and functions) Chapter 3: Names and functions Front panel ...32 Top panel ...34 Left side panel ...37 Right side panel ...37 Bottom panel ...38 Details about screens ...39 Home screen ...39 When no memory card is set in the slot ...39 When a virgin memory card is set in the slot ...40... -
Page 32: Front Panel
FR-2 Field Memory Recorder (Chapter 3: Names and functions) [PHONES] jack Connects headphones for monitoring. Inserting a plug automatically disables the internal monitor speaker. Note that, regardless of the setting of the "Speaker Mute" menu item on the Setup mode in the MENU mode, the [PHONES] jack always feeds audio. - Page 33 [SHIFT] key switches the current file to the next entry in the file list. [ACCESS] indicator This indicator flashes when the FR-2 is accessing a currently selected card (CompactFlash card or Flash ATA card). The indicator may light steadily depending on the FS of a recorded material.
-
Page 34: Top Panel
You can adjust the display contrast by pressing this key while holding down the [SHIFT] key. See "Before using the FR-2" on page 22 for details. [CARD RELEASE] key By pressing this key while stopped, the current memory card is released and ready for being removed from the slot. - Page 35 FR-2 Field Memory Recorder (Chapter 3: Names and functions) Internal monitor speaker This speaker is used for monitoring. When a headphones plug is inserted to the [PHONES] jack, this monitor speaker is muted. You can also select whether or not muting the speaker except during playback using the "Speaker Mute"...
- Page 36 FR-2 Field Memory Recorder (Chapter 3: Names and functions) [LINE/MIC] switches These switches select analog input sources of the left and right channels between MIC and LINE. You can select the sources of the left and right channels independently. [TRIM] controls These controls adjust the analog input levels of the left and right channels.
-
Page 37: Left Side Panel
Slot (for the optional card) Prepared for the optional TC IN/OUT card (available soon). Ask your local Fostex dealer or sale office for installing the optional card. [DIGITAL IN]/[DIGITAL OUT] connectors Both connectors handle AES/EBU or S/P DIF digital audio signals. -
Page 38: Bottom Panel
FR-2 Field Memory Recorder (Chapter 3: Names and functions) [POWER] switch Turns on or off the unit's power. [ANALOG OUT (L/MONO, R)] jacks (RCA) These jacks output -10 dBV analog audio signals. A mono signal is output from the [L/MONO] jack. -
Page 39: Details About Screen
FR-2 Field Memory Recorder (Chapter 3: Names and functions) Details about screens The FR-2 features 132 x 65 dot LCD display for showing record/playback levels, file information, setting information, realtime clock information, etc. Home screen After the unit is turned on and starts up, the "Home screen" appears on the dis- play. -
Page 40: When A Virgin Memory Card Is Set In The Slot
See "Chapter 2: Before using the FR-2" on page 22 for details. MENU mode screens By pressing the [ENTER] key while stopped, the FR-2 enters the MENU mode and the display changes to show the MENU mode screen. In the MENU mode, the Cue menu, File menu, Disk menu, Setup menu and USB Mode menu are available. -
Page 41: Warning Messages
This message appears when the battery for operating the in- ternal realtime clock is exhausted. This message appears when turning on the power. Ask your local Fostex dealer or sales office for replacing the battery. This message appears when the memory card inserted to the slot has a problem. - Page 42 FR-2 Field Memory Recorder (Chapter 3: Names and functions) This message appears when you are going to store illegal cue point data after editing. Enter legal cue point data and store it. This message appears when the digital input signal is illegal during recording a digital source.
-
Page 43: Chapter 4: Basic Connections
Chapter 4: Basic connections This chapter describes the basic connection between the FR-2 and external devices. Audio input/output connection ...44 Analog audio input connection ...44 Digital audio input connection ...45 Analog audio output connection ...45 Digital audio output connection ...45 PC/keyboard connection ...46... -
Page 44: Audio Input/Output Connection
When the [LINE/MIC] switch is set to LINE When the [LINE/MIC] switch is set to MIC The FR-2 can provide +48 V phantom power for condenser microphones. It is also equipped with a HPF (High pass filter) and limiter circuit for each input channel. -
Page 45: Digital Audio Input Connection
FR-2 automatically detects the format of the digital source. When the FR-2 receives a digital signal from the [DIGITAL IN] connector, PLL (Phased- locked loop) activates and the FR-2 locks to the sync signal in the digital input source. -
Page 46: Pc/Keyboard Connection
• The FR-2 must be powered off when connecting or disconnecting a USB keyboard. To control the FR-2 from a USB keyboard, make setting of the "Keyboard" menu • item on the Setup menu appropriately ("US" or "JAPAN") according to the keyboard connected. -
Page 47: Chapter 5: Recording/Playback
Skipping by cue point ...59 Locating to the beginning (ABS 0) of a file ...59 Locating to the end (REC END) of a file ...59 Locating to the desired cue point ...59 FR-2 Field Memory Recorder (Chapter 5: Recording/playback) <Table of contents>... -
Page 48: About Recording System
A BWF file created is stored in the "bwff" folder which is created on a CFC/ATA (see the figure below). The FR-2 uses the "1 take - 1 file" system. With this system, each time you make recording, a new audio file is created on the card. Note that you cannot make additional recording or overwriting to an existing file. -
Page 49: Recording Analog Audio
When the [LINE/MIC] switch is set to "MIC" High-pass Filter The FR-2 is equipped with the high-pass filter circuit. The cutoff frequency is 100 Hz and the filter slope is -12 dB/oct. The [HPF] switch, which selects ON or OFF of the high-pass filter, is provided for each channel. -
Page 50: Limiter Setting
FS and Bit settings are shown on the Home screen. See the available com- bination of FS and Bit settings in the table below. While receiving a digital signal, the FR-2 automatically detects the FS and Bit from the receiving digital signal, which takes priority over the [FS (kHz)] and [QUANTI- ZATION] switch settings. -
Page 51: Selecting The Track Mode
MONO The FR-2 records only the analog "L" input channel signal to a single file. STEREO The FR-2 records the L and R analog stereo input signals to two individual files. <Note>: You cannot change the track mode during recording. -
Page 52: Monitoring Recording Signals
When recording in stereo You can monitor the recorded signal in stereo via the [PHONES] jack. <Note>: While operating the FR-2 on batteries, we recommend not to raise the monitor volume more than required. Raising the volume consumes more battery power. -
Page 53: Making Recording
Therefore, when the FR-2 is receiving only analog audio input signals, you can record these analog input signals. However, when the FR-2 is also receiving a digital signal from the [DIGI- TAL IN] connector as well as analog signals, you cannot record the analog signals. -
Page 54: Recording With Pre Rec Active
When the FR-2 receives analog audio signals and the input amplifier (for L or R) clips, the corresponding PEAK indicator lights up in red. You can also set the FR-2 to generate the error tone from the internal speaker or headphones for warning when the input amplifier clips. -
Page 55: Recording Digital Audio
The [TRACK MODE] switch setting is shown on the Home screen. MONO The FR-2 records only the L channel signal in the digital input signal to a single file. The FR-2 records L and R signals in the digital input signal to two individual files. -
Page 56: Setting Cue Points
FR-2 Field Memory Recorder (Chapter 5: Recording/playback) The FR-2 can store cue points, which can be used as markers. You can manually set and store a cue point at the desired position during recording (or while stopped). <About MARK 00 and MARK E>... -
Page 57: Viewing Cue Point Information
FR-2 Field Memory Recorder (Chapter 5: Recording/playback) Viewing cue point information On the Home screen, you can see the total number of cue points currently stored, as pointed by the arrow below. In the screen example below, eight cue points are currently stored and the current recorder position is "ABS 0". -
Page 58: Playback
FR-2 Field Memory Recorder (Chapter 5: Recording/playback) Normal audio playback Make sure that a recorded card is set to the slot. Select a desired audio file. You can select an audio file by either of the following two ways. <Selecting using the CUE (... -
Page 59: Skip/Locate Functions
FR-2 Field Memory Recorder (Chapter 5: Recording/playback) Skip/locate functions The FR-2 offers comprehensive skip/locate functions. Skipping by file When more than one audio file is created on the current card, you can immedi- ately skip to the beginning (ABS 0) of a desired track. - Page 60 FR-2 Field Memory Recorder (Chapter 5: Recording/playback) Memo...
-
Page 61: Chapter 6: Menu Mode
Chapter 6: MENU mode Menu mode outline ...62 Cue menu ...63 Locating to a cue point (Locate) ...63 Renaming a cue point (Rename) ...64 Editing time data of a cue point (Edit) ...66 Deleting a cue point (Delete) ...67 File menu ...68 Selecting an audio file to be played back (Select) ...68 Renaming an audio file (Rename) ...69 Deleting an audio file (Delete) ...70... -
Page 62: Menu Mode Outline
By pressing the [ENTER] key while the recorder is stopped, the FR-2 enters the MENU mode and the display changes to show the screen as below. This screen is the first layer in the MENU mode and used for selecting the desired menu. -
Page 63: Cue Menu
Locating to a cue point (Locate) The following description is assumed that the FR-2 is now in the MENU mode by pressing the [ENTER] key while the recorder is stopped. Use the [MENU] dial to select "Cue" and press the [ENTER] key. -
Page 64: Renaming A Cue Point (Rename)
When the locate operation is completed, "Completed!" is shown on the screen, and then the display returns to the Home screen. When a USB keyboard is connected to the FR-2, you can carry out the following operation. / key... - Page 65 After moving the cue name cursor to the desired position, move the character selec- tion cursor to "INS" at the bottom, and press the [ENTER] key. (The FR-2 is put into the INSERT mode and the cue name cursor condition changes to be lit solid.) After...
-
Page 66: Editing Time Data Of A Cue Point (Edit)
Editing time data of a cue point (Edit) The following description is assumed that the FR-2 is now in the MENU mode by pressing the [ENTER] key while the recorder is stopped. Use the [MENU] dial to select "Cue" and press the [ENTER] key. -
Page 67: Deleting A Cue Point (Delete)
If you are going to store illegal time data, "Illegal time!" flashes on the display and you cannot store the time. When a USB keyboard is connected to the FR-2, you can carry out the following operation. / key Enter key... -
Page 68: File Menu
The display now shows the screen as shown in the middle below and the recorder starts loading the file. When the operation is completed, the display shows the Home screen of the selected audio file. When a USB keyboard is connected to the FR-2, you can carry out the following operation. / key Enter key File menu Acts the same as the [MENU] dial on the FR-2 panel. -
Page 69: Renaming An Audio File (Rename)
After moving the file name cursor to the desired position, move the character selec- tion cursor to "INS" at the bottom, and press the [ENTER] key. (The FR-2 is put into the INSERT mode and the file name cursor condition changes to be lit solid.) After that, select the character that you would like to insert by the character selection cursor and press the [ENTER] key again. -
Page 70: Deleting An Audio File (Delete)
If you are going to store an illegal name, "Illegal name!" flashes on the display and the operation is canceled. Press the [HOME] key to exit the MENU mode. When a USB keyboard is connected to the FR-2, you can carry out the following operation. Character keys / keys... - Page 71 75 for details about optimizing a card. When a USB keyboard is connected to the FR-2, you can carry out the following operation. Acts the same as the [MENU] dial on the FR-2 panel.
-
Page 72: Audio File Protection On/Off (Protect)
On the Home screen of a protected file, " " is shown at the end of the file name, indicating that the file is protected. <Note>: When a USB keyboard is connected to the FR-2, you can carry out the following operation. / key Enter key You cannot make any editing operation, as well as delete a protected file. -
Page 73: Restoring An Audio File (Restore)
(in the screen example below, you can see file 003 is restored). Press the [HOME] key to exit the MENU mode. When a USB keyboard is connected to the FR-2, you can carry out the following operation. / key Enter key Acts the same as the [MENU] dial on the FR-2 panel. -
Page 74: Disk Menu
However, for example, if both CFC and ATA CF cards are inserted to the respective slots when turning on the FR-2, you have to select the current drive by the following procedure. The following description is assumed that the FR-2 is now in the MENU mode by pressing the [ENTER] key while the recorder is stopped. -
Page 75: Optimizing A Memory Card (Optimize)
FR-2 Field Memory Recorder (Chapter 6: MENU mode/Disk menu) Press the [HOME] key to exit the MENU mode. When a USB keyboard is connected to the FR-2, you can carry out the following operation. / keys Enter key Optimizing a memory card (Optimize) You can optimize a memory card. -
Page 76: Formatting A Memory Card (Format)
When completed, the display shows "Completed!" and then returns to the Home screen. <Note>: when the card is formatted, is as below. When a USB keyboard is connected to the FR-2, you can carry out the following operation. / keys Enter key The default volume label of a memory card, which is automatically given PCMCIA: "PCM000"... -
Page 77: Editing A Volume Label Of A Memory Card (Volume Label)
When a memory card is formatted, the default volume label is automatically given. You can edit this volume label to the desired one. The following description is assumed that the FR-2 is now in the MENU mode by pressing the [ENTER] key while the recorder is stopped. - Page 78 When the operation is completed, "Completed!" is shown on the screen and the display returns to show the Home screen. You can enter up to 11 characters. If you enter more than 11 characters, the FR-2 auto- matically deletes characters after the 12th.
-
Page 79: Viewing Information Of A Memory Card (Disk Info.)
To dismiss the information, press the [ENTER] key. The display returns to the previous screen (Disk menu). Press the [HOME] key to exit the MENU mode. When a USB keyboard is connected to the FR-2, you can carry out the following operation. / key Enter key Acts the same as the [MENU] dial on the FR-2 panel. -
Page 80: Setup Menu
The Setup menu offers the following thirteen menu items which mainly set preferences of the FR-2. * File Name Mode: Selecting default file name type * Default File Name: Setting the default file name and take number * Adjust Real Time Clock: Adjusting the real time clock... -
Page 81: Selecting Default File Name Type (File Name Mode)
Pressing the [ENTER] key fixes the selection and the display shows the previous screen. Press the [HOME] key to exit the MENU mode. When a USB keyboard is connected to the FR-2, you can carry out the following operation. / keys Enter key Acts the same as the [MENU] dial on the FR-2 panel. -
Page 82: Setting The Default File Name (Default File Name)
The "Default scene name" setting is effective when the "File Name Mode" described above is set to "Scene". The following description is assumed that the FR-2 is now in the MENU mode by pressing the [ENTER] key while the recorder is stopped. - Page 83 [ENTER] key. After moving the scene name cursor to the desired position, move the character selection cursor to "INS" at the bottom, and press the [ENTER] key.(The FR-2 is put Inserts a front space into the INSERT mode and the scene name cursor condition changes to be lit solid.)
- Page 84 When a USB keyboard is connected to the FR-2, you can carry out the following operation. Character keys / keys Back space key Insert key Delete key Enter key • Enabling the selected scene name Press the [ENTER] key. The display now shows the setting items for the selected scene name.
-
Page 85: Adjusting The Real Time Clock (Adjust Real Time)
When a USB keyboard is connected to the FR-2, you can carry out the following operation. / keys Enter key Adjusting the real time clock (Adjust Real Time) This menu item sets the internal realtime clock. When the FR-2 is shipped, the realtime clock is adjusted to the local standard time. -
Page 86: Speaker Mute Function On/Off (Speaker Mute)
You can set the realtime clock precisely by pressing the [ENTER] key in sync with the time signal after entering a value to the second field. Press the [HOME] key to exit the MENU mode When a USB keyboard is connected to the FR-2, you can carry out the following operation. / keys Numeric keys Enter key <Note>:... -
Page 87: Setting Error Tone Output Condition (Error Tone)
When a USB keyboard is connected to the FR-2, you can carry out the following operation. / keys Enter key Setting error tone output condition (Error Tone) This menu item selects the condition in which the error tone is output. -
Page 88: Setting The Peak Hold Time Of The Level Meters (Peak Hold Time)
The selection is fixed and the display returns to the previous screen. Press the [HOME] key to exit the MENU mode. When a USB keyboard is connected to the FR-2, you can carry out the following operation. / keys Enter key... -
Page 89: Setting The Time Length Stored In The Buffer For Pre Rec Mode (Pre Rec Time)
By pressing the [ENTER] key after selecting the time, the selected peak hold time is fixed and the display returns to show the previous screen. Press the [HOME] key to exit the MENU mode. When a USB keyboard is connected to the FR-2, you can carry out the following operation. / keys Enter key Setting the time length stored in the buffer for Pre rec mode When the pre rec mode is active (i.e. -
Page 90: Selecting The Remain Display Mode (Remain Display)
By pressing the [ENTER] key after selecting the time, the setting is fixed and the display returns to show the previous screen. Press the [HOME] key to exit the MENU mode. When a USB keyboard is connected to the FR-2, you can carry out the following operation. / keys Enter key... -
Page 91: Setting The Digital Output Signal Format (Digi Out Type)
<Note>: See "Checking the remain for recording" on page 52 for details about remain display. When a USB keyboard is connected to the FR-2, you can carry out the following operation. / keys Enter key Setting the digital output signal format (Digi Out Type) This menu item selects the format of the digital signal fed from the [DIGITAL OUT] connector. -
Page 92: Selecting The Battery Type (Battery)
By pressing the [ENTER] key after selecting the desired option, the setting is fixed and the display returns to show the previous screen. Press the [HOME] key to exit the MENU mode. When a USB keyboard is connected to the FR-2, you can carry out the following operation. / keys Enter key Before operating the unit on batteries, make sure that the battery type is cor- Acts the same as the [MENU] dial on the FR-2 panel. -
Page 93: Selecting The Usb Keyboard Type (Keyboard)
By pressing the [ENTER] key after selecting the desired type, the setting is fixed and the display returns to show the previous screen. Press the [HOME] key to exit the MENU mode. When a USB keyboard is connected to the FR-2, you can carry out the following operation. / keys Enter key Acts the same as the [MENU] dial on the FR-2 panel. -
Page 94: Checking The Rom Version (Version)
The current version of the ROM installed to the unit is displayed. To dismiss the ROM version screen, press the [ENTER] key. Press the [HOME] key to exit the MENU mode. When a USB keyboard is connected to the FR-2, you can carry out the following operation. / keys Enter key Acts the same as the [MENU] dial on the FR-2 panel. -
Page 95: Initializing Settings Of The Setup Menu (Init Setup)
This menu item is used for initializing all settings of the Setup menu to the factory preset condition. The following description is assumed that the FR-2 is now in the MENU mode by pressing the [ENTER] key while the recorder is stopped. - Page 96 FR-2 Field Memory Recorder (Chapter 6: MENU mode/Setup menu) When a USB keyboard is connected to the FR-2, you can carry out the following operation. Acts the same as the [MENU] dial on the FR-2 panel. / keys Returns to the previous screen layer.
-
Page 97: Chapter 7: Exporting Audio Files To A Pc
FR-2 Field Memory Recorder (Chapter 7: Exporting audio files to a PC) Chapter 7: Exporting audio files to a PC This chapter describes how to export audio files created by the FR-2 to your PC. -
Page 98: Connecting The Fr-2 To A Pc
By connecting the FR-2 to your PC via the USB ports, you can transfer audio (BWF) files created by the FR-2 between your PC and a memory card. FR-2 audio data can be copied to a hard disk on your PC, or exported to a computer application such as Digidesign Pro Tools. -
Page 99: Connecting The Fr-2 To A Pc
When opening the removable disk drive newly added, all audio files stored to the memory card in the current drive is shown. While transferring file data from the FR-2 to the PC, the [ACCESS] indicator on the FR-2 panel lights (or flashes). When completing data transfer, the [ACCESS] indicator turns off. -
Page 100: Exporting Audio Data To A Computer Application (Example)
FR-2 Field Memory Recorder (Chapter 7: Exporting audio files to a PC) Exporting audio data to a computer application (example) The following procedure example shows how to export FR-2 audio data to Digidesign Pro Tools for Windows. For details about instructions for Pro Tools, see the instruction manual attached to Pro Tools. - Page 101 FR-2 Field Memory Recorder (Chapter 7: Exporting audio files to a PC) Select a desired audio file in the "bwff" directory on the card (see arrow 4 below). The selected audio file is shown in "Region in current file". Click on "Convert ->", followed by "Done" (see arrow 5 below).
- Page 102 FR-2 Field Memory Recorder (Chapter 7: Exporting audio files to a PC) Enable "Spot" and drag & drop the audio region list to the track area (see arrow 8). The "Spot Dialog" window appears. Click on " " in the "Spot Dialog" window, followed by "OK" (see arrow 9 below).
-
Page 103: Chapter 8: Main Specifications
FR-2 Field Memory Recorder (Chapter 8: Main specifications) Chapter 8: Main specifications... -
Page 104: Inputs/Outputs
FR-2 Field Memory Recorder (Chapter 8: Main specifications) *0 dBu=0.775 Vrms, 0 dBV=1 Vrms. Reference level: -20 dB ANALOG IN [L (MONO)/R] Connectors: <LINE> Input impedance: Nominal input level: Maximum input level: <MIC> Input impedance: Nominal input level: Maximum input level:... -
Page 105: Recording/Playback
FR-2 Field Memory Recorder (Chapter 8: Main specifications) Recording/playback Recording medium: Recording Format: Quantization and Sampling Frequency: 16-bit at 22.05kHz/44.1kHz/48kHz 24-bit at 44.1kHz/48kHz/88.2kHz/96kHz/176.4kHz/192kHz Recording tracks: Record/Playback frequency response: Signal to Noise Ratio (between ADC and DAC, 24-bit, ref. -20 dB, 48 kHz FS) -
Page 106: Physical Dimensions
FR-2 Field Memory Recorder (Chapter 8: Main specifications) Physical dimensions SP/HP MONITOR FR-2 FIELD MEMORY RECORDER MENU /ENTER SHIFT HOME / HOLD RESET PREV. NEXT FILE CARD RELEASE LIGHT MARK CUE PHONES CONTRAST DEL CUE QUANTIZATION TRACK MODE 16BIT 24BIT... - Page 107 In the electrical fast transient/burst requirements, surge, conducted disturbances by radio-frequency fields, power frequency magnetic field, radiate electromagnetic field requirements and static electricity discharging environment, this could be affected by generation of noise in some cases. FOSTEX DISTRIBUTORS LIST IN EUROPE * Including non-EU countries (as of October, 2003) <AUSTRIA>...
- Page 108 Memo...
- Page 110 FOSTEX CO. 3-2-35, Musashino, Akishima-shi, Tokyo, Japan 196-0021 FOSTEX AMERICA 15431, Blackburn Avenue, Norwalk, CA 90650, U. S. A. © PRINTED IN CHINA DEC. 2003 8588 029 000 FX (390172)
Need help?
Do you have a question about the FR-2 and is the answer not in the manual?
Questions and answers