Table of Contents
Advertisement
Quick Links
»
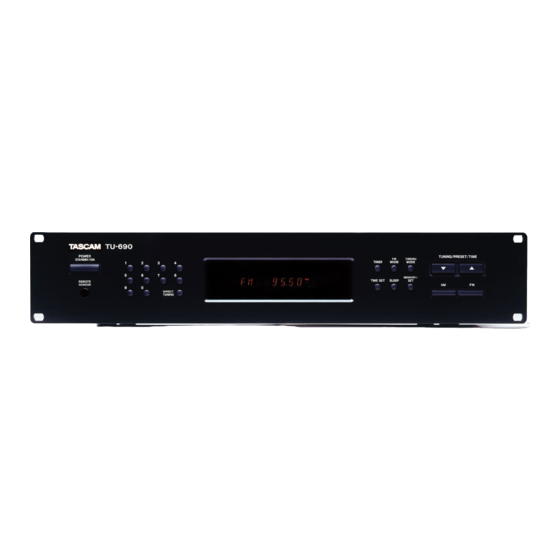
TU-690
AM/FM Stereo Tuner
OWNER'S MANUAL
MANUEL DU PROPRIETAIRE
MANUAL DEL USUARIO
Ü
The lightning flash with arrowhead symbol, within an equilateral triangle, is intended to alert
ÿ
the user to the presence of uninsulated "dangerous voltage" within the product's enclosure
that may be of sufficient magnitude to constitute a risk of electric shock to persons.
The exclamation point within an equilateral triangle is intended to alert the user to the
Ÿ
presence of important operating and maintenance (servicing) instructions in the literature
accompanying the appliance.
This appliance has a serial number located
on the rear panel. Please record the model
number and serial number and retain them
for your records.
Model number
Serial number
CAUTION: TO REDUCE THE RISK OF ELECTRIC SHOCK, DO NOT
REMOVE COVER (OR BACK). NO USER-SERVICEABLE PARTS INSIDE.
REFER SERVICING TO QUALIFIED SERVICE PERSONNEL.
WARNING: TO PREVENT FIRE OR SHOCK
HAZARD, DO NOT EXPOSE THIS
APPLIANCE TO RAIN OR MOISTURE.
9A09063000
Advertisement
Table of Contents

Related Manuals for Teac Tascam TU-690


Summary of Contents for Teac Tascam TU-690
- Page 1 9A09063000 » TU-690 AM/FM Stereo Tuner OWNER'S MANUAL MANUEL DU PROPRIETAIRE MANUAL DEL USUARIO CAUTION: TO REDUCE THE RISK OF ELECTRIC SHOCK, DO NOT Ü REMOVE COVER (OR BACK). NO USER-SERVICEABLE PARTS INSIDE. REFER SERVICING TO QUALIFIED SERVICE PERSONNEL. The lightning flash with arrowhead symbol, within an equilateral triangle, is intended to alert ÿ...
- Page 2 Plug the equipment into a different outlet so that it is not on the same circuit as the receiver. If necessary, consult the dealer or an experienced radio/TV technician for additional suggestions. CAUTION Changes or modifications to this equipment not expressly approved by TEAC CORPORATION for compliance could void the user's authority to operate this equipment. For CANADA...
- Page 3 Important Safety Instructions CAUTION Note to CATV system installer: This reminder is provided to call the CATV system installer’s attention to < Read all of these Instructions. Section 820-40 of the NEC which provides guidelines for proper < Save these Instructions for later use. grounding and, in particular, specifies that the cable ground shall be <...
-
Page 4: Table Of Contents
Contents Before Use....................6 Connecting Antennas ................8 Connection with an Amplifire............10 Remote Control Unit ................12 Name of Each Control ................14 Radio Reception .................16 Direct Tuning ...................18 Preset Tuning ..................20 Manual Memory Presetting ............22 Setting the Clock ................24 Sleep Timer ..................24 Setting the Timer ................26 Troubleshooting ..................28 Specifications ..................28 Voltage Conversion... - Page 5 Sommaire Indice Avant Utilisation ...................7 Previo al empleo ...................7 Raccordements d'antenne ..............9 Conexión de antenas ................9 Raccordement à un amplificateur ...........11 Conexión con un amplificador ............11 Télécommande ...................13 Control remoto ..................13 Nomenclature ..................15 Nombre de los controles..............15 Réception de la radio .................17 Recepción de radio................17 Syntonisation directe ..............19 Sintonización directa ..............19...
-
Page 6: Before Use
Before Use Read this before operation < Choose the installation location of your unit carefully. Avoid placing it in direct sunlight or close to a source of heat. Also avoid locations subject to vibrations and excessive dust, heat, cold or moisture. <... -
Page 7: Avant Utilisation
Avant Utilisation Previo al empleo Lire ceci avant de faire fonctionner l'appareil Lea lo siguiente antes de poner en funcionamiento el aparato < Choisir avec soin l'endroit où vous placerez votre appareil. Eviter de le placer directement au soleil ou près d'une source <... -
Page 8: Connecting Antennas
Connecting Antennas (1) FM Indoor Antenna "T"-type FM Antenna (300Ω)(provided) Antenne FM type "T" (300Ω) (fournie) In an area with strong FM signals, the "T"-type FM antenna Antena FM tipo "T" (300Ω) (incluida) provided is sufficient. Extend this into a "T" shape and connect the two wires at the base of the "T"... -
Page 9: Raccordements D'antenne
Raccordements d'antenne (1) Conexión de antenas (1) Antenne FM intérieure Antena FM para Interiores Dans une région ou les signaux FM sont forts, l'antenne de type En un área con señales fuertes de FM, la antena FM tipo "T" que en "T"... -
Page 10: Connection With An Amplifire
Connecting Antennas (2) AM (MW) Antenna > AM Indoor Loop Antenna A high-performance AM loop antenna provided with the tuner is AM Outdoor Antenna sufficient for good reception in most areas. Antenne AM (MW) extérieure Snap the supplied loop antenna into the hinge on the rear of the Antena externa de AM (MW) unit, and connect the wires running out the loop antenna to the AM terminals, as shown. -
Page 11: Raccordement À Un Amplificateur
Raccordements d'antenne (2) Conexión de antenas (2) Antenne AM (MW) Antena AM (MW) > Antenne-cadre intérieure AM > Antena de bucle AM interior L'antenne cadre AM haute performance, fournie avec le La antena de bucle AM de altas prestaciones suministradas con syntoniseur permet une très bonne réception dans la plupart des el sintonizador es suficiente para una buena recepción en la régions. -
Page 12: Remote Control Unit
Remote Control Unit Using the Remote Control Unit By using the provided remote control unit, the tuner and some other TASCAM components used with it can be controlled from your listening position. To use the remote control unit, point it at REMOTE SENSOR on the tuner (or of other TASCAM component). -
Page 13: Télécommande
Télécommande Control remoto Utilisation de la télécommande Utilización del control remoto (mando a distancia) En utilisant la télécommande fournie, le syntoniseur et certains Utilizado la unida de control remoto suministrada, el sintonizador autres appareils TASCAM utilisés avec lui peuvent être y algunos de los otros instrumentos TASCAM utilizados con el commandés à... -
Page 14: Name Of Each Control
Name of Each Control cDIRECT TUNING button Press this button and you can use the numeric buttons to directly input frequency numbers. dDisplay eTIMER button Press this button to put the tuner under the control of a built-in timer in terms of automatically switching on power to the unit at a predetermined time and turning it off after a predetermined time period. -
Page 15: Nomenclature
Nomenclature Nombre de los controles aCommutateur POWER aInterruptor POWER (ENERGÍA) Appuyer sur ce commutateur pour allumer ou éteindre Oprima este interruptor para encender y apagar la unidad. l’appareil. Esta unidad no gira todo hasta apagado. Cuando oprima el Cet appareil ne s’éteint pas complètement. Quand vous interruptor de ENERGÍA (o el botón remoto de ESPERA appuyez sur le commuateur POWER (ou la touche STANDBY) (STANDBY)) para apagara la unidad, la pantalla central se... -
Page 16: Radio Reception
Radio Reception (1) 1 Select the AM or the FM band by pressing the corres- ponding button. 2 If the PRESET indicator is lit in the display, turn it off by pressing the TUNING MODE button. 3 Select the station you want to listen to (auto selection). Hold down the TUNING button for 0.5 to 2 seconds. -
Page 17: Réception De La Radio
Réception de la radio (1) Recepción de radio (1) 1 Choisir la bande AM ou FM en appuyant la touche 1 Seleccione la banda AM o FM oprimiendo el botón correspondante. correspondiente. 2 Si le témoin PRESET est allumé, l’éteindre en appuyant 2 Si se enciende el indicador PRESET (PREESTABLECIDO) sur la touche TUNING MODE. -
Page 18: Direct Tuning
Radio Reception (2) aFM MODE Button Pressing this button alternates between Stereo mode and Mono mode. Stereo FM stereo broadcasts are received in stereo and the STEREO indicator lights in the display. If FM broadcasts with weak signal strength are received, the FM muting function works automatically to cut the signals, eliminating loud noise. -
Page 19: Syntonisation Directe
Réception de la radio (2) Recepción de radio (2) aTouche FM MODE aBotón FM MODO Une pression sur cette touche fait alterner entre le mode El presionar este botón conmuta entre el modo estereofónico Stéréo et le mode Mono. o monofónico. Stéréo Estereofónico Les émissions stéréo FM sont reçues en stéréo et l'indicateur... -
Page 20: Preset Tuning
Radio Reception (3) Preset Tuning This facility is used to store FM, AM broadcasting from Channel 1 to 30 respectively. Automatic Memory Presetting 1 Select the AM or the FM band by pressing the corresponding button. 2 Hold down the MEMORY/SET button for a while. "AUTOSAVE"... -
Page 21: Syntonisation Préréglée
Réception de la radio (3) Recepción de radio (3) Syntonisation préréglée Sintonización preajustada Cette fonction est utilisée pour ranger des émissions FM, AM Esta función es empleada para almacenar radiofusoras de FM y respectivement du canal 1 à 30. AM en el canal 1 a 30 respectivamente. Préréglage automatique de la mémoire Preajuste de memoria automática 1 Choisir la bande AM ou FM en appuyant sur la touche... -
Page 22: Manual Memory Presetting
Radio Reception (4) Manual Memory Presetting 1 Select the AM or the FM band by pressing the corresponding button. 2 Tune in to a station. 3 Press the MEMORY button. 4 While the MEMORY indicator is blinking in the display, press the PRESET button to get a desired preset number displayed. -
Page 23: Préréglage Manuel De La Mémoire
Réception de la radio (4) Recepción de radio (4) Préréglage manuel de la mémoire Preajuste manual de memoria 1 Choisir la bande AM ou FM en appuyant sur la touche 1 Seleccione la banda AM o de FM oprimiendo el botón correspondante. -
Page 24: Setting The Clock
Setting the Clock 1 Press the TIME SET button. Every time the TIME SET button is pressed, the mode is changed as follows: ON-TIME and OFF-TIME are used when programming a built- in timer (more on this later). Since you are now setting up the clock, select TIME SET. 2 Press the MEMORY/SET button. -
Page 25: Réglage De L'horloge
Réglage de l'horloge Ajuste del reloj 1 Appuyez sur la touche TIME SET. 1 Pulse el botón TIME SET. Chaque pression sur la touche TIME SET permet de changer Cada vez que se pulsa el botón TIME SET, la modalidad de mode selon l'ordre indiqué... -
Page 26: Setting The Timer
Setting the Timer You can program a built-in timer to let the tuner automatically turn on at a predetermined "On Time" and shift back to Standby mode at a predetermined "Off Time," thus there is no chance that you miss your favorite program. Adjust the clock before setting the timer. -
Page 27: Réglage De La Temporisation (Timer)
Réglage de la temporisation (Timer) Ajuste del temporizador Vous pouvez régler la temporisation incorporée pour permettre Usted puede programar un temporizador integrado para permitir au syntonisateur de s’allumer à une heure spécifique et de que el sintonizador se encienda automáticamente a una hora de s’éteindre aussi à... -
Page 28: Troubleshooting
Troubleshooting Specifications If you have problems with your system, look through this chart FM Tuner Section and see if you can solve the problem yourself before calling your (Without notes 98 MHz, 65 dBf) dealer or TASCAM service center. Tuning Range: 87.5 MHz –... -
Page 29: Dépannage
Dépannage Spécifications En cas de problème, commencer par chercher dans ce tableau Section syntoniseur FM pour voir si on peut trouver soi-même la solution avant de (Sans remarques 98 MHz, 65 dBf) Plage de syntonisation: contacter le revendeur ou le centre de service client TASCAM. 87,5 MHz à... -
Page 30: Solución De Problemas
Solución de problemas Especificaciones Si surge algún problema con la unidad, consulte la siguiente Sección del sintonizador de FM tabla y pruebe a solucionarlo antes de ponerse en contacto con (Sin notas 98 MHz, 65 dBf) su distribuidor o con el servicio técnico de TASCAM. Límites de sintonización: 87,5 MHz–108,0 MHz (pasos de 100 kHz) No hay corriente. - Page 32 TEAC NEDERLAND BV Oeverkruid 15, NL-4941 VV Raamsdonksveer, Nederland Phone: 0162-510210 TEAC BELGIUM NV/SA c/o TEAC NEDERLAND BV, Oeverkruid 15, NL-4941 VV Raamsdonksveer, Nederland Phone: 0031-162-510210 TEAC ITALIANA S.p.A. Via C. Cantù 11, 20092 Cinisello Balsamo, Milano, Italy Phone: 02-66010500 TEAC AUSTRALIA PTY., LTD.
Need help?
Do you have a question about the Tascam TU-690 and is the answer not in the manual?
Questions and answers