
Related Manuals for TP-Link WPA8630PK


Summary of Contents for TP-Link WPA8630PK
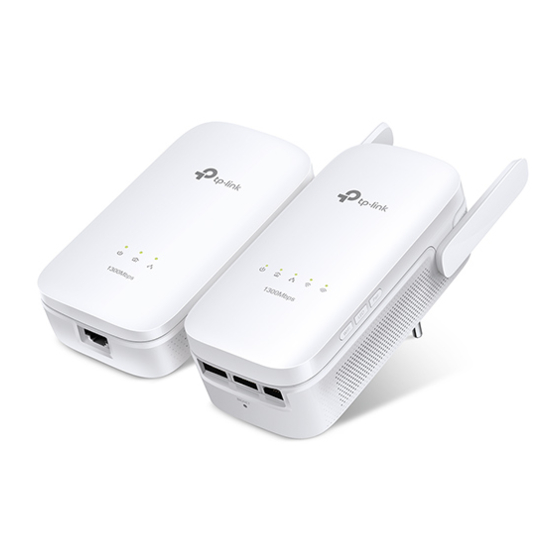
- Page 1 TL-WPA8630 User Guide AV1200 Gigabit Powerline ac Wi-Fi Extender REV1.0.0 1910011472...
-
Page 2: Table Of Contents
Contents About This Guide Chapter 1 Get to Know About Your Powerline Extender 1. 1. Product Overview ............3 1. - Page 3 3. 11. 4. Backup and Restore Configuration Settings ......30 3. 11. 5. System Log ............32 Appendix A: Specifications...
-
Page 4: About This Guide
This guide provides details of each function and shows how to configure the powerline extender appropriate to your needs. In addition to this guide, a Quick Installation Guide is also released with each TP-LINK powerline extender, you are suggested to configure your extender for quick Internet setup by following the published Quick Installation Guide before you get started with a further configuration. -
Page 5: Chapter 1 Get To Know About Your Powerline Extender
Chapter Get to Know About Your Powerline Extender This chapter introduces what the powerline extender can do and shows its main features and appearance. This chapter contains the following sections: • Product Overview Main Features • • Product Appearance... -
Page 6: Product Overview
Product Overview What This Product Does TP-LINK’s TL-WPA8630 AV1200 Gigabit Powerline ac Wi-Fi Extender is a combined wired/ wireless network expansion device. With the help of your home’s existing electrical circuitry, it can extend your Wi-Fi to wherever you want in your house. -
Page 7: Product Appearance
Chapter 1 Get to Know About Your Powerline Extender Product Appearance 1 3 1 LED Legend LEDs of the extender are located on the front side. They indicate the working status. For more details, please refer to the following table. Name Status Indication... -
Page 8: Physical Interface
Chapter 1 Get to Know About Your Powerline Extender 1 3 2 Physical Interface Power Plug Pair Button Ethernet Port LED Button Wi-Fi Button Reset Button LED Button Press and hold the LED button for 1 second to turn all LEDs on or off. All LEDs are on by default. - Page 9 Chapter 1 Get to Know About Your Powerline Extender Ethernet Port The extender has three 10/100/1000Mbps Ethernet ports. You can use them to connect the extender to computers or broadband devices. Power Plug The extender has a Power Plug which can connect to any (100V-240V~, 50/60Hz) power socket.
-
Page 10: Chapter 2 Initial Use
Chapter Initial Use This chapter guides you on how to use the powerline extender when you first open the package. This chapter contains the following sections: • To Set Up a New Secure Wireless Network • To Extend the Existing Wireless Network... -
Page 11: To Set Up A New Secure Wireless Network
Chapter 2 Initial Use To Set Up a New Secure Wireless Network I want to: Use the Powerline Wi-Fi Kit to set up a new secure wireless network in my house. For example, I have a wireless router in my house, but the wireless signal cannot reach every corner. -
Page 12: To Extend The Existing Wireless Network
Chapter 2 Initial Use 5 Find the Wi-Fi Info Card in the package, and then relocate the powerline extender to a new location. Connect to the Wi-Fi using the SSID and password on the card. Note: A red Powerline LED indicates poor signal strength, we recommend another location. - Page 13 Chapter 2 Initial Use Powerline Existing Powerline Extender New Powerline Extender 2 Join the new powerline extender into the existing powerline network by Pairing two powerline devices. a . Press the Pair button on the existing powerline extender for 1 second. The Power LED starts blinking. Note: If the Power LED does not blink, press again.
- Page 14 Chapter 2 Initial Use Done! Now enjoy the Internet! The SSID and password are the same as that of your old wireless network! Q & A: If you still don’t have wireless signals near the new extender, it is possibly you haven’t paired your old powerline devices. We recommend you follow the steps below to pair them.
-
Page 15: Chapter 3 Configuring Via Web Management Interface
Chapter Configuring via Web Management Interface The powerline extender has a management interface to configure all settings. The management interface can be opened on any device that has a web browser, such as Internet Explorer, Chrome or Firefox. This chapter is going to give detailed information on what functions the powerline extender has and how to configure them. -
Page 16: Management Interface
1. Connect your computer to the powerline extender with the provided Ethernet cable. 2. Obtain and install the tpPLC utility (for Windows) from the product support page at http://www.tp-link.com. 3. Open the utility, move your mouse over your powerline extender, and click the icon that appears beside it. -
Page 17: Manage Powerline Network
Chapter 3 Configuring via Web Management Interface 2. Follow instructions on the page to set a new username and password. A strong password should be at least 8 or more characters in length, combining uppercase and lowercase letters, numbers and punctuations. 3. -
Page 18: Change Powerline Network Name
Chapter 3 Configuring via Web Management Interface 3. Click the icon and enter the Powerline Key of the device you want to add. The Powerline Key contains 16 capital letters, formed like XXXX-XXXX-XXXX-XXXX. It is printed on the back of the powerline device. 4. -
Page 19: Wi-Fi Clone
Chapter 3 Configuring via Web Management Interface powerline extenders on the same powerline network whose Wi-Fi Move feature is also enabled. Follow the Steps below to enable Wi-Fi Move feature: 1. Connect to the powerline extender wirelessly. Visit http://tplinkplc.net, and log in with the password you set for the extender. -
Page 20: Wireless Network
Chapter 3 Configuring via Web Management Interface 6 Press the button on your router. 7 Within two minutes, press the Wi-Fi button on the side panel of the extender. Done! When the corresponding Wi-Fi LED blinks quickly for 3 seconds and then stays on. - Page 21 Chapter 3 Configuring via Web Management Interface To select your region: Select your Region from the drop-down list. If your country or region is not specified here, you may be banned from using wireless devices here in this country or region. In this case, contact your local government agency for more information.
- Page 22 Chapter 3 Configuring via Web Management Interface Security: Select an option from the Security drop-down list. The extender provides four options, None, WPA/WPA2 Personal (Recommended), WPA/WPA2 Enterprise, WEP. WPA2 uses the newest standard and the security level is the highest. We recommend you don’t change the default settings unless necessary.
-
Page 23: Wireless Clients
Chapter 3 Configuring via Web Management Interface Transmit Power: Select the level of transmit power. We recommend you choose high have the best signal strength. 3 5 2 Wireless Clients Follow the steps below to view detailed information of all wireless clients connected to the extender. -
Page 24: Schedule Your Wireless Function
Chapter 3 Configuring via Web Management Interface 4 Click to add an entry. 5 Choose LED Off Time from 00:00 to 7:00, and then check all boxes from Sunday to Saturday. Note: Please make sure that the Time Settings are correct before using this function. - Page 25 Chapter 3 Configuring via Web Management Interface How can I 1 Connect to the powerline extender wirelessly. Visit http:// tplinkplc.net and log in with the username and password you do that? set. 2 Go to Wireless > Wi-Fi Schedules. 3 Toggle to enable the Wi-Fi Scheduler.
-
Page 26: Parental Controls
Chapter 3 Configuring via Web Management Interface 8 Click to save the settings. Done! Now your Wi-Fi will be automatically turned off at 00:00 and turned on at 7:00am the next morning. Note: The wireless LED (2.4GHz , 5GHz ) will turn off if the corresponding wireless network is disabled. Parental Controls I want to: Control when my children’s wireless devices can access the... - Page 27 Chapter 3 Configuring via Web Management Interface 4 Click Add. 5 Click View Existing Devices, and select the device to be controlled. Or, enter the Device Name MAC Address manually. 6 Click the icon to set the Internet Access Time. Drag the cursor over the appropriate cell(s) and click OK.
-
Page 28: Guest Network
Chapter 3 Configuring via Web Management Interface Done! Now you can control when your children can access the Internet according to your needs. Guest Network I want to: Create a separate network for my guests, providing Internet access for them while at the same time limit the network authorities for guests to ensure network security and privacy. -
Page 29: Mac Filter
Chapter 3 Configuring via Web Management Interface To change the wireless network name (SSID) and wireless password: The default SSID is TP-LINK_GUEST_XXXX, and the default password is 12345670. You can change the default ones by directly entering new ones in the field. SSID is up to 32 characters, and the value in both SSID and password is case-sensitive. - Page 30 Chapter 3 Configuring via Web Management Interface 5 Click under Device List to add devices to the list. 6 Click View Devices to see how many devices are now connected to the network. Click Choose to choose a device. You can also enter in the MAC address manually. 7 Give a description of the entry here.
-
Page 31: Administration
Chapter 3 Configuring via Web Management Interface 3 11 Administration 3 11 1 LAN IP Address Follow the steps below to configure LAN settings of the extender. Go to Device Settings > Settings. LAN Type: Select Dynamic IP to have your extender automatically obtain IP Address from the main router. - Page 32 Chapter 3 Configuring via Web Management Interface To automatically synchronize the time: 1. Select your local Time Zone from the drop-down menu. 2. In the NTP Server I field, enter the IP address or domain name of your desired NTP Server.
-
Page 33: Upgrade The Firmware
3 11 3 Upgrade the Firmware TP-LINK is dedicated to improving and richening the product features, giving you a better network experience. We will release the latest firmware at TP-LINK official website, you can download the latest firmware file from our website: www.tp-link.com... - Page 34 Chapter 3 Configuring via Web Management Interface 3. Click Backup to save a copy of the current settings to your local computer. A config. file will be stored to your computer. To restore configuration settings: 1. Connect to the powerline extender wirelessly. Visit http://tplinkplc.net, and log in with the username and password you set for the extender.
- Page 35 Chapter 3 Configuring via Web Management Interface 3 11 5 System Log When the extender does not work properly, you can save the system log and send it to the technical support for troubleshooting. Follow the steps below to save the system log: 1.
- Page 36 Appendix A: Specifications Hardware Powerline: up to 1200 Mbps Transmission Speeds Ethernet: 10/100/1000 Mbps Standards and HomePlug AV, IEEE 1901,IEEE 802.3, IEEE 802.3u, IEEE 802.11b/g/n 2.4GHz, Protocols IEEE 802.11a/ac 5GHz Interface 3 * Built-in Ethernet Port Plug Type EU, UK, US Item Dimensions 140.6×68×45mm (W x D x H)
- Page 37 Specifications are subject to change without notice. is a registered trademark of TP-LINK TECHNOLOGIES CO., LTD. Other brands and product names are trademarks or registered trademarks of their respective holders. No part of the specifications may be reproduced in any form or by any means or used to make any derivative such as translation, transformation, or adaptation without permission from TP-LINK TECHNOLOGIES CO., LTD.
- Page 38 FCC STATEMENT This equipment has been tested and found to comply with the limits for a Class B digital device, pursuant to part 15 of the FCC Rules. These limits are designed to provide reasonable protection against harmful interference in a residential installation. This equipment generates, uses and can radiate radio frequency energy and, if not installed and used in accordance with the instructions, may cause harmful interference to radio communications.
- Page 39 The device operates in 5.15 ~ 5.25GHz / 5.745 ~ 5.85GHz frequency range. It is restricted in indoor environment only. This device meets all the other requirements specified in Part 15E, Section 15.407 of the FCC Rules. CE Mark Warning This is a class B product.
- Page 40 ATTENTION: Due to EU law, the country settings must be identical to the country where the device is operating (important due to non-harmonised frequencies in the EU). Restricted to indoor use. Canadian Compliance Statement This device complies with Industry Canada license-exempt RSSs. Operation is subject to the following two conditions: 1.
- Page 41 Radiation Exposure Statement: This equipment complies with IC radiation exposure limits set forth for an uncontrolled environment. This equipment should be installed and operated with minimum distance 20cm between the radiator & your body. Déclaration d’exposition aux radiations: Cet équipement est conforme aux limites d’exposition aux rayonnements IC établies pour un environnement non contrôlé.
- Page 42 Продукт сертифіковано згідно с правилами системи УкрСЕПРО на відповідність вимогам нормативних документів та вимогам, що передбачені чинними законодавчими актами України. Safety Information • When product has power button, the power button is one of the way to shut off the product;...
- Page 43 TP-LINK TECHNOLOGIES CO , LTD DECLARATION OF CONFORMITY For the following equipment: Product Description: AV1200 Gigabit Powerline ac Wi-Fi Extender Model No.: TL-WPA8630 Trademark: TP-LINK We declare under our own responsibility that the above products satisfy all the technical regulations...
Need help?
Do you have a question about the WPA8630PK and is the answer not in the manual?
Questions and answers