TP-Link TL-WPA8630P User Manual
Gigabit passthrough powerline ac wi-fi extender
Hide thumbs
Also See for TL-WPA8630P:
- User manual (40 pages) ,
- Manual (2 pages) ,
- Quick installation manual (2 pages)

Related Manuals for TP-Link TL-WPA8630P


Summary of Contents for TP-Link TL-WPA8630P
- Page 1 User Guide AV1300 Gigabit Passthrough Powerline ac Wi-Fi Extender TL-WPA8630P REV2.1.0 1910012344...
-
Page 2: Table Of Contents
Contents About This Guide Chapter 1 Get to Know Your Powerline Extender 1. 1. Product Overview............3 1. -
Page 3: About This Guide
• The Quick Installation Guide (QIG) can be found where you find this guide or inside the package of the powerline extender. • Specifications can be found on the product page at http://www.tp-link.com. • A Technical Support Forum is provided for you to discuss our products at http://forum.tp-link.com. -
Page 4: Chapter 1 Get To Know Your Powerline Extender
Chapter Get to Know Your Powerline Extender This chapter introduces what the powerline extender can do and describes its main features and appearance. It contains the following sections: • Product Overview • Product Appearance... -
Page 5: Product Overview
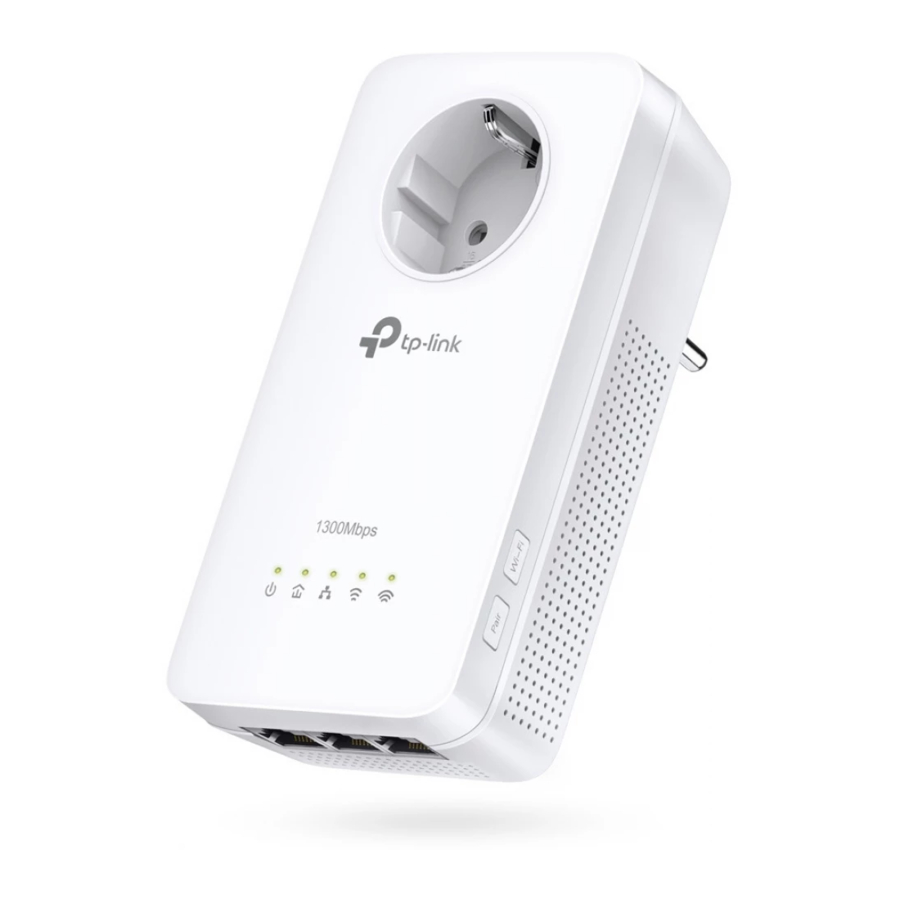
Get to Know Your Powerline Extender Product Overview TP-Link’s Powerline Wi-Fi Extender is a combined wired/wireless network expansion device. With the help of your home’s existing electrical circuitry, it can extend your Wi-Fi to wherever you want in your house. -
Page 6: Physical Interface
Chapter 1 Get to Know Your Powerline Extender Name Status Indication The 2.4GHz wireless band is enabled. The 2.4GHz wireless band is disabled. Slowly: The powerline extender is cloning 2.4GHz 2.4GHz Wireless wireless network settings from the main router. Flashing Quickly: The powerline extender is syncing 2.4GHz wireless network settings from an existing powerline extender. - Page 7 Chapter 1 Get to Know Your Powerline Extender Press and hold the button for at least 5 seconds to turn the wireless function on or off. The wireless function is on by default. You can turn them off at night and then on in the morning by pressing this button.
- Page 8 Chapter 1 Get to Know Your Powerline Extender Wall Outlet Power Strip...
-
Page 9: Chapter 2 Initial Use
Chapter Initial Use This chapter guides you on how to use the powerline extender when you first open the package. It contains the following sections: • To Set Up a New Secure Wireless Network • To Extend the Existing Wireless Network... -
Page 10: To Set Up A New Secure Wireless Network
2. Plug the powerline adapter into a wall socket. 3. Plug the powerline extender into a wall socket near the adapter. Extender TL-WPA8630P Adapter TL-PA8010P (For demonstration only) r l i n Router 4. Pair the powerline devices. -
Page 11: To Extend The Existing Wireless Network
2 minutes Powerline Adapter Powerline Extender (For demonstration only) TL-WPA8630P 5. Relocate the new extender to the Wi-Fi “dead” zone. Use the SSID (network name) and password on the provided Wi-Fi Info Card to connect to the internet. Note: A red Powerline LED indicates poor signal strength. Move the extender to another location. - Page 12 1. Plug the new powerline extender into a wall socket near one do that? of the existing powerline extender. r l i n New Powerline Extender TL-WPA8630P Existing Powerline Device (For demonstration only) 2. Check the new extender’s Powerline LED . Is it on? •...
- Page 13 Chapter 2 Initial Use A . Use the SSID (network name) and password on the provided Wi-Fi Info Card to connect to the internet. B . Use the SSID (network name) and password of your existing wireless network to connect. Done! Enjoy the internet through your extended network!
-
Page 14: Chapter 3 Configuring Via Web Management Interface
Chapter Configuring via Web Management Interface The powerline extender has a management interface to configure all settings. The management interface can be opened on any device that has a web browser, such as Internet Explorer, Chrome or Firefox. This chapter is going to give detailed information on what functions the powerline extender has and how to configure them. -
Page 15: Management Interface
1. Connect your computer to the powerline extender via an Ethernet cable or wirelessly. 2. Obtain and install the tpPLC Utility from the product’s Support page at http://www.tp-link.com. 3. Open the utility, move your mouse over your powerline extender, and click the icon that appears beside it. -
Page 16: Manage Powerline Network
Chapter 3 Configuring via Web Management Interface 2. Follow instructions on the page to set a new username and password. A strong password should be at least 8 characters in length, combining uppercase and lowercase letters, numbers and punctuations. 3. Click Save to make the settings effective. -
Page 17: Change Powerline Network Name
Chapter 3 Configuring via Web Management Interface 3. Click the icon and enter the Powerline Key of the device you want to add. The Powerline Key contains 16 capital letters, formed like XXXX-XXXX-XXXX-XXXX. It is printed on the back of the powerline device. 4. -
Page 18: Wi-Fi Clone
Chapter 3 Configuring via Web Management Interface Follow the steps below to enable the Wi-Fi Move feature: 1. Connect to the powerline extender wirelessly. Visit http://tplinkplc.net, and log in with the username and password you set for the extender. 2. Go to Wireless >... -
Page 19: Wireless Network
Chapter 3 Configuring via Web Management Interface Wireless Router 7 Within two minutes, press the Wi-Fi button on the side panel of the extender. Done! When the corresponding Wi-Fi LED blinks quickly for 3 seconds and then stays on. It’s done! Wireless Network 3 5 1 Customize Wireless Settings... - Page 20 Chapter 3 Configuring via Web Management Interface To enable or disable the wireless function: Select the box to enable the wireless Radio of 2.4GHz or 5GHz. Deselect the box to disable wireless function. If disabled, all wireless settings will be ineffective. To change the wireless network name (SSID) and wireless password: The default SSID is TP-LINK_XXXX for 2.4GHz network and TP-LINK_XXXX_5G for 5GHz network, and the default password is printed on the Wi-Fi Info Card.
- Page 21 Chapter 3 Configuring via Web Management Interface Security: Select an option from the Security drop-down list. The extender provides three options, No Security, WPA/WPA2 Personal (Recommended), and WEP. WPA2 uses the newest standard and the security level is the highest. We don’t recommend you to change the default settings unless necessary.
-
Page 22: Wireless Clients
Chapter 3 Configuring via Web Management Interface 3 5 2 Wireless Clients Follow the steps below to view detailed information of all wireless clients connected to the extender. 1. Connect to the powerline extender wirelessly. Visit http://tplinkplc.net, and log in with the username and password you set for the extender. -
Page 23: Schedule Your Wireless Function
Chapter 3 Configuring via Web Management Interface 4 Click to add an entry. 5 Choose LED Off Time from 00:00 to 7:00, and then check all boxes from Sunday to Saturday. Note: Please make sure that the system time is correct before using this function. - Page 24 Chapter 3 Configuring via Web Management Interface 3 Toggle to enable the Wi-Fi Scheduler. If you are prompted like the following picture, click Continue. 4 Check the box of Do not turn off Wi-Fi while clients are connected to it and click Save.
-
Page 25: Parental Controls
Chapter 3 Configuring via Web Management Interface 8 Click to save the settings. Done! Now your Wi-Fi will be automatically turned off at 00:00 and turned on at 7:00am the next morning. Note: The Wi-Fi LED will turn off if the wireless network is disabled. Parental Controls I want to: Control when my children’s wireless devices can access the... - Page 26 Chapter 3 Configuring via Web Management Interface 3 Toggle to enable Parental Controls. If you are prompted like the following picture, click Continue. 4 Click Add. 5 Click View Existing Devices, and select the device to be controlled. Or, enter the MAC Address manually.
-
Page 27: Guest Network
Chapter 3 Configuring via Web Management Interface 9 Click to save the settings. Done! Now the controlled device can access only from 18:00 (6PM) to 22:00 (10PM) on weekdays and not other times. Guest Network I want to: Create a network for my guests, providing internet access for them while at the same time limit the network authorities for guests to ensure network security and privacy. -
Page 28: Mac Filter
Chapter 3 Configuring via Web Management Interface 5 Click 2.4GHz 5GHz to choose a wireless band, and configure the following settings. To enable or disable the guest network function: Select the box to enable the guest network function. Deselect the box to disable guest network function. If disabled, all guest network settings of the corresponding band will be ineffective. - Page 29 Chapter 3 Configuring via Web Management Interface • The unknown device is not allowed to access the wireless network. • I don’t have to keep changing my wireless password as often. How can I 1 Connect to the powerline extender wirelessly. Visit do that? http://tplinkplc.net, and log in with the username and password you set for the extender.
-
Page 30: Administration
Chapter 3 Configuring via Web Management Interface 8 Click Enable this entry to make this entry effective. 9 Click to save the settings. Done! Now MAC Filter is implemented to protect your wireless network. 3 11 Administration 3 11 1 LAN IP Address Follow the steps below to configure LAN settings of the extender. - Page 31 Chapter 3 Configuring via Web Management Interface To automatically synchronize the time: 1. Select your local Time Zone from the drop-down menu. 2. In the NTP Server I field, enter the IP address or domain name of your desired NTP Server.
-
Page 32: Upgrade The Firmware
3 11 3 Upgrade the Firmware TP-Link is dedicated to improving and richening the product features, giving you a better network experience. We will release the latest firmware at TP-Link official website, you can download the latest firmware file from our website: www.tp-link.com... -
Page 33: Backup And Restore Configuration Settings
Firmware Upgrade page and confirm the Hardware Version. 3. Go to www.tp-link.com. Download the latest firmware file for the extender. Note: The upgraded firmware version must correspond to the hardware. 4. Click Browse to locate the downloaded new firmware file, and click Upgrade. -
Page 34: System Log
Chapter 3 Configuring via Web Management Interface 3. Click Browse to locate the backup configuration file stored on your computer, and click Restore. The configuration file is config.bin. 4. Wait a few minutes for the restoring and rebooting. Note: During the restoring process, do not turn off or reset the extender. To reset the extender to factory default settings: 1. - Page 35 Chapter 3 Configuring via Web Management Interface 3. Choose the type and level of the system log according to your need. 4. Click Save Log to save the system log to local.
- Page 36 Specifications are subject to change without notice. is a registered trademark of TP-Link Technologies Co., Ltd. Other brands and product names are trademarks or registered trademarks of their respective holders. No part of the specifications may be reproduced in any form or by any means or used to make any derivative such as translation, transformation, or adaptation without permission from TP-Link Technologies Co., Ltd.
- Page 37 Product Name: AV1300 Gigabit Passthrough Powerline ac Wi-Fi Extender Model Number: TL-WPA8630P Responsible party: TP-Link USA Corporation, d/b/a TP-Link North America, Inc. Address: 145 South State College Blvd. Suite 400, Brea, CA 92821 Website: http://www.tp-link.com/us/ Tel: +1 626 333 0234 Fax: +1 909 527 6803 E-mail: sales.usa@tp-link.com...
- Page 38 20 cm from all persons and must not be co- located or operating in conjunction with any other antenna or transmitter.” We, TP-Link USA Corporation, has determined that the equipment shown as above has been shown to comply with the applicable technical standards, FCC part 15. There is no unauthorized change is made in the equipment and the equipment is properly maintained and operated.
- Page 39 5150 MHz -5250 MHz (23dBm) EU Declaration of Conformity TP-Link hereby declares that the device is in compliance with the essential requirements and other relevant provisions of directives 2014/53/EU, 2009/125/EC and 2011/65/EU. The original EU declaration of conformity may be found at http://www.tp-link.com/en/ce RF Exposure Information This device meets the EU requirements (2014/53/EU Article 3.1a) on the limitation of...
- Page 40 2. For devices with detachable antenna(s), the maximum antenna gain permitted for devices in the bands 5250-5350 MHz and 5470-5725 MHz shall be such that the equipment still complies with the e.i.r.p. limit; 3. For devices with detachable antenna(s), the maximum antenna gain permitted for devices in the band 5725-5850 MHz shall be such that the equipment still complies with the e.i.r.p.
- Page 41 Industry Canada Statement CAN ICES-3 (B)/NMB-3(B) CAN ICES-6/NMB-6 Korea Warning Statements 당해 무선설비는 운용중 전파혼신 가능성이 있음. NCC Notice 注意! 依據 低功率電波輻射性電機管理辦法 第十二條 經型式認證合格之低功率射頻電機,非經許可,公司、商號或使用者均不得擅 自變更頻率、加大功率或變更原設計之特性或功能。 第十四條 低功率射頻電機之使用不得影響飛航安全及干擾合法通信;經發現有干擾現象 時,應立即停用,並改善至無干擾時方得繼續使用。前項合法通信,指依電信規定作業 之無線電信。低功率射頻電機需忍受合法通信或工業、科學以及醫療用電波輻射性電機 設備之干擾。 BSMI Notice 安全諮詢及注意事項 • 請使用原裝電源供應器或只能按照本產品注明的電源類型使用本產品。 • 清潔本產品之前請先拔掉電源線。請勿使用液體、噴霧清潔劑或濕布進行清潔。 • 注意防潮,請勿將水或其他液體潑灑到本產品上。 • 插槽與開口供通風使用,以確保本產品的操作可靠並防止過熱,請勿堵塞或覆蓋開口。 •...
- Page 42 Продукт сертифіковано згідно с правилами системи УкрСЕПРО на відповідність вимогам нормативних документів та вимогам, що передбачені чинними законодавчими актами України. Safety Information • Keep the device away from water, fire, humidity or hot environments. • Do not attempt to disassemble, repair, or modify the device. •...
Need help?
Do you have a question about the TL-WPA8630P and is the answer not in the manual?
Questions and answers