Table of Contents
Advertisement
Quick Links
Advertisement
Table of Contents

Related Manuals for Edimax ER-1088


Summary of Contents for Edimax ER-1088
- Page 1 Multi-WAN VPN Link Balancer User’s Guide...
-
Page 3: Table Of Contents
1: INTRODUCTION ...1 Internet Features ...1 Other Features ...3 Package Contents ...5 Physical Details ...5 2: BASIC SETUP...9 Overview...9 Procedure ...9 LAN & DHCP……………………………………………………………………………………………..11 MAX WAN ...14 Primary Setup ...15 3: ADVANCED PORT ...20 Overview...20 Port Options ...20 Load Balance ...22 Advanced PPPoE...24 Advanced PPTP ...25 4: ADVANCED SETUP...27... - Page 4 DNS Record...69 9: MANAGEMENT ASSISTANT ...71 Overview...71 Admin. Setup ...71 Email Alert ...73 SNMP ...75 Syslog ...76 Upgrade Firmware ...79 10: METWORK INFO ...80 Operation...80 System Status ...80 WAN Status ...83 APPENDIX A SPECIFICATIONS ...85 APPENDIX B WINDOWS TCP/IP SETUP ...86 Overview...86 TCP/IP Settings ...86 APPENDIX C TROUBLESHOOTING...92...
-
Page 5: 1: Introduction
1: Introduction Congratulations on the purchase of your new Multi-WAN VPN Link Balancer. The Multi-WAN VPN Link Balancer not only provides a selection of 2~8 WAN ports – it also provides Shared Broadband Internet Access for all LAN users. Internet Features •... - Page 6 • Support for all common Connection Methods All popular DSL, Cable Modems and connection methods are supported. These include - Fixed IP, Dynamic IP, PPPoE and PPTP. • Inbound/Outbound Traffic Load Balancing and Failover There are a variety of load balancing methods that allow administrators to manage the traffic from LAN or WAN in order to maximize bandwidth - as well as smart health check methods to protect against connection failure for failover.
-
Page 7: Other Features
• VPN (Virtual Private Network) Support is provided for up to 50 VPN tunnels with a failover and back-up mechanism. • VPN Mesh Group. The Multi-WAN VPN Link Balancer also supports VPN Load Balance with mesh group configuration. Other Features •... - Page 8 • UPnP When UPnP (Universal Plug & Play), is set to “Enable” - the Multi-WAN VPN Link Balancer becomes a network device. This feature is useful for detecting and controlling network devices such as Internet gateways. Page 4...
-
Page 9: Package Contents
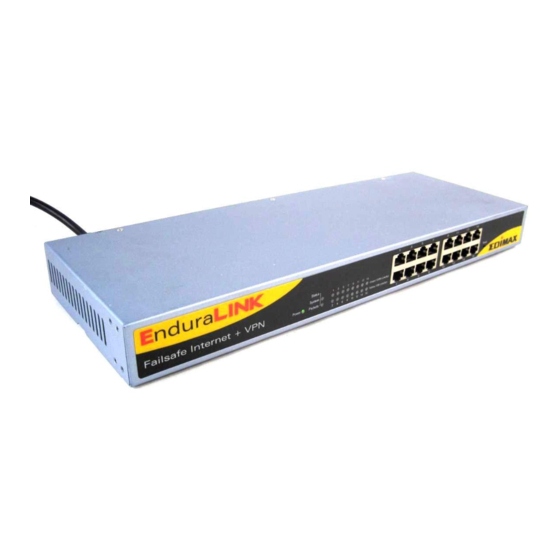
Package Contents The following items are included in the Multi-WAN VPN Link Balancer package: • Multi-WAN VPN Link Balancer Unit • Power Cord • Quick Installation Guide • CD-ROM containing the on-line manual. If any of the above items are damaged or missing, please contact your dealer immediately. Physical Details Front Panel Front Panel LED indication is as follows:... - Page 10 Ethernet Ports and Reset Button WAN ports: 2 to 8 WAN ports (default is 2), using Port 1 to Port 8 for connecting Ethernet Ports to Modem(s). LAN ports: The remaining ports which are connected to PCs or a Hub. Note: Any port will automatically operate as an “Uplink”...
-
Page 11: Rear Panel
Rear Panel AC 100V ~ 240V Connects to AC100~240V / 50~60Hz with supplied AC power cord. Default Settings When the Multi-WAN VPN Link Balancer has finished booting, all configuration settings will be set to the factory defaults, including: • IP Address set to its default value of 192.168.1.1, with a Network Mask of 255.255.255.0 •... - Page 12 Note: The supplied Windows TFTP utility also allows you to perform three (3) additional operations: • Save the current configuration settings to your PC (use the "Save Configuration" button). • Restore a previously saved configuration file to the Multi-WAN VPN Link Balancer (use the "Upgrade Firmware"...
-
Page 13: 2: Basic Setup
2: Basic Setup Overview Basic Setup of your Multi-WAN VPN Link Balancer involves the following steps: Attach the Multi-WAN VPN Link Balancer to a PC using any LAN port (3 to16) and configure it for your LAN. Install your Multi-WAN VPN Link Balancer in your LAN and connect the Broadband Modem(s). Configure your Multi-WAN VPN Link Balancer for Internet Access. - Page 14 Enter admin for the "User Name" and leave the "Password" field blank. • The "User Name" is always set as admin • For security, it is highly recommended that you set a password. You may do this using the Admin Setup screen. After logging in, you will see the Administrator Password setup in the Admin Setup screen, as shown below.
-
Page 15: Lan & Dhcp
Select LAN & DHCP from the menu. You will see a screen like in the example below. If your LAN already has a DHCP Server and you wish to continue using it, the following configuration is required: • The DHCP Server function in the Multi-WAN VPN Link Balancer must be disabled. You will find this setting in the LAN &... - Page 16 Settings – LAN & DHCP • LAN IP Configuration • • Optional Configuration • • DHCP Configuration • • This table shows the IP addresses which have been allocated by the View DHCP List DHCP Server. For each address which has been allocated, the following information is shown: •...
- Page 17 2. Installing the Multi-WAN VPN Link Balancer in your LAN Ensure that the Multi-WAN VPN Link Balancer and any DSL/Cable modem(s) are powered-OFF. Leave the modem or modems connected to their data lines. Connect the Broadband modem(s) to the Multi-WAN VPN Link Balancer. •...
-
Page 18: Max Wan
• For each PC connected to the LAN ports, the corresponding LAN LED (either 10/Yellow or 100/Green) should be ON. 3. Configuring the Multi-WAN VPN Link Balancer for Internet Access To configure access to the Internet, first decide how many WAN ports you are going to use. The pull down menu on the MAX WAN web page (Figure 2-5) will let you setup the WAN port numbers. -
Page 19: Primary Setup
Settings – Primary Setup • Connection Interface – A pull down menu for each WAN port that you are going to Mode connect to the Internet. • Connect Mode – Enable – Select this if you have connected a broadband modem to this port. - Page 20 Address This is for Static IP users only. Enter the address information (IP Address, Information Subnet Mask, Gateway) provided by your ISP. If your ISP provides multiple IP address, you can use the Multi-DMZ screen to assign any additional IP addresses.
- Page 21 4: Configure PCs on your LAN Overview For each PC, the following settings may need to be configured: • TCP/IP network settings • Internet Access configuration TCP/IP Settings If using the default Multi-WAN VPN Link Balancer settings and the default Windows 95/98/ME/2000/XP TCP/IP settings, no changes need to be made.
-
Page 22: Macintosh Clients
Close the TCP/IP panel, saving your settings. Note: If using manually assigned IP addresses instead of DHCP, the required changes are: • Set the Router Address field to the Multi-WAN VPN Link Balancer’s IP Address. • Ensure your DNS settings are correct. Linux Clients To access the Internet via the Multi-WAN VPN Link Balancer using Linux, it is only necessary to set the Multi-WAN VPN Link Balancer as the "Gateway"... - Page 23 Fixed IP Address By default, most Unix installations use a fixed IP Address. If you wish to continue using a fixed IP Address, make the following changes to your configuration. • Set your Default Gateway to the IP Address of the Multi-WAN VPN Link Balancer. •...
-
Page 24: 3: Advanced Port
3: Advanced Port Overview • Port Options contains some options which can be set on any WAN port. For most situations, the default values are satisfactory. • Load Balance is only functional if you are using multiple WAN ports. It allows you to determine the proportion of WAN traffic sent through each port. - Page 25 Settings – Port Options • Interface • • Connection Health Check • • • Transparent Bridge • Option • Transparent Bridge • Options (For all interfaces) • WAN Port – Select a particular WAN port from the pull-down menu to setup WAN port configuration.
-
Page 26: Load Balance
Load Balance This screen is only operational if using Internet connections on multiple WAN ports Figure 3-2: Load Balance Only functional when using two (2) or more WAN ports - these settings determine the proportion of traffic sent over each port. Page 22... - Page 27 Settings – Load Balance • Load Balance Enable – This enables your Load Balance setting options and must be Configuration checked for other settings on this screen to be effective. • Balance Type – You can select the Balance types based on: •...
-
Page 28: Advanced Pppoe
Advanced PPPoE The Advanced PPPoE screen is required in order to use multiple PPPoE sessions on the same WAN port. It can also be used to manually connect or disconnect a PPPoE session. Settings – Advanced PPPoE Select WAN Port WAN Port –... -
Page 29: Advanced Pptp
• Options Specified Fix IP Address – If you have a fixed IP address, enter if here. Otherwise, this field should be left at 0.0.0.0. • Assigned Host Name –This field is used by a Host to uniquely associate an access concentrator with a particular Host request. •... - Page 30 Settings – Advanced PPTP WAN Port Select the desired WAN port (click desired WAN on Connection Status). The data of the selected port will then be displayed in the WAN IP Account section. PPTP MTU – Maximum transfer unit for PPTP. The default value is 1460 •...
-
Page 31: 4: Advanced Setup
4: Advanced Setup Overview The following features are provided in Advanced Setup: • Host IP • Routing • Virtual Server • Special Application • Dynamic DNS • Multi DMZ • UPnP Setup • NAT Setup • Advanced Feature This chapter contains details on the configuration and use of each of these features. Host IP This feature is used in the following situations: •... - Page 32 Settings – Host IP Host Network This section identifies each Host (PC) Identity • Host name – Enter a suitable name. Generally, you should use the "Hostname" (computer name) as defined on the Host itself. • MAC Address – Also called Physical Address or Network Adapter Address. Enter the MAC address of this Host.
-
Page 33: Routing
• Host Network Binding WAN Port / Session – Select Enable if you wish to associate this Binding PC with a particular PPPoE session. All traffic for that PC will then use the selected PPPoE port and session. • Binding Method – Suppose your PC is bound to WAN1 port and you select “Strict Binding.”... - Page 34 Note: If there is an entry or entries in the Routing table with an Index of zero (0), these are System entries. You cannot modify or delete these entries. Settings – Routing • Dynamic RIP v2 – This acts as a “master” switch. If enabled, the selected WAN or LAN Routing will run RIPv1/v2, otherwise RIP function will not be available.
-
Page 35: Configuring Other Routers On Your Lan
255.255.255.0 • Gateway – The IP Address of the Gateway or Router that the Multi-WAN VPN Link Balancer must use to communicate with the destination IP address entered above. (NOT the router attached to the remote segment.) •... - Page 36 Interface Metric Entry 2 (Segment 2) Destination IP Address Network Mask Gateway IP Address Interface Metric For Router A's Default Route Destination IP Address Network Mask Gateway IP Address Metric For Router B's Default Route Destination IP Address Network Mask...
-
Page 37: Virtual Server
Virtual Server This feature allows you to make Servers on your LAN accessible to Internet users. Normally, Internet users would not be able to access a server on your LAN because: • Your Server's IP address is only valid on your LAN, not on the Internet. •... - Page 38 http://my_domain_name.dyndns.org ftp://my_domain_name.dyndns.org This screen allows you to define your own Server types. Settings – Virtual Server • Virtual Server Enable – The enable checkbox is to Enable or Disable each Virtual Configuration server as required. • Server Name – Enter a suitable name for this server. (By default, 12 well-known virtual servers have been listed on the Custom Virtual Server List) •...
- Page 39 or even bind to all WAN ports together. • LAN Port Range – Enter the range of port number used for outgoing traffic from this Server. If only a single port is required, enter it in both fields. • WAN Port Range -– Enter the range of port numbers used for incoming traffic to this Server.
-
Page 40: Special Application
Special Application If you use Internet applications which have non-standard connections or port numbers, you may find that they do not function correctly because they are blocked by the firewall in the Multi-WAN VPN Link Balancer. In this case, you can define the application as a "Special Application" in order to make it work. - Page 41 Settings – Special Application • Special Application Enable – Use this to Enable or Disable the Special Application as required Configuration • Name – Enter a descriptive name to identify the Special Application. • Outgoing Protocol –Select the protocol used by the application when sending data to the remote server or PC.
-
Page 42: Dynamic Dns
Dynamic DNS Dynamic DNS is very useful when combined with the Virtual Server feature. It allows Internet users to connect to your Virtual Servers using a URL, rather than an IP Address. This also solves the problem of having a dynamic IP address. With a dynamic IP address, your IP address may change each time you connect to your ISP, making it difficult to connect to you. - Page 43 Settings – Dynamic DNS Dynamic DNS This pull-down menu can Enable/Disable the Dynamic DNS feature and select the required service provider. Service • Disable – Dynamic DNS is not used. • TZO – Select this to use the TZO service (www.tzo.com). You must configure the TZO section of this screen.
-
Page 44: Multi Dmz
Multi DMZ This feature allows each WAN port IP address to be associated with one (1) computer on your LAN. All outgoing traffic from that PC will be associated with that WAN port IP address. Any traffic sent to that IP address will be forwarded to the specified PC, allowing unrestricted 2-way communication between the "DMZ PC"... - Page 45 Settings – Multi DMZ • Multi DMZ Edit Enable – Use this to enable or disable the DMZ setting, as required. • WAN – Select the desired WAN port binding with a particular LAN host. (There are a maximum 8 WAN ports which can be available.) Its connection type may change based on your WAN connection type (Static/DHCP/PPPoE/PPTP).
-
Page 46: Upnp Setup
UPnP Setup With the UPnP (Universal Plug & Play) function, you can easily setup and configure an entire network as well as enable detection and control of networked devices and services. Settings – UPnP Setup If set to Enable UPnP, this device will register on the local network. You will UPnP Option find that there is an icon showing on the My Network Places in Window XP. -
Page 47: Nat Setup
• NAT Routing – You can enable or disable NAT through the check box. If Configuration you disable the NAT checkbox, it will act as a bridge or Static Router. Most features will be unavailable. • TCP Timeout – Enter the desired value to use on each WAN port. The default is 300 •... - Page 48 Non-Translation If some packets whose port number cannot be translated for special Port Range applications, you must set state to “Enable” and input value in port range. Alternatively, if its port cannot be translated in the specified time period, you must set Enable and enter a seconds value in Timeout.
-
Page 49: Advanced Feature
Advanced Feature • External Filters Configuration – These settings determine whether the Multi-WAN VPN Link Balancer should respond to ICMP (ping) requests received from the WAN port or not. • Interface Binding – Use these settings to ensure that certain traffic is sent by a particular WAN port and thereby a particular ISP account. - Page 50 Settings – Advanced Feature • External Filters IDENT Port – Port 113 is associated with the Internet's (Identification / Configuration Authentication) service. When a client program in your computer contacts a remote server for services such as POP, IMAP, SMTP, that remote server sends back a query to the "Ident"...
- Page 51 Protocol & Port This list shows the details of all protocol and port configuration data which are currently defined. You can modify them by clicking on a selected row. Binding List Page 47...
-
Page 52: 5: Security Management
5: Security Management Overview • Block URL – Ability to block a specific website by configuring IP address, URL or Keywords. • Access Filter – Ability to block all Internet access, a known port or user defined ports by group access. - Page 53 Settings – Block URL This allows you to have different blocking rules for different Groups of PCs. Access Group • All PCs (users) are in the Default Group unless moved to another specified group on the Host IP screen. • If you want the same restrictions to apply to everyone, select Default for the Group.
-
Page 54: Access Filter
Access Filter The network Administrator can use the Access Filter to gain fine control over the Internet access and applications available to LAN users. • Five (5) user groups are available and each group can have different access rights assigned to them. -
Page 55: Session Limit
Settings – Access Filter Access Group This allows you have different access rights for different Groups of PCs. • • Filter Setting Select the desired option for this Group: • • • If you enable ICMP Filter that means it will block ICMP request packet ICMP Filters types specified by users from local host to remote side. - Page 56 Settings – Session Limit Sampling Time The time interval specified by you for new sessions. Only the new sessions that have recently occurred are counted according to the sampling time entered. (Default is 400 mil-sec) The maximum total number of new sessions in the system which is Maximum of Total New session acceptable in the sampling time.
-
Page 57: Sysfilter Exception
SysFilter Exception System Filter Exception - This will reject every packet with an unrecognized port to block port scan programs from hackers. This, however, also incurs problems in some situations where servers (e.g. SMTP server port 113) or WAN clients need to send a response packet to verify the activity of their communication peers. -
Page 58: 6: Vpn Configuration
6: VPN Configuration Overview Virtual Private Network (VPN) uses encryption to create the connection between two end points (computers or networks). It allows private data to be sent securely over a public network or the Internet without the risk of outside intruders gaining unauthorized access. VPN establishes a private network that can send data securely between two networks. - Page 59 Settings – IKE Global Setup The list will only show the approximate information of all Global Settings Global List (Phase 1) on each WAN port. You can modify it by clicking on a selected row. Global Parameters • • • •...
-
Page 60: Ipsec Policy Setup
Planning the VPN When planning your VPN, you must make the following choices first: 1. If the remote site is a LAN network, the two end-point networks must have different LAN IP address ranges. If the remote end-point is a single PC running a VPN client, its destination address must be a single IP address with subnet mask of 255.255.255.255 2. - Page 61 PPPoE session will create a VPN tunnel between two sites. Local Identity Type – You can select how the router will identify itself to the destination VPN site. There are three options to select from: •...
- Page 62 SPI and no two tunnels share the same SPI. Note that the Inbound SPI must match the other router’s outbound SPI. AutoKey (IKE) – There are two types of operation modes which can be used in Phase 1 Negotiation: Main mode –...
- Page 63 Settings – IPSec Policy Options • Dead Peer Detection Feature • • • Figure 6-3: IPSec Policy Options Dead Peer Detection (DPD) – If set to Enable, a device will periodically send HELLO/ACK messages to check if the tunnel is alive when both peers of a VPN tunnel provide DPD mechanism.
- Page 64 • • • • Options • • • • • • • passes - a Detection packet is sent to the peer. Retry Times – The number of times a device will attempt to send the Detection packet before the Check After Idle time expires. Action –...
-
Page 65: Mesh Group Setup
Mesh Group Setup (Optional) The Multi-WAN VPN Link Balancer not only provides VPN failover and backup but is also capable of offering VPN load balance. If you have setup IPSec policy on the “IPSec Policy Setup” web page, then you don’t have to enter IPSec policy setup again here. - Page 66 Once you have added your VPN Policy to the Mesh Group, you can set up your Mesh Group through the VPN Mesh Group Configuration. Settings –Mesh Group Configuration Aggregation Group This will display all the VPN connections that are using for VPN load balancing.
-
Page 67: Vpn Logs
VPN Logs You can monitor the VPN status through the VPN Logs web page. The log level (priority) can be chosen from the VPN IKE Global Settings web page. Data – VPN Logs • Message Status • Undefined Messages • •... -
Page 68: 7: Qos Configuration
7: QoS Configuration Overview The Multi-WAN VPN Link Balancer incorporates a QoS (Quality of Service) utility to provide high quality network support service. Because it classifies outgoing packets based on policies defined by users, real-time applications should respond or perform better. QoS Setup The following web page instructs you on setting up and enabling QoS. -
Page 69: Qos Policy
Settings – QoS Setup. QoS Feature Enable QoS – If set to Enable, it activates the QoS function. • Queuing Method – Management method selection for packets queue. Incorporates” Priority Queuing” - the first queuing variation to be widely implemented. •... - Page 70 Settings – QoS Policy Policy Priority This section identifies each policy: • Policy Name – Enter a suitable name. Generally, you should use the "Policy Name" for network traffic. • Source Address – Define the source address of packets here. It has two types, such as, IP address or MAC address.
-
Page 71: 8: Dns Configuration
8: DNS Configuration (Optional) Overview The DNS configuration web pages are setup steps provided for users requiring Inbound Load Balance. Domain SOA In order to make inbound load balance work, the Multi-WAN VPN Link Balancer incorporates a DNS server module. Users must first construct a server behind the LAN side of the Multi-WAN VPN Link Balancer. - Page 72 Settings – Domain SOA Domain List The Domain List catalogs all DNS configuration data that you have entered. You can modify any of the Domain SOA records by clicking on a selected row. • Domain Data • • • • Domain SOA Record •...
-
Page 73: Dns Record
DNS Record Apart from setting up the DNS SOA configuration, to complete the whole DNS setup - it is also necessary to configure the DNS record. Figure 8-2: DNS Record Page 69... - Page 74 Settings – DNS Record Lists all SOA records stored in the Domain SOA shown above. SOA Record • Record • Record List Of Domain Lists all the DNS Record that you have configured. You can modify its record by clicking on a selected row. Host Name –...
-
Page 75: 9: Management Assistant
9: Management Assistant Overview The following advanced features are • Admin. Setup • Email Alert • SNMP • Syslog • Upgrade Firmware This chapter contains details of the configuration and use of each of these features. Admin. Setup Remote Access Configuration – This feature allows you to manage the Multi-WAN VPN Link Balancer via the Internet. - Page 76 Settings – Admin. Setup Remote Access • Remote Upgrade – If enabled, you can use the supplied Windows Configuration utility to remotely upgrade the firmware. If not enabled, the upgrade must be performed by a PC on the LAN. • Remote Setup –...
-
Page 77: Email Alert
Email Alert This feature will send a warning Email to the system administrator when any WAN port is disconnected, has received excessive ping flooding, exceeded session limitation, etc. Settings – Email Alert • Global Setting: Link Down – If set to Enable, it will send a warning email to alert the administrator when any WAN port is disconnected. - Page 78 Email Alert • Email (SMTP) Server Address – An email sever to which a warning Configuration email will be sent, if email alert has been enabled. For example: mail.domain.com • User Name – An email account name for the sender. •...
-
Page 79: Snmp
SNMP This section is only useful if you have SNMP (Simple Network Management Protocol) software on your PC. If you have SNMP software, you can use a standard MIB II file with the Multi-WAN VPN Link Balancer. Settings – SNMP •... -
Page 80: Syslog
Syslog This feature can send the real time system information to a web page or to specified PCs. Syslog Configuration – Syslog Configuration allows you to select whether to send the system information to another machine or not. Up to three machines can be chosen to send the system log to. Message Status –... - Page 81 Settings – Syslog Syslog Delivery • Sending Out – Set to “Enable”, if you want to send system log messages to other machines (PCs). • Keep Sent Message – If set to Enable, it means you want to keep sent messages;...
- Page 82 Using Remote Web-based Setup To connect to the Multi-WAN VPN Link Balancer from a remote PC via the Internet: 1. Ensure that both your PC and the Multi-WAN VPN Link Balancer are connected to the Internet. 2. Open your Web Browser. 3.
-
Page 83: Upgrade Firmware
Upgrade Firmware The Upgrade Firmware Screen allows you to upgrade the firmware or backup the system configuration. You can backup your system configuration by pressing the Save System Configuration “Save” button. This will save the system configuration for future use. You also can upgrade the firmware by inputting the correct password, browsing to the firmware upgrade file and then pressing the “Upgrade”... -
Page 84: 10: Metwork Info
10: Network Info Operation Once the Multi-WAN VPN Link Balancer and the PCs are configured, operation is automatic. However, there are some situations where additional Internet configuration may be required. Refer to Chapter 4 - Advanced Setup for further details. System Status Use the System Status link on the main menu to view this screen. - Page 85 Data – System Status • WAN Interface Connection Type – The type of connection used – DHCP, Fixed IP, PPPoE or PPTP. • Connection Status – Either "Connected" or "Disconnected”. • "Force Renew" button– Only available if using a dynamic IP address (DHCP).
-
Page 86: Restore Factory Defaults
• Device System UpTime – The time since the device system was last reinitialized. Statistics • CPU Usage – The current CPU percentage usage. • Memory Heap – The current Memory percentage usage (Heap & Queue). • Packet Queue – The current Packet Queue percentage usage. Buttons •... -
Page 87: Wan Status
WAN Status Use the WAN Status link on the main menu to view this screen. Data – WAN Status This section displays data for each WAN port. Statistics • Status – This will display either Connected or Disconnected. • Default Loading Share - The default traffic loading on each WAN port. •... - Page 88 Interface This section displays cumulative statistics. Statistics Use the "Restart Counter" button to restart these counters when required. Page 84...
-
Page 89: Appendix A Specifications
Appendix A Specifications Model Multi-WAN VPN Link Balancer Dimensions 423mm (W) x 155mm (D) x 43mm (H) Operating 0° C to 40° C Temperature Storage -10° C to 70° C Temperature Network TCP/IP Protocol: Network 16 *10/100 BaseT (RJ45) Auto-switching Hub ports for WAN / LAN devices. Interface: LEDs 1 power LED. -
Page 90: Appendix B Windows Tcp/Ip Setup
If you wish to check your TCP/IP settings, the procedure is described in the following sections. • If your LAN has a router, it must be reconfigured by the LAN Administrator. Checking TCP/IP Settings - Windows 9x/ME: 1. Select Control Panel - Network. You should see a screen like the following: Select the TCP/IP protocol for your network card. - Page 91 Ensure your TCP/IP settings are correct as follows: Using DHCP To use DHCP, select the radio button Obtain an IP Address automatically. This is the default Windows setting. Restart your PC to ensure it obtains an IP Address from the Multi-WAN VPN Link Balancer. Using "Specify an IP Address"...
-
Page 92: Checking Tcp/Ip Settings - Windows
• On the DNS Configuration tab, ensure Enable DNS is selected. If the DNS Server Search Order list is empty, enter the DNS address provided by your ISP in the field beside the Add button, then click Add. Checking TCP/IP Settings - Windows 2000: Select Control Panel - Network and Dial-up Connection. - Page 93 5. Ensure your TCP/IP settings are correct: Using DHCP To use DHCP, select the radio button Obtain an IP Address automatically. This is the default Windows setting. Restart your PC to ensure it obtains an IP Address from the Multi-WAN VPN Link Balancer. Using a fixed IP Address ("Use the following IP Address") If your PC is already configured, check with your network administrator before making the following changes:...
-
Page 94: Checking Tcp/Ip Settings - Windows Xp
Checking TCP/IP Settings - Windows XP: Select Control Panel - Network Connection. Right click the Local Area Connection and choose Properties. You should see a screen like the following: Figure B-7: Network Configuration (Windows XP) Select the TCP/IP protocol for your network card. 4. - Page 95 Figure B-8: TCP/IP Properties (Windows XP) 5. Ensure your TCP/IP settings are correct. Using DHCP To use DHCP, select the radio button Obtain an IP Address automatically. This is the default Windows setting. Restart your PC to ensure it obtains an IP Address from the Multi-WAN VPN Link Balancer. Using a fixed IP Address ("Use the following IP Address") If your PC is already configured, check with your network administrator before making the following changes.
-
Page 96: Appendix C Troubleshooting
• Ensure that your PC and the Multi-WAN VPN Link Balancer are on the same network segment. (If you don't have a router, this must be the case.) • If your PC is set to "Obtain an IP Address automatically" (DHCP client), restart •... - Page 97 Problem 2: Some applications do not run properly when using the Multi-WAN VPN Link Balancer. Solution 2: The Multi-WAN VPN Link Balancer processes the data passing through it, so it is not transparent. Use the Special Applications feature to allow the use of Internet applications which are not functioning correctly.
Need help?
Do you have a question about the ER-1088 and is the answer not in the manual?
Questions and answers