Table of Contents
Advertisement
Quick Links
Advertisement
Table of Contents

Related Manuals for Prolitec AirQ AQ100


Summary of Contents for Prolitec AirQ AQ100
- Page 1 AQ100 User Guide Original Instructions Updated Aoril 11, 2016...
-
Page 2: Table Of Contents
Table of Contents Welcome to AirQ ....................... 3 ™ Safety Precautions ......................6 Controls and Display ......................8 Setting Up AirQ ........................9 Equipment and Accessories ................... 9 Getting Started ....................... 9 Removing the Cover ....................9 Removing the Battery Insulator ................11 Connecting to Power .................... -
Page 3: Welcome To Airq
Welcome to AirQ ™ Welcome to a new world of air freshening. You have purchased the most advanced air-freshening and scenting technology available anywhere. AirQ employs recently ™ patented indoor air quality technology with proven success in a wide range of commercial locations. - Page 4 Welcome to AirQ ™ The AirQ User Guide is easy to read with simple instructions. We urge you to read ™ it carefully and completely. Don’t like reading manuals? Please review the separate Quick Start Guide included with the AirQ. AirQ Applications and Uses: AirQ is used to improve indoor air by erasing odors and freshening the air with a pleasant scent.
- Page 5 Welcome to AirQ ™ Older homes often have that “Victorian” smell that suggests it is musty and not clean. A very light use of AirQ can solve this problem. ™ Pet odors are a major problem for the pet owners and their guests. If you live with and love a pet, its odor is often not an issue.
-
Page 6: Safety Precautions
Safety Precautions AirQ Appliance Precautions: • DO NOT position AirQ within the reach of young children or pets. • Must be used only with the supplied and approved Power Supply. • Unit will not operate properly if positioned sideways or upside down. AirQ must not be tilted or turned upside down when fragrance cartridge is inside. - Page 7 5 minutes. If there is any eye irritation, consult a physician immediately Take care to NOT drop a cartridge. It may crack, causing fragrance to spill. Call Prolitec Product Safety & Support toll-free at 1-866-387-4333 or visit airqhome.com. For online safety instructions, visit www.airqhome.com...
-
Page 8: Controls And Display
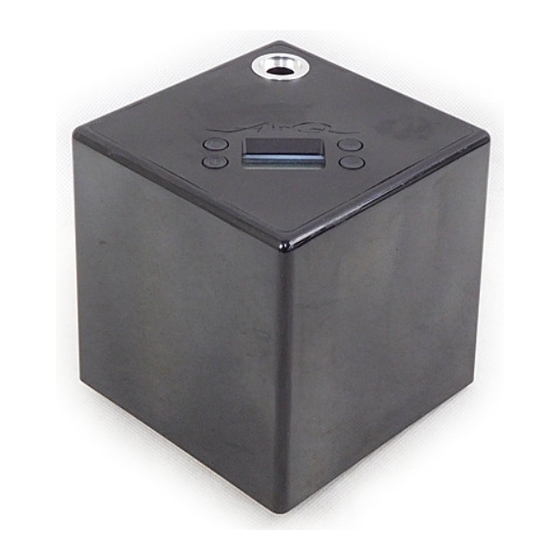
Controls and Display Power Button Cartridge Vent Timer Button Adjust Buttons LCD Screen Fragrance Cartridge Locking Settings Dial... -
Page 9: Setting Up Airq
Setting Up AirQ ™ Equipment and Accessories Remove AirQ from the container. Included: ™ 1. AirQ Cube 3. Director Attachment 2. Power Supply (includes world- 4. Fragrance Cartridge (sold separately) plug assortment, not shown) Getting Started Removing the Cover The cover of the cube is removable as shown below. To remove cover, locate release tab at bottom of the unit, press in, and lift cover up and off with other hand. -
Page 10: Removing The Battery Insulator
Setting Up AirQ ™ Removing the Battery Insulator Remove the yellow battery insulator tab at bottom of appliance. Connecting to Power 1. Connect the power cord to the underside of the appliance. 2. Attach appropriate, country-specific plug to power block. 3. -
Page 11: Inserting The Cartridge
Setting Up AirQ ™ Inserting the Cartridge 1. Ensure power switch is off before inserting cartridge. 2. Cartridge: remove screw-top cap, bottom red plug (save for future storage) and foil seal. Insert cartridge, pressing firmly until cartridge sits in place (Fig. 1). 3. -
Page 12: Selecting Operating Mode
Setting Up AirQ ™ Selecting Operating Mode With the cover off, decide which mode of operation you want to use. 1. 24/7 mode allows for continuous scenting at the intensity level you select. It requires you to turn AirQ ON and OFF. ™... -
Page 13: Timer
Setting Up AirQ ™ Timer: AirQ cover must be on for this mode to function. Directly located below the ™ Power button is the Timer button. This button’s function allows you to turn ON AirQ for a specific number of hours. This feature is good for scenting for a specific period of time. - Page 14 Setting Up AirQ ™ 2. Insert the Director Attachment and adjust to direct the AirQ output away from ™ any nearby surfaces less than 12 inches away. (See “Room Placement Considerations” on page 15.) Use of the Director Attachment also dampens the normal noise from the output.
-
Page 15: Setting The Scent Control
Setting Up AirQ ™ Setting the Scent Control This feature allows you to select the appropriate amount of scent for the room size. It is important to start at a low setting to avoid too strong of a scent level. If needed, you can gradually increase the scent level until it is just right for you. -
Page 16: Room Placement Considerations
Setting Up AirQ ™ Room Placement Considerations Place AirQ in a desired location that cannot be easily accessed by young children ™ or pets. The top of a shelf or cabinet is a good location. An extra-long power cord is provided to make this easy. -
Page 17: Troubleshooting
If the blue light does not illuminate, turn the scent control up to 50 and turn it on again. Place a finger on the appliance. If you cannot detect the slight vibration of the internal compressor, maintenance may be required. Call Prolitec Product Safety and Support toll-free at 1-866-387-4333 or go to www.airq.com. -
Page 18: Frequently Asked Questions
AirQ noise even further. If the problem persists, make sure the cartridge is firmly in place by removing it and putting it back in, sliding down until a firm click is felt. If the problem persists, call Prolitec Product Safety and Support toll- free at 1-866-387-4333 or go to www.airq.com. - Page 19 Frequently Asked Questions is pointed away from surfaces less than 12 inches away. Avoid placing AirQ near a window that is sometimes opened. Do I need to adjust AirQ? Yes! AirQ is a powerful machine. The scent control setting is very important. AirQ can handle very small and very large rooms.
- Page 20 Frequently Asked Questions IMPORTANT ALWAYS ALLOW AT LEAST 15 MINUTES TO ASSESS the scent strength after starting or adjusting. It is best to assess strength when you first enter the room from another room. Household odors, can AirQ help with these? ™...
- Page 21 Frequently Asked Questions Is AirQ eco-friendly? ™ YES! AirQ is the most eco-friendly air freshener on the market. Unlike candles, AirQ produces no black soot or residual hydrocarbons. Unlike aerosols, AirQ uses no propellants and produces no harmful volatile organic compounds or VOCs. Unlike many air fresheners, AirQ uses no ethanol or similar solvents to enhance the evaporation of fragrance chemicals.
- Page 22 Frequently Asked Questions IMPORTANT Always keep the caps on cartridges that are stored outside of the AirQ ™ If you have misplaced the caps from the cartridge being removed from AirQ, you can use the caps from the new cartridge being inserted. What happens if AirQ is knocked over? Will it continue to function? Should AirQ be tipped or knocked over to a position other than upright and level, a sensor switch on the bottom of the appliance prevents AirQ from functioning until...
-
Page 23: Care And Maintenance
Frequently Asked Questions Will AirQ fragrances stain surfaces or fabric if there is a spill? Yes, all air care fragrances will stain wood, stone and all fabrics. The best solution is avoidance by replacing the caps on cartridges after removing them and keeping the caps on all cartridges when not in use. -
Page 24: Specifications
Specifications Dimensions: AirQ Appliance 133 x 139 x 140 mm Weight: 1.41 kg (full); 3.1 lbs (full) Power Supply: Rated input: 100 – 240 VAC, 50 – 60Hz 0.4A Rated output: 15VDC 1 A Battery — Lithium 3V, #CR2032 Approvals: FCC part 15, CE & RoHS Compliant, UL/CUL Power Supply Working Temperature: 0˚... - Page 25 This warranty runs for 90 days labor, one (1) year parts from the date of the original purchase. If a defect arises, and a valid claim is received by Prolitec, Inc. after the first ninety (90) days of the Warranty Period, a shipping and handling charge will apply to any repair or exchange of the product undertaken by Prolitec.
Need help?
Do you have a question about the AirQ AQ100 and is the answer not in the manual?
Questions and answers