Bang & Olufsen BeoCenter 2 User Manual
Bang & olufsen beocenter 2 music systems: user guide
Hide thumbs
Also See for BeoCenter 2:
- User manual ,
- Service manual (64 pages) ,
- Repair manual (55 pages)
Table of Contents
Advertisement
Advertisement
Chapters
Table of Contents

Related Manuals for Bang & Olufsen BeoCenter 2


Summary of Contents for Bang & Olufsen BeoCenter 2
- Page 1 BeoCenter 2 Guide...
-
Page 3: Table Of Contents
This Guide explains how to operate your BeoCenter 2. It will guide you through the operations available for your system. All instructions regarding setting-up and the Socket unit are found in the separate Guide included with the Socket unit. A typical page in this Guide is laid out in the following way: An illustration explaining the menus. -
Page 4: How To Use Your Music System
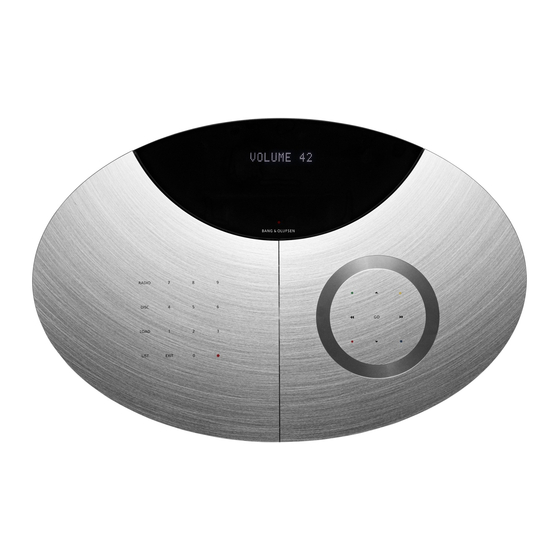
Selects radio programs, tracks on a CD, or N.MUSIC* tracks, Steps back one level in the menu system or leaves the menu Switches BeoCenter 2 to standby *NOTE! The coloured buttons are also used when listening to N.MUSIC, refer to the BeoLink PC 2 Guide for further information. - Page 5 The indicator light below the display flashes when you touch a button. The light shines continuously when the music system is in standby. NOTE! BeoCenter 2 can also be operated with the Beo4 remote control. For further information, refer to page 19.
-
Page 6: How To Read The Menu Symbols
The menu system of BeoCenter 2 gives you several options. Choose extra functions and features via the menus or make your own setup preferences. The current settings for the functions are shown in the menu, for example ‘RANDOM – ON or OFF’. -
Page 7: How To Use The Menus
How to change a setting… 1 N.MUSIC Press LIST to bring up the menu system 2 N.RADIO 3 A.AUX Press ▼ 4 CD RANDOM 5 CD REPEAT 6 CD EDIT Press 7 TIMER 8 SHOW CLOCK 9 SETUP … Press ▼... -
Page 8: First-Time Setup
Once your music system is installed and switched on for the first time, you are guided through the first-time setup procedure. The first time setup consists of: – Menu language selection – Auto tuning of radio programs – Setting the time and date –... -
Page 9: Call Up Additional Sources, Functions And Menus
For further information, refer to page 14. For further information about special CD playback functions, refer to page 11. NOTE! If your BeoCenter 2 is set up in a Master Link system and a computer with BeoLink PC 2 is connected, you can listen to N.Music or N.Radio via BeoCenter 2. -
Page 10: Tune In And Edit Radio Programs
Let the music system find available radio programs for you. You can store up to 60 radio programs. Once a program is stored, you access it directly by keying in the program number or by stepping through all the stored programs. You can rearrange the order in which tuned radio programs appear or delete them via the MOVE PROGRAM... -
Page 11: Audio Cd Settings
Additional CD functions are available via the AUDIO CD menu. This includes naming CDs, editing series of tracks and the random and repeat playback functions. The random playback function plays all the tracks on the loaded CD in random order. The repeat playback function plays the loaded CD over and over –... -
Page 12: Make Your Music System Start And Stop Automatically
Olufsen television or radio with Timer function, the Timer must be set as described in the Guide for the television or radio. If you want to include your BeoCenter 2 in the Timer, you must activate the Timer function. For further information, see page 14. -
Page 13: Make Sound Settings
All sound levels are set to neutral values from the factory, but you can make your own sound adjustments and store them. You can adjust the volume, bass and treble levels, or alter the balance between the left and right speaker. If you store a volume level, your music system starts playing at this level every time you switch it on. -
Page 14: Make Option Settings
When your system is connected to a television or radio, Timers are programmed via the television or radio, but if you want them executed on BeoCenter 2, you must set the ACTIVATE TIMER menu to ON. If by accident, you have chosen a language you do... -
Page 15: How To Use The Pincode System
You choose whether or not to activate the pincode system. The pincode system is deactivated when you delete your pincode. The use of a pincode means that if your music system has been disconnected from the mains for more than approximately 30 minutes, it can only be activated again by switching it on and keying in your pincode via the close-up... -
Page 16: Dvd Operation
PBC, PlayBack Control, you can operate them almost as a DVD. The DVD menus, however, are not available. If your BeoCenter 2 is set up in a system with speakers connected to the BeoCenter 2, you can listen to radio while watching DVD. In such a setup, the operations via the close-up operation panel are directed at the radio. - Page 17 Play Mode Disc Navigator Initial Settings How to use the DVD player menus… > Press GO then 3 to bring up the DVD player menus. > Press to move to the menu you wish to enter and press GO twice. >...
- Page 18 The DVD OPTIONS menu on BeoCenter 2… It is necessary to enter the following settings in the DVD OPTIONS menu on BeoCenter 2. For further information, refer to page 14. SCART SENSE OUT… If your system is connected directly to a television from the BeoVision MX- series (that is 4000/4002, 6000/7000), choose OFF.
-
Page 19: Use The Beo4 Remote Control
Beo4 display, such as CLOCK Displays extra ‘buttons’, such as RANDOM, REPEAT or N.MUSIC* – Not the same as LIST on BeoCenter 2! Pauses CD playback at any time Turns the volume up or down. Press in the middle... -
Page 20: Index
Index Audio/Video system Connect your music system to a video system, Socket unit Guide p. 6 Option programming, Socket unit Guide p. 10 Use an Audio/Video system, Socket unit Guide p. 11 Beo4 remote control Use the Beo4 remote control, 19 Cables Connect the cables, Socket unit Guide p. - Page 21 Maintenance Looking after your music system, Socket unit Guide p. 12 Master Link Audio/Video setup, Socket unit Guide p. 10 Option programming, Socket unit Guide p. 10 Use an Audio/Video system, Socket unit Guide p. 11 Menus How to read menu symbols, 6 How to use the menus, 7 Naming Delete CD names, 11...
-
Page 22: For Your Information
For your information… Your needs as a user are given careful consideration during the design and development process of a Bang & Olufsen product and we strive to make our products easy and comfortable to operate. Therefore, we hope that you will take the time to tell us about your experiences with your Bang &... - Page 23 CLASS 1 LASER PRODUCT The black and yellow label on the compact disc player serves as a warning that the apparatus contains a laser system and is classified as a class 1 laser product. In case any difficulties arise with the compact disc player, please contact a Bang &...
- Page 24 www.bang-olufsen.com...
- Page 25 BeoCenter 2 Correction to the Guide...
- Page 26 Beo4 remote control, you can use this button as well. If your BeoCenter 2 is set up in a system with speakers connected to the BeoCenter 2, you can listen to radio while watching DVD. In such a setup, the operations via the close-up operation panel are directed at the radio.
- Page 27 When you have made your selection, the menu disappears To play back other disc formats… The BeoCenter 2 is designed to play back different disc formats. Supported formats are: – DVD–Video – Audio CD – Video CD –...
- Page 28 Video Output… This menu allows you to select a picture format suitable for your television; 16:9 (widescreen) or 4:3. If you have connected the BeoCenter 2 to the television with a S-Video cable, set S-Video Out to S1. Language… This menu allows you to store your...
- Page 29 BeoCenter 2 – Socket Unit Guide...
- Page 30 CAUTION: To reduce the risk of electric shock, do not remove cover (or back). No User-serviceable parts inside. Refer servicing to qualified service personnel. WARNING: To prevent fire or electric shock, do not expose this appliance to rain or moisture. This symbol indicates that a dangerous voltage constituting a risk of electric...
- Page 31 Contents Placing your music system, 4 Find out how to place your BeoCenter 2 and the Socket unit. Connect the cables, 6 Find out how to connect all cables to the Socket unit. Mounting the wall bracket, 8 Find out how to mount the optional wall bracket for the Socket unit.
-
Page 32: Placing Your Music System
Place your music system on a firm surface, preferably on the table, sideboard or stand where you want it placed permanently. Do not place any items on top of BeoCenter 2. The music system is designed for indoor use in dry, domestic environments only, and for use within a temperature range of 10–40º... - Page 33 As illustrated, you can fasten the Socket unit either horisontally or vertically. Note that the lock mechanism of the wall bracket requires that the sockets face downward if you mount the Socket unit horisontally. Cover for sockets: To gain access to the sockets, it is necessary to remove the cover.
-
Page 34: Connect The Cables
Use the diagram and graphics imprinted on the Socket unit when locating the sockets. Do not connect your system to the mains until you have finished connecting all other cables. To access the sockets in the Socket unit, you must remove the cover – refer to page 5 and the graphics imprinted on the cover. - Page 35 Audio/Video connection without a 21-pin AV cable… If your television is not equipped with an 21- pin AV socket, you can still connect it to the music system. > Connect the CTRL socket on the Socket unit to the CTRL socket on your television. >...
-
Page 36: Mounting The Wall Bracket
The Socket unit can be mounted on the enclosed wall bracket in either a horisontal or vertical position. We recommend that you follow this procedure when you mount the wall bracket: – Use the wall bracket to mark the placement of the holes to be drilled in the wall. - Page 37 Push the two clips in towards the wall and lift the unit out of the bracket. Special notice about light partition walls If you intend to hang the BeoCenter 2 Socket unit on a gypsum wall (also known as drywall or wallboard), the wall bracket must be fastened to a...
-
Page 38: Audio/Video System
Via the menu ‘DVD SOUND’ described on page 18 in the BeoCenter 2 Guide, you decide which speakers should be used. Audio/Video system To program Option for your audio system with the Beo4 remote control…... - Page 39 An Audio and Video system set up in one room. Audio and Video system in one room If your BeoCenter 2 is set up with its own speakers and connected to a television (Option 1–1), you can listen to the radio while watching a DVD.
-
Page 40: Looking After Your Music System
Normal maintenance, such as cleaning the music system, is the responsibility of the user. To achieve the best result, please follow these instructions. Handle discs with care. If the disc is always held by its edges and placed in its original cassette when out of the player, no cleaning will be required. -
Page 41: Index
Play favourite tracks only, BeoCenter 2 Guide p. 11 Play tracks in random order, BeoCenter 2 Guide p. 11 Repeat a CD for up to 12 hours, BeoCenter 2 Guide p. 11 Cleaning Looking after your music system, 12 Handling your CDs, 12... - Page 42 Use an Audio/Video system, 11 Menus How to read menu symbols, BeoCenter 2 Guide p. 6 How to use the menus, BeoCenter 2 Guide p. 7 Naming Delete CD names, BeoCenter 2 Guide p. 11 Name a CD, BeoCenter 2 Guide p. 11 Name a radio program, BeoCenter 2 Guide p.
- Page 43 NOTE: This equipment has been tested and found to comply with the limits for a class B digital device, pursuant to part 15 of the FCC Rules. These limits are designed to provide reasonable protection against harmful interference in a residential installation.
- Page 44 www.bang-olufsen.com...
Need help?
Do you have a question about the BeoCenter 2 and is the answer not in the manual?
Questions and answers