
Related Manuals for Harman AMX ACENDO VIBE ACV-2100


Summary of Contents for Harman AMX ACENDO VIBE ACV-2100
- Page 1 INSTRUCTION MANUAL ™ ACENDO VIBE ACV - 2 1 0 0 A CE N D O V I B E ™ C O N FE RE N C I N G S O U N D B A R ACV - 5 1 0 0 A CE N D O V I B E ™ C O N FE RE N C I N G S O U N D B A R W I T H CA M E RA...
- Page 2 IMPORTANT SAFETY INSTRUCTIONS READ these instructions. KEEP these instructions. HEED all warnings. FOLLOW all instructions. DO NOT use this apparatus near water. CLEAN ONLY with dry cloth. DO NOT block any ventilation openings. Install in accordance with the manufacturer's instructions. DO NOT install near any heat sources such as radiators, heat registers, stoves, or other apparatus (including amplifiers) that produce heat.
-
Page 3: Table Of Contents
Table of Contents Acendo Vibe Conferencing Soundbars ............... 5 Overview ..........................5 ACV-5100 - Product Specifications ................. 5 Camera (ACV-5100 only)......................5 ACV-2100 - Product Specifications ................6 Side Panel Keypad ........................6 Volume and Mute Controls ....................... 6 Bluetooth Pairing Button ......................6 Remote Control........................ - Page 4 Connecting to the the Acendo Vibe via USB ..............20 Accessing the USB Connector....................20 Entering Setup Mode......................21 Exiting Setup Mode ......................... 21 USB Connected Window ....................21 Transfer Options Window....................22 Bluetooth Configuration Options..................22 Events Configuration Options (ACV-5100 only) ..............23 Audio Configuration Options ....................
-
Page 5: Acendo Vibe Conferencing Soundbars
Acendo Vibe Conferencing Soundbars Acendo Vibe Conferencing Soundbars Overview The ACV-2100 and ACV-5100 Acendo Vibe™ Conferencing Sound Bars are expertly designed web conferencing sound ® bars featuring USB and Bluetooth connectivity support for BYOD environments. Dedicated analog audio inputs and outputs allow the Acendo Vibe to easily integrate with other room technology. -
Page 6: Acv-2100 - Product Specifications
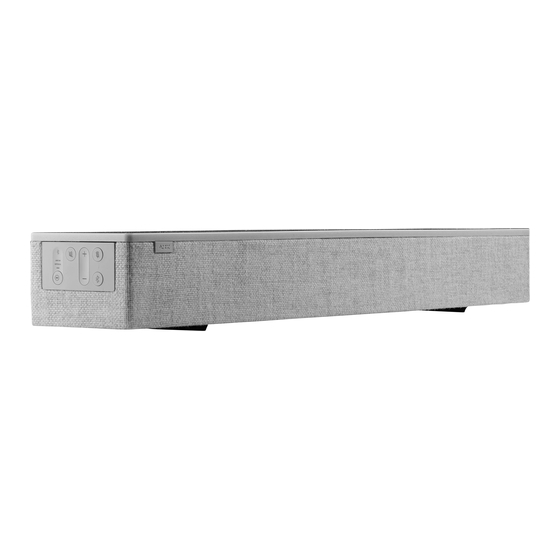
Acendo Vibe Conferencing Soundbars ACV-2100 - Product Specifications Side Panel Keypad Front Wall Mount Bracket Cable Pass-Thru Rear mounting holes (x4) Rubber feet (removable, x2) FIG. 2 ACV-2100 (Front/Rear views) ACV-2100 Product specifications MODELS AVAILABLE • ACV-2100GR, Grey (FG4121-00GR) • ACV-2100BL, Black (FG4121-00BL) INCLUDED ACCESSORIES •... -
Page 7: Remote Control
Acendo Vibe Conferencing Soundbars Remote Control The Acendo Vibe includes a color matched remote control that connects wirelessly (FIG. 4): Bluetooth Pairing (press to pair remote to user device) Source Select pushbutton (on back side) Mute Speaker Mute Microphone Volume Up/Down End Call (rotate ring to adjust) Battery Compartment (bottom panel) -
Page 8: Installing Acendo Vibe
Installing Acendo Vibe Installing Acendo Vibe Overview This section describes the physical installation of the Acendo Vibe unit. Note that many of the mounting illustrations use the ACV-5100 as an example, but these mounting instructions apply equally to the ACV-2100. NOTE: Do not lift the ACV-5100 by the camera or rest the ACV-5100 unit on the camera. -
Page 9: Using The Bracket Mounting Guide
Installing Acendo Vibe Display Camera lens should be Display positioned beyond the display Acendo Vibe Camera to avoid obstructing the view (side view) 40-48” from floor front FIG. 8 Acendo Vibe Wall Mount Considerations Using the Bracket Mounting Guide The Wall Mount Bracket features instructions etched on the inner surface that describe how to position the Acendo Vibe beneath a wall-mounted display to avoid obstructing the camera view (FIG. -
Page 10: Mounting The Wall Mount Bracket And Attaching The Acendo Vibe
Installing Acendo Vibe Mounting the Wall Mount Bracket and Attaching the Acendo Vibe Use the Wall Mount Bracket as a template to mark the locations for the four mounting screws (not included). Use mounting screws and hardware appropriate for the surface being utilized to secure the Bracket to the wall. Optionally, if not hiding them behind the drywall, place the four included Wall Mount Spacers between the Bracket and the wall to create a 5mm gap for routing flat cables (FIG. -
Page 11: Connections
Installing Acendo Vibe Connections All connectors are located within the connector bay (rear panel). For surface installations, place the unit face-down and open the connector bay door to manage cables/connectors. For wall-mounted installations, simply rotate the Acendo Vibe unit down and away from the wall to access the ... -
Page 12: Acv-2100 Connectors
Installing Acendo Vibe ACV-2100 Connectors The connectors on the ACV-2100 are shown in FIG. 12: . DC Power input Optical audio input cable strap cable strap Analog audio output Analog audio input RS-232 (3-pin captive wire) USB (Type B) FIG. 12 ACV-2100 connector bay ACV-2100 Connections DC POWER... -
Page 13: Installing Lock-Down Screws
Installing Acendo Vibe Installing Lock-Down Screws The Acendo Vibe comes with two (flat-head) Lock-Down Screws that can be added after the Acendo Vibe has been installed and connected. The Lock-Down Screws prevent the Bracket from being opened accidentally. With the Bracket/ connector bay door closed, install the Lock-Down Screws in the bottom panel (FIG. -
Page 14: Remote Control
Installing Acendo Vibe Remote Control The Acendo Vibe includes a wireless remote control (FIG. 16): Bluetooth Pairing Source Select pushbutton (on back side) Mute Speaker Mute Microphone Volume Up/Down (rotate ring to adjust) End Call Battery Compartment (bottom panel) Unlock & twist to open FIG. -
Page 15: Connecting An External Motion Sensor (Future Firmware Update / Acv-5100 Only)
Installing Acendo Vibe Connecting an External Motion Sensor (future firmware update / ACV-5100 only) The ACV-5100 features a 3-pin captive-wire connector that provides connectivity for the future implementation of an (optional) motion sensor, located next to the RS-232 connector (see FIG. 11 on page 11). ... -
Page 16: Configuring Acendo Vibe Conferencing Sound Bars
Configuring Acendo Vibe Conferencing Sound Bars Configuring Acendo Vibe Conferencing Sound Bars Overview The ACV-2100/5100 Acendo Vibe Conferencing Sound Bars are configurable via the Acendo Vibe Configuration Tool software (available to download from www.amx.com). Note that there are two versions of the configuration software tool - one for PC and one for Mac. -
Page 17: Downloading And Installing The Acendo Vibe Configuration Tool
Configuring Acendo Vibe Conferencing Sound Bars Downloading and Installing the Acendo Vibe Configuration Tool Go to the ACV-2100 ACV-5100 product pages on the AMX Trade site and click the Acendo Vibe Configuration Software link to download the installation file. Download the installation file to a known location. Double-click the installation (*.exe) file and follow the on-screen directions to install: In the Welcome to the Acendo Vibe Setup Wizard dialog, click Next to proceed (FIG. - Page 18 Configuring Acendo Vibe Conferencing Sound Bars FIG. 22 Acendo Vibe Setup Wizard - Select Start Menu Folder dialog By default, the installation will create a desktop shortcut: de-select this option if desired and click Next to proceed (FIG. 23): FIG. 23 Acendo Vibe Setup Wizard - Select Additional Tasks In the Ready to Install dialog, click Install (FIG.
- Page 19 Configuring Acendo Vibe Conferencing Sound Bars FIG. 25 Device Driver Installation Wizard (1 of 2) - Welcome dialog Click Next to proceed (FIG. 26): FIG. 26 Device Driver Installation Wizard (1 of 2) - Completing the Device Driver Installation Wizard dialog Click Finish to close this dialog and open a second Device Driver Installation Wizard that installs the second device driver (FIG.
-
Page 20: Connecting To The The Acendo Vibe Via Usb
Configuring Acendo Vibe Conferencing Sound Bars FIG. 28 Acendo Vibe Setup Wizard - Completing the Acendo Vibe Setup Wizard Note that by default, both options in this dialog are selected: View Readme.txt - When the Finish button is clicked, the release notes for this release are opened. ... -
Page 21: Entering Setup Mode
Configuring Acendo Vibe Conferencing Sound Bars Entering Setup Mode The Acendo Vibe unit must be in Setup Mode in order to communicate with the Acendo Vibe Configuration Tool. Follow the instructions presented on the Setup Mode window to place the Acendo Vibe unit into Setup Mode (FIG. 31): Mute Microphone Audio Source Select FIG. -
Page 22: Transfer Options Window
Configuring Acendo Vibe Conferencing Sound Bars Transfer Options Window Note that the options described above are also available via the Transfer Options window. In cases where the Acendo Vibe unit is already connected to the PC via USB, select the File > Transfer option in the side menu of the main Acendo Vibe Configuration Tool to open the Transfer Options window (FIG. -
Page 23: Events Configuration Options (Acv-5100 Only)
Configuring Acendo Vibe Conferencing Sound Bars Events Configuration Options (ACV-5100 only) The Events options are only available for ACV-5100 Acendo Vibe Sound Bar with Camera. Select Events from the side menu to access Events configuration options (FIG. 35): FIG. 35 Acendo Vibe Configuration Tool - Events Configuration Options (ACV-5100 only) These options configure how CEC operates relative to defined events, and adjust Occupancy Sensor settings: Events Options (ACV-5100 only) -
Page 24: Audio Configuration Options
Configuring Acendo Vibe Conferencing Sound Bars Audio Configuration Options Select Audio from the side menu to access the Audio Configuration Options (FIG. 36): FIG. 36 Acendo Vibe Configuration Tool - Audio Configuration Options These options toggle Automatic Auto Switching as well as adjust the default volume and gain settings for the Aux Out connector: Audio Options Aux Out Gain... -
Page 25: File Options (Open, Save And Transfer)
Configuring Acendo Vibe Conferencing Sound Bars File Options (Open, Save and Transfer) Use the File options to save the current settings (as a *.json config file), open an existing config (*.json) file, and transfer the current settings to an Acendo Vibe via USB connection (FIG. 37): FIG. -
Page 26: Saving Settings As An Acendo Vibe Configuration File
Configuring Acendo Vibe Conferencing Sound Bars FIG. 40 File Open Options window - What would you like to do? Click Transfer settings from this file to transfer the selected Acendo Vibe Configuration (*.json) file. See the Transfer settings from this file section on page 27 for details. Click View/Modify settings in the application to view and/or modify the settings defined in the selected Acendo ... -
Page 27: Transfer Settings From This File
Configuring Acendo Vibe Conferencing Sound Bars Transfer settings from this file In the Side menu, click File > Transfer (FIG. 43): FIG. 43 File > Transfer NOTE: Alternatively, click "Transfer settings from this file" in the File Open window (see FIG. 40). This selection invokes the Transfer Options window (see FIG. -
Page 28: Sending New Settings To Acendo Vibe
Configuring Acendo Vibe Conferencing Sound Bars Sending New Settings to Acendo Vibe NOTE: The new settings will replace the existing settings on the connected Acendo Vibe. In the Side menu, click File > Transfer (FIG. 46): FIG. 46 File > Transfer This selection invokes the Transfer options window to specify whether to transfer an Acendo Vibe Configuration File to or from the connected unit, or to send a firmware update to the Acendo Vibe (FIG. -
Page 29: Getting Current Settings From Acendo Vibe
Configuring Acendo Vibe Conferencing Sound Bars Getting Current Settings From Acendo Vibe To retrieve the current configuration settings from the Acendo Vibe: In the USB Connected (or Transfer) dialog, select Get current settings from Acendo Vibe (see FIG. 32). The current settings (as currently configured in the Settings application) are retrieved from the Acendo Vibe. The system indicates the progress of this transfer (FIG. - Page 30 Configuring Acendo Vibe Conferencing Sound Bars FIG. 52 Transfer - Transferring files to Acendo Vibe NOTE: The system will indicate if there was an error transferring the files. In this case, refer to the Troubleshooting section on page 39. Close the Transfer dialog. Acendo Vibe Conferencing Soundbars - User Guide...
-
Page 31: Serial Commands
Serial Commands Serial Commands Overview Acendo Vibe supports a set of Serial commands that can be sent to the unit via the 3-pin captive-wire RS-232 connector on the Acendo Vibe unit. Command Protocol Protocol Definition The Acendo Vibe control protocol is a text based protocol. The protocol is command/response from client to server and from server to client. -
Page 32: Getting And Setting Values
Serial Commands Getting and setting values Paths The following tree represents the paths in Vienna. audmic state audio autoswitch defvolume gain mode level source state volume battery state bluetooth connstate hangup pairing state camera state display state occupancy internal state external state sensitivity... -
Page 33: Errors
Serial Commands Errors Error reply The Error reply contains an error message if a parameter is not found with the last command. Always starts with "@" - this is a reply to any command that was invalid. The stuff that comes after @Error is the entire original message as-is. (No extra quotes except what was in the original message.) Then there is one extra parameter at the end, which is the error message. - Page 34 Serial Commands Serial Commands - ACV-2100 & ACV-5100 (Cont.) Command Description Set the gain mode for the aux out audio. It can be set to follow the speaker volume set /audio/gain/mode (“var”) or to a fixed value (“fixed”). Syntax: set /audio/gain <mode> Where: <mode>...
-
Page 35: Serial Commands - Acv-5100 Only
Serial Commands Serial Commands - ACV-2100 & ACV-5100 (Cont.) Command Description Get the state of video streaming from the camera. get /camera/state Returns: @get /camera/state <state> Where: <state> = “idle” or “streaming” Update firmware on the MCU. Will put the MCU into the bootloader, ready to load new exec /system/firmware/update firmware. - Page 36 Serial Commands Serial Commands - ACV-5100 (Cont.) Command Description Get the state of the internal occupancy sensor (mic’s) get /occupancy/internal/state Returns: @get /occupancy/internal/state <state> Where: <state> = “none”, “occupied” or “vacant” Set the color of the ring (meeting status) LEDs. set /ringleds/color Syntax: set /ringleds/color <color>...
- Page 37 Serial Commands Serial Commands - ACV-5100 (Cont.) Command Description Configure delay time for the occupancy detect trigger event. set /trigger/occupancy/delay Syntax: set /trigger/occupancy/delay <delay> Where: <delay> = 0..300 (seconds) Get display action for the vacancy detect trigger event. get /trigger/vacancy/action Returns: @get /trigger/vacancy/action <display-action>...
-
Page 38: Events
Serial Commands Events Acendo Vibe will send event messages when asynchronous events, i.e. occurrences not related to a received command, happen. Note that the Acendo Vibe supports the Command Protocol on both its USB and RS-232 interfaces. However, events are only reported on the RS-232 interface. -
Page 39: Troubleshooting
Troubleshooting Troubleshooting Problem: USB Connection Lost (FIG. 53): FIG. 53 Remote control - bottom panel (lock/unlock/remove) Possible Solution: The USB connection has come loose on either the Acendo Vibe unit, or on the connected laptop/PC. Check the USB connections and make sure they are fully seated and secure in the USB port(s). Problem: Acendo Vibe Not Recognized as an audio device when connected to a laptop/PC via USB When the Acendo Vibe is connected to a Windows laptop/PC, it should be auto-selected as the default audio device for both speakers and microphone. - Page 40 Troubleshooting Rotate the bottom panel to the left and lift to remove. Replace the two AA batteries and dispose the old batteries properly. Replace and lock the bottom panel. Acendo Vibe Conferencing Soundbars - User Guide...
- Page 41 The AMX Warranty and Return Policy and related documents can be viewed/downloaded at www.amx.com. 3000 RESEARCH DRIVE, RICHARDSON, TX 75082 AMX.com | 800.222.0193 | 469.624.8000 | +1.469.624.7400 | fax 469.624.7153 AMX (UK) LTD, AMX by HARMAN - Unit C, Auster Road, Clifton Moor, York, YO30 4GD United Kingdom • +44 1904-343-100 • www.amx.com/eu/...
Need help?
Do you have a question about the AMX ACENDO VIBE ACV-2100 and is the answer not in the manual?
Questions and answers