Table of Contents
Advertisement
Advertisement
Table of Contents

Related Manuals for Harman JBL BAR 1000


Summary of Contents for Harman JBL BAR 1000
- Page 1 BAR 1000 OWNER’S MANUAL...
-
Page 2: Important Safety Instructions
IMPORTANT SAFETY INSTRUCTIONS Verify Line Voltage Before Use The JBL Bar 1000 (soundbar, detachable speakers and subwoofer) has been designed for use with 100-240 volt, 50/60 Hz AC current. Connection to a line voltage other than that for which your product is intended can create a safety and fire hazard and may damage the unit. -
Page 3: Table Of Contents
TABLE OF CONTENTS 7.6 PLAY THROUGH CHROMECAST BUILT-IN IMPORTANT SAFETY INSTRUCTIONS 7.7 PLAY THROUGH AIRPLAY 7.8 PLAY THROUGH AMAZON MUSIC 1. INTRODUCTION 7.9 MULTI-ROOM PLAYBACK 2. WHAT’S IN THE BOX 8. SOUND SETTINGS 8.1 AUDIO SYNC 3. PRODUCT OVERVIEW 8.2 SMART MODE 3.1 SOUNDBAR 8.3 PUREVOICE DIALOGUE ENHANCEMENT TECHNOLOGY... -
Page 4: Introduction
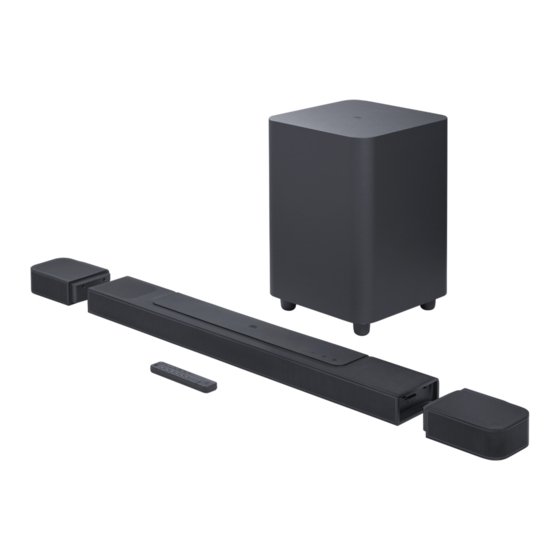
1. INTRODUCTION Thank you for purchasing the JBL Bar 1000 (soundbar, detachable speakers and subwoofer) which is designed to bring an extraordinary 3D sound experience to your home entertainment system. We encourage you to take a few minutes to read through this manual, which describes the product and includes step-by-step instructions for setting up and getting started. -
Page 5: What's In The Box
HDMI cable (1.2 m/3.9 ft.) 2. WHAT’S IN THE BOX Unpack the box carefully and ensure that the following parts are included. If any part is damaged or missing, do not use it and contact your retailer or customer service representative. Soundbar Side caps Subwoofer... -
Page 6: Product Overview
3.1.2 Rear connectors 3. PRODUCT OVERVIEW 3.1 Soundbar 3.1.1 Controls 1) POWER • Connect to power (with the supplied power cord) 2) USB • USB connector for software update (Source) Connect to a USB storage device for MP3 file playback •... -
Page 7: Subwoofer
3.3 Subwoofer 3.4 Remote control • Connection status indicator Solid (white) Connected to the soundbar Fast flashing (white) Pairing mode Reconnecting or exiting the Slow flashing (white) pairing mode Solid (amber) Standby mode 2) Power connector Connect to power (with the supplied power cord) •... -
Page 8: Place
4. PLACE (available when both of the detachable rear speakers are undocked from the soundbar) • Select the surround sound level for rear speakers: middle 4.1 Desktop placement (default), high, muted or low Place the soundbar, detachable speakers and subwoofer on a 4) CALIBR flat and stable surface. -
Page 9: Wall-Mounting
4.2 Wall-mounting 4.2.2 Wall-mount the detachable speakers as rear surround speakers Wall-mount the soundbar and detachable rear speakers together or separately. 4.2.1 Wall-mount the soundbar > 50 mm/2’’ 555.7 mm / 21.88” ≥30 mm/1.18" ≥30 mm/1.18" 1. From the soundbar, remove the two detachable speakers. 2. -
Page 10: Connect
1. Connect the soundbar with the HDMI IN (ARC / eARC) 5. CONNECT connector on your TV by using the supplied HDMI cable. • On your TV, check that HDMI-CEC and HDMI ARC / 5.1 Connection with your TV and digital eARC have been enabled. - Page 11 5.1.2 TV (HDMI eARC) 5.1.3 OPTICAL OPTICAL HDMI (eARC) HDMI (eARC) OPTICAL HDMI IN HDMI IN HDMI IN HDMI OUT HDMI OUT HDMI OUT 1. Connect the soundbar with the HDMI IN (eARC) connector NOTES: on your TV by using the supplied HDMI cable. –...
-
Page 12: Bluetooth Connection
5.2 Bluetooth connection NOTES: – The Bluetooth connection will be lost if the distance between the Through Bluetooth, connect the soundbar with your Bluetooth soundbar and Bluetooth device exceeds 33 ft (10 m). device, such as a smartphone, tablet and laptop. –... -
Page 13: Setup
3. If necessary, use an Ethernet cable to connect the soundbar 6. SETUP to your home network. • Make sure that you connect to the same network as you 6.1 Connect the detachable rear speakers and did during the setup. subwoofer NOTES: −... -
Page 14: Charge The Detachable Speakers
6.2 Charge the detachable speakers 6.2.2 Charge through a USB cable When the detachable surround speakers are out of battery, their wireless connection with the soundbar will be lost. The first time you use the two detachable speakers, charge them for more than 3 hours to ensure sufficient battery power. - Page 15 1) Calibrate the listening zone 2) Calibrate the speaker position PRESS CALIBR AGAIN 1-CALIBRATION 1-CALIBRATION PRESS AGAIN TO CONFIRM PRESS AGAIN TO CONFIRM 2-CALIBRATION 2-CALIBRATION CALIBRATING CALIBRATING CALIBRATING CALIBRATING 1 DONE 1 DONE 2 DONE 2 DONE 1. Place the detachable rear speakers in your desired location. 1.
- Page 16 6.3.2 Dolby Atmos / DTS:X ® ® 2. On the remote control, press to toggle between surround sound levels. With Dolby Atmos or DTS:X, overhead audio distribution is provided for powerful 3D sound immersion. J “MID” / “HIGH” / “MUTE” / “LOW” is displayed (Default: “MID”).
-
Page 17: Play
7.1.3 Auto wakeup 7. PLAY In standby mode, the soundbar will wake up automatically when 7.1 Power-on/Auto standby/Auto wakeup • the soundbar is connected to your TV through the HDMI ARC connection and your TV is switched on; • the soundbar is connected to your TV through the HDMI ARC connection and through the HDMI connection, is also connected to your digital device such as a set-top box, DVD/ Blu-ray player or game console, and your digital device is... -
Page 18: Play From The Hdmi In Source
HDMI-CEC 2. Switch on your digital device. If your TV supports HDMI-CEC, enable the functions as instructed J Your TV and the soundbar wake up from standby mode in your TV user manual. You can control the volume +/-, mute/ and switch to the input source automatically. -
Page 19: Play Through Chromecast Built-In
2. On your Android or iOS device, 2. On the soundbar, a) Check that your Android or iOS device has been • Press on the remote control to access the connected to the same network as the soundbar. personalized playlist and speaker settings. b) Launch the JBL One app, browse available *music streaming services to select music, and then, start music streaming to the connected soundbar. -
Page 20: Play Through Airplay
c) On a Chromecast-enabled app, play music, tap the cast 2. On your Android or iOS device, icon and select the connected soundbar. a) Check that your Android or iOS device has been connected to the same network as the soundbar. b) Launch the JBL One app, and check that you have enabled the streaming service of Amazon Alexa. -
Page 21: Multi-Room Playback
7.9 Multi-room playback 7.9.3 Alexa MRM: Multi-Room Music 1. Check that you have enabled the streaming service of With the multi-room playback, you can stream music on your Amazon Alexa on the soundbar through the JBL One app. Android or iOS device to multiple Chromecast-enabled/ AirPlay / Alexa speakers. -
Page 22: Sound Settings
8. SOUND SETTINGS 9. RESTORE FACTORY SETTINGS 8.1 Audio sync By restoring the default settings defined at factories, you remove all your personalized settings from the soundbar. With the audio sync function, you can synchronize audio and • On the soundbar, press and hold for more than video to make sure that no delay is heard from your video content. -
Page 23: Software Update
Updating through a USB storage device 10. SOFTWARE UPDATE For optimal product performance and your best user experience, JBL may offer software updates for the soundbar system in the future. Please visit www.jbl.com or contact JBL call center to Software update files Software update files receive more information about downloading update files. -
Page 24: Re-Connect The Subwoofer
11. RE-CONNECT THE SUBWOOFER 12. PRODUCT SPECIFICATIONS The soundbar and subwoofer are paired at factories. After General specification: power-on, they are paired and connected automatically. In some • Model: BAR 1000 (soundbar unit) special cases, you may need to pair them again. BAR 1000 SURROUND (detachable speaker) BAR 1000 SUB (subwoofer unit) •... -
Page 25: Troubleshooting
• 5G Wi-Fi transmitter frequency range: 13. TROUBLESHOOTING 5.15 - 5.35GHz, 5.725 - 5.825GHz • 5G Wi-Fi transmitter power: 5.15 - 5.25GHz <23dBm, Never try to repair the product yourself. If you have problems 5.25 - 5.35GHz <20dBm, 5.725 - 5.825GHz <14dBm (EIRP) using this product, check the following points before you request services. - Page 26 Poor audio quality from a connected Bluetooth device Remote control • The Bluetooth reception is poor. Move the source device The remote control does not work. closer to the soundbar, or remove any obstacle between the • Check if the batteries are drained. If so, replace them with source device and the soundbar.
-
Page 27: Trademarks
Bluetooth SIG, Inc. and any use of such marks by U.S. and other countries. HARMAN International Industries, Incorporated is under license. To control this AirPlay 2–enabled speaker, iOS 13.4 or later is Other trademarks and trade names are those of their respective required. -
Page 28: Open Source License Notice
Please feel free to contact us at: Harman Deutschland GmbH HATT: Open Source, Gregor Krapf-Gunther, Parkring 3 85748 Garching bei Munchen, Germany or OpenSourceSupport@Harman.com if you have additional question regarding the open source software in the product. - Page 29 © 2023 HARMAN International Industries, Incorporated. Incorporated 8500 Balboa Boulevard, All rights reserved. Northridge, CA 91329 USA JBL is a trademark of HARMAN International Industries, Incorporated, registered in the United www.jbl.com States and/or other countries. Features, specifications and appearance are subject to change without notice.
Need help?
Do you have a question about the JBL BAR 1000 and is the answer not in the manual?
Questions and answers