Table of Contents
Advertisement
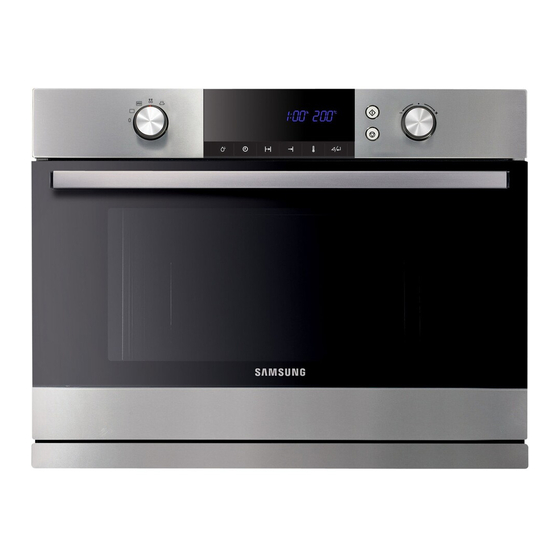
FQ115T
Speed Cook Oven
Installation and Operating
Instruction
This manual is made with 100% recycled paper.
imagine
the possibilities
ENGLISH
Thank you for purchasing this Samsung product.
To receive more complete service, please register
your product at
www.samsung.com/register
FQ115T001_XEU-03869D_EN.indb 1
14/06/2011 15:38:52
Advertisement
Table of Contents
Troubleshooting

Related Manuals for Samsung FQ115T001


Summary of Contents for Samsung FQ115T001
- Page 1 Speed Cook Oven Installation and Operating Instruction This manual is made with 100% recycled paper. imagine the possibilities ENGLISH Thank you for purchasing this Samsung product. To receive more complete service, please register your product at www.samsung.com/register FQ115T001_XEU-03869D_EN.indb 1 14/06/2011 15:38:52...
-
Page 2: Using This Manual
Thank you for purchasing a SAMSUNG speed cook oven. Your Owner’s Manual contains important safety instructions and essential information on using and caring for your new speed cook oven. Before using your oven, please read all the information in this manual and keep it for future reference. A handy quick look- up guide explaining basic cooking operations is provided inside the front cover for your convenience. - Page 3 SEVERE WARNING SIGNS FOR INSTALLATION WARNING The installation of this appliance must be performed by a qualified microwave service technician trained by the manufacturer. Please see the section “Installing your Microwave Oven”. Plug the power cord into the proper wall socket or higher and use the socket for this appliance only.
- Page 4 CAUTION SIGNS FOR INSTALLATION CAUTION This appliance should be positioned in such a way that it is accessible to the power plug. - Failure to do so may result in electric shock or fire due to electric leakage. Install your appliance on a level and hard floor that can support its weight. - Failure to do so may result in abnormal vibrations, noise, or problems with the product.
- Page 5 SEVERE WARNING SIGNS FOR USING WARNING In the event of a gas leak (such as propane gas, LP gas, etc.), ventilate immediately without touching the power plug. Do not touch the appliance or power cord. - Do not use a ventilating fan. - A spark may result in an explosion or fire.
- Page 6 The appliance is not intended for use by persons (including children) with reduced physical, sensory or mental capabilities, or lack of experience and knowledge, unless they have been given supervision or instruction concerning use of the appliance by a person responsible for their safety.
- Page 7 Do not heat food wrapped in paper such as magazines or newspaper. - This may result in fire. Do not use or place inflammable sprays or objects near the oven. - This may result in fire or an explosion. Do not open the door when the food in the cooking compartment is burning. - If you open the door, an inflow of oxygen occurs and this may result in fire.
- Page 8 If any foreign substance such as water has entered the appliance, unplug the power plug and contact your nearest service centre. - Failure to do so may result in electric shock or fire. If smoke is observed, switch off or unplug the appliance and keep the door closed in order to stifle any flames;...
- Page 9 Do not operate the appliance with wet hands. - This may result in electric shock. Do not spray volatile material such as insecticide onto the surface of the appliance. - As well as being harmful to humans, it may also result in electric shock, fire or problems with the product.
- Page 10 Do not use harsh abrasive cleaners or sharp metal scrapers to clean the oven door glass since they can scratch the surface, which may result in shattering of the glass. Do not use your microwave oven to dry papers or clothes. For your safety, do not use high-pressure water cleaners or steam jet cleaners.
- Page 11 CORRECT DISPOSAL OF THIS PRODUCT (WASTE ELECTRICAL & ELECTRONIC EQUIPMENT) (Applicable in the European Union and other European countries with separate collection systems) This marking on the product, accessories or literature indicates that the product and its electronic accessories (e.g. charger, headset, USB cable) should not be disposed of with other household waste at the end of their working life.
-
Page 12: Table Of Contents
contents INSTALLING YOUR MICROWAVE OVEN OVEN FEATURES BEFORE YOU BEGIN CLEANING AND CARE TROUBLESHOOTING & ERROR CODE INSTALLATION & WIRING INSTRUCTION TECHNICAL SPECIFICATIONS 12_ contents FQ115T001_XEU-03869D_EN.indb 12 Oven features Accessories Controls panel Setting the clock OVEN USE Types of heating Using oven mode Setting cook time Setting end time Cooking time reservation function Using speed menu mode Using speed defrost mode How a microwave oven works... - Page 13 installing your microwave oven General Technical Information Electrical Supply: Power consumption: Dimensions (w x h x d): This appliance complies with EU regulations Disposal of Packaging and Appliance Packaging is recyclable. Packaging may consist of the following materials: - cardboard; - polyethylene film (PE);...
- Page 14 Fig. 1 Fig. 3 Fig. 3.1 Fig. 3.2 Fig. 3.3 Fig. 3.4 14_ installing your microwave oven FQ115T001_XEU-03869D_EN.indb 14 Fig. 2 Fig. 4 Fig. 5 14/06/2011 15:38:54...
- Page 15 Fig. 1 Slide the microwave oven partly into the recess. Lead the connection cable to the power source. Fig. 2 Slide the microwave oven completely into the recess. Fig. 3 Fig. 3.1 there are squared holes. Fig. 3.2 align hooks of DECO with squared holes. Fig.
-
Page 16: Oven Features
oven features OVEN FEATURES Top Heating Elements Level 5 Level 4 Oven Levels Level 3 Level 2 Level 1 Safety Door Lock Note • Shelf levels are numbered from the bottom up. • The levels 4 and 5 are mainly used for grill function. •... -
Page 17: Accessories
ACCESSORIES The following accessories are provided with your microwave oven. Ceramic Tray. (Useful for Microwave Mode) Grill Insert for Ceramic Tray. (Useful for Speed Menu and Grill Mode) Note Please refer to Cooking Guides provided throughout this booklet to determine appropriate accessory for your dishes. -
Page 18: Controls Panel
CONTROLS PANEL 2 3 4 5 1. OFF 2. OVEN MODE 3. SPEED MENU MODE 4. SPEED DEFROST MODE 5. MICROWAVE MODE 6. MODE SELECTOR 7. DISPLAY 8. STEAM CLEAN Using Pop Up Dials Note The MODE SELECTOR (6) and MULTI-FUNCTION SELECTOR (14) are pop up dials. -
Page 19: Before You Begin
before you begin SETTING THE CLOCK When connecting the power for the first time, please use the product after setting the time. When the appliance is first plugged in, the DISPLAY lights up. After three seconds, the Clock symbol and “12:00” blink on the DISPLAY. Press CLOCK . -
Page 20: Oven Use
oven use TYPES OF HEATING The following chart summarizes the various heating modes and settings available on your oven. Use the Cooking Guides in the pages that follow to determine the appropriate mode and setting for all your recipes. Oven Mode The following table represents the various oven modes and settings of your oven. -
Page 21: Microwave Mode
Speed Menu Mode Mode Speed Defrost Mode Mode Microwave Mode Mode FQ115T001_XEU-03869D_EN.indb 21 Description Choose from twelve pre-programmed speed menu settings to conveniently cook, roast or bake your favourite foods. Cooking time and power level are automatically set. Simply select the programme and weight to start cooking. -
Page 22: Using Oven Mode
USING OVEN MODE Five settings are available under this mode. Check Cooking Guides on pages 21-25 to determine appropriate setting. Setting Oven Mode Turn MODE SELECTOR Dial to oven mode position. Note The convection heater and grill heater switch on and off constantly to regulate the temperature. - Page 23 Press the START button. ► The TEMPERATURE indicator on display will be lit and the indicator will blink after the temperature is reached. Note 1) During cooking, COOK TIME and TEMPERATURE are available to change the setting. 2) In Oven Mode settings, the convection heater and top and bottom heating elements switch off and on throughout cooking to regulate the temperature.
-
Page 24: Cooking Guide
Dual Convection ( Food is heated by hot air from the left and right sides of the oven. This setting provides uniform heating and is ideal for baking. * Please ensure that glass baking dishes are suitable for 40-250 °C cooking temperatures. - Page 25 Convection + Top Heat ( Hot air and top heating element combine, making this setting ideal for crisping and browning. This setting is especially recommended for cooking meats. * Please ensure that glass baking dishes are suitable for 40-250 °C cooking temperatures.
-
Page 26: Conventional Heat
Conventional Heat ( Heat comes from top and bottom heating elements. This setting is suitable for baking and roasting. * Please ensure that glass baking dishes are suitable for 40-250 °C cooking temperatures. Cooking guide Use temperatures and times in this table as guidelines for baking. We recommend to preheat the oven with Conventional Heat mode. - Page 27 Grill ( ) Setting Food is heated by the top heating elements. * Please ensure that glass baking dishes are suitable for 40-250 °C cooking temperatures. Cooking guide Use temperatures and times in this table as guidelines for grilling. Set 220 °C grill temperature, preheat for 3 minutes. Food item Kebab spits Pork steaks...
- Page 28 Convection + Bottom Heat ( Hot air and the bottom heating element combine to heat food. This is a useful setting for crisping and browning. * Please ensure that glass baking dishes are suitable for 40-250 °C cooking temperatures. Cooking guide Use temperatures and times in this table as guidelines for baking.
-
Page 29: Setting Cook Time
SETTING COOK TIME Select the desired oven function and temperature. See page 35-36 for a guide to the power levels. Note : If there is no further entry on the control panel for 5 seconds, start key will blink. Turn MULTI-FUNCTION SELECTOR to set desired cook time. -
Page 30: Setting End Time
SETTING END TIME Select the desired oven function and temperature. Turn MULTI-FUNCTION SELECTOR to set desired hour and minute. (14:00). Example Desired time is 14:00. Press START to start the oven. The oven will start promptly. Note 1) The cooking time will count down in the time display. When the set time has elapsed, an audible signal sounds and the oven switches itself off. -
Page 31: Cooking Time Reservation Function
COOKING TIME RESERVATION FUNCTION Example : Current time : 12:00. Cook time : 2:00 if you wish to end cooking at 18:00. Select Oven Mode and desired function. Press END TIME. ► “14:00”, which cook time is added to current time, is displayed. ►... -
Page 32: Using Speed Menu Mode
USING SPEED MENU MODE Speed Menu Mode allows you to choose from twelve pre-programmed settings to conveniently cook, roast or bake your favourite foods. Cooking time and power level are automatically set. Simply select one of the twelve settings and set the weight to start cooking. -
Page 33: Guide To Auto Speed Menu Settings
Guide to Auto Speed Menu Settings The following table presents 12 Auto Programmes for Speed Cooking, Roasting and Baking. It contains its quantities, standing times and appropriate recommendations.These auto programmes contain special cook modes, which have been developed for your convenience. Food item Frozen pizza Frozen oven... - Page 34 Food item Baked potatoes Cake Muffins Important Most of Speed Menu Mode settings use microwave energy to heat food. Therefore guidelines for cookware and other microwave safety precautions must be strictly observed when using this mode. Warning When the appliance is operated in the combination mode, children should onlyuse the oven under adult supervision due to the temperatures generated.
-
Page 35: Using Speed Defrost Mode
USING SPEED DEFROST MODE Setting Speed Defrost Mode Choose from five pre-programmed microwave settings for defrosting. Defrosting time and power level are automatically set. Simply select the setting and weight to start defrosting. Open the door. Place the frozen food in the centre of the ceramic tray. Position is level 1. -
Page 36: Guide To Auto Speed Defrost Settings
Guide to Auto Speed Defrost Settings The following table presents the various Auto Defrost programmes, quantities, standing times and appropriate recommendations. These programmes use microwave energy only. Remove all packaging material before defrosting. Place meat, poultry and fish on the ceramic tray. Food Weight item... -
Page 37: How A Microwave Oven Works
HOW A MICROWAVE OVEN WORKS Microwaves are high-frequency electromagnetic waves; the energy released enables food to be cooked or reheated without changing either the form or the colour. You can use your microwave to: • Defrost • Cook Cooking Principle Important As the centre of the food is cooked by heat dissipation, cooking continues even when you have taken the food out of the oven. -
Page 38: Using Microwave Mode
USING MICROWAVE MODE Microwaves are high frequency electromagnetic waves. In microwave cooking, microwave energy penetrates food, attracted and absorbed by its water, fat and sugar content. The microwaves cause the molecules in the food to move rapidly. The rapid movement of these molecules creates friction and the resulting heat cooks the food. -
Page 39: Guide To Microwave Power Levels
Guide to Microwave Power Levels Power Level HIGH HIGH LOW MEDIUM HIGH MEDIUM MEDIUM LOW DEFROST Microwave Cookware Guide Cookware used for Microwave Mode must allow microwaves to pass through and penetrate food. Metals such as stainless steel, aluminum and copper reflect microwaves. - Page 40 Cookware Glassware • Oven-to-table ware • Fine glassware • Glass jars Metal • Dishes • Freezer bag twist ties Paper • Plates, cups, napkins and Kitchen paper • Recycled paper Plastic • Containers • Cling film • Freezer bags Wax or Grease-proof Paper Note “Arcing”...
-
Page 41: Microwave Cooking Guide
Microwave cooking guide General guidelines Food suitable for microwave cooking Many kinds of food are suitable for microwave cooking, including fresh or frozen vegetables, fruit, pasta, rice, grains, beans, fish, and meat. Sauces, custard, soups, steamed puddings, preserves, and chutneys can also be cooked in a microwave oven. - Page 42 Cooking guide for fresh vegetables Use a suitable glass Pyrex bowl with lid. Add 30-45 ml cold water (2-3 tbsp) for every 250 g unless another water quantity is recommended (see table). Cook covered for the minimum time (see table). Continue cooking to get the result you prefer.
- Page 43 Food Potatoes Turnip cabbage Cooking guide for rice and pasta Rice Use a large glass Pyrex bowl with lid. (Note that rice doubles in volume during cooking.) Cook covered. After cooking time is over, stir before letting stand. Add salt or herbs and butter. Note that rice may not have absorbed all water after the cooking time is finished.
- Page 44 Reheating Your microwave oven will reheat food in a fraction of the time a conventional oven takes. Arranging and Covering Avoid reheating large items such as joints of meat since they tend to overcook and dry out before the centre is piping hot. You will have more success reheating smaller pieces.
- Page 45 Reheating liquids Take special care when heating liquids. To prevent eruptive boiling and possible scalding, place a spoon or glass stick in the beverage. Stir during heating and always stir after heating. Allow a standing time of at least 20 seconds after the oven has been switched off to allow the temperature to even out.
- Page 46 Food Meat Minced beef Pork steaks Poultry Chicken pieces Whole chicken Fish Fish fillets Whole fish Fruit Berries Bread Bread rolls (each ca. 50 g) Toast/Sandwich 46_ oven use FQ115T001_XEU-03869D_EN.indb 46 Time Standing Portion (min) time (min) 250 g 15-30 500 g 10-12 250 g 500 g...
- Page 47 Quick & Easy Melting butter Put 50 g of butter into a small deep glass dish. Cover with plastic lid. Heat for 30-40 seconds using 900 W. Melting chocolate Put 100 g of chocolate into a small deep glass dish. Heat for 3-5 minutes using 450 W.
-
Page 48: Switching Off The Beeper
SWITCHING OFF THE BEEPER The oven beeps at the end of cooking, “End” blinks 4 times on the display. To switch beeper off, press STOP/ CANCEL ( ) and START ( button at the same time and hold for one second. 48_ oven use FQ115T001_XEU-03869D_EN.indb 48 To switch beeper back on, press... -
Page 49: Child Safety Lock
CHILD SAFETY LOCK The oven’s Child Safety Lock allows you to lock the control panel to protect the oven against unintended use. To lock oven Press STEAM CLEAN and CLOCK at the same time and hold for 3 seconds. To unlock oven Press STEAM CLEAN and CLOCK at the same time and hold for 3 seconds. -
Page 50: Cleaning And Care
cleaning and care USING THE STEAM CLEAN FEATURE The Steam Clean feature allows you to sanitize your oven in just 15 minutes. The STEAM CLEAN process takes three and a half minutes, and the standby time for the process is eleven and a half minutes. Turn MODE SELECTOR to “Off”... -
Page 51: Cleaning Your Microwave Oven
CLEANING YOUR MICROWAVE OVEN Clean your oven regularly to prevent grease and food particles from building up, especially on inside and outside surfaces, door and door seals. 1. Clean outside surfaces with a soft cloth and warm soapy water. Rinse and dry. 2. Remove any splashes or stains on inside surfaces with a soapy cloth. -
Page 52: Troubleshooting & Error Code
Repairs should only be made by a qualified service technician. If oven requires servicing, unplug the oven and contact the nearest Samsung Customer Service Center. When calling, please have the following information ready: • The model number and serial number (Can be found at rear of the oven.) • Warranty details... -
Page 53: Troubleshooting
TROUBLESHOOTING If you have problems with your oven, try the solutions suggested below. They may save you the time and inconvenience of an unnecessary service call. Food remains uncooked. • Ensure timer has been set correctly and Start button pressed. •... -
Page 54: Error Code
ERROR CODE Error Code TEMP SENSOR OPEN In case the value of a temperature sensor is more than 250 °C during operation / cancellation. TEMP SENSOR SHORT In case the value of a temperature sensor is less than 5 °C during operation / cancellation. -
Page 55: Installation & Wiring Instruction
Installation & Wiring Instruction IMPORTANT NOTE : The mains lead on this equipment is supplied with a mouldedplug incorporating a fuse.The value of the fuse is indicated on the pin face of the plug and, if it requires replacing, a fuse approved to BS1363 of the same rating must be used. Never use the plug with the fuse cover omitted if the cover is detachable. -
Page 56: Cooking Instructions On Food Packaging
Important Consult a qualified electrician or service technician if in doubt about any of these instructions.The manufacturer of this oven will not accept any liability for damage to persons or material for non observance of these requirements.There are no user+serviceable parts inside the oven and if the mains lead of this appliance is damaged, it must only be replaced by qualified service personnel approved by the manufac-turer because special tools are required. -
Page 57: Cooking Instruction
For example : If the heating instructions are 3 minutes on HIGH for a D category oven, then you will need to set your timer for less than 3 minutes on HIGH for the FQ115T001 (E category). Important Always remember that cooking instructions are intended only as a guide. - Page 58 TECHNICAL SPECIFICATIONS Samsung strives to improve its products at all times. Both the design specifications and these user instructions are thus subject to change without notice. By right of the common regulation 2/1984 (III.10) BKM-IpM. we as distributors testify, that the FQ115T ovens of Samsung comply with the undermentioned technological parameters.
- Page 59 note FQ115T001_XEU-03869D_EN.indb 59 14/06/2011 15:39:10...
- Page 60 PORTUGAL SPAIN SWEDEN EIRE SWITZERLAND FQ115T001_XEU-03869D_EN.indb 60 0810-SAMSUNG (7267864,€ 0.07/Min) 02-201-24-18 70-70-19-70 030-6227 515 01-48-63-00-00 01805-SAMSUNG (726-7864 € 0,14/Min) 800-SAMSUNG (726-7864) 261-03-710 0900-SAMSUNG (0900-7267864) (€ 0.10/Min) 815-56-480 80820-SAMSUNG (726-7864) 902-1-SAMSUNG (902 172 678) 0771-726-7864 (SAMSUNG) 0330 SAMSUNG (7267864) 0818-717100 0848-SAMSUNG (7267864, CHF0.08/Min) www.samsung.com...
Need help?
Do you have a question about the FQ115T001 and is the answer not in the manual?
Questions and answers