Table of Contents
Advertisement
Quick Links
#YourGearUpgraded
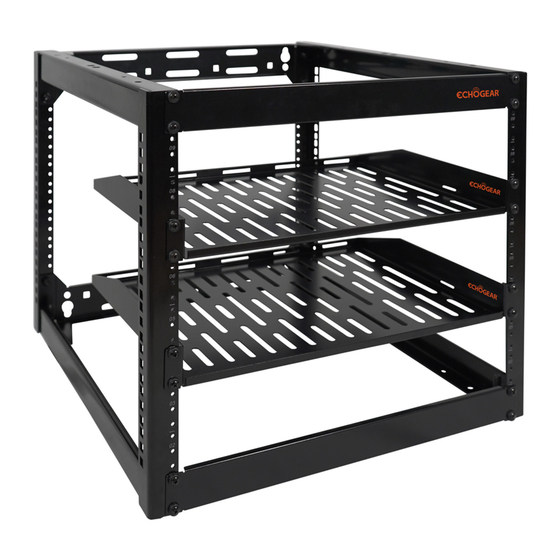
EGAV-PROF10
AV Rack System
INSTRUCTION MANUAL
Before starting assembly, verify all parts are included and undamaged. If any parts are missing or damaged, do not return the
item to Amazon; contact the ECHOGEAR Pros. Never use damaged parts!
Yea, the boring stuff ...
CAUTION:
Avoid potential personal injuries and property damage!
°
Please read through these instructions completely to be sure you're comfortable with this easy install process.
°
Do not use this product for any purpose not explicitly specified by manufacturer.
°
Manufacturer is not responsible for damage or injury caused by incorrect assembly or use.
°
If you do not understand these instructions or have doubts about the safety of the installation,
assembly or use of this product, contact Customer Service.
STACKED INSTALLS
CAUTION:
To prevent tipping,
°
Do not stack more than two (2) rack assemblies.
°
If stacking racks of different weight ratings, the rack
with the highest rating needs to go on the bottom.
°
Load the rack from the bottom up.
°
Load the heaviest item in the rack first.
°
Load 50% of the total weight in the lower 1/3 of the rack.
Confuzzled?
but read it, so you don't jack things up!
Rack Weight Limit:
DO NOT EXCEED
400 lbs.
(181.4 kg)
includes any components
or accessories
Contact the ECHOGEAR Pros:
(North America)
P: 1-855-428-2490
helpmehelpyou@ECHOGEAR.com
ECHOGEAR.com
WALL MOUNTED INSTALLS
CAUTION:
Avoid potential personal injuries and
property damage!
°
The wall must be capable of supporting five
times the weight of the rack and components or
accessories combined.
°
DO NOT install into drywall alone.
(Europe)
P: +44 (0) 800 0568188
helpme@ECHOGEAR.com
ECHOGEAR.com
Rack Weight Limit:
DO NOT EXCEED
150 lbs.
(68.0 kg)
includes any components
or accessories
Advertisement
Table of Contents

Subscribe to Our Youtube Channel
Related Manuals for Echogear EGAV-PROF10


Summary of Contents for Echogear EGAV-PROF10
- Page 1 Before starting assembly, verify all parts are included and undamaged. If any parts are missing or damaged, do not return the item to Amazon; contact the ECHOGEAR Pros. Never use damaged parts! but read it, so you don’t jack things up! Yea, the boring stuff ...
- Page 2 Verify Your Wall Construction Solid Concrete/ Wood studs? CAUTION: Concrete Block? DO NOT install UUUUHHH?!? into drywall alone Unsure? Perfect! Kit# Contact The Echogear Pros Good to Go EGHWLB at 1-855-428-2490 or Required www.echogear.com (Not Included) Grab Your Tools Stacked Installation 1/2 in.
- Page 3 SHELF BACKSTOP U WASHER WASHER qty. 4 qty. 2 qty. 2 LAG SCREW qty. 4 FOR CONCRETE INSTALLATIONS HOOK AND LOOP STRAP Call the Echogear Pros qty. 2 at 1-855-428-2490 for CONCRETE ANCHOR concrete Kit# EGHWLB. (not included) qty. 4...
- Page 4 Rack 'Em Up! 1/2 in. (13mm) 1/2 in. (13mm) Repeat STEP 1B...
- Page 5 1/2 in. (13mm) Repeat STEP 1B Repeat STEP 1B...
-
Page 6: Installations
Stacked Installs (second rack sold separately) Caution: Always stack the bigger/heavier one on the bottom. How Do You Want To Mount This Thing? WALL-MOUNT Installations: Wood Stud Installs — go to PAGE 7 Concrete Installs — go to PAGE 9... - Page 7 WALL-MOUNT Wood Stud Install CAUTION: Avoid potential personal injuries and property damage! • Drywall covering the wall must not exceed 5/8 in. (16 mm). • Minimum wood stud size: Nominal 2 x 4 in. (51 x 102 mm). Actual 1 ½ x 3 ½ in. (38 x 89 mm). Find a Stud Mark TOP Two holes Use a stud...
- Page 8 Hang Tighten TOP Two Lags 1/2 in. (13mm) Drill Lower Holes Secure Lags 3 ½ in. (9 cm) 1/2 in. (13mm) 7/32 in. (5.5 mm)
- Page 9 WALL-MOUNT Solid Concrete and Concrete Block Install Mark TOP Two holes Drill TOP Two Holes 3 ¾ in. (10 cm) 3/8 in. (10 mm) Partially Install Lag Screws Insert Anchors ≈ 1/2 in. (13 mm) 1/2 in. (13mm) FLUSH...
- Page 10 Hang The Rack Mark Lower Holes Drill Lower Holes Remove The Rack 3 ¾ in. (10 cm) 3/8 in. (10 mm)
- Page 11 Hang ... Again Insert Anchors FLUSH Secure Lower Lag Screws Tighten TOP Two Lag Screws 1/2 in. 1/2 in. (13mm) (13mm)
-
Page 12: Shelf Installation
SHELF INSTALLATION Got more Stuff? Buy Extra Shelves! EGAV-PRAS1U is available at ECHOGEAR.com or on Amazon. TIP: After at least 3 shelves or rack mounted components are installed, the front braces [04] may be relocated or removed for additional rack space. -
Page 13: Consignes De Sécurité Importantes
CONSIGNES DE SÉCURITÉ IMPORTANTES Français – CONSERVEZ CES INSTRUCTIONS – VEUILLEZ LIRE ATTENTIVEMENT LE MANUEL AVANT D’UTILISER CE PRODUIT Caractéristiques techniques Voir à la page 2 Capacité de charge des étagères autostable ou empilées - NE PAS DÉPASSER : 181,4 kg (400 lb) incluant tous les accessoires. Ù... -
Page 14: Especificaciones
INSTRUCCIONES DE SEGURIDAD IMPORTANTES. Español CONSÉRVELAS. LEA TODO EL MANUAL ANTES DE UTILIZAR ESTE PRODUCTO. Especificaciones Ver página 2 Peso máximo solo o apilado —NO LO EXCEDA—: 181,4 kg (400 libras), incluidos los componentes o accesorios. Ù Peso máximo instalado en la pared —NO LO EXCEDA—: 68,0 kg (150 libras), incluidos los componentes o accesorios. Ù... - Page 15 Caster Kit 1U Shelf 15 " Deep EGAV-PRACK model: model: EGAV-PRAS1U available at ECHOGEAR.com available at ECHOGEAR.com or on Amazon. or on Amazon. “Wanna show off your hard work? Share a picture of your completed project with #YourGearUpgraded. Who knows, it might not be as bad as you thought”...
- Page 16 Legrand assumes no responsibility for accuracy, completeness or sufficiency of the information contained in this document. ©2020 Legrand AV Inc. All Rights Reserved. ECHOGEAR is a Legrand AV Inc. brand and a registered trademark owned by Legrand. Made in China.
Need help?
Do you have a question about the EGAV-PROF10 and is the answer not in the manual?
Questions and answers