Table of Contents
Advertisement
Quick Links
Advertisement
Table of Contents

Subscribe to Our Youtube Channel
Related Manuals for Kleenmaid cooking GCT6012


Summary of Contents for Kleenmaid cooking GCT6012
- Page 1 cooking collection Instructions for use and warranty details GCT6012...
- Page 2 Once installation is complete, please read this instruction manual carefully and get to know the controls and the features of your new Kleenmaid appliance. These simple instructions will enable you to achieve excellent results from the very first time you use it.
-
Page 3: Table Of Contents
contents Preface Safety Warning Safety Instructions Installation Child and People Safety During Use Cleaning and Service Environmental Information Instructions for use and maintenance Description of the appliance How to Use the appliance Safety and Energy saving advice Cleaning and Maintenance Technical instructions Using instructions Positioning... -
Page 4: Safety Instructions
Safety Instructions Please take the time to read this User Manual before installing or using the appliance. This instruction booklet must be kept with the appliance for any future reference. If the appliance is sold or transferred to another person,ensure the booklet is passed on to the new user. -
Page 5: Installation
Installation Warning This appliance shall be installed in Prior to installation,ensure that the accordance with regulations in force gas and electrical supply complies and only used in a well ventilated with the type stated on the rating space. plate. 220V-240V DO NOT USE THIS APPLIANCE The gas pipe and electrical cable AS A SPACE HEATER. -
Page 6: Child And People Safety
Child and People Safety Warning Do not allow children to play near or with the appliance. The appliance gets hot when it is in use. Children should be kept away until it has cooled. Caution ■ This appliance is designed to be operated by adults. ■... -
Page 7: During Use
During Use Warning Burner ■ Only use the appliance for preparing panel is not designed to operate from food. an external timer or separate remote control system. The use of a gas cooking appliance ■ Do not use this appliance if it comes results in the production of heat and in contact with water. - Page 8 During Use ■ Do not use or store flammable materials ■ Perishable food, plastic items and in a storage drawer near this appliance. aerosols may be affected by heat and should not stored above or below the appliance. Danger of fire: Do not store items on the cooking surface...
-
Page 9: Cleaning And Service
Cleaning and Service Warning ■ Never use abrasive or caustic cleaning ■ This appliance should only be repaired agents. or serviced by an authorised Service Engineer and only genuine approved spare parts should be used. Caution ■ Before attempting to clean the appliance, it should be disconnected from the mains and cooled. -
Page 10: Description Of The Appliance
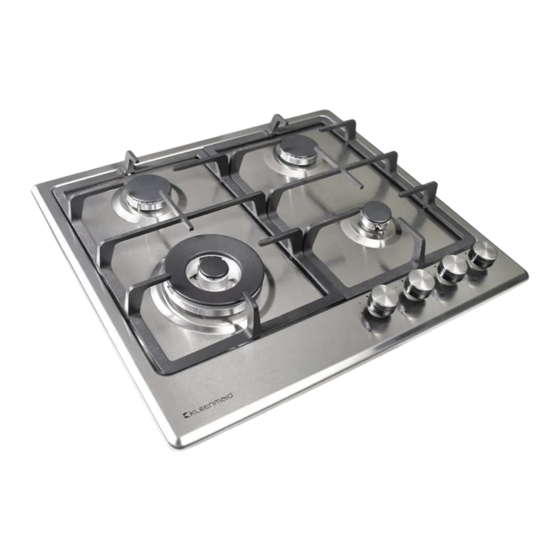
Description of the appliance Ignition Dimension Electric Burner Top Plate ΣQn supply (W*D*H) device Connection Feature Continuous 220-240Vac, Triple-Crown(1) G1/2 thread Stainless 590*510*90 Ignition 50Hz-60Hz, Semi-rapid(2), 8.3kW Steel Type 0.6W Auxiliary (1) -
Page 11: How To Use The Appliance
Description of the appliance ccessories Sponge (4) Bracket (4) Voltage regulator valve (1) Screw (4) Injector Pressure joint(1) Instruction Elbow (1) Auxiliary pan support (1) Manual (1) How to Use the appliance The following symbols will appear on the control panel, next to each control handle : Black circle: gas off Large flame: maximum setting Small flame: minimum setting... - Page 12 How to Use the appliance Automatic ignition with flame failure safety device The appliance is fitted with a flame failure safety device on each burner, which is designed to stop the flow of gas to the burner head in the event of the flame going out. To ignite a burner: o Press in the control knob of the burner that you wish to light and turn it anti- clockwise to the maximum position.
-
Page 13: Safety And Energy Saving Advice
Safety and Energy saving advice - The diameter of the bottom of the pan should correspond to that of the burner. PANS BURNERS max. min. Triple-Crown 200mm 240mm of the Rapid 200mm 240mm burner. Semi-Rapid 160mm 180mm Auxiliary 120mm 160mm Do not use small diameter cookware on large Always use cookware that is burners. -
Page 14: Cleaning And Maintenance
Cleaning and Maintenance completely cool. Metal Brush Nylon Brush Soft cloth Acidic/Alkali Edible Oil Detergent Neutral Detergent Abrasive Thinner/Benzene ■ Take off the Pan support. ■ Clean these and the control handles with a damp cloth, washing up liquid and warm water. - Page 15 Cleaning and Maintenance ■ Remove the burner lids and Flame Spreaders by pulling them upwards and away from the top plate. ■ Soak them in hot water and a little detergent or washing up liquid. ■ After cleaning and washing them, wipe and dry them carefully. Make sure that the flame holes are clean and completely dry.
-
Page 16: Using Instructions
Using instructions Warnings be installed and connected in accordance with current appliance installation Grease cranes produced at the factory are designed to last the life of the hob. This appliance is not suitable for installation with aftermarket lids or covers. -
Page 17: Positioning
Positioning CLEARANCES REQUIRED WHEN FITTING THE HOB WITH A RANGEHOOD ABOVE 650mm 400mm 400mm FO 0813 This appliance is to be built into a kitchen unit or 600mm worktop, providing the following minimum distances are allowed; The edges of the hob must be a minimum distance of 60 mm from a side or rear wall. -
Page 18: Installing The Appliance
Installing the appliance Remove the pan supports, the burner lid and flame spreader and carefully turn the appliance upside down and place it on a cushioned mat. Take care that the Ignition devices and flame supervision devices are not damaged in this operation. -
Page 19: Gas Connection
Gas Connection Turn off power for safety and appliance protection. Close middle valve to prevent gas leakage. Keep away from inflammable materials around appliance. Before work, put on gloves. CAUTION Cool off the appliance for a while right after using appliance for your safety because you can get burned by high temperature from the appliances. - Page 20 Gas Connection Statutory requirements This installation must conform with the following: ■ Manufacturer’s Installation instructions ■ Local Gas Fitting Regulations ■ Municipal Building Codes ■ Refer to AS/NZS 5601.1 for Gas Installations ■ AS/NZS 3000 - Wiring Rules ■ Local Electrical Regulations ■...
- Page 21 Gas Connection ■ Flexible Hose: If installing with a hose assembly, it must comply with AS/NZS 1869,10mmID,class B or D, no more than 1m long and installed in accordance with AS/NZS 5601.1. ■ Ensure that the hose does not contact the hot surfaces of the hotplate, oven, dishwasher or any other appliance that may be installed underneath or next to the hotplate.
-
Page 22: Gas Specification
Gas Specification Heat input and orifice size marked (mm) Gas type & pressure Auxiliary Semi-rapid Wok burner Rapid burner 6.3MJ/h 3.6MJ/h 13.68MJ/h ULPG 1.04 0.72 0.53 2.75kPa Natural Gas 1.72 1.15 0.85 1.0kPa... -
Page 23: Electrical Connection
Electrical Connection ■ This appliance must be earthed. ■ This appliance is designed to be connected to a 220-240V, 50Hz-60Hz AC electricity supply. ■ The wires in the mains lead are coloured in accordance with the following code; - Green/yellow = Earth - Blue = Neutral - Brown... -
Page 24: Gas Adjustment
Gas adjustment Change the injector of the burners. Remove the pan support, Burner lid and Flame spreader. Unscrew the injector using a 7mm box spanner and replace it with the stipulated injector for new gas supply. Carefully reassemble all components. After injectors are replaced, it is advisable to tighten them firmly in place. -
Page 25: Trouble Shooting
Trouble shooting Repairs should be performed by a licensed technician only. Improper repair may result in considerable danger to you and others. ■ However, some minor problems can be resolved as follows : Probable cause Solution Problem No Spark. Check the electricity supply. Not ignited The burner lid is badly assembled. - Page 26 The benefits given to you under this Kleenmaid Warranty are in addition to other rights and remedies to which you may be entitled under the Australian Consumer Law in relation to the Product to which this Kleenmaid Warranty relates. Subject to the conditions below, the Product is warranted by Kleenmaid and/or its agents to be free from defects in materials and workmanship for the Warranty Period for normal Domestic Use.
- Page 27 13. Kleenmaid accepts no liability for items that are lost, damaged, or stolen as a result of freight, transport or storage. If you are required to transport the Product to an authorised service centre, you must ensure that it is securely packed and insured.
- Page 28 Other products available in the Kleenmaid range of appliances Washing machines Clothes dryers Dishwashers Ovens Cooktops Steam ovens Microwave ovens Built in espresso coffee machines Rangehoods Freestanding ovens Refrigerators & Freezers Beverage Serving Cabinets Water Dispensers Vacuum Cleaners Compass Capital Services Pty Limited...
Need help?
Do you have a question about the cooking GCT6012 and is the answer not in the manual?
Questions and answers