Table of Contents
Advertisement
Quick Links
Advertisement
Table of Contents

Related Manuals for CanadianSolar CSI 23KTL-CT/US-480


Summary of Contents for CanadianSolar CSI 23KTL-CT/US-480
- Page 1 THREE-PHASE STRING INVERTER INSTALLATION MANUAL - 23-28KW PRELIMINARY...
-
Page 2: Table Of Contents
Table of Contents Before You Start ............................1 Chapter 1 IMPORTANT SAFETY INSTRUCTIONS ................2 Chapter 2 Overview ........................5 2.1 Inverter for grid-tied PV systems .......................5 2.2 Product features ..........................5 2.3 Product protection functions ......................6 2.4 Circuit structure design ........................6 2.5 Appearance Description ........................7 Chapter 3 Installation ........................8 3.1 Recommendations before installation....................9 3.2 Mechanical installation ........................ - Page 3 5.4.3 History ..............................52 5.4.4 System configuration ........................53 5.4.5 Power dispatch ..........................55 5.4.6 System protection parameters setup ....................55 5.4.7 System control parameters ......................56 5.4.8 Arcing fault current interruption ....................62 Chapter 6 Operation ........................64 6.1 Start-up ..............................64 6.2 Shut-down ............................64 6.3 Operation mode ..........................64 6.4 Grid-tied power generation ........................66 Chapter 7 Maintenance and De-installation ................67 7.1 Fault shut down and troubleshooting ....................67...
-
Page 4: Before You Start
This user manual is applicable for the following 2 models: CSI 23KTL-CT/US-480 and CSI 28KTL-CT/US-480. Instructions inside this user manual will help you solve most installation and operation difficulties. Contact your local supplier if the problem still exists. -
Page 5: Chapter 1 Important Safety Instructions
Chapter 1 IMPORTANT SAFETY INSTRUCTIONS (SAVE THESE INSTRUCTIONS) Please read this user manual carefully before product installation. Canadian Solar reserves the right to refuse warranty claims for equipment damage if the user fails to install the equipment according to the instructions in this manual. - Page 6 MARKINGS ON THE PRODUCT HOT SURFACE: The equipment is designed to meet international safety standards, but surfaces can become hot during operation. Do not touch the heat sink or peripheral surfaces during or shortly after operation. EARTH GROUND: This symbol marks the location of grounding terminal, which must be securely connected to the earth through the PE (protective earthing) cable to ensure operational safety.
- Page 7 CAUTION: CSI 23/28KTL-CT series inverter is approx 55kg (=122 pounds). Please ensure the mounting is properly installed before hanging the inverter on the bracket. CSI 23/28KTL-CT series inverter has the Arc Fault Detection feauture in the disabled mode by default. Please ensure that this setting meets local code requirements.
-
Page 8: Chapter 2 Overview
Chapter 2 Overview 2.1 Inverter for grid-tied PV systems CSI 23/28KTL-CT/US-480 series inverter is suitable for use with commercial and large scale PV grid-tied systems. The system is generally made up of PV modules, DC power distribution equipment, PV inverter and AC power distribution equipment (Figure 2-1). -
Page 9: Product Protection Functions
2.3 Product protection functions ➢ Polarity reverse protection of DC input ➢ Short circuit protection ➢ DC input insulation against ground monitoring ➢ AC output voltage and frequency monitoring ➢ Integrated Arc Fault Detection and Interruption* ➢ Leakage current against ground monitoring ➢... -
Page 10: Appearance Description
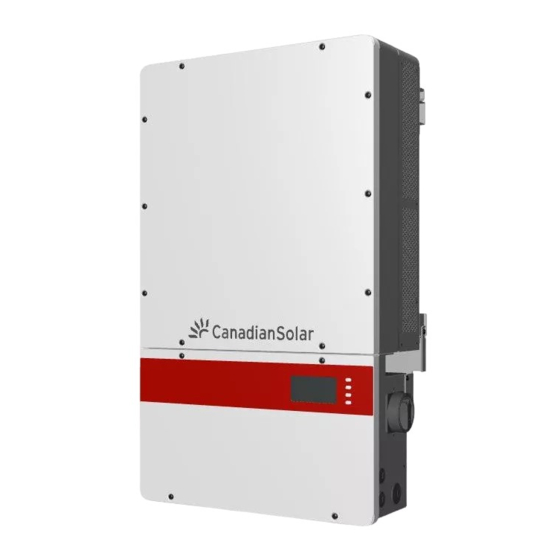
2.5 Appearance Description Figure 2-3 Appearance sketch of CSI 23/28KTL-CT series inverter Main items of the inverter: 1) Main housing of the inverter 2) Wiring box of the inverter 3) Mounting bracket 4) External cooling fans 5) LED indication lights 6) LCD display 7) Key buttons 8) DC switch: DC power on/off... -
Page 11: Chapter 3 Installation
Chapter 3 Installation Below is the installation procedure for the inverter. Please read carefully and install the product step-by-step. Before installation, please check that the following items are included in the package: Table 3-1 Main items Item Q’ty Note Main housing of the PV inverter Wiring box of the PV inverter... -
Page 12: Recommendations Before Installation
cont’d. from previous page Item Q’ty Note M5 flange nut For internal ground stud connection; 1 spare part Lifting eye nut M10 For lifting the main housing OT type terminal For ground connection Pre-insulated end For AC output cables, 1 spare part ferrule for AC side (10) Pre-insulated end... -
Page 13: Mechanical Installation
3.2 Mechanical installation 1) Dimensions Figure 3-1 Dimensions of CSI 23/28KTL-CT series inverter 2) Installation method (see Figure 3-2): Make sure that the mounting structure (wall, rack, etc.) is suitable to support the inverter weight. Follow the mounting guidelines: (a) If the location permits, install the inverter vertically b) If the inverter cannot be mounted vertically, it may be tilted backward by no lower than 15 degrees from horizontal (c) Do NOT mount the inverter leaning forward... - Page 14 Figure 3-2 Mount the inverter correctly NOTICE: When the inverter is mounted backward by ≥ 15° outdoor, shield cover is recommended to be installed above the inverter to avoid direct sunlight. 3) Installation space requirement (see Figure 3-3): The distances between the inverters or the surrounding objects should meet the following conditions:...
- Page 15 NOTICE: The spacing between two adjacently mounted inverters should be ≥500mm (19.7 inches). Ensure that the air space around the inverter is well ventilated. Figure 3-3 Inverter wall mounting dimensions NOTICE: The installation clearance between two inverters needs to be increased when the ambient temperature is higher than 45°...
- Page 16 INSTRUCTION: If the inverter is tilted backward by no lower than 15° from horizontal, the bottom clearance distance can be reduced according to specific conditions Figure 3-4 Inverter pillar mounting dimensions INSTRUCTION: If the inverter is installed in open air on metallic brackets (instead of solid wall), the top clearance distance can be reduced to as minimum as 100mm (3.94in.)
- Page 17 4) Mount the inverter onto the bracket (1) Mark the 8 holes on the bearing surface for mounting the bracket as shown in Figure 3-5: Figure 3-5 Dimensions of holes on the bearing surface (2) Drill holes at hte marked positions with a 10mm (0.4in.) drill and put the M8 expansion tubes① into the holes;...
- Page 18 Figure 3-6 Secure the mounting bracket (3) Hang the inverter onto the mounting bracket as shown in Figure 3-7 and Figure 3-8: Lift mounting: Take out the lifting eye nut M10 (2pcs) from the accessory kit, and screw them on the bolts at the top of the inverter.
- Page 19 Figure 3-7 Mount the main housing on the bracket by lifting Figure 3-8 Position of grab handle (4) Install the wiring box ① Remove the cover plate at the bottom of the main housing. (see Figure 3-9) Tool: No. 2 Phillips head screwdriver...
- Page 20 Figure 3-9 Cover plate of the main housing ② Remove the cover board at the top of the wiring box (see Figure 3-10) Figure 3-10 Cover board of the wiring box Save the cover board ad screws, and fix the board on the left side of the wiring box after the wiring box is attached to the inverter housing (see step 6, Figure 3-13) Tool: No.
- Page 21 ③ Insert the wiring box to the main housing, and use M6x12 screws (4 pcs) to attach the wiring box to the inverter housing. (see Figure 3-11) Tool: No. 10 Wrench, torque value of 2.8N.m Figure 3-11 Installation of the wiring box CAUTION: The total weight of the CSI 23/28KTL-CT series inverter is about 55kg (=122 pounds).
- Page 22 Figure 3-12 Fix the main housing and wiring box on the bracket (6) Attach the cover board shown in Figure 3-10 to the left side of the wiring box. (see Figure 3-13) Tool: No. 2 Phillips head screwdriver, torque value of 1.2N.m Figure 3-13 Attach the cover board to the left side of the wiring box...
- Page 23 (7) Optional - Install an anti-theft padlock when the installation is complete. The anti-theft padlock is used to prevent the inverter from being stolen when the equipment is installed outdoors. You can lock the inverter on the bracket, as shown in Figure 3-14: Figure 3-14 Location of the anti-theft padlock The anti-theft padlock should meet the requiremen of the dimensions shown in Figure 3-15: Recommended lock size:...
- Page 24 Removing/Replacing the wire box cover: (1) Use a 3mm (0.12in.) Hex screwdriver to remove the 4 screws on the wiring box and take off the cover. (See Figure 3-16(a)). Figure 3-16(a) - Take off the cover of the wiring box (2) To replace the cover, use a 3mm (0.12in.) Hex screwdriver to replace the 4 screws on the cover.
-
Page 25: Electrical Installation
3.3 Electrical Installation The connection interface of CSI 23/28KTL-CT series inverter: BYPASS INPUT TERMINAL DC SPD AC SPD Figure 3-17 External connection ports... - Page 26 Figure 3-18 Internal connection points ➢ Knockout holes for DC input cable, 1-1/4” or 1” ➢ Knockout hole for AC output cable, 1-1/4” or 1” ➢ Knockout hole 1/2inch & 3/4inch, for comm. cable ➢ Knockout hole 1/2inch & 3/4inch, for comm. cable, reserved ➢...
-
Page 27: Dc Connection
3.3.1 DC connection 1) Working mode CSI 23/28KTL-CT series inverter has two PV input sections: DC Input-1 and DC Input-2. These two sections can work under “Parallel mode” or “Independent mode.” (see Figure 3-19) Under Parallel mode, the two PV input sections share one MPP Tracker; Under Independent mode, each PV input section works with one MPP Tracker. - Page 28 5. Reinstall the protection cover (see Figure 3-20c) Figure 3-20(a) Jumper busbar Figure 3-20(b)
- Page 29 THE UP HOLES Figure 3-20(c) Figure 3-21 Location of the PV connection mode selector switch...
- Page 30 Selector switch for 1––independent mode PV connection mode 2––parallel mode S401 S401 2) DC fuse configuration CSI 23/28KTL-CT inverters are equipped with standard 15A(23/287kW Inverter) DC fuses. Customers must verify that the appropriate fuses are used depending on the actual configuration on PV strings. 1) Each independent string of DC input from the PV strings needs fuse protection.
- Page 31 cont’d. from previous page 1 strings Inverter Inverter...
- Page 32 Inverter 12.5A 14.5A 16~6AWG 16~6AWG...
- Page 33 5 Strings 11.6A 16~6AWG 16~6AWG 6 Strings...
- Page 34 8.4A 9.7A 16~6AWG 16~6AWG 7.2A 8.3A 16~6AWG 16~6AWG...
- Page 35 7.3A 6.3A 16~6AWG 16~6AWG Note 1: The temperature rating of the input wirings should be no less than 90°C (194°F). Note 2: The recommended fuse types are configured according to the condition that the input strings are the same. (d) Check the polarity (Figure 3-22) before plugging the DC connectors with the cables of PV strings according to the following steps: i.
-
Page 36: Ac And Ground Connection
(e) Knock out the holes of the DC side and plug the suitable conduits of 1-1/4 or 1 inch through the holes. Then put the cables through the conduits inside the wiring box. (f) The DC cables are recommended to be pre-insulated to ensure the cables are well connected. Crimp the DC cables with the attached pre-insulated end ferrule (16Pcs) by using the crimping pliers. - Page 37 Figure 3-26(a) AC output and ground cable connection...
- Page 38 Figure 3-26(b) AC output and ground cable connection (1)The AC cables are recommended to be pre-insulated to ensure the cables are well connected. Connect the AC (L1, L2, L3, N) cables to the terminal block and the ground cable to the grounding bar. (see the 1st graph in Figure 3-26) Set up the cables referring to Figure 3-27.
- Page 39 (2) Connect the AC (L1, L2, L3, N) cables to the terminal block and use the OT type terminal to connect the ground cable to the internal grounding stud inside the wiring box. (See the 2nd graph in Figure 3-26). Set up the cables referring to Figure 3-28.
- Page 40 4) When the output of the inverter is connected to the grid, an AC circuit breaker is recommended to be installed to safely disconnect the inverter from the grid when overcurrent happens. Either 3 pole or 4 pole AC circuit breaker should be selected as per the following specifications: Table 3-9 Specification of AC breaker selection Inverter AC breaker rated current (A)
-
Page 41: Communication Connection
3.3.3 Communication connection CSI 23/28KTL-CT series inverter supports industry standard Modbus RS485 communication. 1. Communication board description Partition plate Figure 3-30 Communication board 2. Connectors and communication cards Table 3-10 Communication connection interfaces Item Picture Configuration description ① Dry contact Please see the section after the table for detailed communication information... - Page 42 120� terminal resistor of the RS485 communication S402 ⑦ Selector switch for 1–––––––––Independent mode setting the 2–––––––––Parallel mode connection mode S401...
- Page 43 ① Dry Contact communication: The inverter features an alarm function that opens or closes a dry contact on the communication board. (Available both as contact normally open - N.O. - and as contact normally closed - N.C.), as shown below: Figure 3-31 Dry contact communication port The voltage and current rating of the dry contact shown in the following table must not be exceeded in any case.
- Page 44 Connection Plan: You can connect an LED or other loads to indicate the operational status of the inverter, as shown in the following figure: (or L N) (or L fault In operation In operation Figure 3-32 Schematic diagram of dry contact communication If you connect the contact port to the power distribution grid, you must install an individual miniature circuit-breaker between the dry contact and the power distribution grid.
- Page 45 Table 3-13 Cable set-up Position Description Value Cable type Double-layer insulated cable Outer diameter 4.5 mm~ 6 mm Cross-section area of conductor 0.2 mm2 ~ 0.75 mm2 Length of stripped outer wire skin Maximum 15mm Length of stripped inner wire skin Maximum 7mm d) Connect wires to the terminal.
- Page 46 ② RS485 communication cable connection: Choose the RS485 communication cables according to the following table: Table 3-14 Cable specifications Cable RS485 UTP CAT-5e or 3x#22~18AWG communication cable communication (eg. Belden 3106A) Figure 3-36 RS485 connection 1. Cable connection of RS485 communication: RJ45 connector 2.
- Page 47 Color Function White orange 485+ Orange N.C. White green 485- Blue N.C. White blue N.C. Green N.C. White brown Brown N.C. Figure 3-37 Crimp RJ45 connector on the RS485 and Ethernet cable 1-------NC 2-------NC 3 (Red)-----RS485+ 4 (Blue)----RS485- 5 (Green)-----COM (1) RS485 communication of single inverter (2) RS485 network communication Figure 3-38 Fasten the cable terminal on the RS485 5 pin connector...
- Page 48 RS485 network connection: When the inverters are monitored via the RS485 communication, the unique RS485 address for each inverter can be set through the LCD interface. Up to 31 inverters can be connected together in the RS485 communication network. The Daisy-chain topology is recommended for the RS485 network connection, as shown in Figure 3-39.
-
Page 49: Chapter 4 Commissioning
Chapter 4 Commissioning WARNING: Please follow the guidelines below before on-grid operation to eliminate possible dangers and ensure safety. 4.1 Commissioning Checklist 4.1.1 Mechanical installation Make sure that the mounting bracket is secure and all the screws have been tightened to the specified torque values. - Page 50 INSTRUCTION: Please check with your local electricity supply company before selecting the grid standard. If the inverter is operated with a wrong grid standard, the electricity supply company may cancel the operation license. Putting the inverter into operation before the overall system complies with the national rules and safety regulation of the application is not permitted.
-
Page 51: Chapter 5 User Interface
Chapter 5 User Interface 5.1 Description of LCD panel The inverter’s LCD panel mainly consists of LCD screen, LED indicator lights, buzzer and 4 keys, as shown in Figure 5-1. Figure 5-1 LCD panel Interpretation for the indicator lights is shown in Table 5-1 and function of the keys is shown in Table 5-2. -
Page 52: Operation State
Light Indicates a fault FAULT Fault Slow Indicates alarm (light up 0.5s, light off 2s) status flash indication Fast Protective action (light up 0.5s, light off 0.5s) light flash Light No fault or power supply not working Table 5-2 Definition of the keys Description Definition of function Escape key... - Page 53 (2) Indication of inverter operation mode: Sys. Checking >>>>>>>>>>> Figure 5-3 Inverter system check ongoing Standby >>>>>>>>>>> Figure 5-4 Inverter system in standby mode Figure 5-5 Default display interface for normal operation GridV.OutLim Figure 5-6 Fault indication interface LCD screen will display different mode interfaces based on the operation modes of the inverter. There are four operation modes: startup system check mode (as shown in Figure 5-3), standby mode (as shown in Figure 5-4), normal operation mode (as shown in Figure 5-5, the switching time between (a) and (b) is 5 seconds), and...
-
Page 54: Menu Functions
5.4 Menu functions LCD screen displays “default indication interface” when the inverter is in operation mode. Press ESC in this interface to escape the default interface and enter the main operation interface. The main operation interface is shown in Figure 5-7. 1 OP.Info →... -
Page 55: Alarm
Remarks: The LCD display is shown as follows when PV parallel mode is selected. 360.0V 14.7A Figure 5-9 Operation information indication (PV parallel mode) 5.4.2 Alarm As described before, if a fault occurs during normal operation of the inverter, corresponding fault messages will be indicated in “2 Alarm”... -
Page 56: System Configuration
Figure 5-11 History menu and submenu 5.4.4 System configuration Move the cursor to “4 Setting” in the main interface. Press ENT to enter the password: UP -> DOWN -> UP ->DOWN. Press ENT to confirm, and set the current system parameters, as shown in Figure 5-12. There are 7 submenus in “4 Setting”: “1 ON/OFF,”... - Page 57 (1) The inverter can be started and shut down with “1 ON/OFF” menu. Move the cursor to “ON” and press ENT, “ON State” will then be indicated at the bottom of LCD screen; move the cursor to “OFF” and press ENT, then “OFF State”...
-
Page 58: Power Dispatch
5.4.5 Power dispatch Move the cursor to “5 Dispatch” in the main interface and press ENT to go to the following interface (Figure 5-13): Figure 5-13 Active Power and PowerFactor Remote power dispatch: The “ActivePower” and “PowerFactor” can be adjusted remotely by software. 5.4.6 System protection parameters setup Press DOWN and ENT at the same time in the main interface and enter the password (UP ->... -
Page 59: System Control Parameters
1) The system protection parameters of each grid standard can be set up in “1 SysPara” menu. Please refer to Chapter 5.4.7. (2) “2 Restart” menu: If a fault shutdown happens, a severe fault may have occurred inside the inverter. The user can perform a force reboot for one time in this menu if the user needs to restart the inverter. - Page 60 (1) “1 GridVProtect” and “2 GridFProtect” menus: Set up the parameters of grid voltage, frequency protection and recovery, etc, as shown in Table 5-3: Table 5-3 Parameters of grid voltage and frequency (IEEE-1547) Parameter name Description Setup range (lower limit, default &...
- Page 61 GridF.Min1(Hz) Protection threshold value of {45.00, 59.30, 60.00} Level 1 Min. grid frequency FminTripT1(S) Trip time of Level 1 Min. grid {0, 0.16, 600.00} frequency GridF.Max2(Hz) Protection threshold value of {50.00, 61.00, 66.00} Level 2 Max. grid frequency FmaxTripT2(S) Trip time of Level 2 Max. grid {0, 0.05, 600.00} frequency GridF.Min2(Hz)
- Page 62 Table 5-4 Start-up and turn-off control parameters Parameter name Description Setup range (lower limit, default & upper limit) PVStartVol(V) PV start-up voltage {300.0, 330.0, 400.0} {0.01, 0.92, 2.00} (CSI 23KTL) SoftStep(KW/S) Soft step {0.01, 1.12, 2.00} (CSI 28KTL) SoftOffOption Soft turn off option {Disable, Disable, Enable} OffPStep(KW/S) Turn off power step...
- Page 63 Note: The power factor changes according to the power change, as shown in Figure 5-16: INSTRUCTION: The PF (P) Curve function is only available for VDE-4105, CEI 0-21 and IEEE- 1547 grid standards. Figure 5-16 PF (P) curve mode 6). Q(U) Curve: Q(U) curve mode Note: The reactive compensation changes according to the grid voltage change, as shown in Figure 5-17.
- Page 64 The Table 5-5 lists the parameters of QReactSet, PF Set, PF(P) Curve and Q(U) Curve modes. Press ENT to start up the modes after the parameters are set up. Table 5-5 Parameters of reactive power control (IEEE-1547) Mode Parameter Name Setup range (lower limit, Description default &...
-
Page 65: Arcing Fault Current Interruption
3. “FreqDeratCtrl” menu: Set up the parameters of over-frequency active power deraring. INSTRUCTION: The “FreqDeratCtrl” function is not available for the IEEE-1547 grid standard. (4) “6 OtherProtect” menu: set up the threshold value of leakage current and output DC component protection: Table 5-6 Protection parameters of leakage current and output DC component Parameter name... - Page 66 MPPT Scan AFCI Test Testing Figure 5-19 AFCI test MPPT Scan AFCI Fault AFCI Test Test Finish Figure 5-20 AFCI test result In the “System Setting”→”OtherCmd” menu, execute “ARCFaultClear” command to clear “ARC Protect” fault alarm, and LCD will show “Succeed” if the fault is successfully cleared, as shown in Figure 5-21. AFCIOperation Enable ARCFaultClear...
-
Page 67: Chapter 6 Operation
Chapter 6 Operation 6.1 Start-up Manual start-up: Manual start-up is required after regulation setting or manual (fault) shut-down. Move the cursor from the main operation interface to “4 Setting”. Press ENT and go to submenu “1 ON/OFF”. Then move the cursor to “ON” and press ENT to start the inverter. Then the inverter will start up and operate normally if the start-up condition is met. - Page 68 Figure 6-2 Default indication interface for manual operation In this mode, the inverter converts the power generated by PV modules to AC continuously and feeds into the power grid. (3) Standby mode, as shown in Figure 6-3: The inverter will enter standby mode when the output voltage and power of PV modules do not meet the startup conditions or PV voltage and input power are lower than the set value.
-
Page 69: Grid-Tied Power Generation
WARNING: All the installation installation and wiring connections should be performed by qualified technical personnel. Disconnect the inverter from PV modules and the AC supply before undertaking maintenance. Do not operate or maintain the inverter until at least 5 minutes after disconnecting all sources of DC and AC. -
Page 70: Chapter 7 Maintenance And De-Installation
Chapter 7 Maintenance and De-installation 7.1 Fault shut down and troubleshooting 7.1.1 LED fault and troubleshooting Please refer to the definition of LED lights in Table 5-1 and troubleshoot according to Table 7-1: Table 7-1 Trouble shooting of LED lights LED fault status Solutions Neither the “Power”... - Page 71 Definition: Communication inside inverter fails Possible causes: Terminal block connectors of internal communication wires have poor contact Alarm 2. CommErr Recommended solutions: 1. Observe for 5 minutes and see whether the alarm will be eliminated automatically; 2. Switch off 3-phase working power supply and then reboot the system 3.
- Page 72 1. Confirm that external ambient temperature is within the specified range of operating temperature; 2. Check whether air inlet is blocked; 3. Check whether fan is blocked; Protection 1. TempOver 4. Check whether the location of installation is appropriate or not; 5.
- Page 73 Definition: PV voltage exceeds the specified value Possible causes: PV over-voltage Recommended solutions: Protection 4. PVVoltOver* 1. Observe for 30 minutes and see whether the alarm will be eliminated automatically; 2. Check whether PV voltage exceeds the specified range; 3. Turn off the PV input switch, wait for 5 minutes, and then turn on the switch again;...
- Page 74 Definition: ARC fault Possible causes: Protection actions of ARC board Recommended solutions: Protection 8. ARC Protect 1. Use “ARCFaultClear” to clear the ARC fault. (Refer to section 5.4.4) 2. Check if there is an arc in PV input or the connection of PV cable is not good.
- Page 75 DANGER: Please disconnect the inverter from AC grid and PV modules before opening the equipment. Make sure hazardous high voltage and energy inside the equipment has been discharged. Do not operate or maintain the inverter until at least 5 minutes after disconnecting all sources of DC and AC. Notes:...
-
Page 76: Product Maintenance
7.2 Product maintenance 7.2.1 Check the electrical connection Check all the cable connections as a regular maintenance inspection every 6 months or once a year. 1.) Check the cable connections. If loose, please tighten all the cables referring to “3.3 Electrical installation.” 2.) Check for cable damage, especially whether the cable surface is scratched or smooth. -
Page 77: Replace The Inverter
Figure 7-1 Replace cooling fans 7.2.4 Replace the inverter Please confirm the following things before replacing the inverter: (1) The inverter is turned off. (2) The DC switch of the inverter is turned to OFF position. Then Replace the inverter according to the following steps: a.) Unlock the padlock if it is installed on the inverter. - Page 78 c.) Use a No. 10 Hex wrench to remove the 4 screws between the main housing and the wiring box. Lift up the main housing and disconnect from the wiring box. Figure 7-4 Disconnect the main housing from the wiring box d.) Use a No.2 Phillips head screwdriver to remove the 2 screws on the left side of the wiring box, and take off the cover board.
-
Page 79: Installing The Inverter
7.3 De-installing the inverter De-install the inverter according to the following steps when the service time is due or for other reasons: DANGER: Please disconnect the electrical connection in strict accordance with the following steps. Otherwise, the inverter will be damaged and the service personnel’s life will be endangered. -
Page 80: Chapter 8 Technical Data
Chapter 8 Technical Data Model Name 23KTL-CT/US-480 28KTL-CT/US-480 DC Input Max. PV Power 31kW 38kW Nominal DC Input 24kW 29kW Power Max. DC Input Voltage 1000Vdc Operating DC Input 300-900Vdc Voltage Range Start-up DC Input 330V/300W Voltage / Power Number of MPP Trackers MPPT Voltage Range 480-800Vdc 500-800Vdc... - Page 81 Current THD <3% AC Disconnection Type Load rated AC switch System Topology Transformerless Max. Efficiency 98.6% CEC Efficiency 98.0% Stand-by / Night <20W / <2W Consumption Environment Protection Degree NEMA 4 Cooling Variable speed cooling fans Operating Temperature -13°F to +140°F / - 25°C to +60°C (derating from Range +113°F / +45°C) Operating Humidity...
- Page 82 Note 2: When the ambient temperature is higher than 113F (45C), the output power begins derating, as shown in Figure 8-2: Figure 8-2 CSI 23/28KTL derating curve with high temperature Note 3: When the altitude is higher than 6562ft (2000m), the power of the inverter needs derating, as shown in Figure 8-3: Figure 8-3 CSI 23/28KTL derating curve of grid voltage Note 4: The inverter can output the AC power with full loads under 90%-110% of the rated grid voltage.
- Page 83 Figure 8-4 CSI 23/28KTL derating curve of grid voltage Notes:...
-
Page 84: Chapter 9 Limited Warranty
Chapter 9 Limited Warranty The warranty policy of this product is specified in the contract; otherwise, the warranty period is 5 years. For service, Canadian Solar will provide local support. For Warranty terms, please refer to the CSI standard warranty policy in place at time of purchase. Appendix: Instruction of inverter selection Table A-1 Optional accessory Item... - Page 85 Figure A-2 Figure A-3 Figure A-4(a) Figure A-4(b)
- Page 86 Figure A-5(a) Figure A-5(b) THE UNDER HOLES Figure A-6...
- Page 87 Notes:...
- Page 88 P: + 1 888 998 7739 P: + 49 (0) 89 5199689 0 F: +1 519 837 2550 F: + 1 925 866 2704 F: + 49 (0) 89 5199689 11 E: inquire.ca@canadiansolar.com E: inquire.us@canadiansolar.com E: inquire.eu@canadiansolar.com Italy Spain U. A. E.
Need help?
Do you have a question about the CSI 23KTL-CT/US-480 and is the answer not in the manual?
Questions and answers