Advertisement
Available languages
Available languages
Quick Links
TC78011LCD
This product is only suitable for well-insulated spaces or occasional use.
Dit product is uitsluitend geschikt voor goed geïsoleerde plaatsen of voor incidenteel gebruik.
Ce produit ne peut être utilisé que dans des locaux bien isolés ou de manière occasionnelle.
Este producto está indicado únicamente en lugares abrigados o para una utilización puntual.
Dieses Produkt ist nur für gut isolierte Räume oder für den gelegentlichen Gebrauch geeignet.
Ten produkt jest odpowiedni tylko do sporadycznego użytku lub do stosowania w dobrze izolowanych pomieszczeniach.
Este produto é adequado apenas para espaços bem isolados espaços ou utilização ocasional.
3
8
13
18
23
28
33
Advertisement

Related Manuals for Velleman Perel TC78011LCD


Summary of Contents for Velleman Perel TC78011LCD
-
Page 1: Table Of Contents
TC78011LCD USER MANUAL HANDLEIDING MODE D'EMPLOI MANUAL DEL USUARIO BEDIENUNGSANLEITUNG INSTRUKCJA OBSŁUGI MANUAL DO UTILIZADOR This product is only suitable for well-insulated spaces or occasional use. Dit product is uitsluitend geschikt voor goed geïsoleerde plaatsen of voor incidenteel gebruik. Ce produit ne peut être utilisé que dans des locaux bien isolés ou de manière occasionnelle. Este producto está... - Page 2 TC78011LCD V. 02 – 14/06/2018 ©Velleman nv...
-
Page 3: User Manual
If the external flexible cable or cord of this appliance is damaged, it shall be exclusively replaced by the manufacturer or his service agent or a similar qualified person in order to avoid a hazard. V. 02 – 14/06/2018 ©Velleman nv... - Page 4 Nor Velleman nv nor its dealers can be held responsible for any damage (extraordinary, incidental or indirect) – of any nature (financial, physical…) arising from the possession, use or failure of this product.
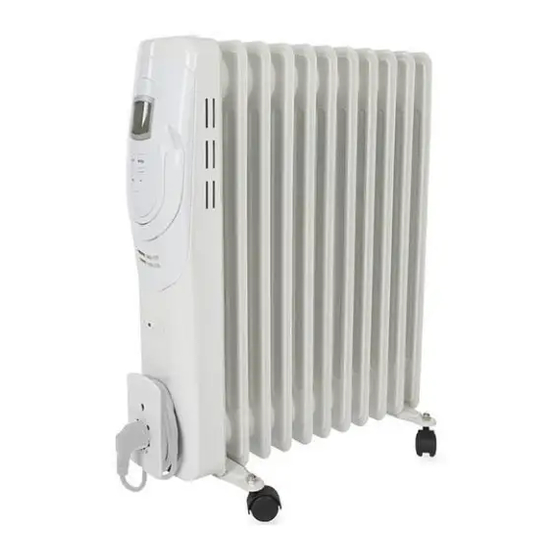
- Page 5 Velleman NV Contact details Legen Heirweg, 33 9890 Gavere, Belgium Overview Refer to the illustrations on page 2 of this manual. display...
- Page 6 6. Press MODE again to enter the timer switch-on mode. Set the switch-on timer with +/-. 7. Press MODE again to enter the timer switch-off mode. Set the switch-off timer with +/-. V. 02 – 14/06/2018 ©Velleman nv...
- Page 7 © COPYRIGHT NOTICE The copyright to this manual is owned by Velleman nv. All worldwide rights reserved. No part of this manual may be copied, reproduced, translated or reduced to any electronic medium or otherwise without the prior written consent of the copyright holder.
-
Page 8: Handleiding
Indien de externe, flexibele kabel beschadigd is, dan moet deze door de fabrikant, diens servicedienst, of een gelijkwaardig bekwaam persoon vervangen worden, om gevaar te vermijden. V. 02 – 14/06/2018 ©Velleman nv... - Page 9 Noch Velleman nv noch zijn verdelers kunnen aansprakelijk gesteld worden voor schade (buitengewoon, incidenteel of onrechtstreeks) – van welke aard dan ook (financieel, fysisch…) voortvloeiend uit het bezit, gebruik of falen van dit product.
- Page 10 Met adaptieve sturing van de start neen Met beperking van de werkingstijd neen Met black-bulbsensor neen Velleman NV Contactgegevens Legen Heirweg 33, 9890 Gavere, België Omschrijving Raadpleeg de afbeeldingen op pagina 2 van deze handleiding. display opbergvak voor het snoer...
- Page 11 5. Stel de gewenste temperatuur in met de knop omhoog/omlaag. De ingestelde temperatuur verschijnt op de display. 6. Druk nogmaals op MODE om de 'timer aan'-modus te activeren. Stel de 'timer aan' in met +/-. V. 02 – 14/06/2018 ©Velleman nv...
- Page 12 Reinig het toestel af en toe met een vochtige doek. Gebruik geen bijtende chemische producten, reinigingsmiddelen of sterke detergenten. Gebruik dit toestel enkel met originele accessoires. Velleman nv is niet aansprakelijk voor schade of kwetsuren bij (verkeerd) gebruik van dit toestel. Voor meer informatie over dit product en de laatste versie van deze handleiding, zie www.perel.eu.
-
Page 13: Mode D'emploi
Le nettoyage et l'entretien ne doivent pas être effectués par des enfants sans surveillance. Si le câble flexible externe est endommagé, il doit être remplacé par le fabricant, son service technique ou toute autre personne qualifiée, pour éviter tout danger. V. 02 – 14/06/2018 ©Velleman nv... - Page 14 Ni Velleman SA ni ses distributeurs ne peuvent être tenus responsables des dommages exceptionnels, imprévus ou indirects, quelles que soient la nature (financière, corporelle, etc.), causés par la possession, l’utilisation ou le dysfonctionnement de ce produit.
- Page 15 à distance contrôle adaptatif de l'activation limitation de la durée d'activation capteur à globe noir Velleman SA Coordonnées de contact Legen Heirweg 33, 9890 Gavere, Belgique Description Se référer aux illustrations en page 2 de ce mode d'emploi.
- Page 16 5. Sélectionner la température souhaitée avec le bouton augmenter/diminuer. La température sélectionnée s'affiche. 6. Appuyer à nouveau sur MODE pour activer le mode de minuterie de mise en marche. Activer la minuterie de mise en marche avec +/-. V. 02 – 14/06/2018 ©Velleman nv...
- Page 17 être modifiés sans notification préalable. © DROITS D’AUTEUR Velleman SA est l’ayant droit des droits d’auteur de ce mode d'emploi. Tous droits mondiaux réservés. Toute reproduction, traduction, copie ou diffusion, intégrale ou partielle, du contenu de ce mode d'emploi par quelque procédé...
-
Page 18: Manual Del Usuario
Para evitar cualquier riesgo de descarga eléctrica, la reparación de un cable flexible externo o del cable del aparato mismo debe ser realizada por el fabricante, su técnico u otro técnico cualificado. V. 02 – 14/06/2018 ©Velleman nv... - Page 19 Normas generales Véase la Garantía de servicio y calidad Velleman® al final de este manual del usuario. Por razones de seguridad, las modificaciones no autorizadas del aparato están prohibidas. Los daños causados por modificaciones no autorizadas, no están cubiertos por la garantía.
- Page 20 Velleman NV Información de contacto Legen Heirweg 33, 9890 Gavere, Bélgica Descripción Véase las figuras en la página 2 de este manual del usuario.
- Page 21 5. Seleccione la temperatura deseada con el botón aumentar/disminuir. La temperatura seleccionada se visualizará. 6. Vuelva a pulsar MODE para entrar en el modo de temporizador de activación. Ajuste el temporizador de activación con +/-. V. 02 – 14/06/2018 ©Velleman nv...
- Page 22 Utilice este aparato sólo con los accesorios originales. Velleman NV no será responsable de daños ni lesiones causados por un uso (indebido) de este aparato. Para más información sobre este producto y la versión más reciente de este manual del usuario, visite nuestra página www.perel.eu.
-
Page 23: Bedienungsanleitung
Gerät spielen. Beachten Sie, dass Kinder das Gerät nicht reinigen oder bedienen. Um elektrische Schläge zu vermeiden soll der Fabrikant, seine Fachkraft oder eine andere Fachkraft das externe, flexible Kabel oder das Netzkabel des Gerätes selber bei Beschädigungen ersetzen. V. 02 – 14/06/2018 ©Velleman nv... - Page 24 Garantieanspruch. Für daraus resultierende Folgeschäden übernimmt der Hersteller keine Haftung. Weder Velleman nv noch die Händler können für außergewöhnliche, zufällige oder indirekte Schäden irgendwelcher Art (finanziell, physisch, usw.), die durch Besitz, Gebrauch oder Defekt verursacht werden, haftbar gemacht werden.
- Page 25 Raumtemperaturkontrolle mit Erkennung offener nein Fenster mit Fernbedienungsoption nein mit adaptiver Regelung des Heizbeginns nein mit Betriebszeitbegrenzung nein mit Schwarzkugelsensor nein Velleman NV Kontaktangaben Legen Heirweg 33, 9890 Gavere, Belgien Beschreibung Siehe Abbildungen, Seite 2 dieser Bedienungsanleitung. Display Kabelaufwickelung Bedienfeld Reifen EIN/AUS-Schalter Rippen V.
- Page 26 5. Stellen Sie nun die gewünschte Temperatur mit der Taste höher/niedriger ein. Die eingestellte Temperatur erscheint auf dem Display. 6. Drücken Sie MODE wieder, um in den Modus 'Timer ein' zu wechseln. Stellen Sie den 'Timer ein' mit +/- ein. V. 02 – 14/06/2018 ©Velleman nv...
- Page 27 Reinigen Sie das Gerät ab und zu mit einem feuchten Tuch. Verwenden Sie keine aggressiven Chemikalien, Lösungsmittel oder starke Reinigungsmittel. Verwenden Sie dieses Gerät nur mit originellen Zubehörteilen. Velleman NV übernimmt keine Haftung für Schaden oder Verletzungen bei (falscher) Anwendung dieses Gerätes. Für mehr Informationen zu diesem Produkt und die neueste Version dieser Bedienungsanleitung, siehe www.perel.eu.
-
Page 28: Instrukcja Obsługi
Jeśli zewnętrzny, elastyczny kabel lub przewód urządzenia jest uszkodzony, powinien zostać wymieniony przez producenta, w autoryzowanym serwisie lub przed wykwalifikowaną osobę, aby uniknąć zagrożenia. V. 02 – 14/06/2018 ©Velleman nv... - Page 29 Podczas złomowania grzejnika należy przestrzegać przepisów dotyczących usuwania oleju. Informacje ogólne Proszę zapoznać się z informacjami w części Usługi i gwarancja jakości Velleman ® na końcu niniejszej instrukcji.
- Page 30 Velleman NV Dane teleadresowe Legen Heirweg, 33 9890 Gavere, Belgia Przegląd Patrz rysunki na stronie 2 niniejszej instrukcji. uchwyt do przechowywania wyświetlacz...
- Page 31 4. Wybrać jednostkę pomiaru za pomocą przycisku °C/°F. 5. Następnie ustawić temperaturę docelową za pomocą przycisku zwiększania/zmniejszania. Ustawiona wartość temperatury zostanie wyświetlona. 6. Nacisnąć ponownie przycisk MODE, aby przejść do trybu włączania timera. Ustawić timer włączania za pomocą +/-. V. 02 – 14/06/2018 ©Velleman nv...
- Page 32 © INFORMACJA O PRAWACH AUTORSKICH Właścicielem praw autorskich do niniejszej instrukcji jest firma Velleman nv. Wszelkie prawa są zastrzeżone na całym świecie. Żadna część niniejszej instrukcji nie może być kopiowana, powielana, tłumaczona ani przenoszona na jakikolwiek nośnik elektroniczny (lub w inny sposób) bez wcześniejszej pisemnej zgody właściciela praw autorskich.
-
Page 33: Manual Do Utilizador
Se o cabo flexível externo ou o cabo de alimentação estiverem danificados, devem ser substituídos única e exclusivamente pelo fabricante, um agente autorizado, ou um técnico igualmente qualificado de modo a evitar qualquer acidente. V. 02 – 14/06/2018 ©Velleman nv... - Page 34 Nem Velleman NV nem os seus distribuidores podem ser responsabilizados por quaisquer danos (extraordinário, incidental ou indireto) - de qualquer natureza decorrentes (financeira, física...) a partir da posse, uso ou falha do produto.
- Page 35 Velleman NV Elementos de contacto Legen Heirweg, 33 9890 Gavere, Bélgica Descrição Veja as imagens na página 2 deste manual. ecrã...
- Page 36 5. De seguida, ajuste a temperatura usando o botão para aumentar/diminuir. O valor definido para a temperatura é apresentado. 6. Pressione MODE novamente para entrar no modo de ligação do temporizador. Ligue o temporizador usando +/-. V. 02 – 14/06/2018 ©Velleman nv...
- Page 37 Podem alterar-se as especificações e o conteúdo deste manual sem aviso prévio. © DIREITOS DE AUTOR A Velleman NV detém os direitos de autor deste manual do utilizador. Todos os direitos mundiais reservados. É estritamente proibido reproduzir, traduzir, copiar, editar e gravar este manual do utilizador ou partes deste sem prévia autorização escrita por parte da detentora dos direitos.
- Page 38 Velleman®. remplacement ou le remboursement complet du prix d’achat lors • Articles to be repaired must be delivered to your Velleman® dealer, d’un défaut dans un délai de 1 an après l’achat et la livraison, ou un solidly packed (preferably in the original packaging), and be article de remplacement moyennant 50% du prix d’achat ou le...
- Page 39 Velleman®; efectiva; - se calcula gastos de transporte de y a Velleman® si el aparato ya • no caso da reclamação ser justificada e que a reparação ou no está cubierto por la garantía.
- Page 40 • W przypadku, gdy usterka jest niemożliwa do usunięcia lub koszt usunięcia jest nadmiernie wysoki Velleman ® może zdecydować o wymianie artykułu na nowy, wolny od wad lub zwrócić zapłaconą kwotę. Zwrot gotówki może jednak nastąpić z uwzględnieniem poniższych warunków:...
Need help?
Do you have a question about the Perel TC78011LCD and is the answer not in the manual?
Questions and answers