Table of Contents
Advertisement
Quick Links
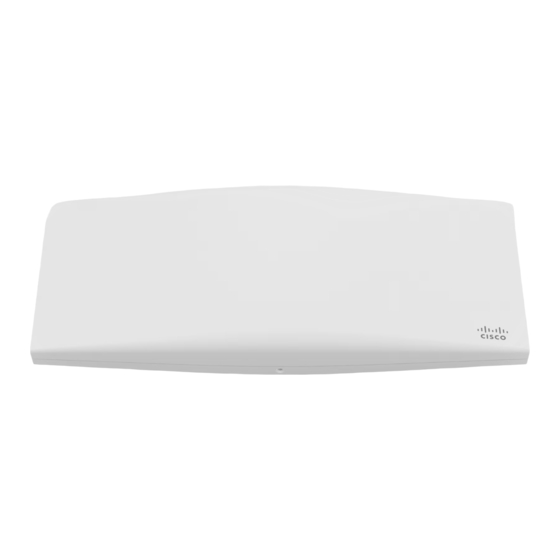
MR44 Installation Guide
The Cisco Meraki MR44 is a dual-band enterprise-class 802.11ax cloud-managed access points. Designed for the highest capacity and highest density, MR44
meets the needs of the most demanding environments. The access point also includes a third radio dedicated to optimizing the RF environment and securing
the airwaves.
About this Guide
This guide provides instructions on how to install and configure your MR44 access points. This guide also provides mounting instructions and limited
troubleshooting procedures. For more wireless installation guides, refer to the
Product Overview
Physical Specifications
Interfaces
•
1x 100/1000/2.5G BASE-T Ethernet (RJ45)
•
1x DC power connector (5.5 mm x 2.5 mm, center positive)
Power
•
Power over Ethernet: 42.5 - 57 V (802.3at) or 37 - 57 V (802.3af) - low power mode **
•
Alternative: 12 V DC input
•
Power consumption: 30W max (802.3at) or 15W max (802.3af) - low power mode **
•
Power over Ethernet injector and DC adapter sold separately
In low power mode, MR44 will do the following:
1.
Downshift its Ethernet uplink speed from 2.5 Gbps to 1 Gbps
2.
Transition from 4x4:4 to 2x2:2 in 5GHz
3.
Disable its dedicated IoT (previously known as BLE) radio
4.
Reduce the max Tx power
wireless installation guides section
MR44
on our documentation website.
1
Advertisement
Table of Contents

Related Manuals for Cisco MERAKI MR44


Summary of Contents for Cisco MERAKI MR44
- Page 1 About this Guide This guide provides instructions on how to install and configure your MR44 access points. This guide also provides mounting instructions and limited troubleshooting procedures. For more wireless installation guides, refer to the wireless installation guides section on our documentation website.
- Page 2 Warning: Please ensure that MR44 is connected to an 802.3at-capable (PoE+) switch/power injector during the initial installation OR ensure that the network MR44 is added to is set to MR 27.6 firmware (not yet available at the time of writing) or newer firmware.
- Page 4 The mount cradle has the following features:...
-
Page 5: Security Features
Ethernet Ports The MR44 features an Ethernet RJ45 port that accepts 802.3at power (labeled “Eth0, PoE”). This port should be used for uplink to your upstream network. Power Source Options The MR44 access point can be powered using either the Meraki AC Adapter, PoE Injector (both sold separately), or a PoE switch. -
Page 6: Package Contents
NOTE: Blinking Green LED indicates that the device is in site survey mode. Please see the Conducting Site Surveys with MR Access Points for more details. The MR44 access point may be operated in the “Run Dark” mode for additional security and to reduce the visibility of the access point. In this mode, the LED will not be illuminated. - Page 7 Drop ceiling mount kit...
- Page 8 Wall screws, wall screw anchors, and security screws...
- Page 9 Safety and Warnings These operations are to be taken with respect to all local laws. Please take the following into consideration for safe operation: • Power off the unit before you begin. Read the installation instructions before connecting the system to the power source. •...
-
Page 10: Pre-Install Preparation
Pre-install Preparation You should complete the following steps before going on-site to perform an installation. Configure your Dashboard Network The following is a brief overview only of the steps required to add an access point to your network. For detailed instructions about creating, configuring, and managing Meraki wireless networks, refer to the online documentation (documentation.meraki.com). -
Page 11: Collect Tools
cable into the AP’s Ethernet jack, and the other end into a PoE switch. Then connect the client machine over Ethernet cable to the PoE switch. If using a PoE Injector, connect the AP to the “PoE” port of the Injector, and the client machine to the “LAN” port. •... -
Page 12: Installation Instructions
Installation Instructions Warning: Due to the heat dissipation in the back of APs during normal operation, please do not stack powered on APs on top of each other during pre-installation to avoid heat damage. Choose Your Mounting Location A good mounting location is important to get the best performance out of your access point. Keep the following in mind: The device should have an unobstructed line of sight to most coverage areas. -
Page 13: Install The Ap
AP placement is ideal. Install the AP For most mounting scenarios, the access point mount cradle provides a quick, simple, and flexible means of mounting your device. The installation should be done in two steps. First, install the mount cradle to your selected location. Then, attach the AP to the mount cradle. Attach the Mount Cradle The access point mount cradle can be used to install your access point in a wide range of scenarios: wall or solid ceiling, below a drop ceiling, on various electrical junction boxes. - Page 14 6-32x7 mm screws only used for recessed rail mount 2 rubber spacers Attach the T-rail clips to the T-rail by rotating them and snapping them into place as shown. The black foam pads should be compressed slightly after installation.
-
Page 16: Mount The Ap
Using the dashed lines on the mount cradle template as a guide, set the proper spacing of the T-rail clips on the T-rail. Tighten the set screws on the T-rail clips to secure the clips using a 5/64”(2 mm) hex key. Attach the mount cradle to the T-rail clips using the mount cradle holes (marked with a “T“). - Page 17 The MR44 AP attaches to the mount cradle with two tabs on the cradle that insert into the MR44 AP and is secured to the cradle using one screw. To attach the MR44 AP to the mount cradle properly, line up the top edge of the AP with the top tab of the mount cradle. Since the cradle is already mounted to...
-
Page 18: Physical Security
Then adjust the MR44 AP to guide the AP’s bottom slot into the cradle’s bottom tab until it clicks into place. Once in place, the MR44 AP should be secured to the cradle by using one of the included screws in the cradle’s bottom tab. -
Page 19: Verify Device Functionality And Test Network Coverage
Verify Device Functionality and Test Network Coverage Check LEDs The Power LED should be solid green (or blue, if clients are connected). If it is flashing blue, the firmware is automatically upgrading and the LED should turn green when the upgrade is completed (normally within a few minutes). See the "LED Indicators"... -
Page 20: Warranty
The original hardware packaging includes device serial number and order information and may be required for return shipping. Meraki MR44 devices have been tested and found to comply with the limits for a Class B digital device, pursuant to part 15 of the FCC rules. These limits are designed to provide reasonable protection against harmful interference in a residential installation. - Page 21 Additional warranty information can be found on https://meraki.cisco.com/support#process:warranty Support and Additional Information If issues are encountered with device installation or additional help is required, contact Meraki Support by logging in to dashboard.meraki.com and opening a case by visiting the Get Help section. •...
Need help?
Do you have a question about the MR44 and is the answer not in the manual?
Questions and answers