
Subscribe to Our Youtube Channel
Related Manuals for ASI EZFILL 0391 Series

Summary of Contents for ASI EZFILL 0391 Series
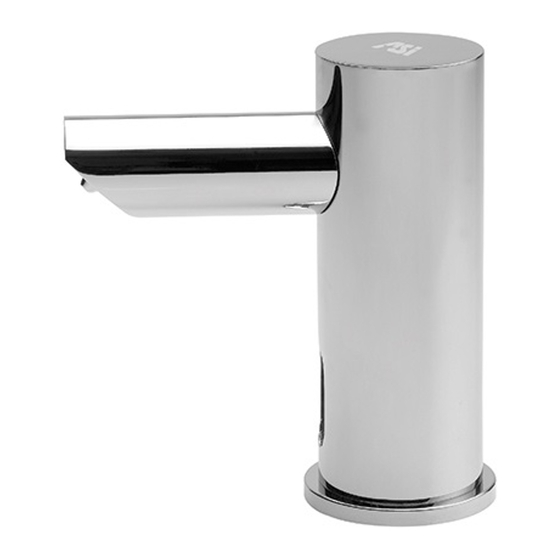
- Page 1 Model 0391-(n)* EZFILL™ SOAP DISPENSER AUTOMATIC DECK MOUNTED SOAP DISPENSER FOR STANDALONE USE INSTALLATION AND MAINTENANCE GUIDE 1408201627 Rev G 05 August 2015...
-
Page 2: Table Of Contents
FILLING THE BOTTLE AND PRIMING THE SOAP DISPENSER BATTERY REPLACEMENT INSTRUCTIONS MAINTENANCE TROUBLESHOOTING SPARE PARTS LIST WARRANTY 14-15 EZ FILL™ REMOTE CONTROL Unit Install Date Unit Location in Facility Unit S/N (From Label) Supplied By Original PO No. ASI Order No. 1408201627 Rev G 05 August 2015... -
Page 3: Suffix Code Index And Applications
*SUFFIX CODE INDEX AND APPLICATION Schedule of Model № Suffix Codes to replace (n) in Model № and Application Model № Suffix Service Application Universal Model, Battery Operation USA/UK/EU Interchangeable Plug Model, AC Adapter Operation AU Model, AC Adapter Operation 6-1A Universal Model, Battery Operation, Six Pack 6-1AC... -
Page 4: Pre-Installation Information
PRE-INSTALLATION INFORMATION CHECK CONTENTS Separate all parts from the packaging and check each part with the PACK CONTENTS section. Make sure all parts are received and separated before discarding any packaging material. If any parts are missing, do not attempt to install the system until you obtain the missing parts. -
Page 5: Pack Contents
PACK CONTENTS EZFILL™ SOAP DISPENSER 0391-(n) Identify the items and confirm that parts are included. Automatic Body Escutcheon vanity mounting hardware Flange with power cord, Com Cable w/O-Ring w/inline plug connector and Gasket black soap supply tube 1/4” dia. (Ø6) Nylon flex 36” (914) long with connector. -
Page 6: Technical Data
TECHNICAL DATA 1-1/2” AC Adapter Config Plug 2-61/64” Per Option (see TDS) (75) (Ø38) 29/32” Dia (Ø23) 4-3/32” 2-7/8” (104) 1-7/32 (73) 2” (31) (51) Note Polarity 0-2-1/16” Power Socket Power Plug (0-52) Fill 36” (914) Prime Button Com Socket Com Plug 5-3/32”... -
Page 7: Installation
INSTALLATION STEP 1 - INSTALLING THE EZFILL™ SOAP DISPENSING SYSTEM SOAP DISPENSER MAX 1-3/16” Drill a hole in the counter top at ( Ø 30) the designated location. MIN 1-1/32” ( Ø 26) Remove and retain the basin nut and the gasket from the base of the soap dispenser body, sliding completely over and off the soap tube, Com and Power Cables. - Page 8 INSTALLATION CONNECTING THE POWER SOURCE Remove the protective sticker covering the sensor. Keep away from the sensor range. Connect the Com Cable motor connector to the mating plug from dispenser (If not already connected in Step 3 above). Please note that since the connector is water proof, some friction will apply.
- Page 9 INSTALLATION CONNECTING THE POWER SOURCE a. For battery versions: install the battery box FROM OBSERVE at the wall underneath THE SOAP DISPENSER POLARITY the sink and connect the battery connector. Ensure adequate clearance to allow removal of the top cover and the battery TO THE carrier tray when battery BATTERY BOX...
- Page 10 FILLING THE SOAP BOTTLE AND PRIMING THE SOAP DISPENSER STEP 1 - FILLING THE SOAP BOTTLE Remove the soap bottle from the EZFILL™ soap dispenser bracket and pour liquid soap into container until it is full. Refer to ‘Technical Data’ section of this manual for soap specifications.
-
Page 11: Maintenance
BATTERY REPLACEMENT INFORMATION Battery models only When the batteries weaken, the red indicator light will blink at a constant rate when the user’s hands are within the sensor range. The batteries must be replaced within two weeks. To replace the batteries: 1. -
Page 12: Troubleshooting
TROUBLESHOOTING PROBLEM INDICATOR CAUSE SOLUTION SOAP QUANTIT Y Voltage of batteries Low volume dispense Replace batteries DIMINISHED is low Red light in the sensor flashes continuously Voltage of batteries Replace batteries. See when the user ’s hands likely below 1.47V per page 10. -
Page 13: Spare Parts List
ASI will not be responsible for labor costs associated with the removal, replacement, repair by others, reinstallation, renovation or return of its products. -
Page 14: Ezfill™ Remote Control
Model 0390-R EZFILL™ REMOTE CONTROL REMOTE CONTROL FOR ALL MODELS 0390-(n) AND 0391-(n) AUTOMATIC VANITY MOUNTED SOAP DISPENSERS INSTALLATION AND MAINTENANCE GUIDE 1408201654 Rev C 27 July 2015... - Page 15 OPERATION If desired, use the remote control to adjust the soap dispenser settings. Hold the remote control straight in front of the sensor at a distance of about 4-6” (10-15cm). User Hint: Holding the soap dispenser remote control out of the recommended range (too close or too far) may interfere with the remote’s activation.
- Page 16 441 Saw Mill River Road, Yonkers, NY 10701 . (914)476-9000 . Web: americanspecialties.com 1408201627 Rev G 05 August 2015...
Need help?
Do you have a question about the EZFILL 0391 Series and is the answer not in the manual?
Questions and answers