
Related Manuals for Atlanta Attachment Company 4300AC


Summary of Contents for Atlanta Attachment Company 4300AC
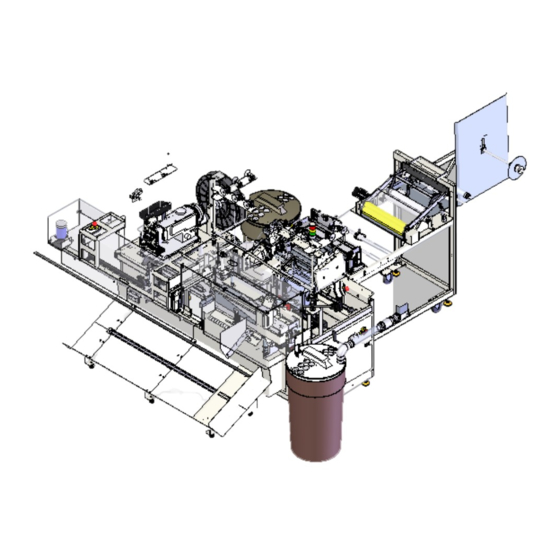
- Page 1 4300AC Model Revision 1.6 updated Aug 11, 2016 Technical Manual & Parts Lists Atlanta Attachment Company 362 Industrial Park Drive Lawrenceville, GA 30046 770-963-7369 • www.atlatt.com...
- Page 3 Attachment Company. In addition to any confidentiality and non-disclosure obligations that currently exist between you and Atlanta Attachment Company, your use of these materials serves as an acknowledgment of the confidential and proprietary nature of these materials and your duty not to make any unauthorized use or disclosure of these materials.
-
Page 4: Table Of Contents
Technical Manual & Parts Lists Contents Important Safety Instruction ........................1 Liability ............................... 2 Safety Equipment on the Machines ......................3 Protective Eyewear ............................. 4 Important Notices............................5 Maintenance ..............................7 Repair ................................8 A Word to the End User..........................9 Safety Precautions ............................. - Page 5 Technical Manual & Parts Lists 2.7.3.- Setting Up The Machine To Make Borders ................... 32 2.7.4.- Compensation and Set-up Instructions ..................33 2.7.2.- Quality Check sheet & Procedure ....................34 2.8.- Maintenance............................36 2.8.1.- Daily (8 -10 hrs. of operation) ...................... 36 3.-TECHNICAL MANUAL ........................
- Page 6 Technical Manual & Parts Lists Assembly Drawings & Parts Lists ......................73 4300AC Vertical Handle Inserter, 18”...................... 76 1366114 Guillotine Assembly,18”......................78 1366140 Guillotine Assembly, 18”......................79 1366150 Worm Gear Drive Adaptor ......................80 1961-800F Waste Assembly ........................81 1961-817 Venturi Assembly, 2” ....................... 82 4300130 Roll Holder Assembly........................
- Page 7 Technical Manual & Parts Lists 4300280 Left Top Belt Feed Assembly ....................130 4300325 Left Marker Module ......................... 131 3200PMC Marking Module ........................132 4300170 Border Prefeed Assembly ......................134 32005600 Prefeed Roller Assembly ....................... 136 32005650A Bottom Puller Roller Assembly ..................137 4300221 Insert Rail Assembly, 18”...
-
Page 8: Important Safety Instruction
Mandatory Information All persons operating and/or working on the 4300AC should read and understand all parts of the Safety Instructions. This applies, in particular, for persons who only operate and/or work on the unit occasionally (e.g. for maintenance and repair). Persons who have difficulty reading must receive particularly thorough instruction. -
Page 9: Liability
Technical Manual & Parts Lists Liability The machine should only be operated when in perfect working order, with due regard for safety and the potential dangers, as well as in accordance with the Instruction Material. Faults and malfunctions capable of impairing safety should be remedied immediately. We cannot accept any liability for personal injury or property damage due to operator errors or non-compliance with the safety instructions contained in this booklet. -
Page 10: Safety Equipment On The Machines
Manual Técnico & Lista de Partes A Word to the Operator The greatest danger inherent in our machines: is that of fingers, hands or loose clothing being drawn into a machine by live, coasting or rotating tools or assemblies or of being cut by sharp tools or burned by hot elements. LWAYS BE CONSCIOUS OF THESE DANGERS Safety Equipment on the Machines All machines are delivered with safety equipment, which shall not be removed or... -
Page 11: Protective Eyewear
Technical Manual & Parts Lists Protective Eyewear Protective eyewear that has been tested by the local authorities should be worn whenever there is a possibility of loose or flying objects or particles such as when cleaning the machine with compressed air. Tools Always count the number of tools in your possession before starting work on the machine. -
Page 12: Important Notices
Manual Técnico & Lista de Partes Important Notices Reporting and Fighting Fires Read the instructions posted in the factory with regard to reporting fires and the emergency exits. Make sure you know exactly where the fire extinguishers and sprinkler systems are located and how they are operated. - Page 13 Technical Manual & Parts Lists - Kinetic energy - Note that some motors or spindles, for example, may continue to run or coast run on after being switched off. - Potential energy - Individual assemblies may need to be secured if necessary for repair work. Delivery of the Machine/Packaging Note any markings on the packaging, such as weights, lifting points and special information.
-
Page 14: Maintenance
Manual Técnico & Lista de Partes Protect against influences from the surroundings: no structure-borne vibrations, no grinding dust, or chemical vapors. Protect against unauthorized access. Ensure that the machine and accessories are set up in a stable position. Ensure easy access for operation and maintenance (Instruction Manual and layout diagram); also verify that the floor is strong enough to carry the weight of the machine. -
Page 15: Repair
Technical Manual & Parts Lists Repair Replacement Parts We cannot accept any liability whatsoever for damage due to the use of parts made by other manufacturers or due to unqualified repair or modification of the machine. Repair, Electrical The power supply must be switched off (master switch off) and secured so that it cannot be switched on again inadvertently before starting any work on live parts. -
Page 16: A Word To The End User
Manual Técnico & Lista de Partes A Word to the End User The end user has sole responsibility to enforce the use of safety procedures and guards on the machine. Any other safety devices or procedures due to local regulations should be should be retrofitted in accordance to these regulations and/or the EC Directive on the safety of machines. -
Page 17: Safety Precautions
Technical Manual & Parts Lists Safety Precautions Safety should be a constant concern for everyone. Always be careful when working with this equipment. While normal safety precautions were taken in the design and manufacture of this equipment, there are some potential safety hazards. Everyone involved with the operation and maintenance of this equipment should read and follow the instructions in this manual. -
Page 18: Installation Manual
Manual Técnico & Lista de Partes 1.- INSTALLATION MANUAL It is important that the machine operator read this manual and is familiar with all the functions and safety concerns of the unit before Installing and operating. 1.1.- Parts and Components Description Gulliotine Assembly Border Tension Rod Assembly... -
Page 19: Technical Data
Technical Manual & Parts Lists 1.2.- Technical Data Max Speed 5.000 rpm Max Stitch Length 6 spi Border Width 8.5 to 18” 1.5 to 2” (up to 3” handle upon request) Handle Width Factory Pre-set Speed 5000 rpm Factory Pre-set Stitch length 6 spi Linear Output 69 ft/min... -
Page 20: Installation & Set Up
Manual Técnico & Lista de Partes 1.3.- Installation & Set Up Remove any shipping straps from machine. Inspect the machine for any damage that may have occurred during shipping. If damage is found, report this immediately to your supervisor. Document the damage and provide details and photographs. -
Page 21: Lockout/Tagout Program
Technical Manual & Parts Lists 1.4.- Lockout/Tagout Program "Lockout/Tagout (LOTO)" refers to specific practices and procedures to safeguard employees from the unexpected energization or startup of machinery and equipment, or the release of hazardous energy during service or maintenance activities. This requires that a designated individual turns off and disconnects the machinery or equipment from its energy source(s) before performing service or maintenance and that the authorized employee(s) either lock or tag the energy-isolating device(s) to prevent the release of hazardous energy and take steps to verify that the energy has been isolated... -
Page 22: Operating Manual
Manual Técnico & Lista de Partes 2.- OPERATING MANUAL It is important that the machine operator read this manual and is familiar with all the functions and safety concerns of the unit before operating. 2.1.- Individual Components 2.1.1.- Control Panel The Control Panel allows the operator to start and stop the automatic function of the machine, shut off power to the machine in the event of an emergency. -
Page 23: Foot Pedal Ee24F163
Technical Manual & Parts Lists 2.1.3.- Foot Pedal EE24F163 It is located on the front left corner of the sewing unit. It is used for a manual activation of the sewing cycle or when loading a new roll of materials. 2.1.4.- Left Head Adjustment Crank It is located on the left side of the machine. -
Page 24: Efka Control Box
Manual Técnico & Lista de Partes 2.1.6.- Efka Control Box There are 4 units located under the machine. They contain an On/Off switch which should remain in the “ON” position at all times, Puller, Sewing heads and Pre-feeder are controlled by these boxes 2.1.7.- Stepping Motors Control Boxes There are 4 control boxes located under the machine. -
Page 25: Touch-Screen
Technical Manual & Parts Lists 2.2.- Touch-Screen It is important that the machine operator read this manual and is familiar with all the functions and safety concerns of the unit before operating. 2.2.1.- General Operation ATTENTION: DO NOT USE ANY SHARP OBJECTS TO TOUCH THE SCREEN The graphics images presented on the touch screen show "3-dimensional"... -
Page 26: 2- Available Menus
Manual Técnico & Lista de Partes 2.2.2- Available Menus The following is a summary of the different screens and their functions available for the Sewing Operator. 1.- Ready - New Order The normal operation of the machine is controlled from the main READY - NEW ORDER menu. From here you can start the automatic cycle and access all machine functions. - Page 27 Technical Manual & Parts Lists 2.- Operator Screen Operator is able to control basic functions of the machine See MACHINE TASK section for details. Rise the sewing head presser foot. Turn on Waste Venturi Left head Start sewing at low speed Right Head start sewing a low speed Activate the handle Chop...
- Page 28 Manual Técnico & Lista de Partes 3.- Edit Order Access from “READY-NEW ORDER” screen. Operator will be able to edit several Order parameters. Type the number of the style required. See style number on the Style list area Storage off all the styles available See CREATE /EDIT Style section for details...
- Page 29 Technical Manual & Parts Lists 4.- Create / Edit Style...
- Page 30 Manual Técnico & Lista de Partes 5.- Advance Functions This screen allows access to SECURITY, SYSTEM INFORMATION, SHOW SETTINGS, ADVANCED SETUP, MANUAL, and CONTRAST. BORDER COMPENSATIONS: See next chapter for details. The SHOW ALL SETTINGS page displays all machine settings as a matrix and is useful for recording all settings prior to a program update or for future reference.
-
Page 31: Changing The Needle
Technical Manual & Parts Lists 2.3.- Changing the Needle Please follow all safety procedures, turning the power off to the machine is recommended. 1. Locate the needle screw, on the front side of the needle chuck. 2. Insert a small Allen screw driver and loosen the screw. Do not remove the screw. - Page 32 Manual Técnico & Lista de Partes Left Sewing Head “Serger” Left Sewing Head “Chainstich” Right Sewing Head “Serger” Right Se wing Head “Chainstich”...
-
Page 33: Loading Materials
Technical Manual & Parts Lists 2.5.- Loading Materials 2.5.1.- Initial Border Loading Procedure It is important that the machine operator read this manual and is familiar with all the functions and safety concerns of the unit before operating. 1. Turn power “ON” by pressing the On button on the Main Power Switch and wait until machine arrives to READY-NEW ORDER screen 2. - Page 34 Manual Técnico & Lista de Partes 6. Using the Left Head Adjustment Crank set the Left head to the desired finished width, Feed fabric through guide assembly: over first bar, under second, then into the front guides on the main frame, across. 7.
-
Page 35: Handle Indexer Loading Procedure
Technical Manual & Parts Lists 2.5.2.- Handle Indexer Loading Procedure. For the optimum performance and minimal machine downtime, you need to obtain two or more spools part # MMSPOOL2.13B of handle strap and store them near the machine. This method will allow quick handle spool changing when one spool runs out of material, and gives the operator some time to prepare the next spool while the machine is running. -
Page 36: Border Splicing Method
Manual Técnico & Lista de Partes 2.5.3.- Border Splicing Method When the machine runs out of border material it stops, and automatically back feeds about 10 inches to make the border splicing easier. The screen displays an “Out of Border Material” message. To make the operation of the 4300 machine more efficient, the border splicing on the Serging Station must be performed correctly. -
Page 37: Creating A Style
Technical Manual & Parts Lists 2.6.- Creating a Style On the “CREATE/EDIT STYLE” Menu proceed as following: 1. Select “BORDER LENGTH” and introduce the dimension “A”: from your border. Units are displayed in tenths of inches Example 314.25 inches 2. Select HANDLES” and introduce the amount of handles you will require. -
Page 38: Set Up And Operating
Manual Técnico & Lista de Partes 2.7.- Set Up and Operating It is important that the machine operator and sewing mechanical read this manual and is familiar with all the functions and safety concerns of the unit before operating. 2.7.1.- Power Up Procedure ... -
Page 39: Setting Up The Machine To Make Borders
Technical Manual & Parts Lists 2.7.3.- Setting Up The Machine To Make Borders If you see a message “Border Slack Warning” on the screen, open the prefeed rollers and pull back the slack border material until the prefeed loop eye is uncovered and then close the rollers. ... -
Page 40: Compensation And Set-Up Instructions
Manual Técnico & Lista de Partes 2.7.4.- Compensation and Set-up Instructions Step 1: Adjusting the Feed and Prefeed compensation Make a Queen size border without handles and measure the length. Adjust the Feed compensation value until it measures correctly. Once the border length is correct, run the Prefeed compensation test using a piece of border that has been marked with two lines that are 300”... -
Page 41: Quality Check Sheet & Procedure
Technical Manual & Parts Lists 2.7.2.- Quality Check sheet & Procedure Refer to the “Border Handle Quality Check sheet” on next page The operator of the 4300 Border Handle Machine must check a border four (4) times each shift (at start-up, 1st break, lunch, 2nd break) and fill out the Border Handle Quality Check sheet according to the following procedure Insert a "P"... - Page 42 Manual Técnico & Lista de Partes MONDAY TUESDAY WEDNESDAY THURSDAY FRIDAY Start 1st- Lunc 2nd- Start 1st- Lunc 2nd- Start 1st- Lunc 2nd- Start 1st- Lunc 2nd- Start 1st- Lunc 2nd- Brea Brea Brea Brea Brea Brea Brea Brea Brea Brea Piece # Size...
-
Page 43: Maintenance
Technical Manual & Parts Lists 2.8.- Maintenance It is important that the machine operator read this manual and is familiar with all the functions and safety concerns of the unit before operating. General Safety Instructions The machine shall be switched off, come to a standstill and be secured so that it cannot be switched on again inadvertently before starting any maintenance work whatsoever. -
Page 44: Technical Manual
Manual Técnico & Lista de Partes 3.-TECHNICAL MANUAL All maintenance should be performed by a qualified service technician. 3.1.- Mechanical 3.1.1- Sewing Head Adjustments 1.- Adjusting the needle height 1. First, check to see if the needle is inserted to the proper depth. 2. - Page 45 Technical Manual & Parts Lists 2.- Adjusting the lower lopper Lower looper setting distance When the lower looper is at the farthest position to the left, adjust setting distance (B) between the center line of the overlock needle and the point of the lower according to the machine type. To make this adjustment, loosen screw (5) and move looper holder (7) left or right as required.
- Page 46 Manual Técnico & Lista de Partes 4.- Adjusting the double chain stitch looper 1.- Adjust clearance (a) between the center line of the double chain stitch needle and the point of the looper correctly. 1. Turn the hand wheel until the double chain stitch looper is at its farthest position to the left.
- Page 47 Technical Manual & Parts Lists 5.- Adjusting the needle guards 1. Adjusting the overlock needle guards •When the point of the lower looper has reached the center line of the overlock needle from the left, check to see if the needle is deflected 0-0.03mm toward the operator by the lower looper.
-
Page 48: 2- Adjusting Cutting Blades
Manual Técnico & Lista de Partes 3.1.2- Adjusting Cutting Blades A clean cut of the border will depend on the type of material, the sharpening of the blade and the tension of between the cutting blades. In order to adjust the tension between blades please follow these procedure. - Page 49 Technical Manual & Parts Lists Adjusting the Handle Knife Blade 1. Make sure air is off to the system. 2. Remove the four standard hex head screws and remove feed roller assembly. 3. Loosen the two metric screws only enough to allow adjusting of the blade.
- Page 50 Manual Técnico & Lista de Partes 4. The silver and black plate need to be flush. Turn of the adjustment screw very slightly clockwise to adjust the blade. 5. Each time you adjust the set screw test the cutting blade by manually pushing down and cutting a piece of border material.
-
Page 51: Pneumatic
Technical Manual & Parts Lists 3.2.- Pneumatic 3.2.1.- Main Air pressure regulator AA198-5110 The regulator assembly is located behind the table. The regulator is for the main air pressure, this is normally set to 70 to 80 psi. The purpose of the regulator is to keep the operating pressure of the system (secondary pressure) virtually constant regardless of fluctuations in the line pressure (primary pressure) and the air consumption. -
Page 52: Electrical
Manual Técnico & Lista de Partes 3.3.- Electrical All maintenance should be performed by a qualified service technician. 3.3.1.- Main Power witch The main power On/Off switch is on the back of the machine. It is used to turn the power on to the whole machine. -
Page 53: Sensors
Technical Manual & Parts Lists 3.3.2.- Sensors 1.- Photoelectric Eyes FFSM312VQ There are 5 Photoelectric sensors mounted on the machine. “A” Left head Hand wheel eye. Reads a piece of reflective tape located on the pulley disks The Hand wheel eye is responsible for reporting to the Efka motor that the sewing head is sewing at the set RPM, stitch counting for all counters, and for needle position when stopping “B”... - Page 54 Manual Técnico & Lista de Partes Eye Sensor Adjustment 1. Remove the clear plastic cover from the end of the sensor. There are two adjusting screws under the cover. One is labeled “GAIN” and is used to set the sensitivity of the sensor.
- Page 55 Technical Manual & Parts Lists Border Flaw Mark Adjustment 1. First mark a small piece of border or Handle with the definite black line. (Like the border or a handle had been marked for a flaw). 2. Place the marked piece of the border on top of the plate above the flaw mark sensor.
- Page 56 Manual Técnico & Lista de Partes 3.- Air Cylinder Sensors There are several sensors locate on the cylinders. A: Hall Switch. AAEHSKQ Used on following cylinders: Border knife open & close. Handle clamp up B: Hall Switch.AAEDY59A-3M Used on following cylinders: Handle knife open &...
-
Page 57: Stepping Motor Control Box
Technical Manual & Parts Lists 3.4.- Stepping Motor Control Box There are 3 stepping motor box located inside the machine. CONVEYORS, HANDLE LOAD, HANDLE FEED The back of the boxes has an on/off switch, fuse, and cables. Leave the on/off switch on all the time. When working on the box always disconnect the power cord before servicing. -
Page 58: Mini Switch (Sw1)
Manual Técnico & Lista de Partes 3.4.5.- Mini Switch (SW1) In case of replacement of the boxes please review following adjustments. Switch # 1: Control the rotations of the motor CW: Clock wise rotation. CCW: Counter close wise Switch 2: No function ... -
Page 59: Efka Motor
Technical Manual & Parts Lists 3.5.- Efka Motor 3.5.1.- Programming the Code Number NOTE: The parameter numbers in the illustrations below serve as examples and may not be available in all program versions. In this case, the display shows the next higher parameter number. See List of Parameters. - Page 60 Manual Técnico & Lista de Partes Parameter Selection Direct Selection...
- Page 61 Technical Manual & Parts Lists Changing Parameter values...
- Page 62 Manual Técnico & Lista de Partes Parameter Selection with the +/- Keys...
-
Page 63: To Perform Master Reset Of Parameters
Technical Manual & Parts Lists 3.5.2.- To Perform Master Reset of Parameters: 1. Power on holding down the "P" button till "COD" is displayed. 2. Press ">>" once and enter the number "591" or 5913 for 4 digits screens 3. Press "E" twice and "093" is displayed. 4. - Page 64 Manual Técnico & Lista de Partes 2.- Left Sewing Head PARAMETER RANGE VALUE DESCRIPTION Mode of operation. MUST SET THIS PARAMETER FIRST! EB301 Treadle Mode Maximum speed when "129" is 0, 1, or 200-9900 rpm Linear acceleration 1=ccw Motor rotation External hand wheel sensor configuration.
- Page 65 Technical Manual & Parts Lists 3.- Pre-Feed PARAMETER RANGE VALUE DESCRIPTION Mode of operation. MUST SET THIS PARAMETER FIRST! EB301 Treadle Mode 70-390 Positioning speed 0-999 Maximum speed when "129" is 0, 1, or 2. Linear acceleration 0-50 Braking power at standstill 1-CCW Motor rotation 1-55...
- Page 66 Manual Técnico & Lista de Partes 4.- Puller NOTE: Program and run the Right Sew Head before programming the Puller. Use the "5131E" Efka program, or "5131I" and above for the puller. PARAMETER RANGE VALUE DESCRIPTION Mode of operation. MUST SET THIS 0-26 PARAMETER FIRST!!! EB301 treadle mode...
- Page 67 Technical Manual & Parts Lists 5-Closer Motor (Juki) 3 DIGIT 4 DIGIT PARAMETER RANGE (default) DESCRIPTION VALUE VALUE 0-24 (5) Mode of operation. MUST SET THIS PARAMETER FIRST! EB301 Treadle Mode (5131F and later pgms only) 0-254 (2) Number of soft start stitches 70-390(200) Positioning speed 200-9900 rpm...
-
Page 68: Serial Bus
Manual Técnico & Lista de Partes 3.6.- Serial Bus 3.6.1.- Technical Menus 1.- Advance Settings The ADVANCED SETTINGS from the ADVANCE FUNCTION menu accesses the advanced machine settings and functions not normally accessible by the operator. After power on or a reset, a pass code must be entered to access these screens. - Page 69 Technical Manual & Parts Lists 2.- Advance Manual. The four ADVANCED MANUAL pages contain buttons, shown as dark "3" dimensional rectangles, and input indicators, shown as light rectangles. The buttons are used to manually turn on or off individual output functions of the machine for testing and troubleshooting. The input indicators show if the computer can "see"...
-
Page 70: Calibrating The Touch Screen
Manual Técnico & Lista de Partes 3.6.2.- Calibrating the Touch Screen If you are having troubles locating the right place to get access to the function by touching the screen a screen calibration may be required. Proceed as following: 1. Place one finger on the screen and hold it there while pushing the Green ON button. -
Page 71: Installation Of A New Touch Screen
Technical Manual & Parts Lists 5. Repeat step 4 where these lines intersect. NOTE: The implementation of step 3 and step 4 directly affects the validity of all the buttons in the entire program. It is very important to be accurate. Press the language button of your choice. -
Page 72: Standard Modules
Manual Técnico & Lista de Partes 3.6.4.- Standard Modules 1.- Program Module…4080-150 Stores the program information. It is also used to load program modifications or updates. For update procedures please refer to next chapter. 2.- Memory Module….4080-970 Stores the unique data required to operate this particular machine; such as serial number, original factory parameters, etc. - Page 73 Technical Manual & Parts Lists 5.- Update a Machine using a New Program Module NOTE: Very Important Before starting the procedure below, go to Advanced Settings and write down all the settings shown in these screens. 1. Turn off power to the machine. 2.
-
Page 74: Maintenance
Manual Técnico & Lista de Partes 3.7.- Maintenance All maintenance should be performed by a qualified service technician. • Maintenance should only be performed by trained, qualified personnel. Before performing any maintenance or repair work, switch off the electrical, pneumatic, etc. power to the machine at the main source and secure it with a padlock so that it cannot be switched on again without authorization. -
Page 75: Troubleshooting
Technical Manual & Parts Lists 3.8.- Troubleshooting 3.8.1.- Efka Controller Error... -
Page 76: Flow Chart Efka Error E1
Manual Técnico & Lista de Partes 3.8.2.- Flow Chart EFKA Error E1... -
Page 77: Sewing Trouble Shooting
Technical Manual & Parts Lists Sewing trouble shooting 1. Handles are not straight a. Foot Pressure on Sergers. (Both units must have equal pressure.) b. Check top feed control box settings (They must be the same number value) c. Trim knife on sew head is dull or too low. 2. - Page 78 Manual Técnico & Lista de Partes 4. Handle already prepped error a. Check handle length eye adjustment b. Replace reflective tape on handle clamp. 5. Handle feed timeout error a. Out of handle material b. Check handle length eye adjustment c.
- Page 79 Technical Manual & Parts Lists...
-
Page 80: Assembly Drawings & Parts Lists
Company. In addition to any confidentiality and non-disclosure obligations that currently exist between you and Atlanta Attachment Company, your use of these materials serves as an acknowledgment of the confidential and proprietary nature of these materials and your duty not to make any unauthorized use or... - Page 81 Technical Manual & Parts Lists...
- Page 82 Manual Técnico & Lista de Partes...
-
Page 83: 4300Ac Vertical Handle Inserter, 18
Technical Manual & Parts Lists 4300AC Vertical Handle Inserter, 18” AAC Drawing Number 9002776 Rev 1 NO QT PART # DESCRIPTION 1 1366140 GULLIOTINE ASSEMBLY,18" 2 1961-800F WASTE ASSEMBLY *3 AR 4300-PD DIAGRAM,PNEUMATIC *4 AR 4300-PD1 DIAGRAM,PNEUMATIC,CLOSER *5 AR 4300-WD... - Page 84 Manual Técnico & Lista de Partes...
-
Page 85: 1366114 Guillotine Assembly,18
Technical Manual & Parts Lists 1366114 Guillotine Assembly,18” AAC Drawing Number 1366114 Rev 2 NO. QTY PART # DESCRIPTION NO. QTY PART # DESCRIPTION 1366113 TOP BLADE, 18" CAPACITY AAFD35000 BAND, SWITCH, HSKQ,UNV. 1366144 MOUNT, PIVOT BRKT BBAW-5Z ROD END, SPHERICAL .5/16ID 1366145 MOUNT, CYLINDER PIVOT BBAW-7... -
Page 86: 1366140 Guillotine Assembly, 18
Manual Técnico & Lista de Partes 1366140 Guillotine Assembly, 18” AAC Drawing Number 1366140 Rev 0 NO QTY PART # DESCRIPTION 1 1366114 GULLI OTI NE ASSY, 18" 1 1366150 ADAPTOR, WORM GEAR DRI VE 3 SSHC01080 1/4-20 X 1-1/4 HHCS 3 WWFS1/4 WASHER,FLAT,SAE,1/4 3 WWL1/4... -
Page 87: 1366150 Worm Gear Drive Adaptor
Technical Manual & Parts Lists 1366150 Worm Gear Drive Adaptor AAC Drawing Number 1366150 Rev 2 NO QTY PART # DESCRIPTION NO QTY PART # DESCRIPTION 0211-209 PLATE,NUT,10-32@2.25 CTC MMD35B12M SPROCKET,22T,DBL,3/4B 4059-DC1500 MOTOR & CONTROLLER MMD35CL MASTER LINK,DBL,#35 CHAIN 1366141 MTG. -
Page 88: 1961-800F Waste Assembly
Manual Técnico & Lista de Partes 1961-800F Waste Assembly AAC Drawing Number 9002612 Rev 3... -
Page 89: 1961-817 Venturi Assembly, 2
Technical Manual & Parts Lists 1961-817 Venturi Assembly, 2” AAC Drawing Number 9001578 Rev 1 QTY PART # DESCRIPTION 1961-817A VENTURI TUBE, 2" AAF1066-4 FEMALE FITTING, 1/8 NPT AAQME-4-8 ELBOW,QUICK MALE,1/4X1/8... -
Page 90: 4300130 Roll Holder Assembly
Manual Técnico & Lista de Partes 4300130 Roll Holder Assembly AAC Drawing Number 4300130 Rev 1 QTY PART # DESCRIPTION 1959335 ROLL HOLDER ARM 1961141 SPINDLE ASSY, 1.5" BORE 4300199 BRAKE, WEIGHT 4300203 WEIGHT, BRAKE 4300434 SSFC98048 #10-32 X .75 SHCSF SSHC01048 1/4-20 X 3/4 HEX CAP WWFS1/4 WASHER,FLAT,SAE,1/4... -
Page 91: 1961141 Spindle Assembly, 1.5 " Bore
Technical Manual & Parts Lists 1961141 Spindle Assembly, 1.5 “ Bore AAC Drawing Number 1961141 Rev 1 QTY PART # DESCRIPTION 1959-003 LOCK, HANDLE 1961142 SHAFT, .751 BORE SPINDLE 1961143 HUB, .751 BORE SPINDLE IID016X064 DOWEL PIN,1/4 X 1 iid024x064 DOWEL PIN,3/8 X 1 JJ012 3/16 DIA. -
Page 92: 4300150 Dual Motor Heavy Duty
Manual Técnico & Lista de Partes 4300150 Dual Motor Heavy Duty AAC Drawing Number 4300150 Rev 1 Page... -
Page 93: 4300020 Left Sewing Head Assembly
Technical Manual & Parts Lists 4300020 Left Sewing Head Assembly AAC Drawing Number 4300020 Rev 0 NO. QTY PART # DESCRIPTION NO. QTY PART # DESCRIPTION 11200T BUMPER,1/4-28 AAC7S-1 CYLINDER,AIR,SA 1961-002 CUTTER,LOWER,LEFT HAND AAQME-5-8 QUICK MALE ELBOW 1961-003C CUTTER,UPPER,LEFT HAND FFSM312LVQ EYE,ELECTRIC,10-30VDC 1975-412A PLATE,NUT,4-40,.95CTC... -
Page 94: 4300030 Right Sewing Head Assembly
Manual Técnico & Lista de Partes 4300030 Right Sewing Head Assembly AAC Drawing Number 4300030 Rev 1 NO. QTY PART # DESCRIPTION NO. QTY PART # DESCRIPTION 11200F BUMPER, 1/4-28 X 1-1/2L 4300322 TAB, FOOTLIFT 1962-424 EYE MOUNT, POS. 1 SENSOR AAC7S-1 CYLINDER,AIR,SA 1975-412A... -
Page 95: 4300265 Left Head Foot Assembly
Technical Manual & Parts Lists 4300265 Left Head Foot Assembly AAC Drawing Number 4300265 Rev 1... -
Page 96: 4300266 Right Foot Assembly
Manual Técnico & Lista de Partes 4300266 Right Foot Assembly AAC Drawing Number 4300266 Rev 0 QTY PART # DESCRIPTION 4300263 FOOT, RH HEAD BBB-66 BEARING,NEEDLE,.375B M1J96-004B SHAFT,60C,.375DIA SSBC90048 8-32 X 3/4 BUTTON CAP... -
Page 97: 4300103 Touch Screen Assembly
Technical Manual & Parts Lists 4300103 Touch Screen Assembly AAC Drawing Number 4300103 Rev 1 PART # DESCRIPTION 0411- NUT PLATE,BOX MOUNT 1278- START/STOP BUTTON ASSY 28201 BLOCK,CROSS,(LARGE) 4080-004 TOUCH SCREEN 4300104 MOUNT, TOUCH SC 4300114 ROD MOUNT, NNE1/4- NUT,ELASTI C LOCK,1/4- SSHC0108 1/4-20 X 1-1/4 HHCS SSSC9004 8-32 X 5/8 SOC CAP SC TTH32425 HANDLE,THRDED,5/16-... - Page 98 Manual Técnico & Lista de Partes...
- Page 99 Technical Manual & Parts Lists...
-
Page 100: 4300200 Closer Assembly
Manual Técnico & Lista de Partes 4300200 Closer Assembly AAC Drawing Number 4300200 Rev 2 NO QTY PART # DESCRIPTION 1315661 ROD, THREADED, 5/8-11X7LG 3200078 BRACKET, FRONT GUARD AR 3200190 COVERS, CLOSER CARRIAGE 32006515A GUIDE, MATERIAL 4300202 DEFLECTOR, BORDER FEED 4300210 CONSOLE, CLOSER, H/T/S/M 4300327... -
Page 101: 3200190 Closer Carriage Covers
Technical Manual & Parts Lists 3200190 Closer Carriage Covers AAC Drawing Number 3200190 Rev 0 NO QTY PART # DESCRIPTION NO QTY PART # DESCRIPTION 12788-503D CABLE, 1' LONG, 2 COND. A-2014-39 MICRO SWITCH 1975-412A PLATE,NUT,4-40,.95CTC MMSLD-ECH 1/2" DIA RUBBER BUMPER 3200181 GUARD, CARRIAGE MOTOR NNK5/16-18 NUT,KEP,5/16-18... -
Page 102: 4300210 Closer Console
Manual Técnico & Lista de Partes 4300210 Closer Console AAC Drawing Number 4300210 Rev 0 NO. QTY PART # DESCRIPTION NO. QTY PART # DESCRIPTION 0411-069D BRKT, THREAD BREAK DETECT 4300013 CONT PANEL, CLOSER 0411-070 CLAMP, SENSOR BRACKET 4300056 POLE, THREAD STAND 1959-112 2 POS THREAD PLATE ASSY NNH5/8-18 NUT,HEX,5/8-18... -
Page 103: 9002422 Thread Break Sensor Assembly
Technical Manual & Parts Lists 9002422 Thread Break Sensor Assembly AAC Drawing Number 9002422 Rev 3 NO QTY PART # DESCRIPTION 1 4003-501A BRACKET,ENCODER MOUNT 1 4003-501B BRKT,AUX TENSI ON SPRI NG 1 4003-502A WHEEL,THREAD SENSOR 2 4003-BYW2 THREAD TENSI ON, EYELET 1 EENC025 ENCODER,SBUS,025,1/8 2 MMKC34... - Page 104 Manual Técnico & Lista de Partes...
-
Page 105: 3200210 Closer Station
Technical Manual & Parts Lists 3200210 Closer Station AAC Drawing Number 3200210 Rev 1 NO. QTY PART # DESCRIPTION NO. QTY PART # DESCRIPTION 0411-1063 ROD, THREADED, 5/8-11 X 5 NNH3/8-16 NUT,HEX,3/8-16 1278-6160C DUAL FOOT PEDAL ASSY NNJ1/4-20 NUT, HEX, JAM, 1/4-20 1278-6689B BRACKET, EYE MOUNT NNSH5/8-11... -
Page 106: 3200200 Sewing Head Assembly
Manual Técnico & Lista de Partes 3200200 Sewing Head Assembly AAC Drawing Number 3200200 Rev 0 NO. QTY PART # DESCRIPTION NO. QTY PART # DESCRIPTION 1278-6364 DISC, TAPE MOUNTING SJUKI-1541-7 SEWING HEAD,SN,LS,UF,UT 1335-316 ROD, SS, "L", 3/8, 4.0 X SS4111215SP SCREW, 11/64-40 X 12MM 23080 BLOCK,CLAMP,EYE... -
Page 107: 1278-6160C Dual Foot Pedal Assembly
Technical Manual & Parts Lists 1278-6160C Dual Foot Pedal Assembly AAC Drawing Number 191152B Rev6 PART # DESCRIPTION NNK6-32 Kep Nut 1278-5275 Label 1278-6161 Foot Switch 12788-502A Cable AAF1/8 Clamp SSFC80024 Screw, Flat Allen 1278-5051A Foot Pedal Plate SSFC80016 Screw, Flat Allen... - Page 108 Manual Técnico & Lista de Partes...
-
Page 109: 3200195 Feed Conveyor Assembly
Technical Manual & Parts Lists 3200195 Feed Conveyor Assembly AAC Drawing Number 3200195 Rev 3 NO. QTY PART # DESCRIPTION NO. QTY PART # DESCRIPTION 011-070 PLATE,CYLINDER MOUNT GGD160XL37 BELT,GEAR,DBL. 1975-213 CYLINDER,AIR,DA,9/16B,1/2S IID012X064 DOWEL PIN,3/16 X 1 26179 BUSHING,IDLER,PULLEY MML050 SPIDER, COUPLING 26183 PULLEY MOD, 18XLB037... - Page 110 Manual Técnico & Lista de Partes...
-
Page 111: 4300013 Control Panel Closer
Technical Manual & Parts Lists 4300013 Control Panel Closer AAC Drawing Number 4300013 Rev 0 NO QTY PART # DESCRIPTION 0411-1503 SHELF MOTOR BOX 4080-110 MODULE,QUAD I NPUT 4080-120 MODULE,DUAL OPTO-I SO 4080-130 MODULE,QUAD OPTO-I SO 4080-140 MODULE,QUAD OUTPUT 4300-WD1 DI AGRAM,WI RI NG,CLOSER 4300012 CONTROL PANEL... -
Page 112: 4300335 Border Support Assembly
Manual Técnico & Lista de Partes 4300335 Border Support Assembly AAC Drawing Number 4300335 Rev 0 QTY PART # DESCRIPTION 3300087 BODY,SLIDE 3300088 PLATE,SUPPORT,ROD 3300089 BODY,SLIDE 4300336 ROD, .50 DIA X 20.0 L 4300337 MOUNT, BORDER SUPPORT 4300338 MOUNT, BORDER SUPPORT 97-6282 NUT,FLOATING COUPLING 97-6290... - Page 113 Technical Manual & Parts Lists...
- Page 114 Manual Técnico & Lista de Partes...
-
Page 115: 4300327 Primary Gripper Assembly
Technical Manual & Parts Lists 4300327 Primary Gripper Assembly AAC Drawing Number 4300327 Rev 1 QTY PART # DESCRIPTION 1510-09 BUMPER 4300328 GRIPPER PLATE, END 4300329 CLAMP, PRIM GRIPPER,LOWER 4300330 CLAMP, PRIM GRIPPER,LOWER 4300331 MOUNT, CYLINDER 4300332 BRKT. SIDE MOUNTING 4300333 BRACKET, SLIDE ADAPTOR 4300334... -
Page 116: 4300339 Edge Guide Assembly
Manual Técnico & Lista de Partes 4300339 Edge Guide Assembly AAC Drawing Number 4300339 Rev 0 NO QTY PART # DESCRIPTION 3200105 SUPPORT, FIXED GUIDE 3200107 MOUNT, FIXED GUIDE 3200108 GUIDE, MOVEABLE 3200109 MOUNT, MOVEABLE GUIDE 3200110 PLATE,WASHER (2) .203 DIA 3200113 BLOCK, SUPPORT 4300340... -
Page 117: 4300344 Guillotine Cover
Technical Manual & Parts Lists 4300344 Guillotine Cover AAC Drawing Number 4300344 Rev 0 QTY PART # DESCRIPTION 4300345 FRONT COVER PANEL 4300346 REAR COVER PANEL 98-6819A CORNER BKT SSBC98032 10-32 X 1/2 BUTTON CAP SC WWFS10 WASHER, FLAT, #10, SAE... -
Page 118: 4300350 Guillotine Bridge Assembly
Manual Técnico & Lista de Partes 4300350 Guillotine Bridge Assembly AAC Drawing Number 4300350 Rev 0 PART # DESCRIPTION 3200138 SPACER, 1/4 @ 50MMCTC 4300351 BRIDGE, BORDER 4300352 SUPPORT, BORDER AA198RA510 FL CONT,5/32X10-32 AACTB12110 CYLINDER,AIR,DUAL ROD SSSC80064 6-32 X 1 SOC CAP SC SSSCM4X16 SCREW,SOCKET CAP... - Page 119 Technical Manual & Parts Lists...
- Page 120 Manual Técnico & Lista de Partes...
-
Page 121: 32007800A Secondary Gripper Assembly
Technical Manual & Parts Lists 32007800A Secondary Gripper Assembly AAC Drawing Number 9002088 Rev 5 NO QTY PART # DESCRIPTION NO QTY PART # DESCRIPTION 32007611 BELT HOLDER MMAGH25CAN LINEAR BEARING 32007622 FLAG,CRASH SWITCH MMAGR25139N RAIL LINEAR AG 32007657 MOUNT, CABLE TRACK MMCPL100 BELT CLAMP 32007801... -
Page 122: 4300390 Indexing Tray Assembly
Manual Técnico & Lista de Partes 4300390 Indexing Tray Assembly AAC Drawing Number 4300390 Rev 0 NO. QTY PART # DESCRIPTION NO. QTY PART # DESCRIPTION 4300379 MOUNT, FOOT, LEFT MMFB4444 FOOT, RUBBER 4300381 MOUNT, FOOT, RIGHT 12 NNH1/2-13 NUT,HEX,1/2-13 4300382 MOUNT, FOOT, CENTER 24 NNK1/4-20... - Page 123 Technical Manual & Parts Lists...
- Page 124 Manual Técnico & Lista de Partes...
-
Page 125: 4300341 Secondary Clamp/Transport
Technical Manual & Parts Lists 4300341 Secondary Clamp/Transport AAC Drawing Number 4300341 Rev 1 NO. QTY PART # DESCRIPTION NO. QTY PART # DESCRIPTION 011-020 MOTOR, STEPPER W/PLUG MMAGH25CAN LINEAR BEARING 1278-6010A START/STOP BUTTON ASSY MMAGR251430 RAIL,LINEAR, AG SERIES 3200095 PLATE,NUT,1/4-20,4 PL MML050 SPIDER, COUPLING... - Page 126 Manual Técnico & Lista de Partes...
- Page 127 Technical Manual & Parts Lists...
-
Page 128: 4300190 Heavy Duty Main Assembly, 18
Manual Técnico & Lista de Partes 4300190 Heavy Duty Main Assembly, 18” AAC Drawing Number 4300190 Rev 1... - Page 129 Technical Manual & Parts Lists...
- Page 130 Manual Técnico & Lista de Partes...
-
Page 131: 4300035 Control Assembly
Technical Manual & Parts Lists 4300035 Control Assembly AAC Drawing Number 4300035 Rev 6... -
Page 132: 4300065 Stepper Box Assembly
Manual Técnico & Lista de Partes 4300065 Stepper Box Assembly AAC Drawing Number 4300065 Rev 0 QTY PART # DESCRIPTION 1335M-9010 BRKT, STEPPER BOX BASE 4300066 BOX, SHELF,STEPPER,DUAL 4300067 MOUNT,CONTROL BOX,SIDE AP-28-600CC CONT BOX,2 AMP MAX,SBUS AP-28-800W CONTROL BOX,STEPPER MTR MMSLD-ECH 1/2"... -
Page 133: 4300320 Right Marker Module
Technical Manual & Parts Lists 4300320 Right Marker Module AAC Drawing Number 4300320 Rev 0 PART # DESCRIPTION PART # DESCRIPTION 1959-015 NUTPLATE, 10-32,3.25 OC 14 * 20 FT AATP5/32 TUBING, 5/32 OD 3200PMC MARKING MODULE * 10" EETS35X7.5A DIN RAIL-AMERICAN 4300-PD2 PNEUMATIC DIAGRAM FF100F2202... - Page 134 Manual Técnico & Lista de Partes...
-
Page 135: 4300270 Right Top Belt Feed Assembly
Technical Manual & Parts Lists 4300270 Right Top Belt Feed Assembly AAC Drawing Number 4300270 Rev 0 QTY PART # DESCRIPTION 1325-39C SPRING CLIP 1342Z-201 ROLLER,DELRIN,TOP BELT FD 3517 WASHER,THRUST,BRONZE 3554-2A PULLEY,GEAR,1/5 PITCH 49023 ROLLER,FRONT 49038 BELT COVER SPACER 4300024 PLATE,NUT 1/4-20,2.50 CTC 4300049 MOUNT, TOP CONVEYOR,RH... - Page 136 Manual Técnico & Lista de Partes...
-
Page 137: 4300280 Left Top Belt Feed Assembly
Technical Manual & Parts Lists 4300280 Left Top Belt Feed Assembly AAC Drawing Number 4300280 Rev 0 NO QTY PART # DESCRIPTION 1325-39C SPRI NG CLI P 1342Z-201 ROLLER,DELRI N,TOP BELT FD 3517 WASHER,THRUST,BRONZE 3554-2A PULLEY,GEAR,1/5 PI TCH 49023 ROLLER,FRONT 49038 BELT COVER SPACER 4300024... -
Page 138: 4300325 Left Marker Module
Manual Técnico & Lista de Partes 4300325 Left Marker Module AAC Drawing Number 4300325 Rev 0 PART # DESCRIPTION PART # DESCRIPTION 1959-015 NUTPLATE, 10-32,3.25 OC AAESY3140 VALVE, REPLACEMENT 3200PMC MARKING MODULE 15 * 20 FT AATP5/32 TUBING, 5/32 OD 4300-PD2 PNEUMATIC DIAGRAM * 10"... -
Page 139: 3200Pmc Marking Module
Technical Manual & Parts Lists 3200PMC Marking Module AAC Drawing Number 9002562 Rev 0 QTY PART # DESCRIPTION 3200302 PEN CAP 3200303 PLATE, CAM 3200312 GUIDE PIN, THREADED 3200313 MOUNTING BRKT. 3200314 BRACKET, CYL ROD MOUNT 3200PM-3001 HOLDER, PIN AAC8D-2 CYLINDER, AIR AAQMC-5-10 QUICK MALE CONNECT... - Page 140 Manual Técnico & Lista de Partes...
-
Page 141: 4300170 Border Prefeed Assembly
Technical Manual & Parts Lists 4300170 Border Prefeed Assembly AAC Drawing Number 4300170 Rev 4... - Page 142 Manual Técnico & Lista de Partes...
-
Page 143: 32005600 Prefeed Roller Assembly
Technical Manual & Parts Lists 32005600 Prefeed Roller Assembly AAC Drawing Number 9002298 Rev 4 QTY PART # DESCRIPTION 1278-7055D PROX SWITCH W/PLUG,12" 1325-11 ROD END,MALE, .5I.D.X.5-2 32005602 ROD,STRAIGHT,60C, 1/2X20 32005603 BAR, PIVOT MOUNTING 32005604 BRACE, PREFEED 32005605 ROLLER, 16.0 L, 1.9 OD, 32005606 COVER 32005607... -
Page 144: 32005650A Bottom Puller Roller Assembly
Manual Técnico & Lista de Partes 32005650A Bottom Puller Roller Assembly AAC Drawing Number 9002271 Rev 4 NO QTY PART # DESCRIPTION NO QTY PART # DESCRIPTION 0411-016 PLATE,NUT,MOTOR MOUNT GG150L050 BELT, 3/8P, 40T, 1/2W 32005652 PLATE,BEARING MOUNT PP10LF050M3 PULLEY, GEAR, 3/8P, 10T, 32005653 BRACKET,GUARD PP24LB050M1... -
Page 145: 4300221 Insert Rail Assembly, 18
Technical Manual & Parts Lists 4300221 Insert Rail Assembly, 18” AAC Drawing Number 4300221 Rev 0 QTY PART # DESCRIPTION 1356142 BLOCK, RAIL STOP 4300222 BRKT, MTG, LINEAR RAIL MMAGH25CAN LINEAR BEARING MMAGR251070N RAIL,LINEAR AG SERIES SSSC01040 1/4-20 X 5/8" SOC CAP SC SSSC98056 10-32 X 7/8 SOC CAP... -
Page 146: 4300223 Cable Rack Assembly
Manual Técnico & Lista de Partes 4300223 Cable Rack Assembly AAC Drawing Number 4300223 Rev 0 QTY PART # DESCRIPTION 4300141 BRKT, MTG, CABLE TRACK 4300224 SUPPORT, CABLE TRACK,18" AAF3/16 CLAMP, BLACK PLASTIC MM45021-22 DUCT,WIRE PLASTITRAK NNK1/4-20 NUT,HEX,KEP,1/4-20,W/LOCK SSBC01040 1/4-20 X 3/4 BUT CAP SC SSBC01048 SCREW,BUTTON CAP,1/4- 20X3/4,SS SSBC90020... -
Page 147: 4300225 Border Tension Road Assembly
Technical Manual & Parts Lists 4300225 Border Tension Road Assembly AAC Drawing Number 4300225 Rev 0 NO QTY PART # DESCRIPTION NO QTY PART # DESCRIPTION 1961-211 PLATE, EDGE GUIDE NNK1/4-20 NUT,KEP,1/4-20 1962-3201 CLAMP,3/4ROD,3"CTC SSFC98040 #10-32 X 5/8 FLAT ALLEN 4300259 MOUNT, TENSION, BORDER SSHC25064 3/8-16 X 1,HEX CAP... - Page 148 Manual Técnico & Lista de Partes...
-
Page 149: 4300285 Encoder Assembly
Technical Manual & Parts Lists 4300285 Encoder Assembly AAC Drawing Number 4300285 Rev 1 NO QTY PART # DESCRIPTION 1 1335637 MOUNT, CYL CLEVI S 1 1335M-2502 MOUNT,BASE1335M-2500 1 1335M-2503 PLATE,TENSI ON 2 1335M-2511 BRKT,SI DE,LONG 1 1335M-2514 COVER,LONG 1 4300284 WHEEL, ENCODER 1 AA198RA508 FLOW CONTROL,5/32 X 1/8"... - Page 150 Manual Técnico & Lista de Partes...
-
Page 151: 4300310 Border Tension Assembly
Technical Manual & Parts Lists 4300310 Border Tension Assembly AAC Drawing Number 4300310 Rev 0 QTY PART # DESCRIPTION 1355081 BRKT,LIFT,R.H 1355083 BRKT,LIFT,LEFT 1961-304 HINGE PLATE,PULLER 1961-305 TOP,LEFT SIDE,PULLER 1961-306 TOP,RIGHT SIDE,PULLER 1961-307A PLATE,TOP,PULLER 1961-311A ROD,STRIAIGHT,CRS,1/2X21 1961-313A PLATE,BASE,PULLER 1961-371A GUARD,ROLLER 4300297 GUARD,TOP 4300298... - Page 152 Manual Técnico & Lista de Partes...
-
Page 153: 4300230 Handle Cut, Insert 18
Technical Manual & Parts Lists 4300230 Handle Cut, Insert 18” AAC Drawing Number 4300230 Rev 2... - Page 154 Manual Técnico & Lista de Partes...
-
Page 155: 4300015 Feed And Cut Assembly
Technical Manual & Parts Lists 4300015 Feed And Cut Assembly AAC Drawing Number 4300015 Rev 1 NO. QTY PART # DESCRIPTION NO. QTY PART # DESCRIPTION WWF4 WASHER, FLAT, #4 RRLC038E1 SPRING,COMP .038X.36X.44 WWSI4 WASHER,INT. TOOTH SSAS016064 SCREW,ALLEN SHOULDER SSPS70064 4-40 X 1 PAN HD SLOTTED AACXSM2020 CYLINDER,AIR,DUAL ROD... -
Page 156: 4300235 Handle Guide Assembly, 18
Manual Técnico & Lista de Partes 4300235 Handle Guide Assembly, 18” AAC Drawing Number 4300235 Rev 0 NO. QTY PART # DESCRIPTION NO. QTY PART # DESCRIPTION 4300109 PLATE, COUPLER, CYLINDER SSFC98048 #10-32 X .75 SHCSF 4300176 GUIDE, CYLINDER SSFCM6X20 M6 X 20 FLAT ALLEN 4300231 BRACE, SUPPORT, UPPER... -
Page 157: 4300080 Handle Insert Drive Assembly
Technical Manual & Parts Lists 4300080 Handle Insert Drive Assembly AAC Drawing Number 4300080 Rev 0 NO. QTY PART # DESCRIPTION NO. QTY PART # DESCRIPTION 1278-7055A PROX SWITCH W/PLUG SSFC01048 1/4-20 X 3/4 FLAT CAP 4300102 PLATE, MTG, SIDE SSHC01032 1/4-20 X 1/2 HHCS 4300116... - Page 158 Manual Técnico & Lista de Partes...
-
Page 159: 4300240 Handle Clamp Assembly, 18
Technical Manual & Parts Lists 4300240 Handle Clamp Assembly, 18” AAC Drawing Number 4300240 Rev 0 QTY PART # DESCRIPTION 4300057 SPACER, PIVOT, RIGHT 4300061 LEVER, PIVOT, CLAMP 4300068 SPACER, PIVOT, LEFT 4300234 PLATE, MTG, MAIN 4300236 GUIDE, HANDLE 4300237 SHAFT, PIVOT, CLAMP 4300238 PLATE, CLAMP... -
Page 160: 4300005 Puller Drive Assembly
Manual Técnico & Lista de Partes 4300005 Puller Drive Assembly AAC Drawing Number 4300005 Rev 0 QTY PART # DESCRIPTION 011-020 MOTOR, STEPPER W/PLUG 1335-119 BLOCK,BEARING 3517 WASHER,THRUST,BRONZE 3554 PULLEY,GEAR,1/5 PITCH 4300002 MOUNT, MOTOR 4300003 GUARD, BELT 4300054 SHAFT,FLATTED,60C,.375 CCCL6F CLAMP COLLAR- 3/8 GG120XL037 BELT,GEAR,3/8P,3/8W... -
Page 161: 4300300 Roll Holder Assembly
Technical Manual & Parts Lists 4300300 Roll Holder Assembly AAC Drawing Number 4300300 Rev 0 NO QTY PART # DESCRIPTION 1 784B-2436 PLATE, ALU, 23.75 X 31.75 1 1961-251C HUB UNWI ND SHAFT 1 1961-252D ROD, ROLL, 27" L 1 1961-253A HUB, UNWI ND STAND 1 32007704 FRAME, ROLL HOLDER... -
Page 162: 4300-Pd Pneumatic Diagram
Manual Técnico & Lista de Partes 4300-PD Pneumatic Diagram 125907B... -
Page 163: 4300-Pd1 Pneumatic Diagram
Technical Manual & Parts Lists 4300-PD1 Pneumatic Diagram 125906B... -
Page 164: 4300-Wd Wiring Diagram
Manual Técnico & Lista de Partes 4300-WD Wiring Diagram 125903A... -
Page 165: 4300-Wd1 Wiring Diagram
Technical Manual & Parts Lists 4300-WD1 Wiring Diagram 125905B... - Page 166 Atlanta Attachment Company (AAC) Statement of Warranty Manufactured Products Atlanta Attachment Company warrants manufactured products to be free from defects in material and workmanship for a period of eight hundred (800) hours of operation or one hundred (100) days whichever comes first. Atlanta Attachment Company warrants all electrical components of the Serial Bus System to be free from defects in material or workmanship for a period of thirty six (36) months.
- Page 167 Declaración de Garantía Productos Manufacturados Atlanta Attachment Company garantiza que los productos de fabricación son libres de defectos de material y de mano de obra durante un período de ochocientos (800) horas de operación o cien (100) días, cual llegue primero.
- Page 168 Atlanta Attachment Company 362 Industrial Park Drive Lawrenceville, GA 30046 770-963-7369 www.atlatt.com Printed in the USA...
Need help?
Do you have a question about the 4300AC and is the answer not in the manual?
Questions and answers