Table of Contents

Related Manuals for JUKI MO-2800


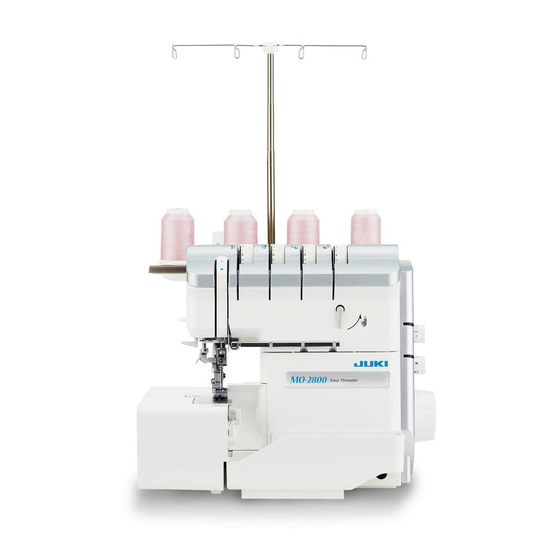
Summary of Contents for JUKI MO-2800
- Page 1 2-Needle, 2/3/4-Thread Overlock Sewing Machine MO-2800 INSTRUCTION MANUAL IMPORTANT: Read all safety regulations carefully and under- stand them before using your sewing machine. Retain this instruction manual for future reference.
-
Page 2: Safety Regulations
“IMPORTANT SAFETY INSTRUCTIONS” When using an electrical appliance, basic safety precautions should always be followed, including the following: Read all instructions before using this sewing machine. “DANGER ___ To reduce the risk of electric shock:” 1. The appliance should never be left unattended when plugged in. 2. - Page 3 Congratulations on your purchase of a JUKI sewing machine. Please be sure to read safety precautions in “To use the sewing machine safely” in the Instruction Manual before use to fully understand the functions and operating procedures of the sewing ma- chine so as to use the sewing machine for a long time.
- Page 4 WARNING For the combination of the material and the thread and needle, in particular, refer to the explanation table in “Replacement of the needle”. If the needle or thread does not match the material used such as in the case that an extra heavy- weight material (e.g., denim) is sewn with a thin needle (#11 or higher), the needle can break re- sulting in an unexpected personal injury.
-
Page 5: Table Of Contents
Contents Safety regulations ........1-3 Threading preparations / Tips ....18 Contents ...........4 Stitch chart ..........19 Details of the machine ......5,6 Threading 4/3 Thread OL ....20-24 • Accessories ..........6 • Lower looper ..........20 • Thread stand ..........6 • Upper looper ..........21 •... -
Page 6: Details Of The Machine
Details of the machine Thread guide support Retractable support rod Open thread guide Thread guide No. 1 Lower looper thread tension dial Magnet needle tray Upper looper thread tension dial Right needle thread tension dial Top cover Left needle thread tension dial Spool holder pin Presser foot pressure regulating knob Anti - vibration cone... -
Page 7: Accessories
Details of the machine ● Accessories Accessory bag Electronic foot control Knee lifter lever Dust cover Nets Wool needle Spool caps Brush/needle inserter Tweezers Looper threader Waste collector Screwdriver Needle set HA×1 No.80(No.12)×3 T-shape Curve foot No.90(No.14)×2 screwdriver ・Instruction manual (This manual) Thread stand Push the support rod firmly into the socket on the back of the ma-... -
Page 8: Preparing The Machine / Using The Machine
Preparing the machine / Using the machine Thread / cones / spools Large spools The anti-vibration cone should be If large industrial spools are used with the wider edge at the used, position the anti-vibration bottom on the spool holder pin cone upside down on the spool when sewing with cones. -
Page 9: Attaching The Foot Control
Preparing the machine / Using the machine Attaching the foot control Plug foot control into the machine socket (A) and then into main socket (B). The foot control regulates the sewing speed. The sewing speed can be adjusted by increasing or decreasing the pressure on the foot control. -
Page 10: Handwheel
Using the machine Handwheel The handwheel turns forward, i.e. in the same direction as on a household sewing machine. * The needle is brought to its upper end by aligning the “ ” marking on the side of the front cover with the “ ” marking on the handwheel. -
Page 11: Changing The Presser Foot
Using the machine Changing the presser foot When you want to change the presser foot, turn CAUTION OFF the power switch and lower the upper knife. • Raise the presser foot. • Turn handwheel towards you until needles are fully raised. Match the matching up marks on handwheel and side cover. -
Page 12: Upper Knife Is Deactivated
Using the machine To carry out sewing without cutting the material (the upper knife is deactivated) To deactivate the upper knife, lift the presser CAUTION foot and turn OFF the power switch. 1. Lower the upper knife changeover knob in the direction of the arrow. 2. -
Page 13: Needle And Thread
Needle and thread Needles Needles must be in perfect condition. Problems can occur if nee- dles: A are bent. B are damaged or blunt. C have hooked points. Needle and thread The needle size used depends on the thread. The needles should be in accordance with thread used. When sewing, the thread is fed through the long groove in the needle. -
Page 14: Adjustments And Settings
Adjustments and settings Stitch length It can be adjusted while sewing. The stitch length is infinitely variable from 0.7 to 4 mm. Most over- lock work is done with a basic setting of 2.5 mm. For roll hemming or narrow overlocking, it is best to set the dial at “0.7 to 1.5”. -
Page 15: Twa (Tweak Width Adjustment)
Adjustments and settings TWA (Tweak Width Adjustment) Overlocking width is set in conjunction with the adjustment of the lower knife position. It is also possible to finely adjust the overlocking width separately. A To decrease the overlocking width B To increase the overlocking width C The material edge does not reach the seam. -
Page 16: Differential Feed
Adjustments and settings Differential feed There are two feed dogs one front (C) and one rear (D). The two feed dogs move independently and the distance each feed dog travels during one complete movement can be adjusted. The differential feed prevents fluting or waving in knitted or stretch fabrics and movements between the layers of fabric. -
Page 17: Gathering
Adjustments and settings Gathering Using the differential feed, a single layer of fabric can be gathered before sew- ing it to the garment. For example, sleeve heads and lower edges, yokes, lace edging or frills. Adjustment: • Stitch: 4-thread overlock •... -
Page 18: Presser Foot Pressure
Adjustments and settings Presser foot pressure Presser foot pressure regulating knob The presser foot pressure is factory adjusted to a medium setting. Align the marker line on the presser foot pressure regulating knob with the upper end of the top cover. •... -
Page 19: Threading Preparations / Tips
Threading preparations / Tips 1. Extend the retractable support rod fitted with open thread guide as far as it goes. 2. Raise the presser foot. (Tension disk opens.) 3. Open the looper cover. 4. Turn the power on. Threading sequence The thread guides can be threaded in any sequence. -
Page 20: Stitch Chart
Stitch chart * The scale marks of the tension regulating dial listed below are just a guide. The correct adjustment differs according to the type of thread and material to be used. Stitch Stitch width Thread tension Basic settings Stitch length: 2.5 4-Thread overlock with Left needle (beige) 3-5 Cutting width: 2.5-5.0... -
Page 21: Threading 4/3 Thread Ol
Threading 4/3 Thread OL Lower looper thread, red markings Switch the machine off (power switch”0”) Place the spool on the spool holder pin as illustrated. (1) Raise the threading changeover lever in the direction of the arrow. Turn the handwheel toward you until it clicks. (The threading pipe is connected.) (2) Thread the thread guide which is located just above the spool from back to front. -
Page 22: Upper Looper
Threading 4/3 Thread OL Upper looper thread, purple markings Switch the machine off (power switch”0”) Place the spool on the spool holder pin as illustrated. (1) Raise the threading changeover lever in the direction of the arrow. Turn the handwheel toward you until it clicks. (The threading pipe is connected.) (2) Thread the thread guide which is located just above the spool from back to front. -
Page 23: Right Needle
Threading 4/3 Thread OL Right-hand needle, green markings Switch the machine off (power switch”0”) Place the spool on the spool holder pin as illustrated. (1) Thread the thread guide which is located just above the spool from back to front. (2) Thread the thread guide No.1 (3) Route the thread in the groove. -
Page 24: Left Needle
Threading 4/3 Thread OL Left-hand needle, beige markings Switch the machine off (power switch”0”) Place the spool on the spool holder pin as illustrated. (1) Thread the thread guide which is located just above the spool from back to front. (2) Thread the thread guide No.1 (3) Route the thread in the groove. -
Page 25: How To Use The Looper Threader
Threading 4/3 Thread OL How to use the looper threader To thread woolly thread or any thread that cannot pass smoothly through the threading holes, it is recommended either to use the “looper threader” supplied in the acces- sory bag, or to prepare an approximately 30cm long spun thread or the like, tie it at the end of the woolly thread, pass the spun thread through the threading hole and pull it until the woolly thread passes through the hole. -
Page 26: Trial Sewing
Trial sewing Sewing test Use two plies of material to check that the quality of the finished seam and thread tensions are correct. 1. Close the looper cover. Turn the power on. 2. Check that the upper knife is raised. 3. -
Page 27: Thread Tension
Thread tension Check your trial run 4/3 Thread OL 1. Upper looper thread (purple). 2. Lower looper thread (red). 3. Right-hand needle thread (green). 4. Left-hand needle thread (beige). Perfect stitch formation is when both looper threads meet at the fabric edge. -
Page 28: Practical Sewing - Overlock
Practical Sewing - Overlock Sewing in tape The standard presser foot is equipped with a tape guide. A tape can be sewn into the shoulder or side seams of gar- ments made from knits or stretch fabrics to prevent stretch- ing. - Page 29 Practical Sewing - Overlock Thread tension for roll hemming (roll hemming and narrow overlocking) ● Roll hemming thread tension lever Raise the roll hemming thread tension lever A up to per- form roll hemming without adjusting the thread tension dial. Raise the roll hemming thread tension lever up to obtain the thread tension that is suited to roll hemming.
-
Page 30: Wrapped Overlocking With Three Threads
Practical Sewing - Overlock Wrapped overlocking with three threads For wrapped overlocking with the right needle (3 to 5.5 mm in width) 1. Remove the left needle. 2. Thread the upper and lower loopers in the same manner as the standard sewing (2-needle, 4-thread). -
Page 31: Cover Stitch With Three Threads (Flatlock)
Practical Sewing - Overlock Cover stitch with three threads (flatlock) 1. Deactivate the upper knife. 2. Use a decorative thread as the upper looper thread. (Filament thread is best-suited as the needle thread and the lower looper thread. However, spun thread can also be used.) ❶... -
Page 32: Securing Thread Ends At The Beginning And End Of Sewing
Practical Sewing - Overlock Securing thread ends at the beginning and end of sewing Overlock stitches can unravel if the threads are not secured at the beginning and end of sewing. Secure the thread ends. Securing thread ends with the overlock machine 1) Securing thread ends at the beginning of sewing 1. - Page 33 Practical Sewing - Overlock In the case of securing thread ends with a wool needle: (A) Leave a 2 to 3 cm long chain-off thread at the beginning and end of sewing. Put the chain-off threads in the finished seam by means of a wool needle. In the case of securing thread ends with glue for handicraft: (B) Apply a little amount of glue for handicraft at the root of chain-off thread on the material.
-
Page 34: Maintenance
Maintenance Cleaning and lubricating Turn off the power switch and disconnect the power plug from the wall outlet before CAUTION starting cleaning or lubricating the ma- chine. As you use the sewing machine, lint is likely to accumulate in the sewing machine. -
Page 35: Replacing The Knife
Maintenance To carry out cleaning with the cloth plate opened Be sure to turn off the power switch be- CAUTION fore opening the cloth plate. • How to open the cloth plate Push this side of the cloth plate to the left to open it. •... -
Page 36: Trouble Shooting Guide
Trouble shooting guide Problem Cause Solution Page The machine • Looper or cloth plate cover is open. • Close the looper or the cloth plate cover. does not sew: • The main switch is not on. • Switch machine on. (Main switch to “I”) •... -
Page 37: Technical Data
Technical data Stitch choice Over lock 2 needles, 2 loopers: 4 thread overlock with integrated safety seam 1 needle, 2 loopers: 3 thread overlock, flatlock roll hem 1 needle, 1 looper: 2 thread overlock, flatlock roll hem 2 needles, 1 looper: 3 thread super stretch Needle system SCHMETZ 130/705 H or JLx2 Seam width... -
Page 38: Optional Accessories
Optional Accessories • Blind stitch presser foot • Piping presser foot • Universal Blind Stitch Presser Foot • Elasticator • Beading presser foot • Cording presser foot • Gathering presser foot • Tractor foot • Clear foot • Curved Beading Presser Foot •... - Page 40 2-11-1, TSURUMAKI, TAMA-SHI, TOKYO, 206-8551, JAPAN PHONE : (81)42-357-2341 FAX : (81)42-357-2379 Copyright © 2021 JUKI CORPORATION All rights reserved throughout the world. 40269227 001221...
Need help?
Do you have a question about the MO-2800 and is the answer not in the manual?
Questions and answers