
Subscribe to Our Youtube Channel
Related Manuals for JUKI MO-104D


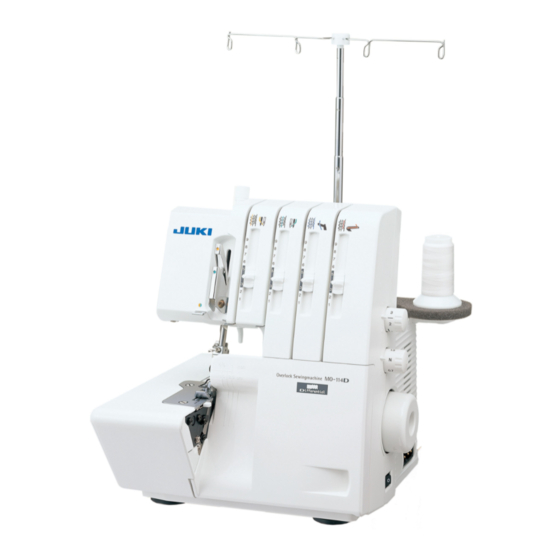
Summary of Contents for JUKI MO-104D
- Page 1 2-Needle, 4-Thread Overlock Sewing Machine MO-114D/104D SERVICE MANUAL MO-114D MO-104D...
-
Page 2: Table Of Contents
CONTENTS 1. Specifications ....................1 2. Removing order of covers ................2 2-1. Front cover ........................2 2-2. Base plate ........................2 2-3. Rear cover ........................3 2-4. Cloth plate ........................3 3. Installation of throat plate ................4 4. Height of needle bar ..................4 5. Position of feed dog ..................5 6. -
Page 3: Specifications
1. Specifications Items Description Number of needle and threads 2-needle and 4-thread (with differential feed) Needle 130/705H No. 70/80 (10/12) Overedge width 2-needle, 4-thread : 6 mm 1-needle, 3-thread : 4 mm Roll hemming : 2 mm Stitch length 1.0 to 4.0 mm (standard : 2.5 mm) Differential feed ratio 1 : 0.5 to 0.7 (standard : 1.2 ±... -
Page 4: Removing Order Of Covers
2. Removing order of covers 2-1. Front cover ○ Remove the setscrews 1 (3 locations). ○ Remove the setscrews 2 (2 locations). ○ Remove the front cover A . 2-2. Base plate ○ Remove the setscrews 3 (4 locations). ○ Remove the base plate B . –... -
Page 5: Rear Cover
○ Raise the presser foot lifting lever 6 . ○ Open the cloth plate D . ○ Remove the rear cover C . 2-4. Cloth plate ○ Remove the setscrews 7 (2 locations). ○ Remove the cloth plate D . <MO-114D> <MO-104D> – 3 –... -
Page 6: Installation Of Throat Plate
3. Installation of throat plate [Checking items] 1 Throat plate 2 Setscrew 3 Feed dog 4 Center of needle entry * Check that all needles are laterally equidistant with respect to the nee- dle slot A in the throat plate 1 . * Check that the distance between the needle center and the front edge of the needle slot A in the throat plate 1 is 1.4 mm B . -
Page 7: Position Of Feed Dog
5. Position of feed dog [Checking items] 1 Main feed dog Clearances are equal. 2 Sub feed dog 3 Throat plate * Check that the feed dogs ( 1 and 2 ) and the slot in the throat plate 3 are parallel with each other. -
Page 8: Adjusting Stroke Of Main Feed Dog
6. Adjusting stroke of main feed dog [Checking items] 1 Feed dog 2 Throat plate * Adjust the stitch length to 1 mm. * Turn the handwheel to move the feed dog up and down. Check that the moving amount of feed dog 1 is 1.2 ± 0.2 mm A when the teeth tip of the feed dog is aligned with the top surface of throat plate 2 during its upward/downward movement. -
Page 9: Adjusting Stroke Of Sub Feed Dog (Mo-114D)
7. Adjusting stroke of sub feed dog (MO-114D) [Checking items] 1 Main feed dog 2 Sub feed dog 3 Throat plate * Adjust the stitch length to 4 mm. * Set the differential feed ratio at "N". * Turn the handwheel to move the feed dog up and down. Check that the difference of clearance ( A - A ') between the main feed dog 1 and the sub feed dog 2 is 0 ±... -
Page 10: Height Of Feed Dog
8. Height of feed dog [Checking items] 1 Front end of feed dog * Adjust the stitch length to 2.5 mm. Bring the feed dog to its highest position. At this time, check that the height of front end 1 of feed dog with respect to the top surface of the throat plate is 1.3 ±... -
Page 11: Position Of Balance Weights And Cams
10. Position of balance weights and cams 1 Feed cam 2 Lower looper and upper knife combined cam 3 Upper looper cam 4 Needle bar driving cam 5 Main shaft 6 1st setscrew 7 1st setscrew 11. Projecting amount of upper looper [Checking items] 1 Upper looper 2 Needle... -
Page 12: Radius Of Lower Looper
12. Radius of lower looper [Checking items] 1 Setscrew of lower looper 2 Lower looper shaft 3 Lower looper * Check that the distance from the center of lower looper shaft 2 to the blade point of lower looper 3 is 66.0 ± 0.15 mm A . [How to perform adjustment] ○... -
Page 13: Adjusting Loop Lift
14. Adjusting loop lift [Checking items] 1 Needle 2 Blade point of lower looper 3 Lower looper 4 Gauge needle (Cut the top end of needle for use. L = 32.3 mm) * Check that the clearance between the needle 1 and the blade point 2 of lower looper is 0.01 to 0.1 mm E . -
Page 14: Timing Between Upper And Lower Looper
15. Timing between upper and lower looper [Checking items] 1 Lower looper 2 Upper looper Rear view * Check that the clearance between the projecting part of lower looper 1 and the blade point of upper looper 2 is 0.5 ± 0.2 mm A when the upper looper 2 goes up and the blade point of upper looper 2 meets the top end of lower looper 1 . -
Page 15: Installation Of Needle Guards
Dimension A MO-114D 6.0 ± 0.5 mm MO-104D 7.5 ± 0.5 mm [How to perform adjustment] ○ Set the upper looper in its lowest position of the stroke. ○ Loosen the setscrew 2 . -
Page 16: Height And Lateral Position Of Presser Foot
18. Height and lateral position of presser foot [Checking items] 1 Throat plate 2 Presser foot * Raise the presser foot using the lifting lever, and check that the dis- tance between the top surface of throat plate 1 and the presser foot 2 sole is 5.0 ±... -
Page 17: Adjusting Floating Amount Of Thread Tension Disk
19. Adjusting floating amount of thread tension disk [Checking items] 1 Tension release actuating bracket 2 Setscrew +0.3 * Lift the presser foot. Set the thread tension adjustment knob - 0.2 at "4". At this time, check that a floating amount (clearance be- tween two disks) of the upper and lower looper thread tension +0.3 disks at the top end of thread tension shaft is 0.9... -
Page 18: Thread Tension Controller
20. Thread tension controller [Checking items] * Using Saba C 120, check that the thread tensions are the nu- meric values shown below. (Scale mark on the knob "4") Turn up the knob to the scale mark on “9” and then return to the scale mark on “4”... -
Page 19: Position Of Needle Thread Take-Up
21. Position of needle thread take-up [Checking items] * To adjust the needle thread loop, adjust the vertical position of the needle thread take-up guide so that a stitch skipping may not occur at the time of double fabric sewing. •... -
Page 20: Belt Tension
22. Belt tension [Checking items] 1 Belt 2 Motor 3 Nuts * Sewing speed : 1,500 sti/min * The belt 1 should slacken approx. 3 to 4 mm A under a 1.96 N (200 g) load. [How to perform adjustment] ○... -
Page 21: Engagement Of Upper Knife With Lower Knife
24. Engagement of upper knife with lower knife [Checking items] 1 Upper knife 2 Upper knife rocking arm 3 Upper knife turning knob * When the lower knife is contact with the upper knife 1 at the leftmost position of the lower knife, check that the clearance between the upper knife turning knob 3 and the upper knife rocking arm 2 is 0.5 to 1.0 mm A . -
Page 22: Position Of Cloth Plate
25. Position of cloth plate [Checking items] 1 Throat plate 2 Cloth plate 3 Rear cover * Check that the clearance between the cloth plate 2 and the throat plate 1 is 0 to 0.3 mm A . * Check that the clearance between the cloth plate 2 and the rear cover 3 is 0.5 to 1.5 mm B . - Page 24 HOUSEHOLD SEWING MACHINERY BUSINESS UNIT 2-11-1, TSURUMAKI, TAMA-SHI, TOKYO, 206-8551, JAPAN PHONE : (81)42-357-2341 FAX : (81)42-357-2380 http://www.juki.com Copyright C 2015 JUKI CORPORATION All rights reserved throughout the world. 40167630 2015/09...
Need help?
Do you have a question about the MO-104D and is the answer not in the manual?
Questions and answers