Table of Contents
Advertisement
Available languages
Available languages
Quick Links
This gas grill must be used only outdoors in a well-ventilated space and must not be used inside a
building, garage, screened-in porch, gazebo or any other enclosed area.
!
WARNING!
MATERIAL.
!
IF YOU SMELL GAS:
• Shut off gas to the appliance.
• Extinguish any open flame.
• Open lid.
• If odor continues, keep away from the
appliance and immediately call your gas
supplier or fire department.
Adults and especially children should be alerted to the hazards of high surface temperatures.
Notice to Installer: Leave these instructions with the grill owner for future reference.
N415-0542 DEC 11.18
N415-0542 DEC 11.18.indd 1
CABINET FRAME, CABINET AND COUNTER TOP MUST BE MADE FROM NON-COMBUSTIBLE
DANGER
Young children should be supervised near the gas grill.
Barrie, Ontario, CANADA L4N 4Y8
grills@napoleonproducts.com
!
Do not try to light this appliance without
reading the "LIGHTING" instructions section of
this manual.
Do not store or use gasoline or other
flammable liquids or vapors in the vicinity of
this or any other appliance. An L.P. cylinder
not connected for use must not be stored in
the vicinity of this or any other appliance.
If the information in these instructions is
not followed exactly, a fire or explosion may
result, causing property damage, personal
injury or death.
Wolf Steel Ltd.
214 Bayview Drive,
APPLY SERIAL NUMBER LABEL FROM CARTON
Serial No.
XXXXXX000000
MODEL NO.
DO NOT DISCARD
BIPRO665-3
WARNING
www.napoleongrills.com
12/13/2018 11:03:46 AM
EN
FR
PG.29
PG.59
Advertisement
Table of Contents

Subscribe to Our Youtube Channel
Related Manuals for Napoleon BIPRO665RBNSS3


Summary of Contents for Napoleon BIPRO665RBNSS3
- Page 1 This gas grill must be used only outdoors in a well-ventilated space and must not be used inside a building, garage, screened-in porch, gazebo or any other enclosed area. APPLY SERIAL NUMBER LABEL FROM CARTON Serial No. XXXXXX000000 MODEL NO. PG.29 DO NOT DISCARD PG.59...
- Page 2 This grill has been thoroughly inspected by a qualified technician before packaging and shipping to ensure that you, the customer, receive the quality product you expect from NAPOLEON. NAPOLEON warrants that components in your new NAPOLEON product will be free from defects in material and workmanship from the date of purchase, for the following period: Aluminum castings / stainless steel base .........
-
Page 3: Safe Operating Practices
WARNING! Failure to follow these instructions could result in property damage, personal injury or death. Read and follow all warnings and instructions in this manual prior to operating grill. Safe Operating Practices • This gas grill must be assembled exactly according to the instructions in the manual. If the grill was store assembled, you must review the assembly instructions to confirm correct assembly and perform the required leak tests before operating the grill. -
Page 4: General Information
General Information This Gas Barbecue is certified under Canadian and American National Standards, CSA 1.6-2015 and ANSI Z21.58-2015 respectively for Outdoor Gas Grills and should be installed to conform according to local codes. In absence of local codes, install to the current CAN B149.1 Natural Gas and Propane Installation Code in Canada or to the National Fuel Gas Code, ANSI Z223.1 in the United States. - Page 5 connect the unit except to connect the cylinder regulator to the piping system. It must be connected with rigid pipe, copper tube or an approved flexible metal connector which complies with Z21.24/ CSA 6.10 or ANSI Z21.75/CSA 6.27. The installation must comply with CAN B149.1 Natural Gas and Propane installation code in Canada, or to the National Fuel Gas code, ANSI Z223.1 in the United States.
-
Page 6: Electrical Precautions
BUILT IN NATURAL GAS HOOK-UP: The piping up to the gas grill is the responsibility of the installer and piping should be located as shown in the built-in instructions. A flexible metal connector is included to simplify the installation of the unit. Connect this connector to the flare fitting on the end of the manifold. Connect the other end of the connector to the gas piping. -
Page 7: Lighting Instructions
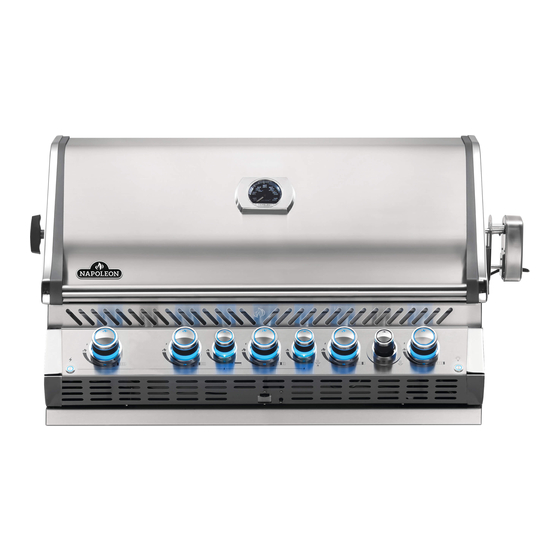
Lighting Instructions Smoker Burner Smoker Tray Igniter Light Left Left Centre Rear Centre Right Centre Right Burner Burner Burner Burner Burner Burner WARNING! Off Position Open lid WARNING! Ensure all burner controls are in the off position. Slowly turn on the gas supply valve. -
Page 8: Cooking Instructions
This may cause the control panel to become extremely hot to touch and the knobs to deform. Napoleon offers a wind deflector illustrated below. Install this wind deflector to help prevent the possibil- ity of improper heat build up. - Page 9 Wood for smoking comes in various forms, chunks, chips, dust and pellets, it also comes in many varieties (flavours) from apple to walnut, each transmitting a different taste. Use only wood that you know has not been treated, or better still buy from your authorized Napoleon dealer. N415-0542 DEC 11.18 www.napoleongrills.com...
-
Page 10: Cleaning Instructions
Cleaning The Outer Grill Surface: Do not use abrasive cleaners or steel wool on any painted, porcelain or stainless steel parts of your Napoleon Grill. Doing so will scratch the finish. Exterior grill surfaces should be cleaned with warm soapy water while the metal is still warm to the touch. To clean stainless surfaces, use a stainless steel or a non-abrasive cleaner. -
Page 11: Maintenance Instructions
Maintenance Instructions We recommend this gas grill be thoroughly inspected and serviced annually by a qualified service person. At all times keep the gas grill area free from combustible materials, gasoline and other flammable vapors and liquids. Do not obstruct the flow of ventilation and combustion air. WARNING! Always wear protective gloves and safety glasses when cleaning your grill. - Page 12 If any of these conditions exist, do not use the gas grill. Have the part replaced by your Napoleon Gas Grill dealer or qualified gas installer. Aluminum Castings: Clean castings periodically with warm soapy water. Aluminum will not rust, but high temperatures and weathering can cause oxidation to occur on aluminum surfaces.
-
Page 13: Troubleshooting
Troubleshooting Problem Possible Causes Solution Low heat / Low flame For propane - improper lighting Ensure lighting procedure is followed when valve turned to procedure. carefully. All gas grill valves must be in the high. off position when the tank valve is turned on. - Page 14 Cracked ceramic tile. Allow burner to cool and inspect very closely for cracks. If any cracks are found, contact your authorized Napoleon dealer to order a replacement burner assembly. Leaking gasket surrounding the ceramic Contact your authorized Napoleon dealer...
-
Page 15: Ordering Replacement Parts
3. A concise description of the problem (‘broken’ is not sufficient). 4. Proof of purchase (photocopy of the invoice). In some cases, Napoleon could request to have the parts returned to the factory for inspection before providing replacement parts. Before contacting Napoleon dealer, please note that the following items are not covered by the warranty: •... -
Page 16: Getting Started
CAUTION! During unpacking and assembly we recommended you wear work gloves and safety glasses for your protection. Although we make every effort to make the assembly process as problem free and safe as possible, it is characteristic of fabricated steel parts that the edges and corners might be sharp and could cause cuts if handled incorrectly. - Page 17 BUILT-IN UNIT OPENING DIMENSIONS MODEL OPENING DIMENSIONS NOTES BIPRO665 38” 20 5/8” 8 7/8” 965mm 524mm 225mm SIDE BURNER N370-0504 -LPG 12 3/4” 16 1/2” 4 1/2” OPENING OF AT LEAST 5 SQ IN MUST BE PROVIDED FOR N370-0505 -NAT 324mm 419mm 114mm...
- Page 18 APPLY A DAB OF SILICONE TO EACH FLANGE TO SECURE IN PLACE. www.napoleongrills.com N415-0542 DEC 11.18 N415-0542 DEC 11.18.indd 18 12/13/2018 11:04:06 AM...
- Page 19 N415-0542 DEC 11.18 www.napoleongrills.com N415-0542 DEC 11.18.indd 19 12/13/2018 11:04:06 AM...
- Page 20 BIPRO665 BUILT-IN INSTRUCTIONS 4” (102mm) minimum, bottom of the grill to top of the electrical panel. GFI Outlet 9⅝” (244mm) 8” (203mm) maximum 7” (178mm) LOCATED INSIDE CABINET WARNING! Failure to follow these instructions could result in property damage, personal injury or death.
- Page 21 NON-METALIC CABINET ONLY LOCATED INSIDE CABINET N415-0542 DEC 11.18 www.napoleongrills.com N415-0542 DEC 11.18.indd 21 12/13/2018 11:04:14 AM...
- Page 22 COUNTER TOP REQD. (NOT INCLUDED) IM-UGC665 www.napoleongrills.com N415-0542 DEC 11.18 N415-0542 DEC 11.18.indd 22 12/13/2018 11:04:17 AM...
- Page 23 IM-UGC665 N570-0038 (1/4”-20 X 1/2”) N450-0008 (1/4”-20) N415-0542 DEC 11.18 www.napoleongrills.com N415-0542 DEC 11.18.indd 23 12/13/2018 11:04:19 AM...
- Page 24 LOCATED INSIDE CABINET www.napoleongrills.com N415-0542 DEC 11.18 N415-0542 DEC 11.18.indd 24 12/13/2018 11:04:23 AM...
- Page 25 N415-0542 DEC 11.18 www.napoleongrills.com N415-0542 DEC 11.18.indd 25 12/13/2018 11:04:24 AM...
- Page 26 www.napoleongrills.com N415-0542 DEC 11.18 N415-0542 DEC 11.18.indd 26 12/13/2018 11:04:26 AM...
-
Page 27: Leak Testing Instructions
Bubbles will indicate a gas leak. Either tighten the loose joint or have the part replaced with one recommended by the Napoleon Customer Solutions department and have the grill inspected by a certified gas installer. STOP If the leak cannot be stopped, immediately shut off the gas supply, disconnect it, and have the grill inspected by a certified gas installer or dealer. - Page 28 Rotisserie Kit Assembly Instruction (optional) Assemble rotisserie kit components as shown. Ensure stop bushing is tightened on the inside of hood casting. www.napoleongrills.com N415-0542 DEC 11.18 N415-0542 DEC 11.18.indd 28 12/13/2018 11:04:32 AM...
- Page 29 Ce gril doit être utilisé uniquement à l’extérieur, dans un endroit bien aéré et ne doit jamais être utilisé à l’intérieur d’un bâtiment, d’un garage, d’un gazebo, d’une véranda avec paramoustique, ou de tout autre endroit fermé. APPOSEZ LÉTIQUETTE DU NUMERO DE SERIE DU CARTON de série XXXXXX000000 DE MODÈLE...
- Page 30 Garantie à Vie Limitée du Président des grils à gaz Napoléon Les produits NAPOLÉON sont conçus avec des composants et des matériaux de qualité supérieure, assemblés par des artisans qualifiés qui sont fiers de leur travail. Le brûleur et le montage de la soupape subissent un test de détection de fuite et d’allumage à...
- Page 31 AVERTISSEMENT! Si ces instructions ne sont pas suivies, des dommages matériels, des blessures corporelles ou des pertes de vie pourraient s’ensuivre. Lisez et respectez tous les avertissements et les instructions de ce manuel avant de faire fonctionner le gril. Pratiques Sécuritaires D’utilisation •...
-
Page 32: Information Générale
Information générale Ce gril à gaz est certifié selon les normes nationales Canadiennes et Américaines, CSA 1.6-2015 et ANSI Z21.58-2015 respectivement pour des grils a gaz pour l’exterieur et son installation devrait être conforme aux codes locaux. En l’absence de codes locaux, installez selon les normes courantes CAN/CSA-B149.1 du code d’installation du gaz naturel et de Propane au Canada ou selon les normes ANSIZ223.1 du «... - Page 33 Un raccord flexible métallique est inclus afin de faciliter l’installation de l’appareil. Branchez ce raccord au raccord évasé de situé à l’extrémité du collecteur. Branchez l’autre extrémité du raccord à la conduite de gaz. Assurez-vous que le raccord ne passe pas à travers un mur, un plancher, un plafond ou une cloison et qu’il soit protégé...
- Page 34 BRANCHEMENT DU GRIL ENCASTRÉ AU GAZ NATUREL: La tuyauterie jusqu’au gril à gaz est la responsabilité de l’installateur et doit être positionnée comme illustré dans le manuel d’instructions du gril encastré. Un raccord flexible métallique est inclus afin de faciliter l’installation de l’appareil. Branchez ce raccord au raccord évasé...
-
Page 35: Instruction D'allumage
Instruction d’allumage Brûleur de fumaison Fumaison plateau Lumières Bouton d’allumeur Brûleur de Brûleur de Brûleur de Bruleur Brûleur de Brûleur de gauche droite gauche centre d’arriere centre droite centre AVERTISSEMENT! Fermez Ouvrez le couvercle AVERTISSEMENT! Fermez tous les boutons de contrôle des brûleurs, ouvrez la soupape d’alimentation en gaz lentement. -
Page 36: Instructions D'opération
Instructions d’opération Éclairage initial : Lorsqu’il est allumé pour la première fois, le gril dégagera une légère odeur. Ceci est un phénomène normal et temporaire causé par l’évaporation des peintures et lubrifiants internes utilisés dans le processus de fabrication et ne se reproduira plus. Allumez simplement les brûleurs de cuve à «... - Page 37 à l’extérieur tout en restant tendres et juteux à l’intérieur. Par exemple, un poulet de 3 livres sur la rôtissoire sera cuit dans approximativement 1h30 à une température entre moyenne et haute. Consultez votre “Livre de recettes toutes saisons” de NAPOLEON pour de plus amples informations. AVERTISSEMENT! La sauce BBQ et le sel sont corrosifs et causeront une détérioration rapide...
- Page 38 Brûleur de fumaison : Le brûleur de fumaison est conçu pour être utilisé de pair avec le plateau à copeaux de bois. Suivez les instructions d’allumage du brûleur de fumaison et laissez celui-ci fonctionner à feu élevé pendant 10 minutes, puis réduisez la chaleur au besoin. Ouvrez le tiroir du plateau à...
-
Page 39: Instructions D'entretien
Nettoyage de l’extérieur du gril : N’utilisez pas de produits abrasifs pour nettoyer les pièces peintes, de fini porcelaine ou en acier inoxydable. Les éléments en porcelaine émaillée doivent être manipulés avec soin. Le fini émaillée étant cuit, il devient comme du verre; il s’ébrèchera au moindre choc. Vous pouvez vous procurer de la peinture émaillée pour les retouches chez votre détaillant Napoléon. - Page 40 Boyau (si applicable): Vérifiez l’usure, coupures, craquelures ou s’il est fondu. Si vous découvrez une de ces défectuosités, n’utilisez pas votre gril. Faites remplacer la pièce par votre détaillant NAPOLEON ou par un installateur qualifié. Moulages en aluminium : Nettoyez les moulages périodiquement à l’aide d’une solution d’eau savonneuse chaude.
- Page 41 AVERTISSEMENT! Portez toujours des gants protecteurs lorsque vous remplacez l’ampoule halogène des lumières internes de votre gril. Lumières : Pour remplacer l’ampoule halogène de votre gril, vous devez d’abord retirer la lentille du compartiment d’éclairage. Pour retirer la lentille du compartiment, retirez la vis cruciforme qui retient le compartiment.
-
Page 42: Guide De Dépannage
Guide De Dépannage Problème Causes possibles Solutions Faible chaleur/petite Pour le propane - procédure Assurez-vous que la procédure d’allumage est flamme lorsque le bouton d’allumage incorrect. suivie à la lettre. Tous les boutons de contrôle du de contrôle est à “high”. gril doivent être fermés lorsque vous ouvrez la soupape de la bonbonne. - Page 43 Problème Causes possibles Solutions La peinture semble peler Accumulation de graisse sur les Ceci n’est pas un défaut. Le fini du couvercle est à l’intérieur du couvercle. surfaces internes. en acier inoxydable et porcelainisé et ne pèlera pas. Le pelage est causé par la graisse qui durci et sèche comme des éclats de peinture qui pèlent.
- Page 44 Problème Causes possibles Solutions L’allumeur électronique L’appareil n’est pas branché. Branchez le cordon d’alimentation (d’une prise ne fonctionne pas. de courant avec disjoncteur de fuite à la terre fonctionnelle) dans le boîtier électrique à l’arrière du gril. Branchez le cordon du transformateur dans le boîtier électrique.
-
Page 45: Commande De Pièces De Rechange
GARDEZ VOTRE REÇU COMME PREUVE D’ACHAT POUR VALIDER VOTRE Commande de pièces de rechange Information sur la garantie MODÈLE : DATE D’ACHAT : NUMÉRO DE SÉRIE : (Inscrivez l’information ici pour y avoir accès facilement.) Pour commander des pièces de rechange ou faire une réclamation sous garantie, communiquez avec le détaillant Napoléon où... -
Page 46: Pour Commencer
ATTENTION! Lors du déballage et de l’assemblage, nous vous conseillons de porter des gants de travail et des lunettes de sécurité pour votre protection. Malgré tous nos efforts pour assurer que l’assemblage soit aussi sécuritaire et sans problème que possible, il se peut que les bords et les coins des pièces usinées en acier soient coupants et qu’ils causent des coupures si les pièces ne sont pas manipulées correctement. - Page 47 DIMENSIONS D’OUVERTURE POUR LES GRILS ENCASTRÉS MODÈLE DIMENSIONS DE L’OUVERTURE NOTES BIPRO665 38” 20 5/8” 8 7/8” 965mm 524mm 225mm BRÛLEUR 12 3/4” 16 1/2” 4 1/2” PRÉVOIR UNE OUVERTURE D’AU MOINS 5 PO² POUR L’AIR DE VENTILATION LATÉRAL 324mm 419mm 114mm NÉCESSAIRE POUR LE BRÛLEUR LATÉRAL...
- Page 48 APPLIQUER UN PEU DE SILICONE À CHAQUE AILETTE POUR FIXER EN PLACE. www.napoleongrills.com N415-0542 DEC 11.18 N415-0542 DEC 11.18.indd 48 12/13/2018 11:04:54 AM...
- Page 49 N415-0542 DEC 11.18 www.napoleongrills.com N415-0542 DEC 11.18.indd 49 12/13/2018 11:04:55 AM...
- Page 50 INSTRUCTIONS POUR LE GRIL ENCASTRÉ BIPRO665 4” (102mm) minimum, à partir du bas de gril et au dessus de la boîte électronique. Prise DDFT 9⅝” (244mm) 8” (203mm) maximum 7” (178mm) SITUÉ À L’INTÉRIEUR DU CABINET AVERTISSEMENT! Omettre de suivre ces instructions peut entraîner des dommages matériels, des blessures corporelles ou des pertes de vie.
- Page 51 SITUÉ À L’INTÉRIEUR DU CABINET N415-0542 DEC 11.18 www.napoleongrills.com N415-0542 DEC 11.18.indd 51 12/13/2018 11:04:58 AM...
- Page 52 Comptoir du haut requis (NON INCLUS) IM-UGC665 www.napoleongrills.com N415-0542 DEC 11.18 N415-0542 DEC 11.18.indd 52 12/13/2018 11:05:00 AM...
- Page 53 IM-UGC665 N570-0038 (1/4”-20 X 1/2”) N450-0008 (1/4”-20) N415-0542 DEC 11.18 www.napoleongrills.com N415-0542 DEC 11.18.indd 53 12/13/2018 11:05:02 AM...
- Page 54 SITUÉ À L’INTÉRIEUR DU CABINET www.napoleongrills.com N415-0542 DEC 11.18 N415-0542 DEC 11.18.indd 54 12/13/2018 11:05:04 AM...
- Page 55 N415-0542 DEC 11.18 www.napoleongrills.com N415-0542 DEC 11.18.indd 55 12/13/2018 11:05:05 AM...
- Page 56 www.napoleongrills.com N415-0542 DEC 11.18 N415-0542 DEC 11.18.indd 56 12/13/2018 11:05:07 AM...
- Page 57 Test de détection de fuites AVERTISSEMENT! Il doit être fait avant la première utilisation, annuellement et à chaque fois qu’une pièce du système de gaz est remplacée ou réparée AVERTISSEMENT! N’utilisez pas une flamme nue pour vérifier pour des fuites de gaz. Assurez- vous qu’il n’y ait aucune étincelle ni flamme nue à...
- Page 58 Instructions d’assemblage de l’ensemble de rôtissoire (optionnelle) Assemblez les composantes de la rôtissoire tel qu’illustré. Assurez-vous que la bague d’arrêt soit serrée à l’intérieur de la hotte. www.napoleongrills.com N415-0542 DEC 11.18 N415-0542 DEC 11.18.indd 58 12/13/2018 11:05:14 AM...
- Page 59 N415-0542 DEC 11.18 www.napoleongrills.com N415-0542 DEC 11.18.indd 59 12/13/2018 11:05:15 AM...
- Page 60 www.napoleongrills.com N415-0542 DEC 11.18 N415-0542 DEC 11.18.indd 60 12/13/2018 11:05:23 AM...
- Page 61 - black / ensemble du couvercle - noir N510-0013 black silicone lid bumper / pare-chocs du couvercle (silicone noir) N385-0308-SER NAPOLEON logo / logo NAPOLEON N715-0091 trim left side lid casting / garniture moulage gauche du couvercle S91005 temperature gauge / jauge de température...
- Page 62 Parts List / Liste Des Pièces Item Part # Description N010-1138 electrical panel assembly / ensemble panneau électrique N707-0012 transformer / transformateur N475-0369-GY1SG electrical panel / panneau électrique N357-0022 electronic ignition - 4 spark / allumeur électronique - 4 étincelles N750-0034 wire connector igniter / connecteur de fil N450-0008...
- Page 63 N415-0542 DEC 11.18 www.napoleongrills.com N415-0542 DEC 11.18.indd 63 12/13/2018 11:05:27 AM...
- Page 64 N415-0542 N415-0542 DEC 11.18.indd 64 12/13/2018 11:05:28 AM...
Need help?
Do you have a question about the BIPRO665RBNSS3 and is the answer not in the manual?
Questions and answers