
Related Manuals for Perlick CR30R12L


Summary of Contents for Perlick CR30R12L
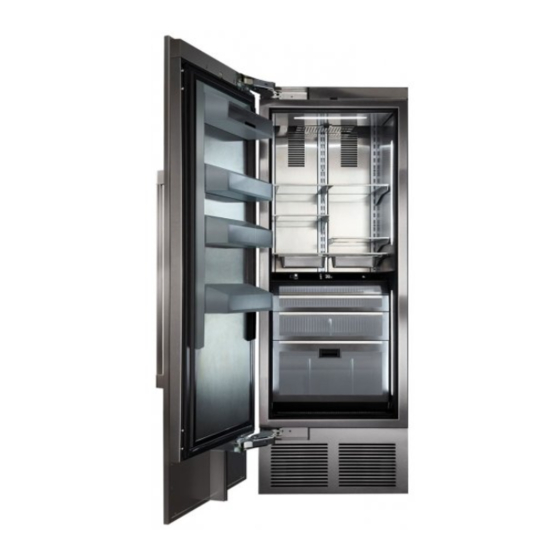
- Page 1 CR SERIES INSTALLATION INSTRUCTIONS PERLICK COLLECTION 24” AND 30” COLUMN REFRIGERATION To prevent appliance damage and injury, read these instructions thoroughly prior to installation. FORM NO. Z2496 REV. D-05/23/2019...
-
Page 2: Table Of Contents
We dedicate considerable time to ensure that our products provide the highest level of customer satisfaction. We thank Niche/Product Dimensions, Installing adjacent to wall you for selecting Perlick products for your home and assure you of our continuing interest in your satisfaction. Electrical... -
Page 3: Safety Considerations
Please review the following safety precautions and read all Please take note of the following safety precautions prior to instructions prior to product installation. After the completion moving, unpacking and installing your Perlick column. of installation, keep these instructions in a safe place for future DANGER... -
Page 4: Prior To Installation
OPENING DIMENSIONS - SINGLE UNIT connecting the unit. Failure to do so can affect the function and performance of the appliance. The depth of each Perlick column is 24” (610). Allow for panel thickness when planning the finished opening depth. A CAUTION This appliance should be installed in dry, minimum of a 4”... - Page 5 PERLICK RESIDENTIAL COLUMN REFRIGERATION INSTALLATION INSTRUCTIONS NICHE / PRODUCT DIMENSIONS PLEASE NOTE: When installing column adjacent to wall, a 2” clearance is required if door is opening towards the wall CR24 24” (610) CR30 30” (762) CR24 23 -3/4” (604) CR30 29-3/4”...
-
Page 6: Electrical
90° HINGE STOP Perlick column doors open to 105°. When installing a panel thicker than ¾” (19), or if located next to adjacent wall, the 90° hinge stop pin may be required to prevent damage to the unit and adjacent cabinetry/walls. -
Page 7: Leveling/Alignment
PERLICK RESIDENTIAL COLUMN REFRIGERATION INSTALLATION INSTRUCTIONS LEVELING / ALIGNMENT When the unit is properly leveled, door adjustments are less LEVELING/ALIGNMENT likely to be needed. Move the unit near the opening. Plug the power cord into the WARNING grounded outlet and roll the unit into position. Push unit into To reduce the possibility of the unit tipping place. - Page 8 PERLICK RESIDENTIAL COLUMN REFRIGERATION INSTALLATION INSTRUCTIONS ANTI-TIP BRACKET INSTALLATION FOR INTEGRATED INSTALLATION NOTE: Do not fasten anti-tip brackets to adjacent cabinetry until the cabinet has been leveled. 8 | perlick.com/residential...
- Page 9 PERLICK RESIDENTIAL COLUMN REFRIGERATION INSTALLATION INSTRUCTIONS ANTI-TIP BRACKET INSTALLATION FOR FREESTANDING INSTALLATION NOTE: Cabinet must be leveled before securing to wall with anti-tip bracket. perlick customer service (800)558-5592 | 9...
-
Page 10: Door/Side Panel Information
3/4” (19). Always allow for panel thickness when planning the finished opening depth. Stainless steel panels come pre-drilled for a Perlick handle. Please note that the Perlick Pro Handle is included with the purchase of a stainless steel panel. CUSTOM OVERLAY DOOR PANEL Perlick columns come ready to accept customer-supplied door panel and handle hardware. - Page 11 PERLICK RESIDENTIAL COLUMN REFRIGERATION INSTALLATION INSTRUCTIONS CR24 SOLID DOOR TEMPLATE FOR 4” TOE KICK 8 " 8 " 8 " 4 " 4 " (4X) .136 .500 8 " 2 " 2 " 8 " 2 " OVER 8 "...
- Page 12 PERLICK RESIDENTIAL COLUMN REFRIGERATION INSTALLATION INSTRUCTIONS CR30 SOLID DOOR TEMPLATE FOR 4” TOE KICK 12 | perlick.com/residential...
- Page 13 PERLICK RESIDENTIAL COLUMN REFRIGERATION INSTALLATION INSTRUCTIONS CR24 SOLID DOOR TEMPLATE FOR 6” TOE KICK 8 " 8 " 8 " (4X) .136 .500 4 " 4 " 8 " 2 " 8 " 2 " 2 " 8 " 8 "...
- Page 14 PERLICK RESIDENTIAL COLUMN REFRIGERATION INSTALLATION INSTRUCTIONS CR30 SOLID DOOR TEMPLATE FOR 6” TOE KICK 14 | perlick.com/residential...
- Page 15 PERLICK RESIDENTIAL COLUMN REFRIGERATION INSTALLATION INSTRUCTIONS CR24 GLASS DOOR TEMPLATE FOR 4” TOE KICK 8 " .136 .500 (4X) 8 " 4 " 8 " FOR LOCK OPTIONAL USE DRILL FIXTURE TO 4 " 4 " 8 " LOCATE HOLE 4 "...
- Page 16 PERLICK RESIDENTIAL COLUMN REFRIGERATION INSTALLATION INSTRUCTIONS CR24 GLASS DOOR TEMPLATE FOR 6” TOE KICK .136 .500 (4X) 8 " 4 " 8 " FOR LOCK OPTIONAL 8 " USE DRILL FIXTURE TO 4 " 4 " LOCATE HOLE 8 "...
- Page 17 PERLICK RESIDENTIAL COLUMN REFRIGERATION INSTALLATION INSTRUCTIONS SCREW ZONE FOR CR24 AND CR30 OVERLAY TEMPLATES 4 " 16 " 16 " 4 " 4 " NOTE: HATCH AREAS SHOULD PROVID THICKNESS FOR WOOD SCREW OVERLAY ATTACHMENT BRACK 66" 2 " NOTE: HATCH AREAS SHOULD...
-
Page 18: Door Panel Installation/Adjustment
PERLICK RESIDENTIAL COLUMN REFRIGERATION INSTALLATION INSTRUCTIONS INSTALLING DOOR OVERLAY PANELS DOOR PANEL INSTALLATION DOOR OVERLAY PANEL ADJUSTMENT Typical panel dimensions are based on 84” (2134) finished Close the door to make adjustments to align panels and reveals. height with 1/8” (3) reveals. Template must be adjusted for For up and down adjustments, turn the height adjustment panels exceeding typical dimensions. - Page 19 PERLICK RESIDENTIAL COLUMN REFRIGERATION INSTALLATION INSTRUCTIONS TOP OF DOOR ILLUSTRATION perlick customer service (800)558-5592 | 19...
-
Page 20: Airflow Divider
DOOR TRIM INSTALLATION AIRFLOW DIVIDER DOOR TRIM INSTALLATION Perlick includes air flow dividers for both 4” and 6” toe kick Once overlay is adjusted, mount the door trim bracket onto the installations. This frame and gasket is installed to the back of door adjustment bracket using the provided screws. -
Page 21: Completion - Grill Installation
PERLICK RESIDENTIAL COLUMN REFRIGERATION INSTALLATION INSTRUCTIONS COMPLETION - GRILL INSTALLATION GRILL INSTALLATION Install the grill by snapping into latch catches. perlick customer service (800)558-5592 | 21... -
Page 22: Toe Kick Clearance
PERLICK RESIDENTIAL COLUMN REFRIGERATION INSTALLATION INSTRUCTIONS TOE KICK CLEARANCE 22 | perlick.com/residential... -
Page 23: Installing Filters
PERLICK RESIDENTIAL COLUMN REFRIGERATION INSTALLATION INSTRUCTIONS INSTALLING FILTERS CARBON AIR FILTERS ETHYLENE FILTERS Carbon air filters should be placed in the holder in the Ethylene filters should be placed in the holder in top of the tip- perforated panel located in the top-rear of the cabinet (A). - Page 24 Perlick Residential is a division of Perlick Corporation © 2019 Perlick Corporation 8300 West Good Hope Road, Milwaukee, WI 53223, USA perlick.com/residential • (800) 558-5592 FORM NO. Z2496 REV. D-05/23/2019...
Need help?
Do you have a question about the CR30R12L and is the answer not in the manual?
Questions and answers