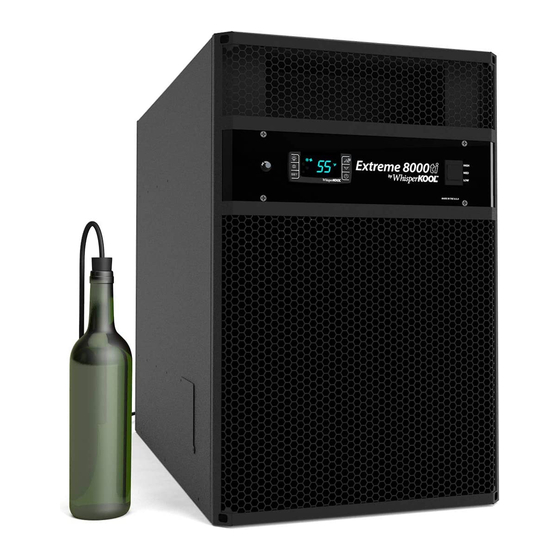
WhisperKool 8000ti Owner's Manual

WhisperKool 8000ti Owner's Manual

Extreme series
Hide thumbs Also See for 8000ti:

Advertisement

EXTREME SERIES
OWNER'S MANUAL
Platinum 4000
Platinum 8000
8000ti
The Coolest Thing In Wine Storage

Advertisement

Table of Contents
loading
Need help?

Need help?

Do you have a question about the 8000ti and is the answer not in the manual?

Questions and answers

Subscribe to Our Youtube Channel

Summary of Contents for WhisperKool 8000ti

  • Page 1 EXTREME SERIES OWNER’S MANUAL Platinum 4000 Platinum 8000 8000ti The Coolest Thing In Wine Storage...
  • Page 2 WhisperKOOL. Every effort has been made to ensure that the information in this manual is accurate. WhisperKOOL is not responsible for printing or clerical errors.
  • Page 3: Table Of Contents

    TABLE OF CONTENTS WhisperKOOL Extreme Series Quick Reference Guide ..Controller Quick Reference Guide......
  • Page 4: Whisperkool Extreme Series Quick Reference Guide

    WHISPERKOOL Series QUICK REFERENCE GUIDE Front / Side View Front Grille Probe Input Controller Control Panel Speed Control (only 8000ti models) Rear View Posterior Grille Rear Power Option Drain Port Page 4 PT-EXPL 072010...
  • Page 5: Controller Quick Reference Guide

    **Based on proper cellar construction and accounting for any windows or non insulated surfaces. Please refer to the Preparing the Wine Cellar section on page 8 for more information. Compressor Evaporator Fan Condenser Fan Pre-Chill Display FAN SPEED REFERENCE (Extreme 8000ti only) DBA* Evaporator/Condenser 57/57 59/59 60/61 Cellar “Pre-Chill” Button Hi Bottle Temp History &...
  • Page 6: Introduction

    Thank you for purchasing a WhisperKOOL Extreme Series cooling unit. We strive to provide the highest quality prod- ucts and the best possible customer service. If you have any questions about your WhisperKOOL unit, please call us at 1(800) 343-9463.
  • Page 7: Receiving & Inspecting The Unit

    Insulation Foam (4 strips) Please leave the WhisperKOOL unit in its original box until you are ready for installation. This will allow you to move the product safely without damaging it. When you are ready to remove the product from the box, refer to page 13 for installation instructions.
  • Page 8: Preparing The Wine Cellar

    PREPARING THE WINE CELLAR The performance and life of your WhisperKOOL unit are contingent upon the steps you take in preparing the wine cellar. Note: Improperly preparing your enclosure or incorrectly installing your WhisperKOOL unit may cause unit fail- ure, leaking of condensation, and other negative side effects.
  • Page 9: Mounting The Unit

    In cases where glass doors are used and the room size is close to the recom- mended unit size, the next larger size WhisperKOOL should be used. This will compensate for the insula- tion loss due to the inefficient door.
  • Page 10 However, you must have a fresh air inlet as well. If your unit requires ducting, please contact WhisperKOOL Customer Service to obtain a spe- cially designed ducting accessory kit for the unit. Using any other ducting system will void the warranty.
  • Page 11: Cutting The Hole For The Whisperkool Unit

    8000ti 1750 8000ti 1500 Cutting the Hole for the WhisperKOOL Unit Tools Needed Hammer Locate the center of the wall upon which the unit will be installed. Using a stud finder, locate the studs on either side of the center point, and mark them with vertical lines.
  • Page 12 Make sure that the internal height remains at 16” so that the WhisperKOOL system will fit snugly through the framed cut-out. Frame the hole with two-by-four supports...
  • Page 13: Installation

    (exterior side). When placed in either position, power will come from that outlet only. Plug your WhisperKOOL unit into a surge protector or power conditioner. As with any sensitive electrical equip- ment, the WhisperKOOL electrical equipment may be damaged by power surges and spikes. Power surges and spikes are not covered in the WhisperKOOL Extreme warranty.
  • Page 14: Through-The-Wall Installation

    This foam creates a tight seal between the flange and the wall. Page 14 #1. Retrofit your current WhisperKOOL cooling unit #2. Middle wall installation #3. Flush mount to exterior wall Back of unit...
  • Page 15: Back Of Unit

    The screws should penetrate the studs as well as the upper and lower supports to provide adequate support for the WhisperKOOL system (see illustration). Seal all cracks and gaps around the WhisperKOOL Extreme unit with an air-tight sealant or caulking to prevent air leakage.
  • Page 16 Condensation Drain Line Tube The condensation drain line tube is used to remove excess condensation from the unit to a proper discharge location. It is important that the drain line tube is properly connected and used to prevent leakage and other problems associated with excess condensation.
  • Page 17: Installation Options

    • For a non-flush installation (i.e. holes location #1 WhisperKOOL retrofit or #2 Middle Wall), place the grille on the condenser end and line up the holes on the grille with the holes on unit location #3. Use the 10 screws provided to fasten the grille to the unit.
  • Page 18: Ducted Installation

    • Keep air paths free of loose foreign objects and debris. • Connect the round flexible ducts to the WhisperKOOL unit using the duct collars provided with the duct accessory kit. • Pull the outer plastic wrapping and insulation away from the end of the duct to expose the reinforced inside duct liner.
  • Page 19 DUCTED INSTALLATION cont. STEP 1: Remove the grill from the unit by unscrewing the screws that hold it in place. STEP 2: Move the duct plenum into place STEP 3: Screw the plenum into place using the same screws that held the grill in place. Page 19...
  • Page 20: Standard Ducted Installation

    STANDARD DUCTED INSTALLATION Dual Outlet Duct Cold Air Supply-Cellar Return Air-Cellar Side Attic Mounted System Page 20 Condenser Intake Cold Air Return Air Wine Cellar Heat Exhaust Condenser Exhaust Condenser Intake Adjacent Room Fresh Air Intake PT-EXPL 072010...
  • Page 21 STANDARD DUCTED INSTALLATION Dual Outlet Duct Adjacent Room Wine Cellar Return Air-Cellar Side Outside through the Wall Adjacent Room Wine Cellar Condenser Intake Return Air-Cellar Side Page 21...
  • Page 22: Remote Controller

    REMOTE CONTROLLER: INSTALLATION AND CONFIGURATION The WhisperKOOL Extreme Series can be configured with a remote controller system. If you have a unit with a remote controller, please review this section. The controller can be installed up to 50 feet away from the cooling unit, or up to 300 feet away with the extend- ed connection wire.
  • Page 23 Connection wire in Side Mount configuration Connection wire in Rear Mount configuration Below is an illustration of one possible way to configure the remote controller in a wine cellar. Cooling Unit Bottle Probe Remote Controller Page 23...
  • Page 24: Liquid Measuring Thermostat System

    LIQUID MEASURING THERMOSTAT SYSTEM The WhisperKOOL Series cooling units come equipped with a liquid temperature measuring thermostat system. This system incorporates the following advantages: Self-Calibrating Probe: The probe contains a sensor chip, which actually communicates back and forth to the thermostat. This results in a consistent temperature setting and accuracy. Do not remove the tip...
  • Page 25: Variable Speed Control

    VARIABLE SPEED CONTROL (only on the 8000ti) Designed for wine cellars from 1500 to 2000 cubic feet, the Extreme 8000ti features variable-speed fans with a “high” setting for maximum performance in high-temperature (+110°F) environments and a “low” setting for super-quiet operation.
  • Page 26: System Operation: Standard And Remote

    “FAN” symbol will turn on. The temperature control feature for the evapora- tor fan is a feature applicable to Whisperkool Advance Product Safety Technology (APST), which ensures that in the possible event of a cooling deficiency, the...
  • Page 27: Control Panel Features And Operation

    CONTROL PANEL FEATURES AND OPERATION Button • ON/OFF The ON/OFF button allows the customer the convenience of turning the refrigeration system ON or OFF, from the control panel. This feature does not disconnect power from the unit, and the condenser fan will continue to run in the OFF position. In order for the power to be shut off from the unit, the power cord must be unplugged from the wall receptacle.
  • Page 28 Energy 1. The ER feature can be used to save energy and aids in extending the life of the system. Reduc- 2. The ER button is located at the top L/H side of the control. The ER feature is activated by press- tion ing the ER button one time, and the ER logo will appear on the digital display.
  • Page 29: Alarm Codes

    CPSM CCS – Cellar Pre-Chill Set Point: This parameter is set at 52°f, but can be adjusted to a set point Mode between 45°f - 67°f. (Cont.) bLL/Act – Compressor Off or On for Low (bLL) or High (Act) Temperature Alarm: These parameters are set at “n”.
  • Page 30: Maintenance Schedule

    Monthly 1. Check filters 2. Check for unusual noise or vibration Quarterly Clean filters: Remove grille/ducting on both ends of unit. 2. Remove the filter covering the coil. 3. Wash with warm water 4. Dry off filter by shaking excess water from filter. Annually 1.
  • Page 31: Troubleshooting Guide

    TROUBLESHOOTING GUIDE Unit has ice forming on the evaporator Possible Cause Evaporator filter and/or coil are dirty. There is something blocking the supply and or return air One or both evaporator fans are not turning on. The temperature of the room, the unit is exhausting to, has dropped below 50°...
  • Page 32 Unit runs but does not cool Possible Cause Lack of air flow/heat exhaust (outer room) Crankcase pressure set too high/low Compressor not running Unit undersized Evaporator fan runs but compressor does not Possible Cause Compressor and/or starting components faulty Compressor runs; evaporator fan motor does not Possible Cause Blown fuse or circuit breaker Faulty fan motor...
  • Page 33: Technical Assistance

    WhisperKOOL Customer Service is available Monday through Friday from 8:00 a.m. to 4:00 p.m. PST. The customer service representative will be able to assist you with your questions and warranty information more effectively if you provide them with the following: •...
  • Page 34: Installation Terms And Conditions

    (b) PARTS: WhisperKOOL will supply, at no charge, new or rebuilt replacement parts in exchange for defective parts for a period of two (2) years. (c) FREIGHT: During the first two (2) years from the date of purchase, WhisperKOOL will cover freight for the repair of units UNDER WARRANTY to customers within the continental United States.
  • Page 35 (c) Purchasers (users) are reminded that they should satisfy themselves that the product they are purchasing is suit- able for their needs and requirements and no responsibility will be placed with WhisperKOOL for their decisions. (d) It is the user’s responsibility to secure safe haven/storage for ANY AND ALL items that are being kept and stored in the user’s wine cellar.
  • Page 36 Limited Warranty. The parties may modify these Terms and Conditions or the Limited Warranty only in a writing signed by each. No waiver by WhisperKOOL of any breach or default hereunder will be deemed to be a waiver of any preceding or subsequent breach or default.
  • Page 37 NOTES...
  • Page 38 WhisperKOOL 1738 E. Alpine Ave Stockton, CA 95205 1(800) 343-9463 www.whisperkool.com...

Table of Contents