Advertisement
Quick Links
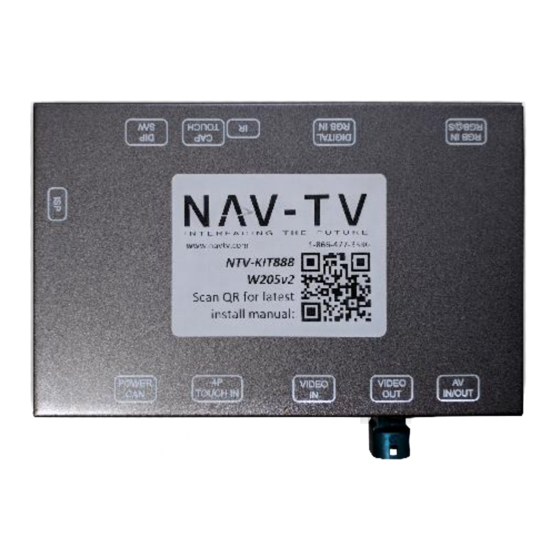
The W205v2 Kit interfaces a backup camera input (with active parking lines) and 1 front camera to the factory
media screen in select 2014+ Mercedes vehicles equipped with NTG5.0+ infotainment system. With an
additional adapter (NTV-KIT800), this kit will also introduce an HDMI input to the OEM screen.
HD-LINK Optional KIT800
:
Agreement
End user agrees to use this product in compliance with all State and Federal laws. NAV-TV Corp. would not be held liable for misuse of its product.
If you do not agree, please discontinue use immediately and return product to place of purchase. This product is intended for off-road use and passenger
entertainment only.
3950 NW 120
th
Ave, Coral Springs, FL 33065 TEL 561-955-9770 FAX 561-955-9760
www.nav-tv.com
W205v2
NTV-KIT888
Overview
Kit Contents
W205V2 Interface
OSD Menu remote
info@nav-tv.com
IR Receiver
BHM
10/18/18
NTV-DOC328
A-Type
LVDS
Video
Cable
Power/CAN T-Harness
1 |
P a g e
Advertisement

Summary of Contents for Nav TV W205v2
- Page 1 NTV-KIT888 Overview The W205v2 Kit interfaces a backup camera input (with active parking lines) and 1 front camera to the factory media screen in select 2014+ Mercedes vehicles equipped with NTG5.0+ infotainment system. With an additional adapter (NTV-KIT800), this kit will also introduce an HDMI input to the OEM screen.
- Page 2 10/18/18 NTV-DOC328 Interface Connectors Video OUT (to screen) AV IN (optional) Video IN (from radio) Not Used Power/CAN OUOUT RGB Input HDMI Cable from HD-LINK IR Receiver Not Used Dip Switches module Dip Switch Settings DIP SW MENU OFF VEH SET VEH SET RVC OFF VEH SET...
- Page 3 10/18/18 NTV-DOC328 Dash Removal (’15 C-Class) 1. Use a plastic tool to remove the silver trim behind the COMAND touchpad controller. You will have to open the center console and press the arm rest locks forwards for clearance: 2. Remove (2x) Torx 20 screws hidden beneath the silver trim piece in step 1: 3.
-
Page 4: Installation
10/18/18 NTV-DOC328 Installation 1. With the radio removed, disconnect all harnesses and set the radio aside. 2. In the main square radio plug, locate the 12-pin black plug and remove it (press clip on top and pull). 3. Separate the outer shell from this OEM connector and insert the provided 12-pin plug in its place (this connector only connects properly in one direction). - Page 5 7. Locate the OEM, typically Dark Blue, 4-pin round connector (LVDS) that was removed from the radio in step 1 from the port on the radio typically labeled ‘DISP’. Connect this factory plug to the W205v2 interface at the port labeled ‘VIDEO OUT’.
- Page 6 10/18/18 NTV-DOC328 8. Connect one end of the provided LVDS Video Cable to the port on the W205v2 interface labeled ‘VIDEO-IN’. 9. Connect the other end of the provided LVDS Video Cable back to the factory radio at the ‘DISP’...
- Page 7 10/18/18 NTV-DOC328 W205v2 RVC Install Diagram Agreement End user agrees to use this product in compliance with all State and Federal laws. NAV-TV Corp. would not be held liable for misuse of its product. If you do not agree, please discontinue use immediately and return product to place of purchase. This product is intended for off-road use and passenger entertainment only.
- Page 8 10/18/18 NTV-DOC328 Setting/Navigating OSD Menu Before you start: • The IR-Eye must be connected • Make sure the car’s ignition is on and radio is on • You must be in Reverse Camera mode Return AUX Video mode (see below): •...
- Page 9 10/18/18 NTV-DOC328 Adding HD-LINK Adapter (HDMI Input) Follow the instructions below when adding the HDMI adapter (HD-LINK) to enable HDMI input to the OEM screen: 1. Put dip switch #1 in the DOWN position. 2. Activate the ‘NAV INPUT’ by holding the BACK BUTTON on the steering wheel.
- Page 10 NTV-DOC328 W205v2 Operation • Once the W205v2 is connected properly, reverse activation is automatic. Placing the vehicle in reverse will display the connected camera’s image automatically. Note: If display doesn’t switch to reverse image when shifting into reverse, check dip switch settings on page 2.


Need help?
Do you have a question about the W205v2 and is the answer not in the manual?
Questions and answers