
Related Manuals for SMA STP 17000TL-30


Summary of Contents for SMA STP 17000TL-30
- Page 1 Operating manual SUNNY TRIPOWER 15000TL / 20000TL / 25000TL ENGLISH STP15-25TL-30-BE-en-17 | Version 1.7...
- Page 2 SMA Solar Technology AG Legal Provisions The information contained in these documents is the property of SMA Solar Technology AG. No part of this document may be reproduced, stored in a retrieval system, or transmitted, in any form or by any means, be it electronic, mechanical, photographic, magnetic or otherwise, without the prior written permission of SMA Solar Technology AG.
-
Page 3: Table Of Contents
SMA Solar Technology AG Table of Contents Table of Contents Information on this Document..........Validity ........................Target Group......................Content and Structure of this Document ..............Levels of Warning Messages ..................Symbols in the Document ..................Typographical Elements in the Document .............. - Page 4 Table of Contents SMA Solar Technology AG Commissioning Procedure ..................34 Configuring the Country Data Set................34 Commissioning the Inverter..................42 Configuration................45 Configuration Procedure.................... 45 Integrating the Inverter into the Network..............45 Changing Operating Parameters................46 Configuring the Modbus Function................46 Configuring Q on Demand 24/7 ................
-
Page 5: Information On This Document
You will find the latest version of this document and further information on the product in PDF format and as eManual at www.SMA-Solar.com. You can also call up the eManual via the user interface of the product. -
Page 6: Symbols In The Document
1 Information on this Document SMA Solar Technology AG NOTICE Indicates a situation which, if not avoided, can result in property damage. Symbols in the Document Symbol Explanation Information that is important for a specific topic or goal, but is not safety-rele-... -
Page 7: Additional Information
For more information, please go to www.SMA-Solar.com. Title and information content Type of information "Application for SMA Grid Guard Code" Form "SMA GRID GUARD 10.0 - Grid management services through Technical Information SMA Inverter" "Efficiency and Derating" Technical Information Efficiency and derating behavior of the SMA inverters "Short-Circuit Currents"... -
Page 8: Safety
All components must remain within their permitted operating ranges and their installation requirements at all times. The product must only be used in countries for which it is approved or released by SMA Solar Technology AG and the grid operator. - Page 9 SMA Solar Technology AG 2 Safety This section contains safety information that must be observed at all times when working. The product has been designed and tested in accordance with international safety requirements. As with all electrical or electronical devices, there are residual risks despite careful construction. To prevent personal injury and property damage and to ensure long-term operation of the product, read this section carefully and observe all safety information at all times.
- Page 10 2 Safety SMA Solar Technology AG WARNING Danger to life due to fire or explosion In rare cases, an explosive gas mixture can be generated inside the product under fault conditions. In this state, switching operations can cause a fire inside the product or explosion.
- Page 11 ≥ 3.00.00.R. This can be identified by the imprints "SMA Grid Guard 10.0" and "RfG Firmware for EU countries" on the box label. If no imprints can be found on the box label, the inverter is equipped with the firmware version ≤...
- Page 12 2 Safety SMA Solar Technology AG Change to the names and units of grid parameters to comply with the grid- connection requirements in accordance with Regulation (EU) 2016/631 (valid from April 27, 2019) To comply with the EU grid-connection requirements (valid from April 27, 2019) the names and units of grid parameters were changed.
-
Page 13: Scope Of Delivery
SMA Solar Technology AG 3 Scope of Delivery Scope of Delivery Check the scope of delivery for completeness and any externally visible damage. Contact your distributor if the scope of delivery is incomplete or damaged. The delivery may contain parts that are not required for the installation of this inverter. -
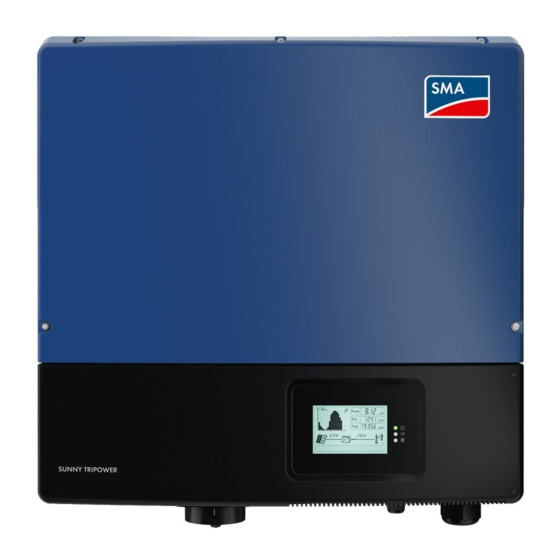
Page 14: Product Overview
The type label uniquely identifies the inverter. You will require the infor- mation on the type label to use the product safely and when seeking cus- tomer support from the SMA Service Line. You will find the following in- formation on the type label: •... -
Page 15: Symbols On The Product
SMA Solar Technology AG 4 Product Overview Position Designation Display (optional) The display shows the current operating data and events or errors (see Section 10.1 "Event Messages", page 55). Lower enclosure lid Upper enclosure lid DC Load-Break Switch The inverter is equipped with a DC load-break switch. If the DC load- break switch is set to the position I, it establishes a conductive connection between the PV array and the inverter. -
Page 16: Interfaces And Functions
4 Product Overview SMA Solar Technology AG Symbol Explanation Observe the documentation Together with the red LED, this symbol indicates an error. No function Three-phase alternating current with neutral conductor Direct current The product has no galvanic isolation. WEEE designation... - Page 17 The product is equipped with a Modbus interface. The Modbus interface is deactivated by default and must be configured as needed. The Modbus interface of the supported SMA products is designed for industrial use – via SCADA systems, for example – and has the following tasks: •...
-
Page 18: Led Signals
With SMA ShadeFix, inverters use the best possible energy supply from the PV modules at all times to increase yields in shaded systems. SMA ShadeFix is enabled by default. The time interval of SMA ShadeFix is usually six minutes. This means that the inverter determines the optimum operating point every six minutes. - Page 19 SMA Solar Technology AG 4 Product Overview Status Explanation Red LED glowing Error An error has occurred. The error must be rectified by a qualified person (see Section 10.1, page 55). Blue LED No function Operating manual STP15-25TL-30-BE-en-17...
-
Page 20: Mounting
5 Mounting SMA Solar Technology AG Mounting Requirements for Mounting Requirements for mounting location: WARNING Danger to life due to fire or explosion Despite careful construction, electrical devices can cause fires. This can result in death or serious injury. • Do not mount the product in areas containing highly flammable materials or gases. - Page 21 SMA Solar Technology AG 5 Mounting Dimensions for mounting: Ø 11 Figure 4: Position of the anchoring points(Dimensions in mm) Recommended clearances: If you maintain the recommended clearances, adequate heat dissipation will be ensured. Thus, you will prevent power reduction due to excessive temperature.
-
Page 22: Mounting The Inverter
5 Mounting SMA Solar Technology AG 2224 Figure 5: Recommended clearances(Dimensions in mm) Mounting the Inverter Additionally required mounting material (not included in the scope of delivery): ☐ At least two screws suitable for the support surface (diameter: 10 mm at maximum) ☐... - Page 23 SMA Solar Technology AG 5 Mounting CAUTION Risk of burns due to hot enclosure parts Some parts of the enclosure can get hot during operation. • Mount the inverter in such a way that it cannot be touched inadvertently during operation.
- Page 24 5 Mounting SMA Solar Technology AG 10. Flip the lower enclosure lid up and remove it. 11. In order to secure the inverter from being lifted off the wall accidentally, attach it to the wall with suitable mounting material. Use both of the lower drill holes on the rear panel of the inverter.
-
Page 25: Electrical Connection
SMA Solar Technology AG 6 Electrical Connection Electrical Connection Overview of the Connection Area 6.1.1 View from Below Figure 6: Enclosure openings at the bottom of the inverter Position Designation Pin connector for the DC load-break switch Enclosure opening M20 with filler plug for the connection cable of the multi- function relay or SMA Power Control Module... -
Page 26: Interior View
Figure 7: Connection areas in the interior of the inverter Position Designation DC protective cover Pin connector for connecting the multifunction relay or the SMA Power Control Module Pin connector for connecting the communication interface Connecting terminal plate for connecting the AC cable... - Page 27 100 mA or higher (information about the selection of a residual-current device see technical information "Criteria for Selecting a Residual-Current Device" at www.SMA- Solar.com). Each inverter in the system must be connected to the utility grid via a separate residual-current device.
-
Page 28: Connecting The Inverter To The Utility Grid
6 Electrical Connection SMA Solar Technology AG 6.2.2 Connecting the Inverter to the Utility Grid Requirements: ☐ The connection requirements of the grid operator must be met. ☐ The grid voltage must be in the permissible range. The exact operating range of the inverter is specified in the operating parameters. -
Page 29: Connecting Additional Grounding
SMA Solar Technology AG 6 Electrical Connection CAUTION Danger of crushing when locking levers snap shut The locking levers close by snapping down fast and hard. • Press the locking levers of the terminal block for the AC cable down with your thumb only. -
Page 30: Dc Connection
6 Electrical Connection SMA Solar Technology AG 2. Lead the clamping bracket over the grounding cable. Arrange the grounding cable on the left-hand side. 3. Screw the clamping bracket tight using the M6x16 cylindrical screw and the conical spring washer M6 (torque: 6 Nm). -
Page 31: Connecting The Pv Array
SMA Solar Technology AG 6 Electrical Connection 6.3.2 Connecting the PV Array NOTICE Damage to the inverter due to ground fault on DC side during operation Due to the transformerless topology of the product, the occurance of ground faults on DC side during operation can lead to irreparable damage. -
Page 32: Retrofitting The Surge Arrester Type Ii
6 Electrical Connection SMA Solar Technology AG 3. Check whether the DC connectors have the correct polarity. If the DC connector is equipped with a DC cable of the wrong polarity, the DC connector must be configured again. The DC cable must always have the same polarity as the DC connector. - Page 33 SMA Solar Technology AG 6 Electrical Connection DANGER Danger to life due to high voltages • Disconnect the inverter from all voltage sources (see Section 11, page 76). • Wait 20 minutes before you remove the DC protective cover to allow residual voltages to discharge.
-
Page 34: Commissioning
Before you can commission the inverter, you must check various settings and make changes if necessary. This section describes the procedure and gives an overview of the steps, which must always be performed in the prescribed sequence. Procedure Connection to the SMA Speedwire/Webconnect data Installation manual of the module SMA Speedwire/Webcon- nect data module Check which country data set the inverter is set to. - Page 35 ≤ 2.99.99.R. • It is decided how to proceed according to the locally valid regulations and the SMA manufacturer's declaration valid for the country of use. Set the generally valid country dataset according to EN 50549 with the firmware version ≥...
- Page 36 7 Commissioning SMA Solar Technology AG Country data set Display language Country VDE0126-1-1 German Germany, Switzerland VDE-AR-N4105* German Germany VDE-AR-N4105-HP** German Germany VDE0126-1-1 French Switzerland, France VFR2014 French France VDE0126-1-1 Italian Switzerland AS 4777.3 English Australia AS 4777.2 English Australia CEI 0-21 external...
- Page 37 SMA Solar Technology AG 7 Commissioning Country data set Display language Country Medium-Voltage Directive English Various countries Germany Medium-Voltage Directive French France Germany Medium-Voltage Directive Spanish Spain Germany Medium-Voltage Directive Retained Czech Republic Germany SI4777_HS131_Pf English Israel MVtgDirective Int. German Germany MVtgDirective Int.
- Page 38 7 Commissioning SMA Solar Technology AG Country data set Display language Country Island mode 50 Hz English Island mode 50 Hz German Island mode 50 Hz French Island mode 50 Hz Spanish Island mode 50 Hz Italian Island mode 50 Hz Greek Island mode 50 Hz Czech * Setting in accordance with VDE-AR-N 4105 for PV systems ≤ 3.68 kVA (Germany)
- Page 39 SMA Solar Technology AG 7 Commissioning Country data set Display language Country [DE] VDE-AR-N4105:2018 English Germany Generators > 4.6 kVA [DE] VDE-AR-N4110:2018 English Germany Generator int. Decoup. Pro- tection Device [DE] VDE-AR-N4110:2018 English Germany Generator ext. Decoup. Pro- tection Device...
- Page 40 7 Commissioning SMA Solar Technology AG Country data set Display language Country [BE] C10/11-LV2:2018 LV English Belgium >10kVA [BE] C10/11-LV2:2018 LV German Belgium >10kVA [BE] C10/11-LV2:2018 LV Dutch Belgium >10kVA [BE] Synergrid French Belgium C10/11:2019 LV Genera- tors int. Decoup. Protection...
- Page 41 SMA Solar Technology AG 7 Commissioning Country data set Display language Country [BE] Synergrid French Belgium C10/11:2019 MV Genera- tors int. Decoup. Protection Device [BE] Synergrid English Belgium C10/11:2019 MV Genera- tors int. Decoup. Protection Device [BE] Synergrid German Belgium C10/11:2019 MV Genera- tors int.
-
Page 42: Commissioning The Inverter
SMA Solar Technology AG Procedure: 1. Determine the rotary switch position for your country and purpose. Call up the Technical Information "Overview of the Rotary Switch Settings" at www.SMA-Solar.com. DANGER Danger to life due to high voltages • Ensure that the inverter is disconnected from all voltage sources and that the enclosure lid is removed (see Section 11, page 76). - Page 43 SMA Solar Technology AG 7 Commissioning 3. Tighten all six screws with an Allen key (AF 3) in the order 1 to 6 (torque: 2.0 Nm ± 0.3 Nm). By tightening the screws in the prescribed order, you avoid warping the enclosure lid, which would keep it from sealing correctly.
- Page 44 7 Commissioning SMA Solar Technology AG 8. Switch on the circuit breaker of all three line conductors. ☑ All three LEDs start to glow and the start-up phase begins. The start-up phase may take several minutes. ☑ The green LED is glowing. Feed-in operation begins.
-
Page 45: Configuration
You will not need to carry out network configuration. If the router does not support DHCP, automatic network configuration will not be possible and you will need to use the SMA Connection Assist to integrate the inverter into the network. Requirements: ☐... -
Page 46: Changing Operating Parameters
☐ The inverter must be registered in the communication product. ☐ The changes to the grid-relevant parameters must be approved by the responsible grid operator. ☐ When changing grid-relevant parameters, the SMA Grid Guard code must be available (see "Application for SMA Grid Guard Code" at www.SMA-Solar.com). Procedure: 1. -
Page 47: Configuring Q On Demand 24/7
Procedure: • Activate the Modbus interface and adjust the communication ports if necessary (see the technical information "SMA Modbus® Interface" or "SunSpec® Modbus® Interface" at www.SMA-Solar.com). Configuring Q on Demand 24/7 With the "Q on Demand 24/7" function, the inverter remains connected to the utility grid overnight and is supplied with power via the utility grid in order that it can provide reactive power. -
Page 48: Reducing The Attenuation Of Ripple Control Signals
Setting SMA ShadeFix For partially shaded PV modules, you should set the interval at which the inverter is to optimize the MPP of the PV system. If you do not want to use SMA OptiTrac Global Peak feature, you can deactivate the feature. - Page 49 This value should only be increased if the shading situation changes extremely slowly. ☑ The inverter optimizes the MPP of the PV system at the predetermined time interval. • In order to deactivate the SMA OptiTrac Global Peak feature, select the parameter OptiTrac Global Peak switched on or set MPPShdw.IsOn to Off.
-
Page 50: Operation
9 Operation SMA Solar Technology AG Operation Display Overview The display shows the current operating data of the inverter (e.g. current power, daily energy, total energy) as well as events or errors. Power and energy are displayed as bars in a diagram. - Page 51 SMA Solar Technology AG 9 Operation Position Symbol Explanation When output voltage is displayed: line conductors between which the output voltage is present When output current is displayed: line conductor to which the output current is allocated Utility grid Event number of an error on the utility grid side...
-
Page 52: Changing The Display Language
9 Operation SMA Solar Technology AG Changing the Display Language If the language for the country data set is not the language you want to use, you can change the display language as follows: Overview of rotary switch settings: Country data set Display lan-... -
Page 53: Calling Up Display Messages Of The Start-Up Phase
☑ The display shows all messages of the start-up phase in sequence. Updating the Firmware If no automatic update is set in the communication product (e.g., SMA Cluster Controller) or in Sunny Portal, you have the option of carrying out a manual firmware update. - Page 54 9 Operation SMA Solar Technology AG Requirements: ☐ An SD memory card with a maximum memory capacity of 2 GB is required. ☐ The SD memory card must be formatted as FAT32. ☐ An "Update" directory must be created on the SD memory card.
-
Page 55: Troubleshooting
SMA Solar Technology AG 10 Troubleshooting 10 Troubleshooting 10.1 Event Messages Event number Message, cause and corrective measures Grid fault The grid voltage or grid impedance at the connection point of the inverter is too high. The inverter has disconnected from the utility grid. - Page 56 10 Troubleshooting SMA Solar Technology AG Event number Message, cause and corrective measures Grid fault The ten-minute average value of the grid voltage is no longer within the per- missible range. The grid voltage or grid impedance at the connection point is too high.
- Page 57 SMA Solar Technology AG 10 Troubleshooting Event number Message, cause and corrective measures Grid fault The inverter has detected an excessively high proportion of direct current in the grid current. Corrective measures: 1. Check the grid connection for direct current.
- Page 58 10 Troubleshooting SMA Solar Technology AG Event number Message, cause and corrective measures 3301 Unstable operation > Generator output too low There is not enough power at the DC input of the inverter for stable operation. This may be caused by snow on the PV modules or insufficient irradiation. The inverter interrupts feed-in operation and can no longer connect to the utility grid.
- Page 59 SMA Solar Technology AG 10 Troubleshooting Event number Message, cause and corrective measures 3401 3402 DC overvoltage > Disconnect generator Overvoltage at the DC input. This can destroy the inverter. Corrective measures: 1. Immediately disconnect the inverter from all voltage sources.
- Page 60 10 Troubleshooting SMA Solar Technology AG Event number Message, cause and corrective measures 3801 3802 DC overcurrent > Check generator Overcurrent at the DC input. The inverter briefly interrupts feed-in operation. Corrective measures: • If this message is displayed frequently, ensure that the PV array has been correctly rated and wired.
- Page 61 SMA Solar Technology AG 10 Troubleshooting Event number Message, cause and corrective measures 6603 6604 Self-diagnosis > Overload The cause must be determined by the Service. Corrective measures: • Contact the service. 6606 Interference device The cause must be determined by the Service.
- Page 62 Parameters could not be set using the memory card. The inverter continues to feed in. Corrective measures: • Ensure that the parameters are set correctly. • Ensure that the SMA Grid Guard code is available. 7106 Update file defect. Update file on the memory card is defective.
- Page 63 SMA Solar Technology AG 10 Troubleshooting Event number Message, cause and corrective measures 7201 7202 Data stor. not poss. Internal error. The inverter continues to feed into the utility grid. Corrective measures: • Contact the service. 7303 Update main CPU failed The cause must be determined by the Service.
- Page 64 The cause must be determined by the Service. 8104 Corrective measures: • Contact the service. 9002 Installer code invalid The SMA Grid Guard code entered is incorrect. The operating parameters are still protected and cannot be changed. Corrective measures: • Enter the correct SMA Grid Guard code. STP15-25TL-30-BE-en-17 Operating manual...
-
Page 65: Cleaning The Fans
Grid parameter locked The parameters are now locked. You cannot change the parameters. Corrective measures: • Unlock the parameters with the SMA Grid Guard code. 9005 Changing of grid parameters not possible > Ensure DC supply PV power is too low for setting the country data set. As soon as sufficient irra- diation is available, the inverter assumes the setting automatically. -
Page 66: Cleaning The Fan On The Left-Hand Side Of The Enclosure
10 Troubleshooting SMA Solar Technology AG 4. Press the locking tabs on the fan toward the center of the fan. 5. Carefully remove the fan from the inverter. 6. Release and remove the fan plug. NOTICE Damage to the fan due to compressed air •... - Page 67 SMA Solar Technology AG 10 Troubleshooting • Turn the rotary fastener of the ventilation grid with a flat-blade screwdriver until the notch is in a vertical position. • Remove the ventilation grid. Use a screwdriver to gently lever open the ventilation grid.
-
Page 68: Checking The Function Of The Fans
10 Troubleshooting SMA Solar Technology AG 9. After cleaning, insert the fan plug into the pin connector until it snaps into place. 10. Insert the fan into the inverter until it snaps into place. 11. Attach the ventilation grids on the right-hand and left-hand sides of the inverter: •... -
Page 69: Checking The Pv System For Ground Faults
SMA Solar Technology AG 10 Troubleshooting 3. Check whether air is being drawn in through the bottom and is coming out of the upper ventilation grid and whether the fan is making any unusual noises. If no air is being drawn in through the bottom, no air is coming out of the ventilation grid, or the fan is making unusual noises, then the fan may have been installed incorrectly. - Page 70 10 Troubleshooting SMA Solar Technology AG • If the voltage measurement was not successful, check the PV system via insulation resistance measurement for ground faults. Test by Measuring the Voltage Proceed as follows to check each string in the PV system for ground faults.
- Page 71 For the resistance of a PV module an average value can be assumed: for thin-film PV modules approximately 40 MOhm and for polycrystalline and monocrystalline PV modules approximately 50 MOhm per PV module (for further information on calculating the insulation resistance see the Technical Information "Insulation Resistance (Riso) of Non-Galvanically Isolated PV Systems" at www.SMA-Solar.com). Operating manual STP15-25TL-30-BE-en-17...
-
Page 72: Checking The Function Of The Surge Arresters
10 Troubleshooting SMA Solar Technology AG Required devices: ☐ Suitable device for safe disconnection and short-circuiting ☐ Measuring device for insulation resistance Device required for safe disconnection and short-circuiting of the PV array The insulation resistance can only be measured with a suitable device for safe disconnection and short-circuiting of the PV array. - Page 73 SMA Solar Technology AG 10 Troubleshooting Procedure: DANGER Danger to life due to electric shock • Disconnect the inverter from all voltage sources (see Section 11, page 76). • Wait 20 minutes before removing the DC protective cover. 2. Release the screws on the DC protective cover using an Allen key (AF 3), lift the DC protective cover...
-
Page 74: Replacing The Surge Arrester
10 Troubleshooting SMA Solar Technology AG 10.6 Replacing the Surge Arrester If at least one surge arrester is defective, SMA Solar Technology AG recommends replacing all surge arresters. Procedure: DANGER Danger to life due to electric shock • Disconnect the inverter from all voltage sources and open the lower enclosure lid (see Section 11, page 76). - Page 75 SMA Solar Technology AG 10 Troubleshooting 5. Plug the new surge arresters into the designated slots until they lock into place with the locking tabs. The inspection window on each surge arrester must face to the right. 6. Ensure that each surge arrester is securely inserted into its slot.
-
Page 76: Disconnecting The Inverter From Voltage Sources
11 Disconnecting the Inverter from Voltage Sources SMA Solar Technology AG 11 Disconnecting the Inverter from Voltage Sources Prior to performing any work on the inverter, always disconnect it from all voltage sources as described in this section. Always adhere to the prescribed sequence. - Page 77 SMA Solar Technology AG 11 Disconnecting the Inverter from Voltage Sources 7. Pull the DC load-break switch down and out of the recess. 8. Remove all six screws from the lower enclosure lid using an Allen key (AF 3). 9. Lift and remove the lower enclosure lid from below.
- Page 78 11 Disconnecting the Inverter from Voltage Sources SMA Solar Technology AG 13. If the neutral conductor is connected, use an appropriate multimeter to ensure that no voltage is present at the AC connecting terminal block between L1 and N, L2 and N, and L3 and N.
-
Page 79: Procedure For Receiving A Replacement Device
Under fault conditions, the inverter may need to be replaced. If this is the case, you will receive a replacement device from SMA Solar Technology AG. If you received a replacement device, replace the defective inverter with the replacement device as described in this section. - Page 80 12 Procedure for Receiving a Replacement Device SMA Solar Technology AG CAUTION Risk of burns due to hot enclosure parts • Wait 30 minutes before disassembling the inverter. This will allow the enclosure to cool down and thus prevent burn injuries.
- Page 81 SMA Solar Technology AG 12 Procedure for Receiving a Replacement Device • Position the upper enclosure lid with the six screws and conical spring washers on the enclosure and tighten it using an Allen key (AF 4) in the order 1 to 6 (torque: 6 Nm ±...
- Page 82 4. Pack the defective inverter in the packaging of the replacement device and arrange with SMA Solar Technology AG for it to be picked up.
-
Page 83: Decommissioning The Inverter
AC cable. 3. Press down the locking levers of the terminal block for the AC cable. 4. If the multi-function relay or the SMA Power Control Module are used, remove the connection cable from the inverter. - Page 84 13 Decommissioning the Inverter SMA Solar Technology AG CAUTION Risk of burns due to hot enclosure parts • Wait 30 minutes for the enclosure to cool down. 9. If the inverter is protected from being lifted off, unscrew the screws out of the lower drill holes in the rear panel of the inverter.
-
Page 85: Technical Data
SMA Solar Technology AG 14 Technical Data 14 Technical Data DC Input STP 15000TL-30 STP 17000TL-30 STP 20000TL-30 STP 25000TL-30 Maximum DC 15330 W 17374 W 20440 W 25550 W power at cos φ = 1 Maximum input 1000 V 1000 V 1000 V 1000 V voltage MPP voltage 240V to 800 V 275 V to 800 V 320 V to 800 V... - Page 86 14 Technical Data SMA Solar Technology AG AC Output STP 15000TL-30 STP 17000TL-30 STP 20000TL-30 STP 25000TL-30 Rated power at 15000 W 17000 W 20000 W 25000 W 230 V, 50 Hz Maximum appar- 15000 VA 17000 VA 20000 VA 25000 VA ent AC power Rated grid voltage 230 V 230 V 230 V 230 V Nominal AC volt- 220 V / 230 V /...
- Page 87 SMA Solar Technology AG 14 Technical Data STP 15000TL-30 STP 17000TL-30 STP 20000TL-30 STP 25000TL-30 Displacement overexcited overexcited overexcited overexcited power factor, ad- underexcited underexcited underexcited underexcited justable Feed-in phases Phase connection Surge category in accordance with IEC 62109-1 * Depending on the configured country data set Efficiency STP 15000TL-30 STP 17000TL-30 STP 20000TL-30 STP 25000TL-30...
- Page 88 14 Technical Data SMA Solar Technology AG Climatic category in accordance with IEC 4K4H 60721-3-4 Environmental category Outdoors Pollution degree outside the enclosure Pollution degree inside the enclosure Operating temperature range -25°C to +60°C Maximum permissible value for relative humid-...
- Page 89 SMA Solar Technology AG 14 Technical Data Multifunction relay Optional SMA Power Control Module Optional Surge arrester type II Optional Fans Width x height x depth 60 mm x 60 mm x 25.4 mm Noise emission, typical ≤29 dB(A) Maximum operating altitude 3000 m Air flow rate ≥ 40 m³/h Torques Upper lid screws 6 Nm ±...
-
Page 90: Spare Parts And Accessories
SMA Solar Technology AG 15 Spare Parts and Accessories You will find the corresponding accessories and spare parts for your product in the following overview. If required, these can be ordered from SMA Solar Technology AG or your distributor. Designation Brief description... -
Page 91: Contact
SMA Solar Technology AG 16 Contact 16 Contact If you have technical problems with our products, please contact the SMA Service Line. The following data is required in order to provide you with the necessary assistance: • Device type • Serial number •... - Page 92 Toll free for Australia: SMA Online Service Center: 1800 SMA AUS www.SMA-Service.com (1800 762 287) International: +61 2 9491 4200 United Arab SMA Middle East LLC India SMA Solar India Pvt. Ltd. Emirates Abu Dhabi Mumbai +971 2234 6177 +91 22 61713888 SMA Online Service Center: www.SMA-Service.com STP15-25TL-30-BE-en-17 Operating manual...
- Page 93 SMA Solar Technology AG 16 Contact ไทย Service Partner for String inverter: 대한민국 Enerone Technology Co., Ltd Solar Power Engineering Co., Ltd. 4th Fl, Jungbu Bldg, 329, 333/7,8,9 United Tower Build- Yeongdong-daero, Gangnam- ing 4th floor. Soi Sukhumvit 55 (Thonglor 17),...
-
Page 94: Eu Declaration Of Conformity
(L 174/88, June 8, 2011) and 2015/863/EU (L 137/10, March 31, 2015) (RoHS) SMA Solar Technology AG confirms herewith that the products described in this document are in compliance with the fundamental requirements and other relevant provisions of the above- mentioned directives. The entire EU Declaration of Conformity can be found at www.SMA- Solar.com. - Page 96 www.SMA-Solar.com...
Need help?
Do you have a question about the STP 17000TL-30 and is the answer not in the manual?
Questions and answers