Table of Contents
Advertisement
Quick Links
Advertisement
Table of Contents

Related Manuals for Coda LINUS10


Summary of Contents for Coda LINUS10
- Page 1 INFORMATION FOR USE FOR MODELS CODA AUDIO LINUS10 The leading version of this brochure is the English one which shall prevail to the exclusion of the national translation on hand. USER MANUAL v2.1 Copyright 2010 - 2020 by CODA Audio GmbH...
- Page 2 +49 (0) 511 866 55 887 Fax: Internet: www.codaaudio.com Email: contact@codaaudio.com Subject to change. Please visit our website www.codaaudio.com for the latest version of this User Manual. Please note that the leading version of CODA Audio manuals is always the English one.
-
Page 3: Table Of Contents
. . . . . . . . . . . . . . . . . . . . . . . . . . . . . . . . . . . . . . . . . . . . . . . . 7.3 What CODA Audio will do . -
Page 4: Important Safety Instructions
The user manual forms an integral part of the amplifier. It is recommended to check the CODA Audio website for any updates and new versions of this manual. - Page 5 14. Servicing All service and repair work must be carried out by a dealer/distributor authorized by CODA Audio. Do not attempt to service this amplifier yourself. Opening or removing covers may expose you to dangers or other hazards. The amplifier may only be opened by qualified personnel.
-
Page 6: Symbols
LINUS10 SYMBOLS SYMBOLS CAUTION - HIGH VOLTAGE HAZARDS CAUTION EXIST WITHIN THIS PRODUCT. REFER ALL SERVICING TO RISK OF ELECTRIC SHOCK DO NOT OPEN AUTHORIZED PERSONNEL THE LIGHTNING FLASH WITH ARROW HEAD SYMBOL IS INTENDED TO ALERT THE USER TO THE PRESENCE OF UNINSULATED DANGEROUS VOLTAGE WITHIN THE PRODUCT’S ENCLOSURE. -
Page 7: Ce Conformity
Manufacturer's name: CODA Audio GmbH Manufacturer's address: Boulevard der EU 6, 30539 Hannover, Germany declares that the product with the model name: LINUS10 conforms to the following standards: IEC/EN/UL/CSA 62368-1:2016 Safety IEC/EN 55103-1:2010 Emission (for all environments E1/residential to ES/industrial) -
Page 8: Consignes De Sécurité Importantes
Ce mode d'emploi fait partie intégrante de l’amplificateur. Il est recommandé de visiter régulièrement le site web de CODA Audio afin d’obtenir les mises à jour et nouvelles versions de ce manuel. La revente de l'amplificateur n'est possible qu'avec le mode d'emploi. Tout changement subi par l'amplificateur doit être documenté... - Page 9 été utilisé dans un environnement poussiéreux pendant un temps prolongé 14. Entretien Toute opération de maintenance ou réparation doit être effectuée par un revendeur / distributeur certifié par CODA Audio. N’essayez pas d'entretenir l'amplificateur par vous-même. L'ouverture de l’amplificateur ou retirer le capot pourrait vous exposer à...
-
Page 10: Symboles
LINUS10 SYMBOLES SYMBOLES ATTENTION —CE PRODUIT PRÉSENTE ATTENTION DES RISQUES ASSOCIÉS AU COURANT ÉLEVE. TOUT SERVICE RISQUE DE CHOC ÉLECTRIQUE DOIT ÊTRE EFFECTUE PAR DU NE PAS OUVRIR PERSONNEL AUTORISÉ. L’ÉCLAIR AVEC LE SYMBOLE DE LA FLÉCHE SERT A AVERTIR L’UTILISATEUR DE LA PRÉSENCE D’UNE TENSION NON ISOLÉE... -
Page 11: Ce Conformité
CODA Audio GmbH Adresse du constructeur : Boulevard der EU 6, 30539 Hannover, Allemagne déclare que le produit avec le nom de modèle : Amplificateur LINUS10 est en conformité avec les normes suivantes : IEC/EN/UL/CSA 62368-1 : 2016 Sécurité IEC/EN 55103-1 : 2010 Emission (pour tous les environnements E1 / résidentiel à E5 / industriel) IEC/EN 55103-2 : 2010 Immunité... -
Page 12: Wichtige Sicherheitshinweise
Nutzung des Verstärkers sicher, dass allen Anweisungen, insbesondere den Sicherheitsanweisungen Folge geleistet wird. Die CODA Audio LINUS Verstärker sind darauf ausgelegt ein gepulstes Audiosignal zu verarbeiten und zu verstärken. An den Verstärker dürfen ausschließlich Lautsprecher mit den in dieser Anleitung spezifizierten Impedanzen angeschlossen werden. - Page 13 Verstärker wurde längere Zeit in einer staubigen Umgebung eingesetzt. 14. Service Jegliche Reparaturarbeiten müssen durch eine von CODA Audio autorisierte Stelle durchgeführt werden. Versuchen Sie nicht den Verstärker selbst zu reparieren, da das Öffnen des Verstärkers Sie gefährlichen Spannungen und anderen Risiken aussetzen kann.
-
Page 14: Symbole
LINUS10 SYMBOLE SYMBOLE VORSICHT: PRODUKT UNTER VORSICHT HOCHSPANNUNG. ÜBERLASSEN SIE JEGLICHE WARTUNGSARBEITEN NICHT ÖFFNEN – AUTORISIERTEM KUNDENDIENST. STROMSCHLAGGEFAHR. DAS BLITZSYMBOL WARNT DEN BENUTZER VOR NICHTISOLIERTEN GEFÄHRLICHEN SPANNUNGEN INNERHALB DES GEHÄUSES. DAS AUSRUFEZEICHEN SOLL BENUTZER AUF WICHTIGE BEDIENUNGS- UND WARTUNGSANLEITUNGEN IN DER DEM VERSTÄRKER BEIGEFÜGTEN LITERATUR AUFMERKSAM MACHEN. -
Page 15: Eg-Konformitätserklärung
Name des Herstellers: CODA Audio GmbH Adresse des Herstellers: Boulevard der EU 6, 30539 Hannover, Deutschland erklärt, dass das Produkt mit der Modellbezeichnung: LINUS10 den folgenden Normen entspricht: IEC/EN/UL/CSA 62368-1:2016 Sicherheitsnorm IEC/EN 55103-1:2010 Emissionen (für alle Umgebungen E1/Wohngebiete bis ES/gewerblich) IEC/EN 55103-2 :2010 Störfestigkeit (für alle Umgebungen E1/Wohngebiete bis ES/gewerblich) -
Page 16: Welcome To Coda Audio
CODA Audio is represented via a global network of experienced and techni cally qualified international distributors. We believe that the best way to get to know us better is by listening to our loudspeakers because:... -
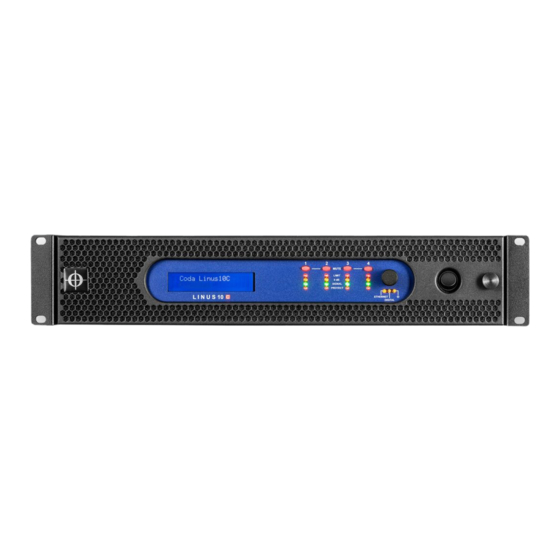
Page 17: The Amplifier
Users can adapt the power amp to meet their specific audio requirements before use. The display mounted on the front of the LINUS10 amplifier allow the differ ent functions to be accessed. Since there are a lot of parameters available, it is important that users should familiarise themselves thoroughly with the entire range of settings and programmable features before using the pow er amp. -
Page 18: Factory Settings
18 Sensor connection 21 Digital audio network connection (not used) 2.3 Fuse Protect settings LINUS10 is shipped with the Fuse Protection set to 24A. To change the Fuse Protect level: Move to device information page on the display. Press ,,ESC" button for min 2 seconds, hold it and press aditionally:... -
Page 19: Installation
LINUS10 3. INSTALLATION 3. INSTALLATION 3.1 Mounting Use four screws and washers when mounting the amplifier to the front rack rails. For mobile use, the amplifier should also be secured using the 19” mounting elements on the rear panel. -
Page 20: Cooling
3.3.1 Mains supply Only connect the LINUS10 amplifier to an appropriate AC circuit and outlet in accordance with the requirements indicated in the second line on the rating plate. Only use mains cables with original Neutrik powerCON® 32 A connectors for safety reasons. - Page 21 3.3.3 Mains power consumption and current draw Due to the huge output power of the LINUS10 the mains current draw can get very high when demanding large output powers. Please refer to follow ing table for an overview of mains currents and power cunsuption under different operating conditions.
-
Page 22: Signal Inputs
3. INSTALLATION 3.4 Signal inputs The LINUS10 amplifier offers two different input signal sources: Analog - in this mode the analog signals connected to the XLR input connectors will be used as input signal. LiNET - with the LiNET setting the input signals are taken from the LiNET digital audio network interface. -
Page 23: Remote Control Inputs (Ethernet)
3.5 Remote control inputs (Ethernet) The Ethernet Link network connector allows you to access the LINUS10 from a host computer for remote control, firmware update and download ing DSP presets. Please note that for setting up proper network connec tion you need to use the CODA Audio LINUS Control software (download online: www.codaaudio.com). -
Page 24: Operation
LINUS10 4. OPERATION 4. OPERATION 4.1 Screen user interface Indication: 1. Channel mute / channel selection buttons 2. Rotary encoder knob selects, changes and enters parameters. 3. Press "ESC" escape button any time to deny selection and/or go back to main operation page. - Page 25 LINUS10 4. OPERATION 4.1.4 Delay Press the “DOWN” button to skip to second operation page. 0 1_ Delay Move selection field to position “D” (DELAY). Push the encoder knob on the corresponding output channel that 1-> 2-> you want to delay, then choose its value and confirm.
- Page 26 LINUS10 4. OPERATION 4.1.8 Analog fallback LINUS14 SERIAL:XXXXXXXX Analog fallback can be activated as redundant analog signal for LiNET 192.168. FW:3.62 LED METERS:OUTPUT LCD:0 signal source. Analog Fallback FALLBACK: Lock-> Select input on the main page. Numbers indicate LiNET and letters indicate analog fallback signal source.
- Page 27 LINUS10 4. OPERATION 4.1.9 Lock device LINUS10 SERIAL:XXXXXXXX Navigate to the device overview page and select the “LOCK“ function. 192.168. FW:3.62 LED METERS:OUTPUT LCD:0 FALLBACK:OFF Lock-> Define your new password (in numbers) and confirm. Device After the definition of password add it into the “CURRENT PASSWORD“...
-
Page 28: Indicators
When a persistent DC voltage is located at an output stage, the main SMPS will be permanently switched off. This will be indicated on the display. 4.3.3 DC servo To prevent DC offset at the speaker output, the LINUS10 amplifiers are fit ted with two DC servos (hence there are no capacitors in the signal path). -
Page 29: Mains Protections
Due to the very large output power of the LINUS10, this limiter has been set to a maximum average mains input current of approx. 24 A. -
Page 30: Main Smps Protections
4.5.3 Thermal protection The temperature of the main SMPS transformer of your LINUS10 ampli fier is permanently monitored. If the temperature exceeds 85°C/185°, the main SMPS is switched off. The amplifier's display will indicate a main SMPS error in this case. -
Page 31: Internal Led Description
LINUS10 4. OPERATION 4.7 Internal LED description This section describes the internal status LEDs which can be seen from the front behind the dust filter. These status LEDs can be helpful for trou bleshooting in case of an unexpected amplifer behaviour. -
Page 32: Filter Cleaning
4.8 Filter cleaning The air intake on the front of your LINUS10 amplifier is fitted with a remov able filter system. If the filter becomes clogged, the unit will not cool as efficiently as it should and may result in reduced output levels. -
Page 33: Specification
LINUS10 5. SPECIFICATION 5. SPECIFICATION General Number of output channels Output stage Hybrid Class H Internal samplerate / bit-depth 96 kHz / 24 bit Signal-to-noise ratio > 107 dB (unweighted) > 110 dB (A-weighted) (22 Hz - 20 kHz, 4 Ω - analogue input) Signal-to-noise ratio >... - Page 34 LINUS10 5. SPECIFICATION AC Mains AC mains input connector Neutrik 32 A powerCON® AC mains voltage (high range)** 180 V = Minimum (dual voltage SMPS with automatic 230 V = Nominal 267 V = Maximum voltage range selection) AC mains voltage (low range)**...
- Page 35 LINUS10 5. SPECIFICATION Output 1250 W @ 16 Ω RMS output power* 2300 W @ 8 Ω (20 Hz - 20 kHz, THD < 0.1%) 4000 W @ 4 Ω 4700 W @ 2.7 Ω (both channels driven) 5100 W @ 2 Ω...
- Page 36 LINUS10 5. SPECIFICATION Physical Dimensions 483 x 88.1 x 452.5 mm | 19" x 3.5" x 17.2" (W x H x D) (2 Rack units) Shipping dimensions 615 x 130 x 540 mm | 21.3" x 5.12" x 21.26" (W x H x D) Volume = 0.045 m³...
-
Page 37: Performance
LINUS10 6. PERFORMANCE 6. PERFORMANCE Figure 6.1 Gain vs. frequency, 120 W output power, 4 Ω (channel 1, channel (Measurement of a typical performance) Figure 6.2 THD @ 1 kHz, 4 Ω vs. input voltage (channel 1, channel (Measurement of a typical performance) Figure 6.3... - Page 38 LINUS10 6. PERFORMANCE Figure 6.4 THD vs. frequency, 120 W output power, 4 Ω (channel 1, channel (Measurement of a typical performance) Figure 6.5 Channel separation vs. frequency@ 250 W / 2 Ω (channel 1, channel (Measurement of a typical performance) Figure 6.6...
- Page 39 (channel 1, channel (Measurement of a typical performance) Figure 6.8 SMPTE intermodulation distortion (60 Hz and 7 kHz) @ 4 Ω vs. input level (channel 1, channel (Measurement of a typical performance) Figure 6.9 LINUS10 (Measurement of a typical performance)
-
Page 40: Warranty
CODA Audio guarantees the LINUS10 amplifier to be free from defective material and/or workmanship for a period of five (5) years from the date of sale. When a defect occurs under normal installation and use, CODA Audio will repair the product under this warranty. -
Page 41: Warranty Form
CODA Audio appointed distributor. Nature of problem occurred. Please describe the conditions that existed when the problem occurred and what attempts were made to correct it: Other equipment in your system: Our website: www.codaaudio.com provides a complete list of licensed CODA Audio dealers/distributors. -
Page 42: Maintenance Information
LINUS10 8. MAINTENANCE 8. MAINTENANCE INFORMATION Cleaning and servicing work on the inside of the amplifier must only be carried out by qualified personnel. Qualified personnel is defined as a person who has gained specialised relevant knowledge of electronic engineering... -
Page 43: Notes - Changes Made To The Amplifier
LINUS10 11. NOTES 11. NOTES - CHANGES MADE TO THE AMPLIFIER NOTE/ IMPORTANT: Please consider that any changes made to the amplifier have to be documented in writing and passed on to the buyer in the event of resale!
Need help?
Do you have a question about the LINUS10 and is the answer not in the manual?
Questions and answers