
Subscribe to Our Youtube Channel
Related Manuals for AirLive GW-300RNAS


Summary of Contents for AirLive GW-300RNAS
- Page 1 GW-300NAS Wireless 2T2R 300Mbps Giga NAS Router User’s Manual AirLive GW-300NAS User’s Manual...
- Page 2 Trademarks All products, company, brand names are trademarks or registered trademarks of their respective companies. They are used for identification purpose only. Specifications are subject to be changed without prior notice. AirLive GW-300NAS User’s Manual...
- Page 3 Copyright and Disclaimer CE Declaration of Conformity This equipment complies with the requirements relating to electromagnetic compatibility, EN 55022/A1 Class B. AirLive GW-300NAS User’s Manual...
-
Page 4: Table Of Contents
3.1.3 Wireless Settings..................26 3.1.4 Change Password ..................29 3.2 Forwarding Rules....................38 3.3 Security Setting...................... 41 3.4 Advanced Setting....................47 4.TROUBLESHOOTING ....................60 APPENDIX A. SPEC SUMMARY TABLE................63 APPENDIX B. LICENSING INFORMATION ..............65 AirLive GW-300NAS User’s Manual... -
Page 5: Introduction
It provides a complete solution for Internet surfing and broadband sharing. Instructions for installing and configuring this product can be found in this manual. Before you install and use this product, please read this manual carefully for fully exploiting the functions of this product. AirLive GW-300NAS User’s Manual... -
Page 6: Package List
1. Introduction 1.1 Package List Items Description Contents Quantity WiFi Broadband Router Antenna Power adapter AirLive GW-300NAS User’s Manual... -
Page 7: Hardware Installation
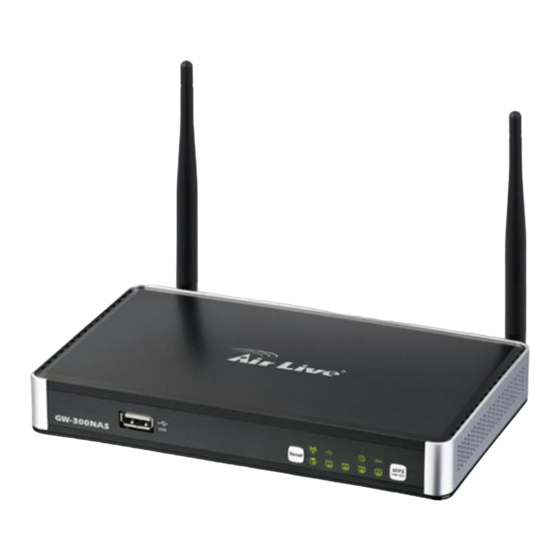
1. Introduction 1.2 Hardware Installation 1.2.1 Hardware configuration AirLive GW-300NAS User’s Manual... -
Page 8: Led Indicators
It is connected to local Ethernet. WAN LED Green in flash Data access Green RJ45 cable is plugged Ethernet LED Green in flash Data access Green WLAN is on WiFi LED Green in flash Data access Power LED Green Power ON AirLive GW-300NAS User’s Manual... - Page 9 Step 2. Plug the RJ45 cable into LAN port 1~4 and connect with your PC or NB. Step 3. Plug your RJ-45 into the WAN port and connect with your xDSL modem. AirLive GW-300NAS User’s Manual...
- Page 10 1. Introduction Step 4. Plug the power jack into it. Step 5. Power ON. Step 6. Prepare a USB Storage and then plug into the USB port. AirLive GW-300NAS User’s Manual...
-
Page 11: Getting Started
Please use windows EZ setup utility or Web UI wizard to enter the setup process. 2.1 Easy Setup by Windows Utility Step 1. Install the Easy Setup Utility from the provided CD then follow the steps to configure the device. Step 2. Select Language then click “Next” to continue. AirLive GW-300NAS User’s Manual... - Page 12 2. Getting Started Step 3. Then click the “Wizard” to continue. Step 4. Click “Next” to continue. AirLive GW-300NAS User’s Manual...
- Page 13 ‘ check’ to see if the name server accept it or not. You also can click ‘Ignore’ to pass it. Step 6. Select Wireless Enable, and then click “Next” to continue. AirLive GW-300NAS User’s Manual...
- Page 14 2. Getting Started Step 7. Enter SSID, Channel and Security options, and then click “Next” to continue. Step 8. Select A uto Detect WAN service. AirLive GW-300NAS User’s Manual...
- Page 15 2. Getting Started Step 9. Save the setting. Step 10. Congratu lations! Setup is completed Now you have alread connected to Internet successfully. AirLive GW-300NAS User’s Manual...
-
Page 16: Easy Setup By Configuring Web Ui
Type the default Username and password ‘adm in’ in the System Password an d then click ‘login’ button. Select your language. Select “Wizard” for basic settings in simple way. Press “Next” to start the Setup Wizard. AirLive GW-300NAS User’s Manual... - Page 17 2. Getting Started Configure with the Setup Wizard Step 1 You can change the password of administrator here. Step 2 Select Time Zone. Step 3 You can select Auto detecting WAN type or setup WAN type manually. AirLive GW-300NAS User’s Manual...
- Page 18 Step 5 Type in Host name and ISP registered MAC address. (if no such information, you can go next) Step 5-1 Wireless setting. Step 5-2 Wireless authentication and encryption. AirLive GW-300NAS User’s Manual...
- Page 19 2. Getting Started Step 6 Check the information again. Step 7 System is applying the setting. Step 8 Click finish to complete it. AirLive GW-300NAS User’s Manual...
-
Page 20: Making Configuration
EzGuard via windows IE browser or 3G smart phone or device. For example : type in http://AliasTest.ezguard.net/ and enter the system. Username and password support This NAS router provides another model for guest to enter it with lower level authorization. AirLive GW-300NAS User’s Manual... -
Page 21: Basic Setting
Note : Once you type in username and password ‘ guest/guest’, you can see as below WebHDD contents, which means your guest can only be allowed to check the ‘public’ area in the Hard drive under this NAS router. 3.1 Basic Setting AirLive GW-300NAS User’s Manual... -
Page 22: Network Setup
1. WAN Interface: Select Ethernet WAN or Wireless WAN to continue. 2. WAN Type: WAN connection type of your ISP. You can click WAN Type combo button to choose a correct one from the following options: Ethernet WAN A. Static IP Address AirLive GW-300NAS User’s Manual... - Page 23 Auto Reconnect (Always-on): The device will link with ISP until the connection is established. Manually: The device will not make the link until someone clicks the connect-button in the Status-page. NAT disable: The device would not send private IP to other LAN PC if you select disable. AirLive GW-300NAS User’s Manual...
- Page 24 Maximum Idle Time: the amount of time of inactivity before disconnecting your PPPoE session. Set it to zero or enable “Auto-reconnect” to disable this feature. PPPoE Service Name: Optional. Input the service name if your ISP requires it. Otherwise, leave it blank. AirLive GW-300NAS User’s Manual...
- Page 25 IP Mode: Please check the IP mode your ISP assigned, and select “Static IP Address” or “Dynamic IP Address”. My IP Address and My Subnet Mask: The private IP address and subnet mask your ISP assigned to you. AirLive GW-300NAS User’s Manual...
- Page 26 Manually: The device will not make the link until someone clicks the connect-button in the Status-page. Maximum Transmission Unit (MTU): Most ISP offers MTU value to users. The default MTU value is 0 (auto). E. L2TP AirLive GW-300NAS User’s Manual...
-
Page 27: Dhcp Server
Manually: The device will not make the link until someone clicks the connect-button in the Status-page. Maximum Transmission Unit (MTU): Most ISP offers MTU value to users. The default MTU value is 0 (auto). 3.1.2 DHCP Server AirLive GW-300NAS User’s Manual... - Page 28 Gateway: Optional. Gateway Address would be the IP address of an alternate Gateway. This function enables you to assign another gateway to your PC, when DHCP server offers an IP to your PC. Press “Clients List” and the list of DHCP clients will be shown consequently. AirLive GW-300NAS User’s Manual...
- Page 29 3. Making Configuration Press “Fixed Mapping” and the DHCP Server will reserve the special IP for designated MAC Address. AirLive GW-300NAS User’s Manual...
-
Page 30: Wireless Settings
Wireless Mode: Choose “B/G mixed”, “B only”, “G only”, “N only”, “G/N mixed” or “B/G/N mixed”. The factory default setting is “B/G/N mixed”. Authentication mode: You may select one of the following authentications to secure your wireless network: Open, Shared, Auto, WPA-PSK, WPA, WPA2-PSK, WPA2, WPA-PSK/WPA2-PSK, or WPA /WPA2. AirLive GW-300NAS User’s Manual... - Page 31 Another encryption options for WPA-PSK-TKIP and WPA2-PSK-AES, the others are same as the WPA-PSK. WPA/WPA2 Another encryption options for WPA-TKIP and WPA2-AES, the others are same the WPA. Press “WDS Setting” and It allows PC to get connected to wireless network within the area. AirLive GW-300NAS User’s Manual...
- Page 32 Press “WPS Setup”, you can configure and enable the easy setup feature WPS (Wi-Fi Protection Setup) for your wireless network. WPS:.You can enable this function by selecting “Enable”. WPS offers a safe and easy way to allow the wireless clients connected to your wireless network. AirLive GW-300NAS User’s Manual...
-
Page 33: Change Password
3.1.4 Change Password You can change the System Password here. We strongly recommend you to change the system password for security reason. Click on “Save” to store your settings or click “Undo” to give up the changes. AirLive GW-300NAS User’s Manual... - Page 34 The name that is showed on the windows network neighbors search result. WorkGroup This name MUST be the same as your computer, or you could not search this device via windows. Server Comment Just a comment for recognize. AirLive GW-300NAS User’s Manual...
- Page 35 Please set correct value to suit your language. Access Control The default setting is “Guest mode”, all clients could access as anonymous users. If you want to control the permission, change to “Authorization mode” and save it, then go to “User Configuration”. AirLive GW-300NAS User’s Manual...
- Page 36 The name of this server, it will be shown on the iTunes. Service Port: The TCP port for WEB management interface, for example, if the default value is 3689, then your iTunes server URL will be http://This_Device_IP:3689 Access Password: The password for iTunes Server WEB management interface. AirLive GW-300NAS User’s Manual...
- Page 37 The destination path on USB disk that you want to save files. Default value is /C/Download/FTP Login method: Anonymous, you can access this site without any authentication Account, you have to enter the username and password to login. AirLive GW-300NAS User’s Manual...
- Page 38 Schedule: this device will start FTP download on the time that you specified. The schedule job that is saved could be check on Status page by selecting “View Scheduled Download Status”. At Once: the FTP download would be started immediately. AirLive GW-300NAS User’s Manual...
- Page 39 First, you have to get a seed file, which we called “torrent”. Then click the “Open” link on UI, it would pop up a sub menu to let you upload. Or, if your torrent file could be download from network, you could just enter a URL. AirLive GW-300NAS User’s Manual...
- Page 40 Stop, Resume and Remove seed Select any job on the list, and click right button of mouse, you could see a menu with several actions you could do.You could Stop (Pause), Resume, or Remove a job with this sub menu. AirLive GW-300NAS User’s Manual...
Need help?
Do you have a question about the GW-300RNAS and is the answer not in the manual?
Questions and answers