
Related Manuals for Cisco Linksys WVC210


Summary of Contents for Cisco Linksys WVC210
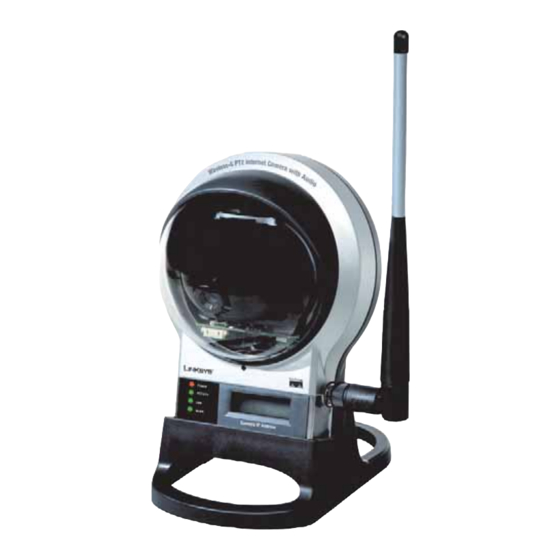
- Page 1 ® A Division of Cisco Systems, Inc. Wireless-G 802.11g PTZ Internet Camera User Guide WIRELESS with Audio WVC210 Model No.
- Page 2 Specifications are subject to change without notice. Linksys is a registered trademark or trademark of Cisco Systems, Inc. and/or its affiliates in the U.S. and certain other countries. Copyright © 2005 Cisco Systems, Inc. All rights reserved. Other brands and product names are trademarks or registered trademarks of their respective holders.
-
Page 3: Table Of Contents
Wireless-G PTZ Internet Camera with Audio Table of Contents Chapter 1: Planning Your Wireless Network ....... . . 4 Introduction . - Page 4 Wireless-G PTZ Internet Camera with Audio Chapter 7: Using the Wireless-G Internet Camera’s Web-based Utility ..41 Overview ............41 How to Access the Web-based Utility .
- Page 5 Wireless-G PTZ Internet Camera with Audio List of Figures Figure 2-1: Camera LEDS, LCD Screen and Built-in Microphone ... . 6 Figure 2-2: Camera Ports ......... . 7 Figure 3-1: Connect the Ethernet Network Cable .
- Page 6 Wireless-G PTZ Internet Camera with Audio Figure 5-6: Viewer & Recorder Utility Icon ......21 Figure 5-7: Main Screen .
- Page 7 Wireless-G PTZ Internet Camera with Audio Figure 6-21: Web Utility Login Screen....... . 39 Figure 6-22: Web-based Utility Welcome .
-
Page 8: Chapter 1: Planning Your Wireless Network
Wireless-G PTZ Internet Camera with Audio Chapter 1: Planning Your Wireless Network Introduction A wireless local area network (WLAN) is exactly like a regular local area network (LAN), except that each LAN (Local Area Network): the computer in the WLAN uses a wireless device to connect to the network. Computers and other devices, such as computers and networking products peripherals, in a WLAN share the same frequency channel and SSID, which is an identification name for wireless that make up the network in your home... -
Page 9: Network Layout
Wireless-G PTZ Internet Camera with Audio Network Layout The PTZ Internet Camera is compatible with all 802.11b and 802.11g routers, such as model numbers BEFW11S4 and WRT54G, as well as access points, including model numbers WAP11 and WAP54G. The Camera will also communicate with network adapters, such as the Wireless-B and Wireless-G Notebook Adapters (model numbers WPC11 and WPC54G) for your laptop computers, Wireless-B and Wireless-G PCI Adapters (model numbers WMP11 and WMP54G) for your desktop PCs, and Wireless-B and Wireless-G USB Adapters (model numbers... -
Page 10: Chapter 2: Getting To Know The Ptz Internet Camera
Wireless-G PTZ Internet Camera with Audio Chapter 2: Getting to Know the PTZ Internet Camera Camera LCD Screen and Built-in Microphone The Camera has a LCD screen that indicates the Camera’s current IP address and whether it is a fixed or dynamic address. -
Page 11: Camera Ports And Button
Wireless-G PTZ Internet Camera with Audio Camera Ports and Button IMPORTANT: Resetting the Camera will erase all of your settings, such as encryption information, and The Camera features three ports and a Reset button on the bottom panel. replace them with the factory defaults. Do not reset the Camera if you want to retain these settings. -
Page 12: Chapter 3: Connecting The Ptz Internet Camera
Wireless-G PTZ Internet Camera with Audio Chapter 3: Connecting the PTZ Internet Camera Overview Before you set up the Camera, connect it to a wired or wireless network. Proceed to the appropriate section for your setup. If you need to move the Camera from a wired network to a wireless network, or vice versa, go to this section, “Moving the Camera to a Different Network.”... -
Page 13: Connection To A Wireless Ad-Hoc Network For Setup
Wireless-G PTZ Internet Camera with Audio Connection to a Wireless Ad-Hoc Network for Setup 1. Make sure your computer has the following wireless settings: • SSID - linksys • Network Mode - Ad-Hoc • Channel - 6 • WEP - Disabled 2. - Page 14 Wireless-G PTZ Internet Camera with Audio To move the Camera from a wireless network to a wired network, follow these instructions: 1. Unplug the power adapter from the Camera. 2. Connect the Ethernet network cable to your PC, router, or switch. 3.
-
Page 15: Chapter 4: Setting Up And Mounting The Wireless-G Internet Camera
Wireless-G PTZ Internet Camera with Audio Chapter 4: Setting up and Mounting the Wireless-G Internet Camera Setup Wizard The Wireless-G Internet Camera Setup Wizard will guide you through the installation and configuration procedure. 1. Insert the Setup CD-ROM into your CD-ROM drive. The Setup Wizard should run automatically, and the Welcome screen should appear. -
Page 16: Figure 4-3: Connect Network Cable To Network
Wireless-G PTZ Internet Camera with Audio 3. The next three screens show how to connect the Camera to your network, starting with connecting a network cable to your network’s router or switch. Once you have done this, click Next. Figure 4-3: Connect Network Cable to Network 4. -
Page 17: Figure 4-6: Check Leds Screen
Wireless-G PTZ Internet Camera with Audio 6. Now, check the Camera’s LEDs to verify that they’re functioning properly. Then, click Next. Figure 4-6: Check LEDs screen 7. The Wizard will now display a list of Internet Cameras on your network, along with the status information for the Camera whose name is highlighted. -
Page 18: Figure 4-9: Basic Settings Screen
Wireless-G PTZ Internet Camera with Audio 9. On the Basic Settings screen, you can alter the following settings: • Camera Name. You can give the Camera a unique name. Memorable names are helpful, especially if you are using multiple Cameras on the same network. It should have 15 characters or fewer. •... -
Page 19: Figure 4-11: Ip Settings Screen
Wireless-G PTZ Internet Camera with Audio 11. If you selected Automatic Configuration-DHCP, proceed to the next step. If you selected Static IP Address, the IP Settings screen will appear. Enter an IP Address, Subnet Mask, and Default Gateway appropriate for your network. You must specify an IP Address and Subnet Mask on this screen. -
Page 20: Figure 4-13: Wireless Settings Screen
Wireless-G PTZ Internet Camera with Audio 13. The Wireless Settings screen will appear, so you can change the wireless settings. Enter your wireless network’s SSID or network name. If you chose Ad-Hoc mode, select the channel at which the network broadcasts its wireless signal. -
Page 21: Figure 4-15: Review New Settings Screen
Wireless-G PTZ Internet Camera with Audio Review your settings before the Setup Wizard starts to copy your files. Click the Next button to continue. Figure 4-15: Review New Settings Screen 14. If you want to save the new settings, click the OK button. If you want to cancel your changes, click the Cancel Figure 4-16: Confirmation Screen button. -
Page 22: Placement Options
Wireless-G PTZ Internet Camera with Audio Placement Options There are two ways to place the Camera. The first way is to place the Camera horizontally on a surface using the included stand. The second way is to mount the camera on a wall using an optional wall mount stand. Stand Option 1. -
Page 23: Chapter 5: Installing And Using The Internet Camera Viewer & Recorder Utility
Wireless-G PTZ Internet Camera with Audio Chapter 5: Installing and Using the Internet Camera Viewer & Recorder Utility Overview This chapter will instruct you on how to install and use the Internet Camera Viewer & Recorder Utility on your PC. The Utility allows you to easily view and record the Camera’s video. -
Page 24: Figure 5-3: Choose Destination Location Screen
Wireless-G PTZ Internet Camera with Audio 3. The Choose Destination Location screen will appear. To install the Viewer & Recorder Utility files in the default folder, click the Next button. To select a different folder, click the Browse button and follow the on-screen directions. -
Page 25: Using The Viewer & Recorder Utility
Wireless-G PTZ Internet Camera with Audio Using the Viewer & Recorder Utility After the Viewer & Recorder Utility has been installed, the Viewer & Recorder Utility icon will be displayed in two locations, one on your desktop and one in the system tray of your desktop’s taskbar. There are two ways to open the Viewer &... -
Page 26: Figure 5-8: Selecting Camera
Wireless-G PTZ Internet Camera with Audio Selecting A Camera When you first access the Utility’s main screen, you will want to select a camera to view and manage the camera’s video. To select a camera, click one of the numbered buttons, 1-9, on the bottom of the screen. Selecting that number, will bring up the camera assigned to it, which is described later. - Page 27 Wireless-G PTZ Internet Camera with Audio Using the Main Screen Navigation through the main screen is performed through the icons at the bottom. Here is a list of the icons and a short explanation of each Setup - Clicking this button opens the Setup Camera Selection - Clicking the camera number you wish to Window.
-
Page 28: Figure 5-10: Set Preset Position Screen
Wireless-G PTZ Internet Camera with Audio Setting Presets Preset camera positions can have various uses, in addition to being a part of the Patrol function. To preset camera positions, do the following: 1. Click the Set Preset Position button on the View Video page to set the position. 2. -
Page 29: Setting Up The Camera
Wireless-G PTZ Internet Camera with Audio Setting Up the Camera The Camera’s setup functions are performed by clicking the Setup button on the Main screen. This will open the Setup screen. Several setup options appear on the left-hand side of the screen. They are Camera Setup, Recording Schedule, and Preferences. -
Page 30: Figure 5-12: Recording Schedule Screen
Wireless-G PTZ Internet Camera with Audio Recording Schedule Scheduling a Recording You can record video while watching, or schedule recordings to occur when you are absent. Recordings are stored in a standard Microsoft ASF file format, and can be played using Microsoft’s Windows Media Player, or in a standard AVI (MJPEG) file format. -
Page 31: Figure 5-13: Preferences Screen
Wireless-G PTZ Internet Camera with Audio Preferences Setting Preferences Refer to the following tables when changing preferences. Recording Path Recording This is the Drive and Folder on your PC where recorded files will be saved. The default location is C:\Program Files\Linksys\Linksys Surveillance Utility\Local ID\File Type. - Page 32 Wireless-G PTZ Internet Camera with Audio Disk Allocation for Recording Total Disk Space This shows the total amount of storage space on your hard drive. Available Disk This shows the amount of storage space available on your hard drive. Space Enable Disk Space This feature allows you to limit the amount of space your recordings occupy on your Limitation...
-
Page 33: Using File Finder
Wireless-G PTZ Internet Camera with Audio Using File Finder To view the recordings saved for each camera you’ve assigned to the Utility, click the number of the camera and then click the Files button. This will open the File Finder. You can also open File Finder by clicking the icon placed on your desktop when you installed the Utility. -
Page 34: Chapter 6: Setting Up The Linksys Sololinktm Ddns Service
Wireless-G PTZ Internet Camera with Audio Chapter 6: Setting up the Linksys SoloLink DDNS Service Overview This chapter will briefly discuss the Linksys SoloLink DDNS Service, explain how to set up your SoloLink account, and describe how to register additional Cameras on your SoloLink account. You need only one SoloLink account. Once you have set up your account, you can register additional Cameras, one at a time, through each Camera’s Web-based Utility. -
Page 35: Figure 6-2: Sololink For Dynamic Ip Address Screen
Wireless-G PTZ Internet Camera with Audio 2. The next screen explains why you would want to use the SoloLink DDNS Service if your network is using a dynamic IP address. Click the Next button. Figure 6-2: SoloLink for Dynamic IP Address Screen 3. -
Page 36: Figure 6-4: Check Connections Screen
Wireless-G PTZ Internet Camera with Audio 4. Make sure your network has an active Internet connection. Verify that your PC and Camera are connected to the network and the Camera is configured properly. Click Next. Figure 6-4: Check Connections Screen 5. -
Page 37: Figure 6-6: Login Screen
Wireless-G PTZ Internet Camera with Audio 6. To ensure security, you will be asked to enter a user name and password before you can access the Camera. If you have not changed the Camera’s user name and password, then enter admin in the User name and Password fields (admin is the default). -
Page 38: Figure 6-9: Welcome To The Sololink Ddns Service Screen
Wireless-G PTZ Internet Camera with Audio 9. On the Welcome to the SoloLink DDNS Service screen, click Set up a NEW Account. Figure 6-9: Welcome to the SoloLink DDNS Service Screen 10. On the Sign Up screen, enter the Access ID for your free trial offer. It is provided on the Promotion Card included with the Camera. -
Page 39: Figure 6-11: Confirmation Of New Settings Screen
Wireless-G PTZ Internet Camera with Audio 11. Review your information on the Confirmation screen. If the new settings are correct, click Continue. Figure 6-11: Confirmation of New Settings Screen 12. On the Select a Location ID screen, enter a Location ID, which can be a name describing your network’s location. -
Page 40: Figure 6-13: Confirm Your Location Id Screen
Wireless-G PTZ Internet Camera with Audio 13. On the Confirm your Location ID screen, verify that the Location ID is correct. Then, click Continue. Figure 6-13: Confirm Your Location ID Screen 14. On the Payment screen, choose one of two payment plans, Bill me now or Bill me later. (If you did not enter an Access ID, then you have one choice, Bill me now.) If you click Bill me later, go to step 15. -
Page 41: Figure 6-16: Create Links Screen
Wireless-G PTZ Internet Camera with Audio 16. On the Create Links screen, click Continue. The SoloLink DDNS Service will send your account information to the Camera. Figure 6-16: Create Links Screen 17. A pop-up screen will inform you that you have successfully registered your account. Click OK. At the bottom of the SoloLink DDNS screen, click the Apply button to register the Camera with your account. -
Page 42: Figure 6-18: Account Confirmation Of Camera Screen
Wireless-G PTZ Internet Camera with Audio 18. A confirmation page will display the link or address you will use to access the Camera and the port number the SoloLink DDNS Service will use to find the Camera. Click Continue. Figure 6-18: Account Confirmation of Camera Screen 19. -
Page 43: Sololink Registration Of Additional Cameras
Wireless-G PTZ Internet Camera with Audio 20. Set up port forwarding on your network router, so the SoloLink DDNS Service will be able to track the Wireless-G Internet Camera. Go to www.linksys.com/portfwd for instructions on how to configure a Linksys router. -
Page 44: Figure 6-23: Find Available Port Screen
Wireless-G PTZ Internet Camera with Audio 5. In the Username, Password, and Your Domain fields, enter your SoloLink account information. 6. In the Device Name field, give the Camera a unique name. The DDNS service will not work if multiple Cameras have the same Device Name. -
Page 45: Chapter 7: Using The Wireless-G Internet Camera's Web-Based Utility
Wireless-G PTZ Internet Camera with Audio Chapter 7: Using the Wireless-G Internet Camera’s Web-based Utility Overview Use the Camera’s Web-based Utility to access and alter its settings. This chapter will describe each webpage in the Utility and its features. The Utility can be accessed via the web browser of a computer connected to the Camera. -
Page 46: View Video
Wireless-G PTZ Internet Camera with Audio View Video Follow these instructions to view the Camera’s video. 1. Click the View Video tab on the Welcome screen. NOTE: To view video using a web browser, you must use Internet Explorer version 5.5 or higher. The View Video feature will not work with Netscape. -
Page 47: Setup
Wireless-G PTZ Internet Camera with Audio Setup The Basic screen will appear. You have six tabs available: • Basic. To configure the Camera’s basic, LAN, and wireless settings, use the Basic screen. • Image. Customize the video settings on the Image screen. •... -
Page 48: Figure 7-6: Confirmation Screen
Wireless-G PTZ Internet Camera with Audio Date. Enter the current date. Time. Enter the current time. Time Zone. Select the time zone for the Camera’s location. Network Time Protocol. If you want to update the Camera’s time through an NTP (Network Time Protocol) server on the Internet, click the first checkbox. -
Page 49: Figure 7-7: Wep Key Settings Screen
Wireless-G PTZ Internet Camera with Audio WEP Encryption. Select the level of WEP encryption you wish to use, 64 Bit Keys (10 Hex chars) or 128 Bit Keys (26 Hex chars). Passphrase. Instead of manually entering WEP keys, you can use a Passphrase to generate them. It is case- sensitive and should not be longer than 16 alphanumeric characters. -
Page 50: Figure 7-8: Image Screen
Wireless-G PTZ Internet Camera with Audio Fix Quality. Select the level of quality you want for viewing or recording the Camera’s video. The range varies from Very Low to Very High. Fix Bit Rate. Select the level of quality you want for viewing or recording the Camera’s video. The range varies from 64 kbps to 2 Mbps. - Page 51 Wireless-G PTZ Internet Camera with Audio Video Quality Control. Select the desired Maximum bandwidth for the video stream. Note that you can specify EITHER the Bandwidth OR the Frame Rate, not both. If Bandwidth is defined, the frame rate will be adjusted as necessary to achieve the best possible frame rate at that bandwidth that the network can carry.
-
Page 52: Figure 7-9: Maintenance Screen
Wireless-G PTZ Internet Camera with Audio Maintenance The Maintenance screen allows you to reset the Camera’s factory defaults and upgrade the firmware. NOTE: When you restore the Camera’s factory defaults, you will lose the settings you have saved previously. Restore Factory Defaults. To restore the Camera’s factory default settings, click the Restore Defaults button. Firmware. -
Page 53: Figure 7-10: Users Screen
Wireless-G PTZ Internet Camera with Audio Users The Users screen allows you to designate access rights for Camera users. User Name. Complete this field with a name of your choice. Password and Verify Password. Enter your new password in both fields. The password should have eight characters or fewer. -
Page 54: Figure 7-11: Ddns Screen
Wireless-G PTZ Internet Camera with Audio DDNS The DDNS screen allows you to set up and configure your DDNS Service. DDNS (Dynamic Domain Name System) lets you assign a fixed host and domain name to a dynamic Internet IP address. If you have already set up your SoloLink account, then you can use this screen to register additional Cameras. -
Page 55: Figure 7-12: Ftp Upload Screen
Wireless-G PTZ Internet Camera with Audio FTP Upload The FTP Upload screen allows you to manage images uploaded to an FTP server. Enable FTP Upload. Check this box to enable the FTP Upload feature. If enabled, you must enter details of the FTP Server. -
Page 56: Figure 7-13: Options Screen
Wireless-G PTZ Internet Camera with Audio Options The Options screen allows you to alter the Camera’s e-mail alert features, UPnP configuration, and Alternate Port settings. E-mail Alert You can choose to be notified when the Camera detects motion in its field of view. You will be sent a text-only e- mail or an e-mail with video attached. - Page 57 Wireless-G PTZ Internet Camera with Audio Other UPnP. When enabled, the Camera’s Universal Plug and Play (UPnP) feature allows a UPnP-enabled computer to easily detect the Camera. The Camera’s UPnP feature is disabled by default. If your computer is UPnP-enabled, then click the checkbox next to UPnP.
-
Page 58: Figure 7-14: Pan/Tilt Screen
Wireless-G PTZ Internet Camera with Audio Pan/Tilt The Pan/Tilt screen allows you to manage the Camera’s preset positions as well as the pan and tile. Set Positions. Set the desired position through adjusting the control panel. Calibration. Click this button to reset the calibration of Pan/Tilt area. Set Home. -
Page 59: Figure 7-15: Status Screen
Wireless-G PTZ Internet Camera with Audio Status The Status screen allows you to view the Camera’s status information and log. System Firmware Version. The version of the current firmware installed. MAC Address. The MAC Address of the Camera is displayed here. Camera Name. -
Page 60: Help
Wireless-G PTZ Internet Camera with Audio System Log. This shows the Camera’s activities. To empty the log, click the Clear Log button. System Log Server. This allows the Camera to upload System Log files to a System Log Server. To get the Camera’s most up-to-date information, click the Refresh button. To get additional information about the screen’s features, click the Help button. -
Page 61: Appendix A: Troubleshooting
Wireless-G PTZ Internet Camera with Audio Appendix A: Troubleshooting This appendix provides solutions to problems that may occur during the installation and operation of the Wireless-G Internet Camera. Read the description below to solve your problems. If you can't find an answer here, check the Linksys website at www.linksys.com. - Page 62 Wireless-G PTZ Internet Camera with Audio 4. I can't connect to the Wireless Network Camera using a Wireless connection. If a LAN cable is connected to the LAN port, the Wireless interface is disabled. Only one interface can be active. Check that your PC and the Wireless Network Camera have compatible Wireless settings.
-
Page 63: Appendix B: Wireless Security
Wireless-G PTZ Internet Camera with Audio Appendix B: Wireless Security Linksys wants to make wireless networking as safe and easy for you as possible. The current generation of Linksys products provide several network security features, but they require specific action on your part for implementation. - Page 64 Wireless-G PTZ Internet Camera with Audio SSID. There are several things to keep in mind about the SSID: 1. Disable Broadcast 2. Make it unique 3. Change it often Most wireless networking devices will give you the option of broadcasting the SSID. While this option may be more convenient, it allows anyone to log into your wireless network.
-
Page 65: Appendix C: Upgrading Firmware
Wireless-G PTZ Internet Camera with Audio Appendix C: Upgrading Firmware Note: Linksys recommends that you upgrade the Camera’s firmware within your network; in other words, use a computer within the Camera’s local network. If you attempt to upgrade the Camera’s firmware from a remote location—using a computer outside of the Camera’s local network—the upgrade will fail. -
Page 66: Appendix D: Vwindows Help
Wireless-G PTZ Internet Camera with Audio Appendix D: vWindows Help Almost all wireless products require Microsoft Windows. Windows is the most used operating system in the world and comes with many features that help make networking easier. These features can be accessed through Windows Help and are described in this appendix. -
Page 67: Appendix E: Glossary
Wireless-G PTZ Internet Camera with Audio Appendix E: Glossary This glossary contains some basic networking terms you may come across when using this product. For more advanced terms, see the complete Linksys glossary at http://www.linksys.com/glossary. Access Point - A device that allows wireless-equipped computers and other devices to communicate with a wired network. - Page 68 Wireless-G PTZ Internet Camera with Audio DMZ (Demilitarized Zone) - Removes the Router's firewall protection from one PC, allowing it to be "seen" from the Internet. DNS (Domain Name Server) - The IP address of your ISP's server, which translates the names of websites into IP addresses.
- Page 69 Wireless-G PTZ Internet Camera with Audio IP Address - The address used to identify a computer or device on a network. IPCONFIG - A Windows 2000 and XP utility that displays the IP address for a particular networking device. IPSec (Internet Protocol Security) - A VPN protocol used to implement secure exchange of packets at the IP layer. ISP (Internet Service Provider) - A company that provides access to the Internet.
- Page 70 Wireless-G PTZ Internet Camera with Audio RJ-45 (Registered Jack-45) - An Ethernet connector that holds up to eight wires. Roaming - The ability to take a wireless device from one access point's range to another without losing the connection. Router - A networking device that connects multiple networks together. Server - Any computer whose function in a network is to provide user access to files, printing, communications, and other services.
- Page 71 Wireless-G PTZ Internet Camera with Audio TKIP (Temporal Key Integrity Protocol) - a wireless encryption protocol that provides dynamic encryption keys for each packet transmitted. Topology - The physical layout of a network. TX Rate - Transmission Rate. Upgrade - To replace existing software or firmware with a newer version. Upload - To transmit a file over a network.
-
Page 72: Appendix F: Specifications
Wireless-G PTZ Internet Camera with Audio Appendix F: Specifications Standards IEEE802.11g, IEEE802.11b, IEEE802.3, IEEE802.3u, 802.11e (Wireless QoS) Ports Ethernet, Antenna, Microphone, Power Protocols TCP/IP, HTTP, DHCP, SMTP, FTP, NTP, DNS, UPnP and DDNS Button One Reset Button Cabling Type UTP CAT 5 LEDs Power, Ethernet, Wireless-G Sensor... - Page 73 Wireless-G PTZ Internet Camera with Audio Web Browser Internet Explorer 5.x, or Above Event Logging Event Logging Web F/W Upgrade Firmware Upgradable Through Web-Browser Dual Codec MPEG-4 Simple Profile, MJPEG Snapshot JPEG Modulation NTSC and PAL Image Position Flip and Mirror Image Settings Brightness and Contrast Night Vision...
- Page 74 Wireless-G PTZ Internet Camera with Audio User List User Rights List to View Video and/or to Camera Control Functions Username/Password Logon authentication 20 characters username and 8 characters password Network Time Protocol SMTP Simple Mail Transfer Protocol Client allows video clips to be emailed FTP Client FTP Client facilitates scheduling transfer of images to an FTP server DDNS...
-
Page 75: Appendix G: Warranty Information
Wireless-G PTZ Internet Camera with Audio Appendix G: Warranty Information LIMITED WARRANTY Linksys warrants to You that, for a period of three years (the “Warranty Period”), your Linksys Product will be substantially free of defects in materials and workmanship under normal use. Your exclusive remedy and Linksys' entire liability under this warranty will be for Linksys at its option to repair or replace the Product or refund Your purchase price less any rebates. -
Page 76: Appendix H: Regulatory Information
Wireless-G PTZ Internet Camera with Audio Appendix H: Regulatory Information FCC Statement This equipment has been tested and found to comply with the limits for a Class B digital device, pursuant to Part 15 of the FCC Rules. These limits are designed to provide reasonable protection against harmful interference in a residential installation. - Page 77 Wireless-G PTZ Internet Camera with Audio Safety Notices Caution: Risk of explosion if battery is replaced by an incorrect type. Dispose of used batteries according to the instructions. Do not use this product near water, for example, in a wet basement or near a swimming pool. Avoid using this product during an electrical storm.
- Page 78 Wireless-G PTZ Internet Camera with Audio User Information for Consumer Products Covered by EU Directive 2002/96/EC on Waste Electric and Electronic Equipment (WEEE) This document contains important information for users with regards to the proper disposal and recycling of Linksys products.
- Page 79 Wireless-G PTZ Internet Camera with Audio Appendix H: Regulatory Information...
- Page 80 Wireless-G PTZ Internet Camera with Audio Appendix H: Regulatory Information...
- Page 81 Wireless-G PTZ Internet Camera with Audio Appendix H: Regulatory Information...
- Page 82 Wireless-G PTZ Internet Camera with Audio For more information, visit www.linksys.com. Appendix H: Regulatory Information...
-
Page 83: Appendix I: Contact Information
Wireless-G PTZ Internet Camera with Audio Appendix I: Contact Information Need to contact Linksys? Visit us online for information on the latest products and updates to your existing products at: http://www.linksys.com or ftp.linksys.com Can't find information about a product you want to buy on the web? Do you want to know more about networking with Linksys products? Give our advice line a call at: 800-546-5797 (LINKSYS)
Need help?
Do you have a question about the Linksys WVC210 and is the answer not in the manual?
Questions and answers