Table of Contents
Advertisement
Available languages
Available languages
Quick Links
No: 26167 – 01/18 rev. 3
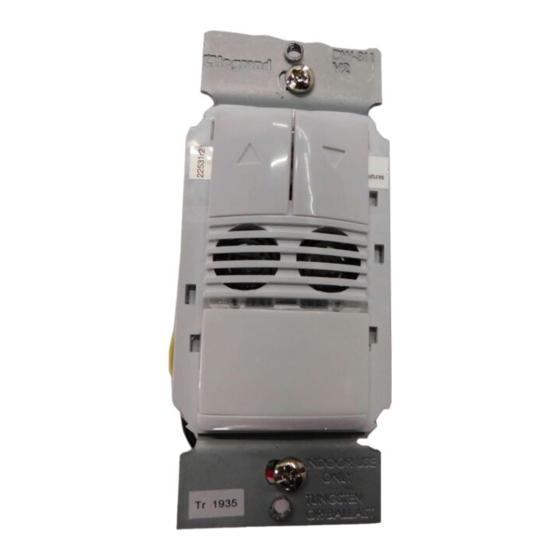
Catalog Numbers • Les Numéros de Catalogue • Números de Catálogo: DW-311/DW-311-347
Country of Origin: Made in China • Pays d'origine: Fabriqué en Chine • País de origen: Hecho en China
Models ending in -U are BAA and TAA compliant (Product produced in the U.S.)
DESCRIPTION AND OPERATION
The DW Dual Technology Multi-Way Wall
Switch sensors combine advanced passive
infrared (PIR) and ultrasonic technologies
into one unit. The combined technologies
help to eliminate false triggering even in
difficult applications.
• The DW sensor has Multi-Way
• A "walk-through" mode can turn lights
• The DW-311 has one relay with
• DW sensors contain a light level
1. Make sure that the power has been turned OFF at the circuit breaker.
2. Connect wires to the DW flying leads as shown in the wiring diagram
that is appropriate to the DW model and electrical supply. The ground
wire (green) must be fastened to ground for the sensor to work
properly.
3. Attach the sensor to the wall box by inserting screws into the two wide holes on the
top and bottom of the attached metal bracket. Match them up with the holes in the wall
box and tighten. Do not use excessive force when installing the sensor into the
wallbox. Doing so can bend the mounting strap which can affect button operation.
4. Turn the circuit breaker ON. Wait one minute, then push the Auto ON/OFF switch and
the lights will turn ON. There is a delay due to initial power-up of the sensor that only
occurs during installation.
5. Test and adjust the sensor if necessary.
6. Install industry standard decorator wall switch cover plate (not included).
Red
White
Black
WARNING: Grounding the violet and gray wires can damage the
unit. Do not apply power to the sensor until all wires are connected or
capped off if the driver is to be installed at a future time.
Wattstopper
Dual Technology 0–10 Volt Wall Switch Occupancy Sensor (version 2)
Interrupteur mural 0–10 Volt avec détecteur de mouvement à double technologie (v2)
Sensor de ocupación con interruptor de pared y tecnología doble de voltaje 0 a 10 (V2)
Installation Instructions • Instructions d'Installation • Instrucciones de Instalación
available on all models.
off after only 3 minutes, if no activity is
detected after 30 seconds following an
occupancy detection.
dimming control capability and two
buttons to allow control of the dimming.
sensor. If adequate daylight is present,
the sensor holds the load OFF until
light levels drop, even if the area
is occupied. See the Light Level
Adjustment section.
8" flying leads for
#12 – #14 AWG
line, load, ground
and multi-way
connections
Cu Wire Only
Grey
Violet
Yellow
Green
®
Voltages:
DW-311 .................................................120/277 VAC, 50/60 Hz
DW-311-347 .................................................347 VAC, 50/60 Hz
Load Limits:
@120 VAC......... 1000-W tungsten ballast, E-ballast, LED, 1/4 HP
@277 VAC ................... 1200-W ballast, E-ballast, LED, 1/4 HP
@347 VAC .....................................1500W ballast, LED, 1/4 HP
Time Delay Adjustment ..................................................3 to 30 minutes
Walk-Through Mode ....................... 3 minutes if no activity after 30 sec.
Test Mode ............................................. 10 min. with 10-sec. time delay
PIR Adjustment .................................................................... High or Low
Ultrasonic Adjustment ..................... Minimum to Maximum (trimpot), Off
Alerts ........................................................Selectable Audible & Visual
Multi-Way Capability ...............................................................All models
Terminal screw torque ............................................ 16 lbf-in (18 kgf-cm)
High Trim ................................................................................... 6 to 10V
Low Trim ...................................................................................... 0 to 4V
Ramp Up ....................................................................... 1 to 10 seconds
Fade Down ................................................................. 2.5 to 30 seconds
INSTALLATION
Typical Multi-Way Wiring
(DW-311 or DW-311-347 up to 4 sensors)
Strip Gage
1/2"
Line
12.7mm
Violet
Gray
Black
Green
Ground
Neutral
SPECIFICATIONS
WARNING: TURN THE POWER OFF AT THE
CIRCUIT BREAKER BEFORE WIRING.
DW-311 and DW-311-347 Wiring
Yellow
Black
Line
Green
Ground
Neutral
Yellow
Yellow
traveler
Red
Black
Green
White
Ground
0-10V
Dimming
Violet
Driver
Gray
or Ballast
Red
White
Connect 0-10V
leads to dimming
ballast from one
DW-311 only
Violet
Driver
Gray
or Ballast
Red
White
Advertisement
Table of Contents

Related Manuals for LEGRAND Wattstopper DW-311-347


Summary of Contents for LEGRAND Wattstopper DW-311-347
- Page 1 Wattstopper ® Dual Technology 0–10 Volt Wall Switch Occupancy Sensor (version 2) Interrupteur mural 0–10 Volt avec détecteur de mouvement à double technologie (v2) Sensor de ocupación con interruptor de pared y tecnología doble de voltaje 0 a 10 (V2) No: 26167 –...
-
Page 2: Coverage Patterns
Top View COVERAGE PATTERNS Major motion Major motion Coverage testing has been performed according to the NEMA WD 7 guideline. Minor motion Minor motion For best performance, use in spaces not larger than 15’ x 12’. Ultrasonic Coverage Coverage PIR Sensor The sensor has a two-tiered, multi-cell viewing Fresnel lens with 180 degree 35’... - Page 3 Time Delays The DW-311 sensors hold the load ON until no motion is detected for the selected time delay. Select the time delay using DIP switches 2 and 3. Available time delays are 3, 5, 15, and 30 minutes. When you set both DIP switches to the OFF position, the DW-311 enters Test Mode, and the delay is set to a short time delay of only 10 seconds.
- Page 4 Ramp Up and Fade Down Time You can adjust the amount of time it takes to Ramp Up from the Low Trim value to the High Trim value when motion is detected, or Fade Down from High Trim to Low Trim after no motion is detected and the time delay has expired. The available values for ramp up are 1 (default),2½, 5, and 10 seconds.
-
Page 5: Troubleshooting
Reset to Factory Default Press and hold the Up or Down button for 5 seconds. The green LED will flash 3 times to indicate the reset is complete. Return the DIP Switches 6–9 to the OFF state. This resets the sensor and disables light level control (the brightest ambient light will not hold the light OFF). DIP SWITCH SETTINGS Time Additional... -
Page 6: Instructions En Français
INSTRUCTIONS EN FRANÇAIS DESCRIPTION DE L’APPAREIL CARACTÉRISTIQUES TECHNIQUES Les détecteurs interrupteurs muraux multiples à double Tensions : technologie DW allient les technologies de l’infrarouge passif DW-311 ............120/277 V c.a., 50/60 Hz (IRP) et des ultrasons en une seule unité. L’alliance de ces DW-311-347 ............347 V c.a., 50/60 Hz technologies permet d’éviter tout déclenchement intempestif, Charge nominale :... -
Page 7: Fonctions Des Boutons
MULTI-VOIES La fonction de multi-voies est disponible sur tous les modèles. Les détecteurs peuvent facilement être connectés les uns aux autres pour le contrôle pratique d’une même charge. Si vous effectuez ce type de câblage, utilisez uniquement des détecteurs de la série DW-311. La fonction de multi-voies des détecteurs de la série DW-311 est incompatible avec les modèles plus anciens. - Page 8 MARCHE automatique Lorsque l’interrupteur DIP 1 est placé sur OFF, la charge est ACTIVÉE ou COUPÉE automatiquement en fonction de la présence. Il existe un délai de re-déclenchement de 5 secondes. Si la charge est COUPÉE manuellement, le paramètre activer / désactiver le fonctionnement en mode présentation s’applique.
- Page 9 Mode passage Le mode passage raccourcit la temporisation pour réduire le délai d’ACTIVATION de la charge après une brève présence, telle qu’un retour au bureau pour récupérer un objet oublié suivi d’une sortie immédiate. Si le mode passage est ACTIVÉ, le capteur DW COUPE la charge trois minutes après la première détection de présence si aucun mouvement n’est détecté...
-
Page 10: Dépannage
Mode présentation / Désactiver le mode présentation Le mode présentation est une fonctionnalité du mode MARCHE automatique. Lorsque le relais est COUPÉ manuellement, le DW maintient les lumières ÉTEINTES jusqu’à ce que plus aucun mouvement ne soit détecté pendant la durée de la temporisation. Si une présence est ensuite détectée, le DW ACTIVE la charge. - Page 11 Les lumières ne S’ALLUMENT pas lorsqu’il y a du mouvement (la DEL ne clignote pas). 1. Enfoncez puis maintenez le bouton HAUT pour vous assurer que les bonnes lumières S’ALLUMENT. Si les lumières S’ALLUMENT, assurez-vous que la sensibilité est réglée sur Élevé. 2.
-
Page 12: Instrucciones En Español
INSTRUCCIONES EN ESPAÑOL DESCRIPCIÓN DE LA UNIDAD ESPECIFICACIONES Los sensores del interruptor de pared de múltiples vías con Voltajes: tecnología doble DW combinan las tecnologías infrarroja DW-311 ............120/277 V CA, 50/60 Hz pasiva (PIR) avanzada y la ultrasónica en una sola unidad. DW-311-347 ............ -
Page 13: Funciones De Los Botones
MÚLTIPLES VÍAS La funcionalidad de múltiples vías está disponible en todos los modelos. Los sensores pueden cablearse fácilmente en conjunto para un control conveniente de la carga común. Cuando cablee de esta manera, solo utilice sensores de la serie DW-311. La función de múltiples vías en la serie DW-311 no es compatible con los modelos anteriores del sensor. - Page 14 Encendido automático Con el conmutador selector para bascular 1 en la posición de Apagado, la carga se enciende y se apaga automáticamente según la ocupación. Hay una demora de 5 segundos de reinicio. Si la carga se apaga manualmente, se aplica la operación del ajuste activar/ desactivar en modo de presentación.
- Page 15 Recorrido El modo de recorrido acorta el tiempo de demora para reducir la cantidad de tiempo en que la carga está encendida después de un breve momento de ocupación como, por ejemplo, volver a la oficina para buscar algo que se olvidó y salir inmediatamente. Si el modo de recorrido se enciende, el sensor DW apaga la carga tres minutos después de que el área esté...
-
Page 16: Solución De Problemas
Modo de presentación/Desactivar el modo de presentación El modo de presentación es una función del modo de Encendido automático. Cuando el relé se apaga manualmente, el DW mantiene las luces apagadas hasta que no se detecta ningún movimiento durante el tiempo de demora. Con la ocupación subsiguiente, el DW enciende la carga. -
Page 17: Warranty Information
No. 26167 – 01/18 rev. 3 © Copyright 2018 Legrand All Rights Reserved. 800.879.8585 © Copyright 2018 Tous droits réservés Legrand. www.legrand.us/wattstopper © Copyright 2018 Legrand Todos los derechos reservados.
Need help?
Do you have a question about the Wattstopper DW-311-347 and is the answer not in the manual?
Questions and answers