Advertisement
No: 24582 – 08/16 rev. 1
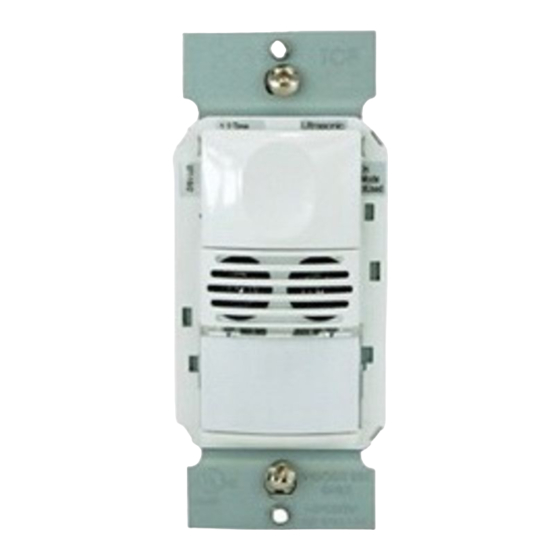
Catalog Numbers • Les Numéros de Catalogue • Números de Catálogo: DW-103 and DW-203
Country of Origin: Made in China • Pays d'origine: Fabriqué en Chine • País de origen: Hecho en China
DESCRIPTION AND OPERATION
The DW Dual Technology Multi-Way Wall Switch sensors
combine advanced passive infrared (PIR) and ultrasonic
technologies into one unit. The combined technologies
help to eliminate false triggering even in difficult
applications.
Selectable operating modes allow the sensor to turn
a load ON, and hold it ON as long as either or both
technologies detect occupancy. The DW Dual Technology
Multi-Way Wall Switch Occupancy Sensor allows for up
to 4 sensors to be connected to the same circuit. The
first sensor to detect occupancy will turn ON all the lights
that are connected to the same circuit. After the room is
unoccupied, the last sensor that detected occupancy turns
OFF all the lights once the time delay has expired. The
occupant can turn OFF the load at any time by pressing
the ON/OFF button of any sensor that is connected to the
circuit. A "walk-through" mode can turn lights OFF after
only 3 minutes, if no activity is detected after 30 seconds
following an occupancy detection.
The DW-103 has one relay and one ON/OFF button. The DW-203 contains two relays and two ON/OFF buttons to allow control of one
or two loads independently. Pressing a button toggles the state of the corresponding relay.
DW sensors contain a light level sensor. If adequate daylight is present, the sensor holds the load OFF until light levels drop, even if the
area is occupied. In the DW-203, light level only affects the load on Relay 2. Users can overule this function by pressing the ON/OFF
button. See Light Level Adjustment.
Turning ON the Load
The relays are programmed independently for either Auto ON or Manual ON. In either mode, the load can be turned ON or OFF using
the ON/OFF button. In either mode, the load can be turned ON or OFF using the ON/OFF button.
Auto ON
(DIP# 8 OFF for Relay 1)
(DIP #9** OFF for Relay 2)
Manual ON
(DIP #8 ON for Relay 1)
(DIP #9** ON for Relay 2)
** DW-103: DIP Switch 9 is not used. DW-203: DIP Switch 9 default is ON to comply with CA Energy Commission Title 24 bi-level
switching requirements.
Sensor
Relay
Default ON Mode
DW-103
1
Manual ON
DW-203
1
Auto ON
2
Manual ON
Presentation Mode
This is a feature of the Auto ON mode. When both relays are manually turned OFF the DW holds the lights OFF until no motion has
been detected for the duration of the Time Delay. With subsequent occupancy, the DW turns the load ON. If both relays are ON and one
relay is manually turned OFF this relay remains OFF until both the Time Delay and the retrigger delay expire for the relay that is ON.
After that time the ON Mode control settings again apply.
With an ON Mode DIP Switch in the OFF position, the load turns ON and OFF automatically based on
occupancy. If the load is turned OFF manually, Presentation Mode operation applies. This prevents the
load from turning ON automatically after it was deliberately turned OFF. Pressing the button to turn lights
ON returns the sensor to Auto ON mode.
With an ON Mode DIP Switch in the ON position, the occupant must press the ON/OFF button to turn
ON the load. The sensor keeps the load ON until no motion is detected for the selected time delay.
There is a 30 second re-retrigger delay. If occupancy re-triggers during the delay (see Trigger Mode), the
sensor turns the load back ON. After the re-trigger delay elapses the ON/OFF button must be pressed to
turn ON the load.
DIP Switch #
8
8
9
Wattstopper
Dual Technology Multi-Way Wall Switch Occupancy Sensor (V3)
Installation Instructions • Instructions d'Installation • Instrucciones de Instalación
Voltages ...........................................................120/277VAC, 50/60Hz
Load Limits for each relay:
Load Type Compatibility:
DW-103 Single Relay
Time Delay Adjustment ...............................................5 to 30 minutes
PIR Adjustment ........................................... High or Low (DIP Switch)
Ultrasonic Adjustment ................. Minimum to Maximum (trimpot), Off
Frequency.................................
Light Level Adjustment ....................................................8fc to 180+fc
Alerts ......................................................................Selectable Audible
DW-203 Dual Relay
US Patents: 5640113, 6617560, 7436132, 8067906
Setting
ON
OFF
ON
®
SPECIFICATIONS
@120VAC .......................... 0-800W tungsten or ballast, 1/6 HP
@277VAC ........................................................ 0-1200W ballast
Incandescent, fluorescent
Horsepower Rating (each relay) ....................1/6 HP @120VAC
Walk-Through Mode .......... 3 minutes if no activity after 30 sec.
Test Mode ................ 5 sec. for 10 min. with DIP Switch setting
......................................... 40kHz
Advertisement
Table of Contents

Related Manuals for LEGRAND DW-103


Summary of Contents for LEGRAND DW-103
- Page 1 ON. After the re-trigger delay elapses the ON/OFF button must be pressed to turn ON the load. ** DW-103: DIP Switch 9 is not used. DW-203: DIP Switch 9 default is ON to comply with CA Energy Commission Title 24 bi-level switching requirements.
-
Page 2: Walk-Through
NOTE: Shaded cells below indicate default operation and switch setting. Time Delays The DW sensor holds the load ON until no motion is detected for the selected time delay. Select the time delay using DIP Switch settings. In the DW-203, both relays use the same delay. Test/20 min A Test Mode with a short time delay of five seconds is set when DIP Switches 1 &... -
Page 3: Ultrasonic Sensor
Red (Load 1) Red (Load 1) Brown (Load 2) Yellow (Traveler) Yellow (Traveler) Ground Ground DW-103 Wiring DW-203 Bi-Level Wiring Load 2 Load 1 White (Neutral) Important: Wire the remote unit to the same branch circuit as the main Black (Line 2) unit controlling the load. -
Page 4: Sensor Adjustment
Green = All models High Option C Ultrasonic DW-203 shown. Both Both Both DW-100 series PIR Lens DW-103 has a single =ON =OFF DW-200 series button and the Ultrasonic sensitivity adjustment trimpot is in a slightly different position. ADJUSTMENTS Sensor Adjustment Remove the wall plate. -
Page 5: Troubleshooting
TROUBLESHOOTING Lights do not turn ON with motion (LED does flash). 1. Press and release each button to make sure that the correct lights come ON for each relay. If the lights do NOT turn ON, check wire connections, especially the Load connection. If the lights turn ON, verify that the correct ON Mode is selected in DIP Switches 8 and 9. - Page 6 No. 24582 – 08/16 rev. 1 © Copyright 2016 Legrand All Rights Reserved. 800.879.8585 © Copyright 2016 Tous droits réservés Legrand. www.legrand.us/wattstopper © Copyright 2016 Legrand Todos los derechos reservados.
Need help?
Do you have a question about the DW-103 and is the answer not in the manual?
Questions and answers