Advertisement
Instruction Manual
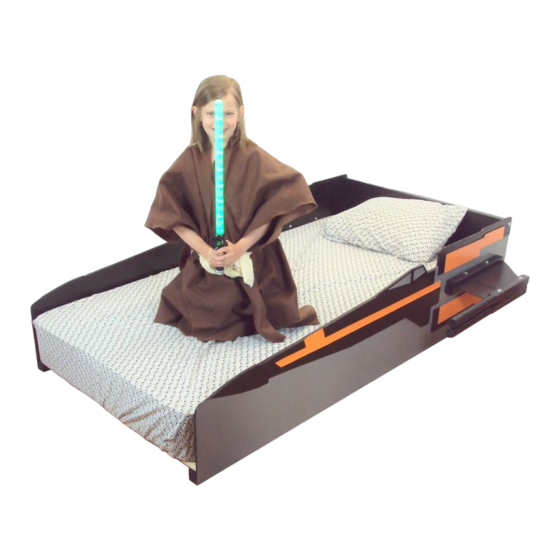
Bed Frame For Twin Mattress
Model SWXWNG-6
Due to the presence of small parts during assembly, keep
out of reach of children until assembly is complete.
Model SWXWNG-6 X-wing Fighter Bed Frame Revised 04/11/2016
Read all instructions before assembly and use.
Keep instructions for future use.
ADULT ASSEMBLY REQUIRED
Lancaster, PA 17601
tradecraftspecialties@gmail.com
www.tradecraftspecialties.com
1900 Alfa Drive
(717) 269-8934
Page
1 of 7
Advertisement
Table of Contents

Related Manuals for Tradecraft Specialties SWXWNG-6


Summary of Contents for Tradecraft Specialties SWXWNG-6
- Page 1 Due to the presence of small parts during assembly, keep out of reach of children until assembly is complete. 1900 Alfa Drive Lancaster, PA 17601 (717) 269-8934 tradecraftspecialties@gmail.com www.tradecraftspecialties.com Page Model SWXWNG-6 X-wing Fighter Bed Frame Revised 04/11/2016 1 of 7...
- Page 2 Please verify that you or your child does not have an allergy to linseed oil before using this product. General Specifications Assembled dimensions (approximate): 77" long, 39.5" wide, 24" high. Page Model SWXWNG-6 X-wing Fighter Bed Frame Revised 04/11/2016 2 of 7...
- Page 3 The smell should completely dissipate within several days. The smell may be stronger on products with areas of exposed unpainted material. Disassembly To disassemble, reverse order of steps for assembly. Page Model SWXWNG-6 X-wing Fighter Bed Frame Revised 04/11/2016 3 of 7...
- Page 4 Parts List Page Model SWXWNG-6 X-wing Fighter Bed Frame Revised 04/11/2016 4 of 7...
- Page 5 (1) screw at each end of support bar. Make sure support bar end is tight and perpendicular with side of bed. Start at rear of bed and work towards front. Leave 4.5” gaps between each support bar (approximately 7” center-to-center). Page Model SWXWNG-6 X-wing Fighter Bed Frame Revised 04/11/2016 5 of 7...
- Page 6 Use (1) washer [L] on each nut. Bolts shall face outward so that the smooth head is in. Side assemblies pictured are for reference only; individual assembly types will vary with bed model. For exact fit and style, refer to picture on cover of manual. Page Model SWXWNG-6 X-wing Fighter Bed Frame Revised 04/11/2016 6 of 7...
- Page 7 For exact fit and style, refer to picture on cover of manual. Step 4: Tighten all hardware. Make sure all assembled parts are tight and secure. Page Model SWXWNG-6 X-wing Fighter Bed Frame Revised 04/11/2016 7 of 7...
Need help?
Do you have a question about the SWXWNG-6 and is the answer not in the manual?
Questions and answers