
Related Manuals for Samlexpower PST-1000F-12


Summary of Contents for Samlexpower PST-1000F-12
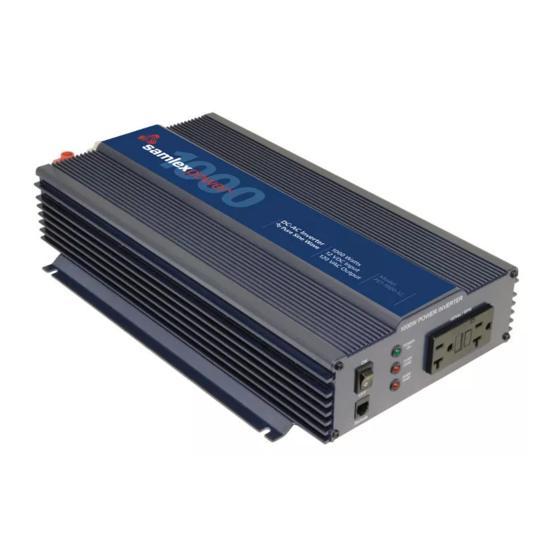
- Page 1 DC-AC Power Owner's Please read this manual BEFORE Manual Inverter installing your Pure Sine Wave inverter PST-1000F-12...
-
Page 2: Table Of Contents
OWNER'S MANUAL | Index SECTION 1 Safety Instructions ........3 SECTION 2 General Information ........8 SECTION 3 Limiting Electromagnetic Interference (EMI) ....... 14 SECTION 4 Powering Direct / Embedded Switch Mode Power Supplies (SMPS) ............15 SECTION 5 Principle of Operation ....... 17 SECTION 6 Layout ............ -
Page 3: Safety Instructions
SECTION 1 | Safety Instructions 1.1 SAFETY SYMBOLS The following safety symbols will be used in this manual to highlight safety and information: WARNING! Indicates possibility of physical harm to the user in case of non-compliance. CAUTION! Indicates possibility of damage to the equipment in case of non-compliance. INFO Indicates useful supplemental information. - Page 4 SECTION 1 | Safety Instructions 1.2.4 Preventing fire and explosion hazards • Working with the unit may produce arcs or sparks. Thus, the unit should not be used in areas where there are flammable materials or gases requiring ignition protected equipment.
- Page 5 SECTION 1 | Safety Instructions 1.3.2 Preventing DC Input Over Voltage It is to be ensured that the DC input voltage of this unit does not exceed 16.5 VDC to prevent permanent damage to the unit. Please observe the following precautions: •...
- Page 6 SECTION 1 | Safety Instructions 1.5 CONSIGNES DE SÉCURITÉ - GÉNÉRALES 1.5.1 Installation et Conformité du Câblage • L’installation et le câblage doivent conformer aux Normes Électriques Locales et Nationales; l’installation doit être faite par un(e) électricien(ne) CERTIFIÉ(E). 1.5.2 Prévention des Décharges Électriques •...
- Page 7 SECTION 1 | Safety Instructions 1.6 CONSIGNES DE SÉCURITÉ - POUR L'ONDULEUR 1.6.1 Empêcher la Sortie CA de Se Mettre en Parallèle La sortie CA de l'appareil ne devrait jamais être branchée directement à un tab- leau électrique qui est aussi alimenté par la puissance d'un service public / d'un générateur.
-
Page 8: General Information
SECTION 2 | General Information 2.1 DEFINITIONS The following definitions are used in this manual for explaining various electrical concepts, specifications and operations: Peak Value: It is the maximum value of electrical parameter like voltage / current. RMS (Root Mean Square) Value: It is a statistical average value of a quantity that varies in value with respect to time. - Page 9 SECTION 2 | General Information tance X to cause the current to lag the voltage by 90° and that of the capacitive reac- tance X to cause the current to lead the voltage by 90° are exactly opposite and the net effect is a tendency to cancel each other.
- Page 10 SECTION 2 | General Information Resistive Load: A device or appliance that consists of pure resistance (like filament lamps, cook tops, toaster, coffee maker etc.) and draws only Active Power (Watts) from the inverter. The inverter can be sized based on the Active Power rating (Watts) of the Resistive Load without creating overload (except for resistive loads with Tungsten based heating element like filament lamps, Quartz/Halogen lamps and Quartz heaters.
- Page 11 SECTION 2 | General Information Also, as the modified sine wave is a form of square wave, it is comprised of multiple sine waves of odd harmonics (multiples) of the fundamental frequency of the modified sine wave. For example, a 60 Hz modified sine wave will consist of sine waves with odd harmonic frequencies of 3rd (180 Hz), 5th (300 Hz), 7th (420 Hz) and so on.
- Page 12 SECTION 2 | General Information • High intensity discharge (HID) lamps like Metal Halide lamps. These may get damaged. Please check with the manufacturer of these types of devices for suitability. • Some fluorescent lamps / light fixtures that have power factor correction capacitors. The inverter may shut down indicating overload.
- Page 13 SECTION 2 | General Information Inverter TABLE 2.1: INVERTER SIZING FACTOR Sizing Factor Type of Device or Appliance (See Note 1) Air Conditioner / Refrigerator / Freezer (Compressor based) Air Compressor Sump Pump / Well Pump / Submersible Pump Dishwasher / Clothes Washer Microwave (where rated output power is the cooking power) Furnace Fan Industrial Motor...
-
Page 14: Limiting Electromagnetic Interference (Emi)
SECTION 3 | Limiting Electro-Magnetic Interference (EMI) 3.1 EMI AND FCC COMPLIANCE These inverters contain internal switching devices that generate conducted and radiated electromagnetic interference (EMI). The EMI is unintentional and cannot be entirely eliminated. The magnitude of EMI is, however, limited by circuit design to acceptable levels as per limits laid down in North American FCC Standard FCC Part 15(B), Class B. -
Page 15: Powering Direct / Embedded Switch Mode Power Supplies (Smps)
SECTION 4 | Powering Direct / Embedded Switch Mode Power Supplies (SMPS) 4.1 CHARACTERISTICS OF SWITCHED MODE POWER SUPPLIES (SMPS) Switch Mode Power Supplies (SMPS) are extensively used to convert the incoming AC power into various voltages like 3.3V, 5V, 12V, 24V etc. that are used to power vari- ous devices and circuits used in electronic equipment like battery chargers, computers, audio and video devices, radios etc. - Page 16 SECTION 4 | Powering Direct / Embedded Switch Mode Power Supplies (SMPS) NOTE: Voltage and current scales are di erent Input voltage Peak inrush current Rated steady state input RMS current Inrush current Fig 4.1: Inrush current in an SMPS NOTE: Voltage Peak Current and current scales...
-
Page 17: Principle Of Operation
SECTION 5 | Principle of Operation 5.1 GENERAL This inverter converts 12 VDC battery voltage to AC voltage with an RMS (Root Mean Square) value of 120 VAC, 60 Hz RMS. 5.2 PURE SINE WAVE OUTPUT WAVEFORM The waveform of the AC voltage is a pure Sine Waveform that is same as the waveform of Grid / Utility power (Supplementary information on pure Sine Waveform and its advantages are discussed in Sections 2.2 to 2.4). -
Page 18: Layout
Wire hole diameter: 7/16” 9. Positive (+) DC Input Terminal Set screw: • 5/16” x 24 TPI • 1/2” long ; Slotted Head 10. Modular Jack for RC-15A Remote Control (optional) Fig. 6.1: Layout of PST-1000F-12 18 | SAMLEX AMERICA INC. -
Page 19: General Information On Lead-Acid Batteries
SECTION 7 | General Information on Lead-Acid Batteries 7.1 GENERAL INFO For complete background information on Lead Acid Batteries and charging process, please visit www.samlexamerica.com > support > white papers > White Paper - Batteries, Chargers and Alternators. Lead-acid batteries can be categorized by the type of application: Automotive service - Starting/Lighting/Ignition (SLI, a.k.a. - Page 20 SECTION 7 | General Information on Lead-Acid Batteries Reserve capacity is the time in minutes for which the battery can deliver 25 Amperes at 80ºF (26.7ºC) till the voltage drops to 1.75V / Cell i.e. 10.5V for 12V battery, 21V for 24V battery and 42V for 48V battery.
- Page 21 SECTION 7 | General Information on Lead-Acid Batteries TABLE 7.2: DISCHARGE CURRENT RATES - “C-RATES” (continued from Previous page) "C-Rate" Discharge Current in Amps = Example of C-Rate Hours of discharge time “T” till ÷ Capacity "C" in Ah Discharge Time Discharge Currents the “End Point Voltage”...
- Page 22 SECTION 7 | General Information on Lead-Acid Batteries 7.8 REDUCTION IN USABLE CAPACITY AT HIGHER DISCHARGE RATES – TYPICAL IN INVERTER APPLICATION As stated above, the rated capacity of the battery in Ah is normally applicable at a discharge rate of 20 Hours. As the discharge rate is increased as in cases where the inverters are driving higher capacity loads, the usable capacity reduces due to “Peukert Effect”.
- Page 23 SECTION 7 | General Information on Lead-Acid Batteries TABLE 7.4: STATE OF CHARGE VERSUS STANDING VOLTAGE Percentage of Standing Voltage Standing Voltage of Full Charge of Individual Cells 12V Battery 100% 2.105V 12.63V 2.10V 12.6V 2.08V 12.5V 2.05V 12.3V 2.03V 12.2V 2.02V 12.1V...
- Page 24 SECTION 7 | General Information on Lead-Acid Batteries The discharge curves in Fig. 7.1 show the % State of Charge versus the terminal voltage of typical battery under different charge /discharge currents, i.e. “C-Rates” and fixed temperature of 80°F. (Please note that the X-Axis of the curves shows the % of State of Charge.
- Page 25 SECTION 7 | General Information on Lead-Acid Batteries - 85% State of Discharge (15% State of Charge) at very high C-rate discharge current of C/3 Amps. - 100% State of Discharge (0 % State of Charge) at high C-Rate discharge current of C/5 Amps.
- Page 26 SECTION 7 | General Information on Lead-Acid Batteries 7.15 SERIES AND PARALLEL CONNECTION OF BATTERIES 7.15.1 Series Connection Cable “A” Battery 2 Battery 1 12V Inverter 200 Ah 200 Ah or 12V Charger Cable “B” Fig 7.2: Series Connection When two or more batteries are connected in series, their voltages add up but their Ah capacity remains the same.
- Page 27 SECTION 7 | General Information on Lead-Acid Batteries 7.15.3 Series – Parallel Connection 12V String 1 12V String 2 Battery 1 Battery 2 Battery 3 Battery 4 Cable “A” 12V Inverter or 12V Charger 200 Ah 200 Ah 200 Ah 200 Ah Cable “B”...
- Page 28 SECTION 7 | General Information on Lead-Acid Batteries ATTENTION! Lorsque deux ou plusieurs batteries / chaine de batteries sont connectés en parallèle et sont ensuite connectés à un onduleur ou un chargeur (voir les figures 7.3 et 7.4), l'attention devrait être accordée à la manière dont le chargeur / onduleur es connecté...
- Page 29 SECTION 7 | General Information on Lead-Acid Batteries Formula 1 given above may be used to calculate the AC watts. The next step is to estimate the DC current in Amperes (A) from the AC watts as per Formula 2 above. An example of this calculation for a 12V inverter is given below: Let us say that the total AC Watts delivered by the inverter = 1000W.
-
Page 30: Installation
SECTION 8 | Installation WARNING! 1. Before commencing installation, please read the safety instructions explained in the Section titled “Safety Instructions” on page 3. 2. It is recommended that the installation should be undertaken by a qualified, licensed / certified electrician. 3. - Page 31 SECTION 8 | Installation Protection against fire hazard: The unit is not ignition protected and should not be located under any circumstance in an area that contains highly flammable liquids like gasoline or propane as in an engine compartment with gasoline-fueled engines. Do not keep any flammable / combustible material (i.e., paper, cloth, plastic, etc.) near the unit that may be ignited by heat, sparks or flames.
- Page 32 SECTION 8 | Installation WARNING! Mounting the unit vertically on a vertical surface is NOT allowed (fan opening facing up or down). As explained above, this is to prevent falling of objects into the unit through the fan opening when the fan opening faces up. If fan open- ing faces down, hot damaged component may fall out.
- Page 33 SECTION 8 | Installation 8.3 OVERALL DIMENSIONS Overall dimensions and location of mounting slots are given in Fig. 8.1 below: 16.5 NOTE: All dimensions are in mm. Fig. 8.1 Overall Dimensions (Chassis) SAMLEX AMERICA INC. | 33...
- Page 34 SECTION 8 | Installation 8.4 DC SIDE CONNECTIONS 8.4.1 Preventing DC Input Over Voltage It is to be ensured that the DC input voltage of this unit does not exceed 16.5 VDC to prevent permanent damage to the unit. Please observe the following precautions: - Ensure that the maximum charging voltage of the external battery charger / alterna- tor / solar charge controller does not exceed 16.5 VDC.
- Page 35 SECTION 8 | Installation 8.4.3 Connection from the Batteries to the DC Input Side of the Unit – Wire and External Fuse Sizes WARNING! The input section of the inverter has large capacitors connected across the input terminals. As soon as the DC input connection loop (Battery (+) termi- External fuse Positive input terminal of the inverter Negative input...
- Page 36 SECTION 8 | Installation drop due to the current & the resistance of the length of the wire should be less than 2%. Use oil resistant, multi- stranded copper wire wires rated at 90ºC minimum. Do not use aluminum wire as it has higher resistance per unit length. Wires can be bought at a marine / welding supply store.
- Page 37 America DC Model No. ing of external fuse 3 ft. 6 ft. 10 ft. Install Kit PST-1000F-12 160A AWG #2 AWG #1/0 AWG #3/0 DC-2000-KIT NOTES: 1. The ampere carrying capacity (Ampacity) of various sizes of wires is based on NEC Table 310.17 for single, insulated conductors rated at 194˚F / 90˚C insulation, and in free air at 104˚F / 40˚C...
- Page 38 SECTION 8 | Installation 8.4.6 DC Input Connection The DC input terminals for battery connection (8 & 9 in Fig. 6.1) have cylindrical hole with set screw: - Hole size: 11 mm / .433" with M-8 set screw DO NOT insert the stranded bare end of the wire directly into the tubular hole as the set screw will not pinch all the strands, resulting in a partial/loose contact.
- Page 39 SECTION 8 | Installation MISE EN GARDE! Empêcher la Sortie CA de Se Mettre en Parallèle 1. La sortie CA de l'appareil ne peut pas être synchronisée avec une autre source CA et ainsi, ce n'est pas approprié de la mettre en parallèle. La sortie CA de l'appareil devrait jamais être directement branchée à...
- Page 40 SECTION 8 | Installation As soon as the Inverter is switched OFF and 120 VAC is removed from the internal Line Side of the GFCI, Red LED marked “Life End Alarm” (5c in Figs 6.1) will flash once and then will remain OFF. The Green LED (5d in Figs 6.1) will switch OFF indicating that AC power is NOT available at the Load Side outlets.
- Page 41 SECTION 8 | Installation ATTENTION! 1. N'alimentent pas la sortie de la prise GFCI à un Panel de sélection / Charger Centre où la position neutre est lié à la terre. Ce qui déclenche le disjoncteur. 2. Si une rallonge est utilisée, veuillez vous assurer que le cordon est mise à la terre à...
- Page 42 1A Fuse (10-33VDC) Toggle Switch NOTE: Wiring Size: AWG #22 +12V battery voltage from the battery supplying DC input to PST-1000F-12 Fig 8.2(a) − 2-Wire Fig 8.2(b) − 2-Wire Fig 8.2(c) − 1-Wire ON/OFF ON/OFF control using ON/OFF control using...
- Page 43 SECTION 8 | Installation 8.9.1.1 2-Wire ON/OFF Control from Remote Location Using Switch/Relay Contact, Fig 8.2(a): In this arrangement, external voltage source is NOT required. The inverter will switch ON when potential free relay contact / switch is closed and terminals "S" and "–" of the Terminal Block (4A, Fig 6.1) are shorted.
- Page 44 SECTION 8 | Installation The inverter will switch ON when the external relay contact / switch is closed [External DC voltage (10-33VDC) is fed to terminals marked "+" and "–" on the 3-Way Terminal Block (4A, Fig 6.1). The inverter will switch OFF when the external relay contact / switch is opened [External DC voltage (10-33VDC) is removed from terminals marked "+"...
-
Page 45: Operation
SECTION 8 | Installation 8.10 POWERING ON LOADS After the inverter is switched on, it takes a finite time to become ready to deliver full power. Hence, always switch on the load(s) after a few seconds of switching on the inverter. - Page 46 SECTION 9 | Operation When the inverter is switched ON, the GREEN "Power ON" LED (2, Fig. 6.1) will be lighted. This LED indicates that the input section of the inverter is operating normally. Under normal operating conditions, AC output voltage will now be available at the GFCI Duplex Receptacle (5).
-
Page 47: Protections
SECTION 10 | Protections 10. PROTECTIONS The inverter has been provided with protections detailed below: 10.1 POWER SURGE / OVERLOAD / SHORT CIRCUIT PROTECTIONS INFO Please refer to definitions of Active Power (Watts), Apparent Power (VA) and Power Factor (PF) at Section 2. In the explanation below, the values of Power are expressed in Apparent Power in VA. - Page 48 SECTION 10 | Protections 10.1.3 Short Circuit: Short circuit condition will be detected when the AC output volt- age drops to 80VAC or lower over a period of up to 2.5 sec. The AC output voltage will be shut down thereafter. Red LED marked “OVERLOAD” (3, Fig 6.1) will turn ON, the Green indication light on the GFCI outlet will be OFF and buzzer alarm will sound.
- Page 49 SECTION 10 | Protections 10.6 REVERSE POLARITY AT THE DC INPUT TERMINALS The Positive of the battery should be connected to the Positive DC input terminal of the inverter and the Negative of the battery should be connected to the Negative DC input terminal of the inverter.
-
Page 50: Troubleshooting Guide
SECTION 11 | Troubleshooting Guide ISSUE POSSIBLE CAUSE REMEDY When switched ON, The There is no voltage at the Check the continuity of the battery GREEN "Power ON"LED (2) DC input terminals input circuit. does not light. Buzzer is OFF. Check that the internal/external battery fuse is There is no AC output volt- not blown. - Page 51 SECTION 11 | Troubleshooting Guide ISSUE POSSIBLE CAUSE REMEDY AC output shuts down com- Permanent shut-down of Reduce the load. pletely. Red "Overload" LED the AC output due to con- The load is not suitable as it requires higher (3) is lighted. Buzzer is ON. tinuous overload beyond power to operate.
-
Page 52: Specifications
SECTION 12 | Specifications MODEL NO. PST-1000F-12 OUTPUT OUTPUT VOLTAGE 120 VAC ± 3% MAXIMUM OUTPUT CURRENT 8.5A OUTPUT FREQUENCY 60 Hz ± 1% TYPE OF OUTPUT WAVEFORM Pure Sine Wave TOTAL HARMONIC DISTORTION OF < 3% OUTPUT WAVEFORM CONTINUOUS OUTPUT POWER... - Page 53 SECTION 12 | Specifications CAUTION! RISK OF FIRE Do not replace any vehicle fuse with a rating higher than recommended by the vehicle manufacturer. This product is rated to draw 160 Amperes from 12V vehicle circuit. Ensure that the electrical system in your vehicle can supply this product without causing the vehicle fusing to open.
-
Page 54: Warranty
Warranty 3 YEAR LIMITED WARRANTY The PST-1000F-12 is manufactured by Samlex America Inc. (the “Warrantor“) is warrant- ed to be free from defects in workmanship and materials under normal use and service. The warranty period is 3 years for the United States and Canada, and is in effect from the date of purchase by the user (the “Purchaser“). - Page 55 NOTES: SAMLEX AMERICA INC. | 55...
- Page 56 Ph: 1 800 561 5885 Fax: 1 888 814 5210 Local Numbers Ph: 604 525 3836 Fax: 604 525 5221 Website www.samlexamerica.com USA Shipping Warehouses Kent, WA Plymouth, MI Canadian Shipping Warehouse Delta, BC Email purchase orders to orders@samlexamerica.com 11001-PST-1000F-12-1119...
Need help?
Do you have a question about the PST-1000F-12 and is the answer not in the manual?
Questions and answers