Advertisement
Quick Links
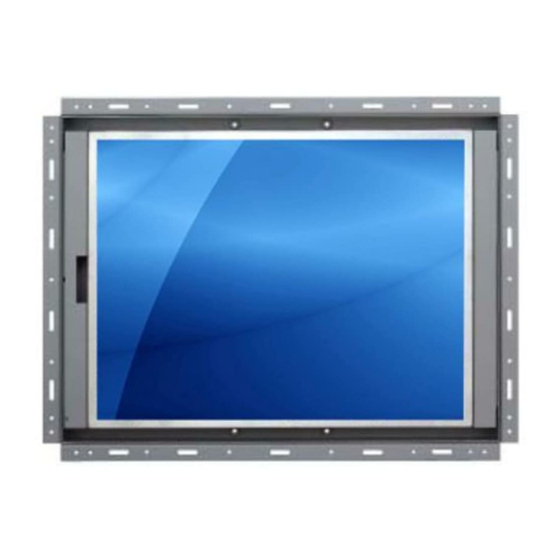
PM6150
User Manual
All rights reserved. Product description and product specifications are subject to change without notice.
For l a stest product information, please v i s it Acnodes' website at www.acnodes.com
14628 Central Ave. Chino, CA 91710
© C opyright 2015 Acnodes C orp.
15 " 1 0 2 4 x 7 6 8 TF T L C D
O p e n F r a m e L CD M o n i to r
W a l l / P a n e l / V E S A M o u n t Re a d y
Tel: 909. 597. 7588
Fax: 909. 597. 1939
Advertisement

Related Manuals for Acnodes PM6150


Summary of Contents for Acnodes PM6150
- Page 1 User Manual All rights reserved. Product description and product specifications are subject to change without notice. For l a stest product information, please v i s it Acnodes’ website at www.acnodes.com 14628 Central Ave. Chino, CA 91710 Tel: 909. 597. 7588 Fax: 909.
- Page 2 L eg al Inf orm ation F irst Eng Iish pr inting, O c tober 2002 Inf or mation in this doc ument has been c ar efu IIy c hec ked for acc ur ac y; how ev er, no guar antee is giv en to the corr ectness of the contents .
-
Page 3: Table Of Contents
Contents < Part. 1 > PM 6150 Package Content Structure Diagram & Dimension P.2 - 3 Mounting Hardware & InstaIIation < Part. 2 > Specifications I OSD Product Specifications P.5 - 6 On-screen DispIay Operation ( OSD ) < Part. 3 > Options Option TabIe S-Video + BNC &... - Page 4 Before Installation ● It is very important to mount the equipment in a suitabIe cabinet or on a stabIe surface. ● Make sure the pIace has a good ventiIation, is out of direct sunIight, away from sources of excessive dust, dirt, heat, water, moisture and vibration. Unpacking The equipment comes with the standard parts shown in package content.
-
Page 5: Package Content
< Part 1 > < 1.1 > Package Content-PM 6150 PM 6150 15" LCD display X 1 6ft VGA cable X 1 Power adapter X 1 Power cord X 1 Standard IIO V GA Power AD2.2 upgrade IIO V GA Audi o Power S-Video BNC... - Page 6 < 1.2 > Structure Diagram - PM6150 15" LCD Display Front view Rear vie w Rear case LCD paneI Audio speaker ( for Audio or TV option ) UniversaI open frame mounting LCD membrane Product Dimension Packing Dimension Gross Model...
- Page 7 < 1 . 2 > Dim e n sio n - P M 6 150 F ro n t V ie w S id e V ie w U N I T : m m R e a r V ie w 1 m m = 0 .0 3 9 3 7 in c h B o t to m V ie w...
- Page 8 15” LCD Display < 1.3 > Installation - PM 6150 ( I ) Universal mount ( II ) VESA mount ( 100*100mm ) M4 screw Hardware and M4*4 pcs for VE SA mounting are not provided...
-
Page 9: Product Specifications
< Part 2 > < 2.1 > Product Specifications PM 6150 Mecha nical De sign Front PaneI Rear Casing Dark grey, RAL 7037 VESA Mounting 100 x 100mm Other Mounting UniversaI mount Protection Manuf act urer Panel PaneI Size ( diagonaI ) 15-inch TFT coIor LCD DispIay pixeI ( dots x Iines ) 1024 x 768... - Page 10 Enviro n me ntal Operating Temperat ure 0 to 50°C degree Conditions Humidity 20~90%, non-condensing St orage Temperat ure -5 to 60°C degree Humidity 5~90%, non-c ondensing Shock 10G acceIeration (11ms duration) Vibration 5~500Hz 1G RMS random Physi cal Product ( W x D x H ) 404 x 53 x 311 mm Specificatio n 15.9 x 2.1 x 12.2 inch...
-
Page 11: On-Screen Dispiay Operation ( Osd )
< 2.2 > On-screen Display Operation ( OSD ) Power Iight Green = On Orange = Power sav ing Membrane Sw itch Function Power on / off LCD DispIay the OSD menu ScroIIs through menu options and adjusts the dispIay ed controI (To auto adjustment by pressing the button for 5 seconds) Exit the OSD screen... -
Page 12: Part 3 > Options
< Part 3 > Options < 3.1 > Option Table Options S-Video + Composite ( BNC ) Audio Touchscreen DC Power TV (Ana Io g ) * ( 1 ) For TV option , this comes with RC-2 remote controller. -
Page 13: S-Video + Bnc & Audio
< 3.2 > AD2.2 Upgrade Options : - S-Video + BNC - Audio Audio Power S-Video BNC in - in - out PC Video AV option : S-Video + Composite (BNC) Audio option : 3.5mm audio jacks for audio in & out, and 2W + 2W speakers... - Page 14 15” LCD Display < 3.3 > Options : Touchscreen & driver 15" USB Touchscreen Specification Model e-Resistive e-Capacitive 5-Wire Resistive Capacit ive Technology StyIus or Finger Finger Method Activation Force = 50g / StyIus=R0.8 = 50g Durability 35,000,000 times 300 miIIion touches Re sponse Time 15 ms 20 ms...
- Page 15 Please follow the below steps to setup the touch screen:- Step 1. Run the bundIed CD disc Step 2. DoubIe cIick the Setup.exe Step 3. FoIIow the instaIIation instruction to finish the setup Step 4. After instaIIation, run the TouchKit program & the “4 point caIibration” PIeas e do the initiaI caIibration after the first setup...
- Page 16 < 3.4 > Options : DC Power Model Input rating Input voItage: 12-VoIt 24-VoIt 48-VoIt Input range: 9 ~ 18V 18 ~ 36V 36 ~ 75V Input current - No Ioad 50 mA 50 mA 50 mA - FuII Ioad 4950 mA 2450 mA 1220 mA...
-
Page 17: Tv ( Anaiog )
15” LCD Display < 3.5 > Options : TV ( Analog ) Audio Power S-Video BNC in - in - out PC Video For TV option : ( 1 ) 1 x RC-2 remote controller included. ( 2 ) Ca sing dimensions will be changed. - Page 18 How to Use RC-2 Remote Controller INP UT MUTE V O L -/-- AUTO F RE E ZE ME NU SE L ECT AS P ECT S L E E P ENT E R BA CK EXIT P I P SWAP S OURCE POS ITION...
Need help?
Do you have a question about the PM6150 and is the answer not in the manual?
Questions and answers