
Related Manuals for Eiki LC-XB250A


Summary of Contents for Eiki LC-XB250A
- Page 1 Multimedia Projector Network Supported Wired LAN Refer to the Owner's Manuals below for details about network MODEL LC-XB250A function. Network Set-up and Operation PJ Network Manager Owner's Manual...
-
Page 2: Features And Design
Features and Design This Multimedia Projector is designed with the most advanced technology for portability, durability, and ease of use. This projector utilizes built-in multimedia features, a palette of 16.77 million colors, and matrix liquid crystal display (LCD) technology. Compact Design ... -
Page 3: Table Of Contents
Table of Contents Features and Design . . . . . . . . . . . . . . . . . . .2 Computer System Selection Auto PC Adjustment Table of Contents . -
Page 4: To The Owner
To the Owner Before installing and operating this projector, read this Safety Precaution manual thoroughly. This projector provides many convenient features and wARNING: THIS APPARATUS MUST BE EARTHED . functions. Operating the projector properly enables TO REDUCE THE RISK OF FIRE OR ... -
Page 5: Safety Instructions
Safety Instructions All the safety and operating instructions should be read Do not install the projector near the ventilation duct of before the product is operated. air-conditioning equipment. Read all of the instructions mentioned here and retain This projector should be operated only from the type them for later use. -
Page 6: Air Circulation
Safety Instructions Installing the Projector in Proper Air Circulation Position Openings in the cabinet are provided for ventilation. To Install the projector properly. Improper Installation ensure reliable operation of the product and to protect it may shorten the lamp life and cause a fire hazard. from overheating, these openings must not be blocked or covered. -
Page 7: Compliance
If such changes or modifications should be made, you could be required to stop operation of the equipment. Model Number : LC-XB250A Trade Name : EIKI Responsible party : EIKI International,Inc. Address : 30251 Esperanza Santa Margaria CA 92688-2123 Telephone No. : 800-242-3454 (949-457-0200) AC Power Cord Requirement The AC Power Cord supplied with this projector meets the requirement for use in the country you purchased it. -
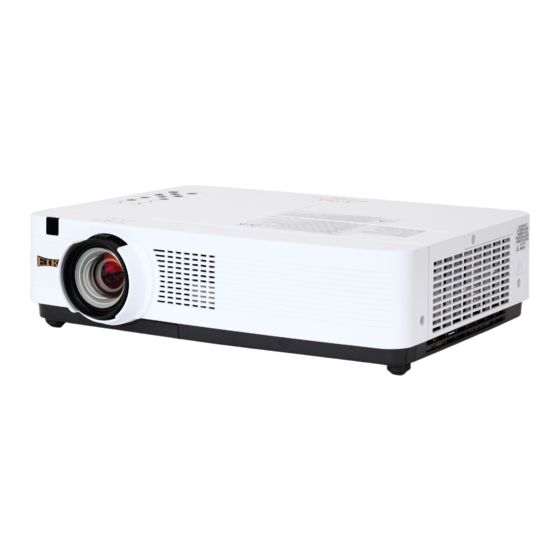
Page 8: Part Names And Functions
Part Names and Functions ① Infrared Remote Receiver Front ② Zoom Ring ③ Focus Ring ④ Projection Lens CAUTION Do not cover the light beam in front of the lens. High temperature from light beam may damage the lens. ⑤ Lens Cap (See page 62 for attaching.) CAUTION Do not turn on a projector with lens cap attached. -
Page 9: Rear Terminal
Part Names and Functions Rear Terminal ⑤ ④ ① ③ ② ⑥ ⑦ ⑪ ⑩ ⑨ ⑧ ⑦ CONTROL PORT ① LAN Connection Terminal When controlling the projector with RS-232C, Connect the LAN cable (refer to the owner’s manual connect the control equipment to this connector of "Network Set-up and Operation"). -
Page 10: Top Control
Part Names and Functions Top Control ⑨ ⑤ ④ ⑧ ⑦ ③ ② ① ⑥ ① SELECT button ⑦ AUTO SETUP button – Execute the selected item (p.21). Execute the setting of Auto setup (includes Input – Zoom in or out the image in the Digital zoom mode search, Auto PC adj. -
Page 11: Remote Control
Part Names and Functions Remote Control ① ON/STAND-By button Turn the projector on or off (pp.18-20). ② AUTO SET button Execute the setting of Auto setup (includes Input search, Auto PC adj. and Auto Keystone functions) in the setting menu (pp.23, 47) ③... -
Page 12: Remote Control Battery Installation
Part Names and Functions Remote Control Battery Installation Open the battery Install new batteries Replace the compartment lid. into the compartment. compartment lid. Two AAA size batteries For correct polarity (+ and –), be sure battery terminals are in contact with pins in compartment. -
Page 13: Installation
Installation Positioning the Projector For projector positioning, see the figures below. The projector should be set perpendicularly to the plane of the screen. Note: • The brightness in the room has a great influence on picture quality. It is recommended to limit ambient lighting in order to obtain the best image. • All measurements are approximate and may vary from the actual sizes. 23.7’(7.23m) 15.8’(4.81m) 11.8’(3.6m) 186" 7.8’(2.39m) 2.3’(0.69m) 124"... -
Page 14: Connecting To A Computer
Installation Connecting to a Computer Cables used for connection • VGA Cables (Mini D-sub 15 pin) * • Audio Cables • DVI cable • VGA-DVI cable (*One cable is supplied; other cables are not supplied with the projector.) Monitor Output Monitor Output Monitor Input Audio Output External Audio Equipment VGA-DVI cable cable cable cable Audio Input Audio cable... -
Page 15: Connecting To Video Equipment
Installation Connecting to Video Equipment Cables used for connection • Video and Audio Cable (RCA x 3) • S-VIDEO Cable • Audio Cable (Cables are not supplied with the projector. ) External Audio Equipment Video and Audio Output Audio Input (Video) S-Video Output Video and audio cable S-Video cable Audio cable (stereo) AUDIO IN AUDIO OUT (stereo) -
Page 16: Connecting To Component Video Equipment
Installation Connecting to Component Video Equipment Cables used for connection • Audio Cables • Scart-VGA Cable • VGA Cable • Component Cable • Component-VGA Cable (Cables are not supplied with this projector.) External Audio Equipment RGB Scart Component Video Output 21-pin Output Audio Output Monitor Input (Y, Pb/Cb, Pr/Cr) Audio Input Component cable Scart-VGA... -
Page 17: Connecting The Ac Power Cord
Installation Connecting the AC Power Cord This projector uses nominal input voltages of 100-240 V AC and it automatically selects the correct input voltage. It is designed to work with single-phase power systems having a grounded neutral conductor. To reduce the risk of electrical shock, do not plug into any other type of power system. -
Page 18: Basic Operation
Connect the projector’s AC power cord into an AC outlet. The POWER indicator lights red. Open the lens cap (pp.8, 62). http://www.eiki.com Press the ON/STAND-BY button on the top control or on the remote control. The POWER indicator lights The preparation display will disappear after 30 seconds. - Page 19 Basic Operation Enter a PIN code Use the Point buttons to enter a number. Press the ▲▼ PIN Code Input Dialog Box Point button to fix the number and move the red frame ► pointer to the next box. The number changes to “ ”.
-
Page 20: Turning Off The Projector
Basic Operation Turning Off the Projector Press the ON/STAND-BY button on the top control or on the remote control, and Power off? appears on the screen. Press the ON/STAND-BY button again to turn off the projector. The POWER indicator starts to blink red, and the cooling fans keep running. -
Page 21: How To Operate The On-Screen Menu
Basic Operation How to Operate the On-Screen Menu The projector can be adjusted or set via the On-Screen Top Control Menu. The menus have a hierarchical structure, with a main menu that is divided into submenus, which are further divided into other submenus. For each adjustment POINT buttons and setting procedure, refer to respective sections in this (arrowhead) -
Page 22: Main Menu
Basic Operation Main Menu For detailed functions of each menu, see “Menu Tree” on pages 68-69. Main Menu Sub-Menu Input Used to select an input source from Computer 1, Computer 2, Video or S-video (pp.27-28,38-39). -
Page 23: Zoom And Focus Adjustment
Basic Operation Zoom and Focus Adjustment Rotate the Zoom Ring to zoom in and out. Rotate the Focus Ring to adjust the focus of the image. Focus Ring Zoom Ring Auto Setup Function Auto setup function is provided to automatically execute the setting of Auto setup (includes Input search, Auto PC adj. -
Page 24: Sound Adjustment
Basic Operation Sound Adjustment Top Control Direct Operation VOLUME+/- Volume buttons Press the VOLUME+/– buttons on the top control or on the remote control to adjust the volume. The volume dialog box appears on the screen for a few seconds. Remote Control Mute Press the MUTE button on the remote control to select On... -
Page 25: Remote Control Operation
Basic Operation Remote Control Operation Using the remote control for some frequently used operations is advisable. Just pressing one of the buttons enables you to make the desired operation quickly without calling up the On-Screen Menu. COMPUTER 1/2, VIDEO, S-VIDEO and Remote Control COMPONENT buttons COMPUTER 1/2... - Page 26 Basic Operation NO SHOw button Press the NO SHOW button on the remote control to black out the image. To restore to normal, press the NO SHOW button again or press any other button. When the projected image is captured and is set as User in the Logo selection (p.48), the screen changes each time you press the NO SHOW button as follows.
-
Page 27: Computer Input
Computer Input Input Source Selection {(RGB: Computer 1/Computer 2(Analog)} Direct Operation Choose either Computer 1(RGB) or Computer 1(Scart) or Computer 2(Analog) by pressing the INPUT button on the top control or press the COMPUTER 1 button or Computer 2 on the remote control. Before using INPUT button, correct input source should be selected through Menu operation as described below. -
Page 28: Input Source Selection {Computer 2: Rgb(Pc Digital), Rgb(Av Hdcp)
Computer Input Input Source Selection {Computer 2: RGB(PC digital), RGB(AV HDCP)} Direct Operation Choose Computer 2 (PC digital) or Computer 2 (AV HDCP) by pressing the INPUT button on the top control or press the COMPUTER 2 button on the remote control. Before using INPUT button, correct input source should be selected through Menu operation as described below. -
Page 29: Computer System Selection
Computer Input Computer System Selection This projector automatically tunes to various types of computers with its Multi-scan system and Auto PC Adjustment. If a computer is selected as a signal source, this projector automatically detects the signal format and tunes to project a proper image without any additional settings. (Signal formats provided in this projector are shown on pages 71-72.) One of the following messages may appear when: When the projector cannot recognize the... -
Page 30: Auto Pc Adjustment
Computer Input Auto PC Adjustment Auto PC Adjustment function is provided to automatically adjust Fine sync, Total dots, Horizontal and Vertical to conform to your computer. Menu Operation PC adjust Menu Auto PC adj . Press the MENU button to display the On-Screen Menu. -
Page 31: Manual Pc Adjustment
Computer Input Manual PC Adjustment Some computers employ special signal formats which may not be tuned by Multi-scan system of this projector. Manual PC Adjustment enables you to precisely adjust several parameters to match those signal formats. The projector has 10 independent memory areas to store those parameters manually adjusted. It allows you to recall the setting for a specific computer. - Page 32 Computer Input Reset Mode free To reset the adjusted data, select Reset and press the SELECT button. A confirmation box appears and then select yes. All adjustments will return to their previous figures. Mode free To clear the stored data, select Mode free and then press the Point ►...
-
Page 33: Image Mode Selection
Computer Input Image Mode Selection Remote Control Direct Operation IMAGE button Select the desired image mode among Dynamic, Standard, Dynamic Real, Cinema, Blackboard(Green), Colorboard, Image 1, Image 2, Image 3 and Image 4 by pressing the IMAGE Standard button on the remote control. Real Cinema IMAGE button...
Need help?
Do you have a question about the LC-XB250A and is the answer not in the manual?
Questions and answers