Pitco SSHLV14 Series Installation & Operation Manual
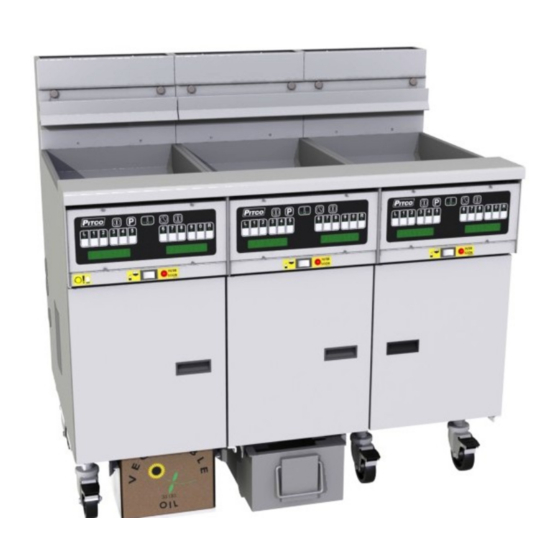
Reduced oil volume
frying system
Hide thumbs
Also See for SSHLV14 Series:
- Installation & operation manual (32 pages) ,
- Installation & operation manual (32 pages)
Table of Contents
Advertisement
Quick Links
IMPORTANT FOR FUTURE REFERENCE
Please complete this information and retain this manual
for the life of the equipment:
Model #: ___________________________
Serial #: ___________________________
Date Purchased: ____________________
Installation & Operation Manual
REDUCED OIL VOLUME
FRYING SYSTEM
Covering
Models
SSHLV14, SSHLV184 SERIES
C
E
R
T
I
F
I
E D
I
L20-407 rev. 2 (12/14)
Advertisement
Table of Contents
Troubleshooting

Related Manuals for Pitco SSHLV14 Series


Summary of Contents for Pitco SSHLV14 Series
- Page 1 IMPORTANT FOR FUTURE REFERENCE Please complete this information and retain this manual for the life of the equipment: Model #: ___________________________ Serial #: ___________________________ Date Purchased: ____________________ Installation & Operation Manual REDUCED OIL VOLUME FRYING SYSTEM Covering Models SSHLV14, SSHLV184 SERIES L20-407 rev.
- Page 2 Authorized Service and Parts (ASAP) companies, this service technician for proper performance and operation on a warranty will be void. In addition, Pitco and its affiliates will not yearly basis. be liable for any claims, damages or expenses incurred by the...
-
Page 3: Table Of Contents
INSTALLATION & OPERATIONAL SSHLV SERIES MANUAL THEORY OF OPERATION ..........................5 INSTALLATION ..............................6 2.1. CHECKING AND UNPACKING YOUR NEW APPLIANCE ..................6 2.2. INSTALLATION CLEARANCES .......................... 6 2.3. LEVELING THE FRYER – LEGS/CASTERS ......................7 2.4. GAS CONNECTION ............................8 2.5. - Page 4 INSTALLATION & OPERATIONAL SSHLV SERIES MANUAL 5.19. : (L ) ................... 23 ONTROL OR IMER EFT SIDE OF UAL OR INGLE 5.20. : (R ) ....................24 ONTROL OR IMER IGHT SIDE OF 5.21. OTHER DISPLAYS: ............................. 24 5.22. SHUTDOWN ..........................24 OMPUTER 5.23.
-
Page 5: Theory Of Operation
INSTALLATION & OPERATIONAL SSHLV SERIES MANUAL 1. THEORY OF OPERATION The Pitco Low (or reduced) Oil Volume fryer works very similarly to the Pitco standard SG/SSH fryer. The Low Oil Volume Fryer has a reduced cold zone to significantly reduce oil usage and extend oil life. -
Page 6: Installation
CHECKING AND UNPACKING YOUR NEW APPLIANCE Your new Pitco appliance has been carefully packed into one crate. Every effort has been made to ensure that it is delivered to you in perfect condition. Pitco does not assume responsibility for damage or loss incurred in transit. -
Page 7: Leveling The Fryer - Legs/Casters
INSTALLATION & OPERATIONAL SSHLV SERIES MANUAL 2.3. LEVELING THE FRYER – LEGS/CASTERS CAUTION To prevent equipment damage and/or personal injury, do not tilt the appliance onto any two of its casters or legs, or pull the appliance by the splash back. WARNING This appliance must be installed with the legs or casters provided by the manufacturer. -
Page 8: Gas Connection
INSTALLATION & OPERATIONAL SSHLV SERIES MANUAL 2.4. GAS CONNECTION Your gas appliance will give you peak performance when the gas supply line is of sufficient size to provide the correct gas pressure. The gas line must be installed to meet the local building codes or National Fuel Gas Code ANSI Z223.1 Latest Edition. -
Page 9: Electrical Connections
INSTALLATION & OPERATIONAL SSHLV SERIES MANUAL 2.8. ELECTRICAL CONNECTIONS It is advised that this power supply be plugged into a wall receptacle that is controlled by the ventilation control. This will prevent the appliance from being operated without the ventilator on. If your appliance requires an electrical connection, the power requirements are listed below. -
Page 10: Inspection
INSTALLATION & OPERATIONAL SSHLV SERIES MANUAL WARNING Ensure that your ventilation system does not cause a down draft at the appliance’s flue opening. A down draft will not allow the appliance to exhaust properly and will cause overheating, which may cause permanent damage. Damage caused by down drafts will not be covered by the warranty. -
Page 11: Initial Adjustments
INSTALLATION & OPERATIONAL SSHLV SERIES MANUAL 2.11. INITIAL ADJUSTMENTS After your appliance has been properly installed as described in the installation section of this manual, it will need to be adjusted to ensure that it will perform as designed. A qualified person must perform these adjustments. -
Page 12: Pilot Flame Adjustment
INSTALLATION & OPERATIONAL SSHLV SERIES MANUAL WARNING Do not store flammable materials in or near this appliance. Do not spray aerosols in the vicinity of this appliance while it is in operation. Contact a qualified service person or the factory, using the information on the back of this manual, if the appliance produces unusual odor, yellow tipping flames or is not performing as per the original installation. -
Page 13: Initial Cleaning
4. When the pressure is correct, replace the regulator adjustment screw cover. 5. Turn off the ALL appliances, shut the main gas valve to your Pitco appliance and remove the pressure gauge. Apply pipe joint compound to the manifold pressure tap plug and reinstall it. -
Page 14: Operation
INSTALLATION & OPERATIONAL SSHLV SERIES MANUAL 3. OPERATION An operator’s manual for your appliance’s specific control type should be included with this manual. Refer to that manual prior to operating this appliance. WARNING Before operating the fryer, check that tipping restraints or other features to prevent tipping are installed and mechanically sound. -
Page 15: Basic Operational Features
INSTALLATION & OPERATIONAL SSHLV SERIES MANUAL 3.2. BASIC OPERATIONAL FEATURES 1. Basket Hanger - Holds fry baskets while draining or between loads. Lifts off for easy cleaning. 2. Fry pot oil top off supply jug- Supplied by others, provides on board storage for fresh cooking oil. 3. -
Page 16: Filling The Fry Pot
INSTALLATION & OPERATIONAL SSHLV SERIES MANUAL 3.3. FILLING THE FRY POT Only use shortening that is liquid at room temperature in this appliance. CAUTION This appliance is NOT designed for cooking with water. Fill with oil or shortening only. WARNING This appliance is not designed for use with solid shortening. -
Page 17: Appliance Start Up
INSTALLATION & OPERATIONAL SSHLV SERIES MANUAL 4. APPLIANCE START UP Refer to the following procedure to start the appliance prior to operation. 1. Ensure that the drain valve is closed. 2. Fill the cook tank with oil/shortening. (See section 3.3 “Filling the Cook Tank”) 3. -
Page 18: Cooking
INSTALLATION & OPERATIONAL SSHLV SERIES MANUAL 4.1. COOKING To ensure the quality of the food you cook in this appliance, follow the preparation instructions from the food manufacturer. When the appliance is not in use, the oil should be cooled and covered to prevent contamination. -
Page 19: Computer Controller Operation
INSTALLATION & OPERATIONAL SSHLV SERIES MANUAL 5. COMPUTER CONTROLLER OPERATION 5.1. TO TURN THE APPLIANCE ON: If power is applied to the appliance, the displays will show [OFF]. Press the [I/O] key. Displays will show one of the normal displays: [HEATING]; [MELTING] [SOLID]/[LIQUID];... -
Page 20: To View Current Settings For Cook, Shake, And Hold Times
INSTALLATION & OPERATIONAL SGLV MANUAL 5.6. TO VIEW CURRENT SETTINGS FOR COOK, SHAKE, AND HOLD TIMES: To view the current settings for any product key, press the clock key, followed by the desired product key. The display will show [CKn mm:ss], followed by [SHn mm:ss], then [HDn mm:ss]. Where “n” is the key number, and “mm:ss”... -
Page 21: To Enter Programming Level 1 (For The Store Manager)
INSTALLATION & OPERATIONAL SSHLV SERIES MANUAL 5.8. TO ENTER PROGRAMMING LEVEL 1 (FOR THE STORE MANAGER): Note: The factory default setting for this control does not require an operator password to be entered. However, the operator password requirement and value may be changed in (See section 4.12 “To Enter Programming Level 2”... -
Page 22: Hold Pre-Alarm
INSTALLATION & OPERATIONAL SGLV MANUAL 5.10.4. HOLD PRE-ALARM Hold Pre-Alarm is a timer setting that is used to warn operators that the Hold Time is about to expire. To use Hold Pre-Alarm, time value must be a non-zero value, and must be set to a value less than Hold Time. -
Page 23: Beeper Volume And Tone
INSTALLATION & OPERATIONAL SSHLV SERIES MANUAL 5.15. BEEPER VOLUME AND TONE: Volume and Tone of the beeper alarm may be changed in this section. Volume ranges are 1,2 and 3, where 3 is the loudest setting. With display showing [PROGRAM], press the product key [0]. Display will show [SELECT] [OPTIONS]. -
Page 24: Control Or Timer: (Right Side Of Dual Vat)
5.21. OTHER DISPLAYS: [PROBE OP] [OPEN] Open probe detection is standard on all Pitco controls. If probe is detected open, normal heating and cooking activities are suspended. [HIGH TMP] [HIGH TMP] This display warns operators that the vat temperature has exceeded set temperature by 40°F (22°C), or an absolute maximum of 410°F (210°C). -
Page 25: Basket Lift Operation
FRYPOT TOP OFF SWITCH 8. AUTOMATIC OIL TOP SYSTEM (OPTION) Pitco offers the “Automatic Oil Level Control” option (Auto-Top Off) to maintain the optimal oil level in your Pitco fryer. This optional system minimizes the need for the operators attention during busy cooking hours. -
Page 26: Quick Strain Filtering "Filter Soon" Light Flashing
5. Only filter 1 frypot at a time, the filter pan may overflow. COOK COUNTER ADJUSTMENT The Pitco SSHLV14 is a Low oil volume fryer. Low oil volume fryers have smaller cold zones than standard fryers, and may require filtering during the cooking day. Excessive sediment levels in the bottom of the frypot, can cause shortening to break down prematurely. -
Page 27: Appliance Shutdown
INSTALLATION & OPERATIONAL SSHLV SERIES MANUAL APPLIANCE SHUTDOWN There are two shutdown modes of appliance operation: STANBY and COMPLETE. The standby mode removes the ability of the appliances main burners to operate. Complete shutdown turns off the gas supply to the appliance. Refer to the following procedures to enter the appropriate shutdown mode. -
Page 28: Replacing The Filter Media (If Equipped)
INSTALLATION & OPERATIONAL SGLV MANUAL 12.1.2. REPLACING THE FILTER MEDIA (IF EQUIPPED) Refer to the following procedure to replace the filter media if the appliance is equipped with a filter drawer. 1. Detach the pickup tube from the filter pickup assembly by unscrewing it (counterclockwise), at the knurled fitting, from the threaded fitting on the filter screen. -
Page 29: Appliance Inspection
INSTALLATION & OPERATIONAL SSHLV SERIES MANUAL 12.1.3. APPLIANCE INSPECTION Check that the high temperature limit and temperature probe are in the correct position and secured in place. Check that wires and cords are not frayed or loose in and out of the cabinet. ... -
Page 30: Weekly Preventative Maintenance
INSTALLATION & OPERATIONAL SGLV MANUAL 4. Wipe the filter pan with clean damp cloth and a food grade detergent. If necessary place pan in pot sink to rinse all the detergent from the surfaces and dry all surfaces before re- assembly. -
Page 31: Temperature Check
1, 2 for degrees F or 1, 0, 0. for degrees C. 7. Once the water reaches a simmer, add 8 to10 ozs (227 to 283 g) of Pitco cleaner for every 25 lbs (11.3 kgs) of oil/shortening your fryer is rated to hold. -
Page 32: Annual/Periodic Preventative Maintenance And Inspection
This section should ONLY be performed by a qualified service technician as part of a regular kitchen maintenance program. This inspection should take place a minimum of once a year by an Authorized Service Technician recommended by Pitco. It may be necessary perform this inspection more then once a year. -
Page 33: Gas Combustion System
INSTALLATION & OPERATIONAL SSHLV SERIES MANUAL 12.4.5. GAS COMBUSTION SYSTEM Check for gas leaks. Check and clean vent tube on gas valve pressure regulator. Check burners, clean debris and grease from pilot and pilot orifice tips. Check self cleaning burner system (if equipped) that it activates when the appliance is turned on and NOT during normal cooking &... -
Page 34: Troubleshooting
INSTALLATION & OPERATIONAL SGLV MANUAL TROUBLESHOOTING 13.1. POWER FAILURE If electric power is removed for any reason, the appliance will shut down. Wait five minutes after the power is restored before attempting to restart the appliance. This will allow time for any gas that may have accumulated in the burner or tubes to dissipate. To restart the appliance, follow the appliance start up procedure in section 2.2. -
Page 35: Self Cleaning Burner System
INSTALLATION & OPERATIONAL SGLV MANUAL 13.4. SELF CLEANING BURNER SYSTEM (NOT ON ALL MODELS) If your appliance is equipped with the self cleaning burner system, the appliance should behave as outlined in the table below. A cleaning cycle will execute every time the appliance is turned “ON” from an “OFF”... -
Page 36: Troubleshooting Charts
INSTALLATION & OPERATIONAL SGLV MANUAL 13.6. TROUBLESHOOTING CHARTS 13.6.1. FRYER TROUBLESHOOTING CHART Problem Probable Causes Corrective Actions No power to appliance. Check main building power supply. Controller not turned on. Turn on controller. Power Cord loose or not Connect power cord. Controller does connected. -
Page 37: Computer & Digital Controller Displays (If Equipped)
INSTALLATION & OPERATIONAL SGLV MANUAL 13.6.3. COMPUTER & DIGITAL CONTROLLER DISPLAYS (IF EQUIPPED) If your appliance is equipped with a computer or digital controller it may display the following messages on its display. L20-407 rev. 2 (12/14) - Page 38 (603) 225-6684 World Wide representative (ASAP) covering your area, or Website Address: www.pitco.com contact Pitco at the numbers listed to the left. MAILING ADDRESS – P.O. BOX 501, CONCORD, NH 03302-0501 SHIPPING ADDRESS – 10 FERRY ST., CONCORD, NH 03301...
Need help?
Do you have a question about the SSHLV14 Series and is the answer not in the manual?
Questions and answers