
Related Manuals for Pitco SSHLV Series


Summary of Contents for Pitco SSHLV Series
- Page 1 Solstice Gas ROV Fryers SSHLV Series Service Manual RETAIN AND STORE THIS MANUAL IN A SAFE PLACE FOR FUTURE USE L22-392 R1 (10/14)
- Page 2 Pitco SSHLV (ROV) Gas Fryers DANGER Improper installation, operation, adjustment, maintenance, all alterations or service, and unauthorized alterations or modifications can cause property damage, injury or death. Read the installation, operating and service manuals thoroughly before installing or servicing this equipment.
- Page 3 Pitco SSHLV (ROV) Gas Fryers DANGER Instructions to be followed, in the event an operator smells/detects a gas leak, must be posted in a prominent location. This information can be obtained from your local gas company or supplier. Failure to post the instructions could leave an active gas leak unresolved, leading to fire, property damage, injury and death.
- Page 4 This appliance is intended for professional use only and is to be operated by qualified, trained personnel only. A Pitco Authorized Service Agent (ASA) or other qualified professional must perform installation, maintenance and repairs. Installation or repairs by unqualified personnel will void the manufacturer’s warranty.
-
Page 5: Notice
Pitco SSHLV (ROV) Gas Fryers NOTE If, during the warranty period, the end user uses a part for this Pitco appliance other than an UNMODIFIED new part purchased directly from Pitco or any of Pitco’s authorized service agents, and/or the part being used is modified from its original configuration, THE WARRANTY WILL BE VOID. -
Page 6: Table Of Contents
Pitco SSHLV (ROV) Gas Fryers TABLE OF CONTENTS Notice ............................5 General ............................8 Serial Numbers ........................9 Safety Information ....................... 10 2.2.1 Installation, Operating, and Service Personnel ............... 10 Definitions ..........................10 2.3.1 Qualified and/or Authorized Operating Personnel ............10 2.3.2... - Page 7 Pitco SSHLV (ROV) Gas Fryers Replacing the Pump Relay and Circuit Breaker ..............50 24.1 Replacing the Circuit Breaker ....................50 24.2 Replacing the Pump Relay ....................51 Cleaning the Gas Valve Vent Tube ..................52 Checking the Gas Pressure ..................... 53 26.1...
-
Page 8: General
Read the instructions in this manual thoroughly before attempting to operate this equipment. This manual covers all configurations of Pitco SSHLV gas models. The fryers in this model family have most parts in common, and when discussed as a group, will be referred to as SSHLV fryers. -
Page 9: Serial Numbers
Pitco SSHLV (ROV) Gas Fryers 2.1 Serial Numbers NOTE If, parts returned to the factory under warranty are found to be a functional/serviceable, Pitco may, at its discretion, decline warranty reimbursement and may charge for replacement parts. L22-392 R1... -
Page 10: Safety Information
Operating information for Pitco equipment has been prepared for use by qualified and/or authorized personnel only, as defined in Section 2.3. All installation and service on Pitco equipment must be performed by qualified, certified, licensed, and/or authorized installation or service personnel, as defined in Section 2.3.2. -
Page 11: Shipping Damage Claim Procedure
TRANSIT. 3 Theory of Operation SSHLV Series gas fryers utilize a welded, stainless steel fryvat that is directly heated with high efficiency, atmospheric burner tubes. The atmospheric burner tubes eliminate the maintenance heavy and inefficient (over time due to clogging) blowers used in other fryers. Heat tubes provide as much as 80% more surface area for heat transfer than open vat fryers (tubeless), providing faster recovery without scorching the oil. -
Page 12: Auto Filtration Boards
Pitco SSHLV (ROV) Gas Fryers 3.2 Auto Filtration Boards All fryers in this series have an Auto-Filtration Board (AFB) located in the component box behind the control bezel. The AFB provides a “bus” between the controller and the fryer's individual components without requiring additional wiring by using a communication protocol over a twisted pair, and allows the controller to execute commands from one central point. - Page 13 Pitco SSHLV (ROV) Gas Fryers Figure 2 - Auto-Filtration Board (AFB) L22-392 R1...
-
Page 14: Thermostats
Pitco SSHLV (ROV) Gas Fryers 3.3 Thermostats SSHLV Series gas fryers have temperature probes located above and between the third and fourth heat tube of each fryvat (split vat fryers have two probes, one in each vat). SSHLV fryers, like all Solstice series fryers, use a thermistor style temperature probe. -
Page 15: Safety System
Circuit Breaker should remain in the “ON” position at all times. Pulling the BROWN waste oil valve will: (If equipped): • Divert oil flow from the pump to the fry vat to user supplied waste oil plumbing through a Pitco supplied three way valve. •... -
Page 16: Basket Lift (Optional)
Pitco SSHLV (ROV) Gas Fryers 3.8 Basket Lift (Optional) The basket lift is a self contained unit that requires a 120V, 208V, or 240V supply. With most fryer configurations, the power is supplied from the entrance box at the back of the fryer, but some configurations require power directly from a wall outlet. -
Page 17: Automated Filtration (Optional)
Pitco SSHLV (ROV) Gas Fryers • Food debris, or oil caked onto probe may prevent ATO operation. Occasional probe cleaning when vat is empty and cool is recommended. • Top off does not occur when the control is Off, Melting, Cooking, or Heating. -
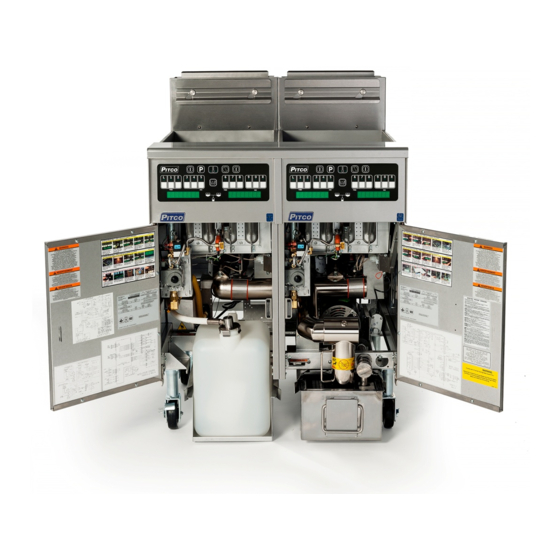
Page 18: Accessing Fryer For Servicing
Pitco SSHLV (ROV) Gas Fryers 4 Accessing Fryer for Servicing 3. Unplug all power cords. DANGER Prior to moving, testing, maintaining or repairing your appliance, ensure it is emptied of all oil, cool, disconnected from gas and all electrical power. Failure to do so may result in property damage, damage to your fryer, injury or death. -
Page 19: Replacing The Controllers
Pitco SSHLV (ROV) Gas Fryers 5 Replacing the Controllers 5.1 Removing the Controller Front Panel Bezel 1. Remove the two (2) screws on the controller 3. Disconnect the controller wiring harness. panel using a Phillips screwdriver. (on a Dual unit you will need to remove the front panel divider). -
Page 20: Manual Operation Of Drain And Return (Auto Filter Only)
Pitco SSHLV (ROV) Gas Fryers 6 Manual Operation of Drain and Return (Auto Filter Only) 3. Pressing the “1” key brings up drain toggle 1. To open and/or close drain or return oil from option- press “YES” to open drain – drain will filter pan manually, hold center filter button until remain open until “YES”... -
Page 21: Blocked Drain (Auto Filter Only)
3.If after three tries, the drain is still blocked the fryer will no longer operate. If you have a multi fryer system, the other fryers shouldn’t be affected by this error. Contact Pitco Service or Authorized Service Person for assistance. There is NO reset from front controller panel. -
Page 22: Replacing The Relay Board And Paper
Pitco SSHLV (ROV) Gas Fryers 7.1 Replacing the Relay Board and Paper 1. Remove the front panel. See “Removing the 5. Remove the existing insulation paper and Controller Front Panel Bezel” in Section 5.1. replace with a new insulator paper. -
Page 23: Checking Resistance
Pitco SSHLV (ROV) Gas Fryers 8 Checking Resistance 8.1 Checking the Resistance of the Transformer 1. Disconnect all electrical power. Remove the front panel (see “Removing the Controller Front Panel Bezel” in Section 5.1). 2. Disconnect the secondary side terminals. -
Page 24: Diagram Identifying Terminals For Second Resistance
Pitco SSHLV (ROV) Gas Fryers 8.2 Diagram Identifying Terminals for Second Resistance PP10429 PP10428 Secondary Resistance Secondary Resistance Volts Resistance Volts Resistance 10 - 6 10 - 6 Primary Resistance Primary Resistance Volts Resistance Volts Resistance 5 - 1 240V 30.4... -
Page 25: Checking The Resistance Of The Hi-Limit
Pitco SSHLV (ROV) Gas Fryers 8.4 Checking the Resistance of the Hi-Limit NOTE Connect the multimeter to the Hi-limit leads If the Hi-limit is suspect, allow the fryer to cool to and check the resistance. room temperature before performing this test. -
Page 26: Checking The Resistance Of The Temperature Probe
Pitco SSHLV (ROV) Gas Fryers 8.5 Checking the Resistance of the Temperature Probe 2. Connect the multimeter to the temperature 1. Remove the probe connection probe leads and check the resistance. ” See Temperature Probe Resistance Chart on page 84”. -
Page 27: Replacing Temperature Probe
Pitco SSHLV (ROV) Gas Fryers 9 Replacing Temperature Probe 1. Remove Phillips screws from probe holder. 4. Loose compression fitting, pull entire probe out of bottom of tank. 5. Install new probe from top. 2. Slide probe holder off toward the back of the tank. - Page 28 Pitco SSHLV (ROV) Gas Fryers 7. Install stuffing block in tank using high temperature food grade thread sealer. Install white housing on terminals. Tighten ferrule nut on stuffing block. Plug connector back in to entrance box (J7/J107). Tighten screws on probe holder.
-
Page 29: Replacing The Ignition Module And Hi-Limit
Pitco SSHLV (ROV) Gas Fryers 10 Replacing the Ignition Module and Hi-Limit 3. Lift the ignition box up and back towards the DANGER burners. Prior to moving, testing, maintaining or repairing any appliance, ensure it is emptied of all oil, cool, disconnected from gas and all electrical power. -
Page 30: Replacing An Igniter/Pilot Assembly
Pitco SSHLV (ROV) Gas Fryers 11 Replacing an Igniter/Pilot Assembly DANGER 3. The pilot assembly consists of the pilot tube, flame hood, flame sensing rod and spark rod Prior to moving, testing, maintaining or repairing and also the pilot orifice. (If spark wire, flame... -
Page 31: Replacing Drain Valve With Actuator (Auto Filter Only)
Failure to do so may result in property damage, damage to your fryer, injury or death. 1. Pitco ROV fryer with automated filtration uses a 24 VDC drain actuator for opening /closing the drain for each pot. - Page 32 Pitco SSHLV (ROV) Gas Fryers 7. Don’t forget gray rubber protector on the thread of the clamp so they don’t get damaged. After servicing the powered drain system, If the drain remains open, the motor and valve assembly are not indexed correctly, remove motor, and align marks as instructed 9.
-
Page 33: Replacing The Dc Power Supply
Pitco SSHLV (ROV) Gas Fryers 13 Replacing the DC Power Supply DANGER Prior to moving, testing, maintaining or repairing any appliance, ensure it is emptied of all oil, cool, disconnected from gas and all electrical power. Failure to do so may result in property damage, damage to your fryer, injury or death. -
Page 34: Replacing Transformer/Power Box
Pitco SSHLV (ROV) Gas Fryers 14 Replacing Transformer/Power Box 3. Entrance box is located on sliding tabs, move DANGER box toward rear and down towards the floor to unmount from tabs. Prior to moving, testing, maintaining or repairing any appliance, ensure it is emptied of all oil, cool, disconnected from gas and all electrical power. -
Page 35: Changing Filter Pump Actuator
Pitco SSHLV (ROV) Gas Fryers 15 Changing Filter Pump Actuator 1. Pull two (2) re-usable cotter pins. One is located in the front of the actuator unit, second 3. Remove filter pump actuator. is located in the rear of the actuator. -
Page 36: Testing The Auto Top Off Probe (If Equipped)
Pitco SSHLV (ROV) Gas Fryers 16 Testing the Auto Top Off Probe (if equipped) The Auto Top Off probe should be tested prior to replacement (follows this section). 1. Unplug connector J7 from the Auto Top Off Relay board. Measure the resistance with a multimeter (set to OHMS) between pins 1 and 2. - Page 37 Pitco SSHLV (ROV) Gas Fryers L22-392 R1...
-
Page 38: Replacing The Auto Top Off Probe (If Equipped)
Pitco SSHLV (ROV) Gas Fryers Replacing the Auto Top Off Probe (If equipped) DANGER 3. Remove two (2) screws from pilot assembly. Prior to moving, testing, maintaining or repairing any appliance, ensure it is emptied of all oil, cool, disconnected from gas and all electrical power. - Page 39 Pitco SSHLV (ROV) Gas Fryers 6. Remove five (5) screws from burner plate 9. Remove front panel divider and front panel using 5/16 nut driver. using a phillip screw driver. 7. Position burner assembly out of the way, so you have access to DLP fitting.
-
Page 40: Gas Conversion
Pitco SSHLV (ROV) Gas Fryers 18 Gas Conversion 6. Replace and adjust the gas valve regulator. DANGER Only qualified service personnel may service or convert this appliance to use a gas other than that for which it was originally manufactured. -
Page 41: Replacing The Return Valve
Pitco SSHLV (ROV) Gas Fryers 19 Replacing the Return Valve WARNING Serious injury will result DO NOT remove fry vat or drain fittings before all oil is drained from the tank. from slipping, falling or contact with hot liquids causing property damage, injurious severe burns and/or death. -
Page 42: Replacing The Optional Flush Hose Assembly And Valve
Pitco SSHLV (ROV) Gas Fryers 20 Replacing the Optional Flush Hose Assembly and Valve 4. Remove two (2) screws holding the flush DANGER hose assembly using a 5/16 socket. Prior to moving, testing, maintaining or repairing your appliance, ensure it is emptied of all oil, cool, disconnected from gas and all electrical power. - Page 43 Pitco SSHLV (ROV) Gas Fryers 7. Remove the two (2) screws from the valve 9. Lift bracket out and slide forward. mounting brackets using a 5/16 socket. 10. Bend down tabs of the stem nut washer using a needle-nose plier.
- Page 44 Pitco SSHLV (ROV) Gas Fryers 12. Remove the handle. 14. Remove the piping using a 15/16 inch wrench on the valve and an adjustable wrench on the piping. 13. Remove the mounting bracket. 15. Replace the flush hose assembly and valve by following steps 1 through 14 in reverse.
-
Page 45: Replacing The Waste Oil And Components
Pitco SSHLV (ROV) Gas Fryers 21 Replacing the Waste Oil and Components 21.1 Removing Rear Mounting Bracket 1. Remove six (6) screws using a 5/16 socket 3. Remove two (2) screws with a 5/16 socket wrench. wrench. DANGER Prior to moving, testing, maintaining or repairing... -
Page 46: Removing The Check Valve
Pitco SSHLV (ROV) Gas Fryers 21.2 Removing the Check Valve 1. Remove the 3/8 inch nipple using an adjustable wrench. 3. Remove the valve nut using a 9/16 inch open-ended wrench. 2. Remove the second nipple using two adjustable wrenches. - Page 47 Pitco SSHLV (ROV) Gas Fryers 5. Remove the two (2) screws using a Phillips screwdriver. 8. Follow steps 1 through 7 in reverse to reinstall. 6. Lift off the mounting bracket. 7. Remove the valve using two adjustable wrenches. L22-392 Rev 1...
-
Page 48: Removing The Filter Pump From The Motor
Pitco SSHLV (ROV) Gas Fryers 22 Removing the Filter Pump from the Motor 1. Remove the two (2) bolts holding the filter 2. Remove the filter pump head from the motor. pump head to the motor using a 1/2 inch open- ended wrench. -
Page 49: Replacing The Drain Line Or Gasket
Pitco SSHLV (ROV) Gas Fryers 23 Replacing the Drain Line or Gasket 1. Remove one (1) screw on the drain line using 3. Slide off the drain manifold gasket. a 7/16 inch wrench. 4. Slide out the drain line. 2. Lift off the drain manifold clamp. -
Page 50: Replacing The Pump Relay And Circuit Breaker
Pitco SSHLV (ROV) Gas Fryers 24 Replacing the Pump Relay and Circuit Breaker 24.1 Replacing the Circuit Breaker 1. Disconnect the connections and power 4. Remove all wires on the circuit breaker using supply cords from the filter pump. needle-nose pliers. -
Page 51: Replacing The Pump Relay
Pitco SSHLV (ROV) Gas Fryers 24.2 Replacing the Pump Relay 1. Remove the two (2) screws, which hold the pump relay, using a Phillips screwdriver. 3. Remove the pump relay. 4. Reinstall the new pump relay by following steps 1 through 2 in reverse. -
Page 52: Cleaning The Gas Valve Vent Tube
Pitco SSHLV (ROV) Gas Fryers 25 Cleaning the Gas Valve Vent Tube 3. Clean the tube (not shown) and reinstall. DANGER NOTE Prior to moving, testing, maintaining or repairing your appliance, ensure it is emptied of all oil, Insure the vent tube is not reinstalled in an... -
Page 53: Checking The Gas Pressure
Pitco SSHLV (ROV) Gas Fryers 26 Checking the Gas Pressure 26.1 Taking a Supply Gas Pressure Reading 1. Turn off gas. 4. Finish tightening the test fitting using a 7/16 inch open-ended wrench. 2. Unscrew and remove the gas supply plug with a 3/16 inch hex wrench. - Page 54 Pitco SSHLV (ROV) Gas Fryers 6. Turn on the main gas supply line. 11. Apply Fluoropolymer paste to gas supply plug. 7. Check the supply gas pressure with the manometer and compare the reading to the 12. Reinstall gas supply plug with a 3/16 inch supply gas pressure table to determine what hex wrench.
-
Page 55: Taking A Manifold Gas Pressure Reading
Pitco SSHLV (ROV) Gas Fryers 26.2 Taking a Manifold Gas Pressure Reading 1.Turn off main gas. 4. Finish tightening the test fitting using a 7/16 inch open-ended wrench. 2. Unscrew and remove the gas manifold plug with a 3/16 inch hex wrench. -
Page 56: Adjusting Manifold Gas Pressure
Pitco SSHLV (ROV) Gas Fryers 26.3 Adjusting Manifold Gas Pressure 1. Check the manifold gas pressure with the 3. Insert flathead screwdriver into the cap and manometer and compare the reading to the turn counter-clockwise to increase the gas manifold gas pressure table. -
Page 57: Replacing The Self-Cleaning Burner Solenoid
Pitco SSHLV (ROV) Gas Fryers 27 Replacing the Self-Cleaning Burner Solenoid 3. Disconnect the terminals using needle-nose DANGER pliers. Prior to moving, testing, maintaining or repairing your appliance, ensure it is emptied of all oil, cool, disconnected from gas and all electrical power. -
Page 58: Replacing The Gas Valve
Pitco SSHLV (ROV) Gas Fryers 28 Replacing the Gas Valve 3. Holding the elbow with a wrench, remove the NOTE swivel nut on the bottom gas valve fitting using Prior to moving, testing, maintaining or repairing a 1-1/16 inch open-ended wrench. - Page 59 Pitco SSHLV (ROV) Gas Fryers 6. Remove the fittings and plate from the gas 7. Install the heat shield, vent tube, and fittings. valve using a 7/8 inch open-ended wrench. 8. Reinstall a new gas valve by following steps 1 through 8 in reverse.
-
Page 60: Replacing The Dvi Switch (Manual Filter Only)
Pitco SSHLV (ROV) Gas Fryers 29 Replacing the DVI Switch (Manual Filter Only) 3. Replace the DVI switch ensuring a 1/4 inch NOTE gap between the actuator and the magnet. Photos are for illustrative purposes only and 4. Follow steps 1 through 3 in reverse to may not be an exact match to your appliance.. -
Page 61: Replacing The Burner Assembly
Pitco SSHLV (ROV) Gas Fryers 30 Replacing the Burner Assembly 30.1 Replacing the Burner(s) 3. Remove the two (2) screws, which hold the NOTE rollout switch, using a 5/16 inch socket. Gas valve can stay in place if replacing right side burners. - Page 62 Pitco SSHLV (ROV) Gas Fryers 6. Remove the two (2) screws, which hold the 8. Remove the right burner(s) by sliding them SCB runner tube, using a 5/16 inch socket. off the SCB runner tube. 9. Remove the SCB runner tube.
-
Page 63: Replacing The Burner Assembly
Pitco SSHLV (ROV) Gas Fryers 30.2 Replacing the Burner Assembly See “Replacing the Burner(s)” in section 31.1. 3. Remove the burner rack by pulling it toward the front of the unit. 1. Remove the burner shield. 4. If necessary, replace the insulation on the... -
Page 64: Replacing The Frypot
Pitco SSHLV (ROV) Gas Fryers 31 Replacing the Frypot 4. Loosen the collet using a spanner wrench. DANGER Prior to moving, testing, maintaining or repairing your appliance, ensure it is emptied of all oil, cool, disconnected from gas and all electrical power. - Page 65 Pitco SSHLV (ROV) Gas Fryers 7. Remove the flange elbow. 11. Remove the six (6) screws, which hold the back of the splash back, using a 5/16 inch socket. DANGER Any and all spilled oil, water or other liquids that 12.
- Page 66 Pitco SSHLV (ROV) Gas Fryers 14. Remove the splash back by lifting up. 16. Remove the channel strip by pulling up. 17. Score the silicon sealer between the tanks using a flathead screwdriver or utility knife. 15. Remove the six (6) screws, which hold the tank to the cabinet, using a 5/16 inch socket.
- Page 67 Pitco SSHLV (ROV) Gas Fryers 20. Lift up and pull out the tank. 23. Remove the four (4) screws, which hold the flue, using a 5/16 inch socket and 3/8 inch close-ended wrench. 24. Remove the return valve using two adjustable wrenches.
-
Page 68: Replacing The Basket Lift Components
Pitco SSHLV (ROV) Gas Fryers 32 Replacing the Basket Lift Components 32.1 Removing the Basket Lift Cover 1. Remove the six (6) screws, which hold the 2. Lift up the back and remove. back of the basket lift cover, using a 5/16 inch socket. -
Page 69: Replacing The Basket Lift Driver Board
Pitco SSHLV (ROV) Gas Fryers 32.3 Replacing the Basket Lift Driver Board 1. Remove all wires on basket lift driver board 4. Remove the actuator power connection using using needle-nose pliers. needle-nose pliers. 2. Remove the sensor connection using needle- 5. -
Page 70: Adjusting The Magnetic Sensor
Pitco SSHLV (ROV) Gas Fryers 32.4 Adjusting the Magnetic Sensor 1. Make sure the sensor is approximately 3/4 2. Make sure the sensor is approximately 7 3/4 inch from top of the motor to bottom of the inch from top of the motor to bottom of the sensor. - Page 71 Pitco SSHLV (ROV) Gas Fryers 5. Remove the top retaining bushing by 8. Rotate up the actuator collar. unscrewing. 9. Remove the actuator collar. 6. Slide the bushing off the shaft. 10. Follow steps 1 through 9 in reverse to 7.
-
Page 72: Replacing The Filter Pump And Motor
Pitco SSHLV (ROV) Gas Fryers 33 Replacing the Filter Pump and Motor 33.1 Removing the Filter Pump and Motor NOTE DANGER Photos are for illustrative purposes only and Any and all spilled oil, water or other liquids that may not be an exact match to your appliance.. - Page 73 Pitco SSHLV (ROV) Gas Fryers 6. Remove the lower connection at the 3-way 9. Remove the rear hair pin on the actuator. return valve using a 15/16 inch wrench. 7.Using a 1” inch wrench remove the JIB hose. 10.Remove the bracket.
- Page 74 Pitco SSHLV (ROV) Gas Fryers 11. Turn down the pins and then pull them out. 14. Remove two (2) screws on back of filter pump using a 5/16 inch socket. 12. ROV units with a solofilter, will require the removal of the RH pan guide rail to allow the pump to be lowered as shown (Filter pan rails are not shown).
-
Page 75: Information Charts/Tables
Pitco SSHLV (ROV) Gas Fryers 34 Information Charts/Tables L22-392 Rev 1... -
Page 76: Temperature Probe Resistance Chart
Pitco SSHLV (ROV) Gas Fryers 34.1 Temperature Probe Resistance Chart Probe Resistance in 5°F Increments. Probe Probe Probe Probe Probe Probe Resistance Resistance Resistance Temp Temp Temp Temp Temp Temp (Ohms) (Ohms) (Ohms) (°F) (°C) (°F) (°C) (°F) (°C) -12.2 562734 79.4... -
Page 77: Orifice Size Chart
Pitco SSHLV (ROV) Gas Fryers 34.2 Orifice Size Chart Main Burner Main Burner Model Gas Type Model Gas Type Orifice Orifice SSHLV (ROV) SSHLVT (ROV) 1.25 mm 1.25 mm SG14 SGM34 1.5 mm SG14R SSH55 .062" SG14T SSH55T 1.45 mm... -
Page 78: Orifice Size At Sea Level Chart
Pitco SSHLV (ROV) Gas Fryers 34.3 Orifice Size at Sea Level Chart Orifice Orifice Size Required at Other Elevations Size at Level 2000 3000 4000 5000 6000 7000 8000 9000 10,000 0.062 0.062 L22-392 Rev 1... -
Page 79: Simplified Wiring Diagrams
NOTE: The following wiring diagrams represent the latest revisions and most common models. A current wiring diagram for the fryer can be found on the inside of the fryer door or call the Pitco Service Department for your particular unit. -
Page 80: Wiring Diagram - Auto Filter Board (Afb2) Wiring (Rov)
Pitco SSHLV (ROV) Gas Fryers 35.2 Wiring Diagram – Auto Filter Board (AFB2) Wiring (ROV) L22-392 Rev 1... -
Page 81: Wiring Diagram - Connector Locations Detail Afb2 W/Jib & No Bulk Oil Option (Rov)
Pitco SSHLV (ROV) Gas Fryers 35.3 Wiring Diagram – Connector Locations Detail AFB2 W/Jib & No Bulk Oil Option (ROV) L22-392 Rev 1... -
Page 82: Wiring Diagram - Calibration Test Points And Indicators (Rov)
Pitco SSHLV (ROV) Gas Fryers 35.4 Wiring Diagram – Calibration Test Points and Indicators (ROV) L22-392 Rev 1... -
Page 83: Wiring Diagram - Ac & Dc Control Voltage Supplies (Rov)
Pitco SSHLV (ROV) Gas Fryers 35.5 Wiring Diagram – AC & DC Control Voltage Supplies (ROV) L22-392 Rev 1... -
Page 84: Wiring Diagram - Basket Lift Option & Connector Locations (Rov)
Pitco SSHLV (ROV) Gas Fryers 35.6 Wiring Diagram – Basket Lift Option & Connector Locations (ROV) L22-392 Rev 1... -
Page 85: Wiring Diagram - Filter Pump Options 208V-240V (Rov)
Pitco SSHLV (ROV) Gas Fryers 35.7 Wiring Diagram – Filter Pump Options 208V-240V (ROV) L22-392 Rev 1... -
Page 86: Wiring Diagram - Full Vat With Scb
Pitco SSHLV (ROV) Gas Fryers 35.8 Wiring Diagram – Full Vat with SCB L22-392 Rev 1... -
Page 87: Wiring Diagram - Basket Lifts
Pitco SSHLV (ROV) Gas Fryers 35.9 Wiring Diagram – Basket Lifts L22-392 Rev 1... -
Page 88: Wiring Diagram - Filter Motor 115V-60Hz
Pitco SSHLV (ROV) Gas Fryers 35.10 Wiring Diagram – Filter Motor 115V-60Hz L22-392 Rev 1... -
Page 89: Wiring Diagrams - Filter Motor 208-240V
Pitco SSHLV (ROV) Gas Fryers 35.11 Wiring Diagrams – Filter Motor 208-240V L22-392 Rev 1... - Page 90 Pitco SSHLV (ROV) Gas Fryers NOTES: L22-392 Rev 1...
- Page 91 Pitco SSHLV (ROV) Gas Fryers NOTES: L22-392 Rev 1...
- Page 92 Pitco SSHLV (ROV) Gas Fryers L22-392 Rev 1...
Need help?
Do you have a question about the SSHLV Series and is the answer not in the manual?
Questions and answers