
Related Manuals for Advantech ACP-4020


Summary of Contents for Advantech ACP-4020
- Page 1 User Manual ACP-4020 Compact 4U Rackmount Chassis for Half-sized SBC or ATX/MicroATX Motherboard 支持半长 SBC 或 ATX/MicroATX 母板的短浅型 4U 上架式工业机箱 支持半長 SBC 或 ATX/MicroATX 主機板的短淺型 4U 上架式工業主機 殼...
- Page 2 No part of this manual may be reproduced, copied, translated, or transmitted in any form or by any means without the prior written permission of Advantech Co., Ltd. The information provided in this manual is intended to be accurate and reliable.
- Page 3 Discard used batteries according to the manufacturer’s instructions. THE COMPUTER IS PROVIDED WITH CD DRIVES COMPLY WITH APPRO- PRIATE SAFETY STANDARDS INCLUDING IEC 60825. CLASS 1 LASER PRODUCT KLASSE 1 LASER PRODUKT ACP-4020 User Manual/ 用户手册...
- Page 4 For rack-mount equipment, please firmly install the device with pallets or sliding rails in the rack. 请仔细阅读此安全操作说明。 请妥善保存此用户手册供日后参考。 用湿抹布清洗设备前,请从插座拔下电源线。请不要使用液体或去污喷雾剂清洗 设备。 对于使用电源线的设备,设备周围必须有容易接触到的电源插座。 请不要在潮湿环境中使用设备。 请在安装前确保设备放置在可靠的平面上,意外跌落可能会导致设备损坏。 请不要把设备放置在超出我们建议的温度范围的环境,即不要低于 0°C (32°F)或高于 40°C (104°F) ,否则可能会损坏设备。 设备外壳的开口是用于空气对流,从而防止设备过热。请不要覆盖这些开口。 当您连接设备到电源插座上前,请确认电源插座的电压是否符合要求。 请将电源线布置在人们不易绊到的位置,并不要在电源上覆盖任何杂物。 请注意设备上的所有警告和注意标语。 如果长时间不使用设备,请将其同电源插座断开,避免设备被超标的电压波动损 坏。 请不要让任何液体流入通风口,以免引起火灾或者短路。 请不要自行打开设备。为了确保您的安全,请由经过认证的工程师来打开设备。 如遇下列情况,请由专业人员来维修: 电源线或者插头损坏; 设备内部有液体流入; 设备曾暴露在过于潮湿的环境中使用; 设备无法正常工作,或您无法通过用户手册来使其正常工作; 设备跌落或者损坏; 设备有明显的外观破损。 注意:计算机配置了由电池供电的实时时钟电路,如果更换错误的电池,将有爆 炸的危险。因此,只可以使用制造商推荐的同一种或者同等型号的电池进行替 换。请按照制造商的指示处理旧电池。 ACP-4020 User Manual/ 用户手册...
- Page 5 若该设备是上架式机箱 , 请务必使用机柜里的层板或滑轨 , 确实将设备安稳的安 装固定在机柜内。 請仔細閱讀此安全操作說明。 請妥善保存此用戶手冊供日後參考。 用濕抹布清洗設備前,請從插座拔下電源線。請不要使用液體或去汙噴霧劑清洗 設備。 對於使用電源線的設備,設備周圍必須有容易接觸到的電源插座。 請不要在潮濕環境中使用設備。 請在安裝前確保設備放置在可靠的平面上,意外跌落可能會導致設備損壞。 請不要把設備放置在超出我們建議的溫度範圍的環境,即不要低於 0°C (32° F)或高於 40°C (104°F) ,否則可能會損壞設備。 設備外殼的開口是用於空氣對流,從而防止設備過熱。請不要覆蓋這些開口。 當您連接設備到電源插座之前,請確認電源插座的電壓是否符合要求。 請將電源線配置在其它人不易絆到的位置,並不要在電源線上覆蓋任何雜物。 請注意設備上的所有警告和注意標語。 如果長時間不使用設備,請將電源插线拔除,避免設備被超標的電壓波動損 壞。 請不要讓任何液體流入通風口,以免引起火災或者短路。 請不要自行打開設備。為了確保您的安全,請由經過認證的工程師來打開設備。 如遇下列情況,請由專業人員來維修: 電源線或者插頭損壞; 設備內部有液體流入; 設備曾暴露在過於潮濕的環境中使用; 設備無法正常工作,或您無法透過用戶手冊來使其正常工作; 設備跌落或者損壞; 設備有明顯的外觀破損。 注意:電腦配置了由電池供電的即時時鐘電路,如果更換錯誤的電池,將有爆 炸的危險。因此,只可以使用製造商推薦的同一種或者同等型號的電池進行替 換。請按照製造商的指示處理舊電池。 ACP-4020 User Manual/ 用户手册...
- Page 6 Advantech has come to be known. Your satisfaction is our primary concern. Here is a guide to Advantech’s cus- tomer services.
- Page 7 Our dealers are well trained and ready to give you the support you need to get the most from your Advantech products. In fact, most problems reported are minor and can be easily solved over the phone.
- Page 8 Because of Advantech’s high quality-control standards and rigorous testing, most of our customers never need to use our repair service. If an Advantech product is defec- tive, it will be repaired or replaced at no charge during the warranty period. For out- of-warranty repairs, you will be billed according to the cost of replacement materials, service time and freight.
- Page 9 如果研華產品出現故障,在保固期內我們提供免費維修或更換服務。對於超過保固期 之產品, 我們將會酌收材料費、人工服務費用。請聯繫您的銷售人員瞭解詳細情況。 如果您認為您購買的產品出現了故障,請遵循以下步驟: 收集您所遇到的問題資訊 (例如,CPU 頻率、使用的研華產品及其它軟體、硬 體等) 。請注意螢幕上出現的任何不正常資訊顯示。 打電話給您的供應商,描述故障問題。請參考手冊,產品和任何有幫助的資訊。 如果您的產品被診斷發生故障,請從您的供應商那裏獲得 RMA (Return Mate- rial Authorization) 序號。這可以讓我們儘快地進行故障產品的回收。 請細心包裝故障產品,並在包裝中附上完整的售後服務卡片和購買日期證明 (如銷售發票) 。我們對無法提供購買日期證明的產品不提供保固服務。 把相關的 RMA 序號寫在外包裝上,並將其運送給銷售人員。 ACP-4020 User Manual/ 用户手册...
- Page 10 打開包裝時,用戶需確認包裝中含有下所列各項: 機箱 用戶手冊 品質保證卡 附件盒,包括一袋螺絲 (用於固定母板、背板、薄型光碟機、其它磁碟機、耳 翼及把手等) 、1 對鑰匙、1 對耳翼把手和 1 個 EMI 彈簧遮罩 (背板版本) , 14 個 (背板版本)或 7 個 (主機板版本)橡膠墊。 若任何不符,請立即與經銷商聯繫。裝貨前,我們已全面仔細檢查過產品。因此您購 買的產品應當是完好無 損且運轉正常的。在您打開產品的包裝時,請檢查是否有破損 痕跡 (例如,包裝箱損壞,刮痕,凹痕等) 。如果產品有破損或者不符合規格,請立 即聯繫我們 的服務部門或您的銷售商。同時也要通知搬運人員。請保留包裝箱及包裝 材料以備搬 運人員檢查。檢查之後,我們會給您提供維修或更換服務。 ACP-4020 User Manual/ 用户手册...
-
Page 11: Table Of Contents
Installing Optional Mobile Rack (P/N: IPC-DT-3120E)/安装可选移 动支架(P/N: IPC-DT-3120E)/安裝可選移動支架(P/N: IPC- DT-3120E) ..........20 Figure 2.13Installing the optional 2.5" SATA mobile rack for a 3.5" drive bay /安装用于 3.5" 磁盘托架的可选 2.5" SATA 移动支架 /安裝用於 3.5" 磁片托架的可選 2.5" SATA 移動支架 ACP-4020 User Manual/ 用户手册... - Page 12 Table 4.7: SW10................ 36 Board Layout/板卡布局/板卡佈局 ........ 36 Figure 4.1 Connector locations for the intelligent system module/ 智能系统模块接口位置/智慧系統模組接口位置 ..36 Pin Define/针脚定义/針腳定義 ........36 Table 4.8: SMB_MB1 ..............36 Table 4.9: IPMB1............... 36 Table 4.10:PMBUS1..............36 ACP-4020 User Manual/ 用户手册...
- Page 13 Table 4.22:PWR1 ............... 38 Appendix A Exploded Diagram & Parts List 分解图 &部件列表 分解圖&零件表... 39 Exploded Diagram & Parts List/分解图&部件列表/分解圖&零件表 ..40 Figure A.1 Exploded diagrams & parts list/分解图 & 部件列表/分 解圖 & 零件表.........40 Table A.1: Parts list/部件列表/零件表 ......41 xiii ACP-4020 User Manual/ 用户手册...
- Page 14 ACP-4020 User Manual/ 用户手册...
-
Page 15: General Information 概述/產品資訊
Chapter General Information 概述 產品資訊... -
Page 16: Introduction/产品简介/產品簡介
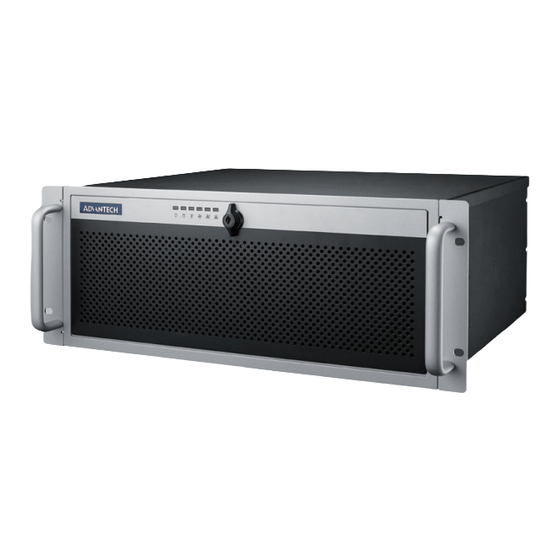
Introduction/ 产品简介 / 產品簡介 Advantech’s ACP-4020 series is a compact 4U rackmount chassis designed for machine automation and/or general industrial applications. This series supports ver- satile 15-slot backplanes — for half-sized SBC or ATX/microATX motherboards — with a highly-efficient switching power supply and easy-to-maintain cooling fans. This series provides 2 x front-accessible 3.5"... - Page 17 冷卻系統:2 個 9 cm x 9 cm (52 CFM)可前方更換冷卻風扇 濾網:1 個易於維護並且可重複使用的濾網位於前門後部 重量:8.5 kg (18.7 lbs) 產品尺寸 (W x H x D) :482 x 177 x 348 mm (19” x 7” x 13.7”) ACP-4020 User Manual/ 用户手册...
-
Page 18: Power Supply Options/电源选项/電源選項
+12V3@16A -5A@0.3A -12V@0.3A +12V4@16A +5Vsb@2.5A -5V@0.3A +5Vsb@4A -12V@0.5A -5V@0.5A 100,000 @ 25 °C (77 °F) MTBF CE/FCC/UL/CB/TUV/KC Safety 安规认证 安規認證 Caution! Power supply options are detailed on the product datasheet on the Advantech website. 请以研华公司官方网站公告的该机箱产品型录上的电源选项料号为准。 請以研華公司官方網站公告的該機箱產品型錄上的電源選項料號為準。 ACP-4020 User Manual/ 用户手册... -
Page 19: Environmental Specifications/环境规格/環境規格
10 ~ 85% @ 40 °C (104 °F), 10 ~ 95% @40 °C (104 °F), Humidity non-condensing non-condensing 湿度 濕度 1G rms Vibration (5 ~ 500Hz) 振动 振動 10 G with 11 ms duration, Shock half sine wave 冲击 衝擊 ACP-4020 User Manual/ 用户手册... -
Page 20: Dimensions Diagram/产品尺寸/產品尺寸
Dimensions Diagram/ 产品尺寸 / 產品尺寸 Figure 1.1 Dimensions diagram/ 产品尺寸 / 產品尺寸 ACP-4020 User Manual/ 用户手册... -
Page 21: System Setup系统安装/系統安裝
Chapter System Setup 系统安装 系統安裝... -
Page 22: Attaching The Ears & Handles/安装耳柄和把手/安裝耳翼和把手
机箱打开时,请小心安装或操作机箱内部组件。请务必关闭机箱电源并 断开电源线。接触机箱内部组件之前,请先触摸金属机箱接地。 機箱打開時,請小心安裝或操作機箱內部元件。請務必關閉機箱電源並 拔除電源線。接觸機箱內部元件之前,請先觸摸金屬機箱接地。 Attaching the Ears & Handles/ 安装耳柄和把手 / 安裝耳翼和把手 Figure 2.1 Attaching the ears and handles/ 安装耳柄和把手 / 安裝耳翼和把手 ACP-4020 User Manual/ 用户手册... -
Page 23: Removing The Top Cover/移除顶盖/移除上蓋
Removing the Top Cover/ 移除顶盖 / 移除上蓋 Figure 2.2 Removing the top cover/ 移除顶盖 / 移除上蓋 ACP-4020 User Manual/ 用户手册... -
Page 24: Hold-Down Clamp/压杆/壓桿
Hold-down Clamp/ 压杆 / 壓桿 Figure 2.3 Installing rubber cushions and hold-down clamp/ 安装橡胶垫和压杆 / 安裝橡膠墊和壓杆 ACP-4020 User Manual/ 用户手册... -
Page 25: Installing The Backplane Or Motherboard/安装底板或母板/安裝背板或主機
The cooper stubs can be found in the accessory box. DO NOT fasten the cooper stubs when installing a motherboard. 安装底板之前,请先将铜柱固定在机箱底部的托脚上。铜柱可在附件盒中找到。安装 母板时,则无需固定这些铜柱。 安裝底板之前,請先將銅柱固定在主機殼底部的托腳上。銅柱可在附件盒中找到。安 裝主機板時,則無需固定這些銅柱。 Figure 2.4 Installing the backplane/ 安装底板 / 安裝背板 ACP-4020 User Manual/ 用户手册... - Page 26 Figure 2.5 Installing a motherboard/ 安装母板 / 安裝主機板 ACP-4020 User Manual/ 用户手册...
-
Page 27: Installing A Cpu Card/安装 Cpu 卡/安裝 Cpu 卡
住 CPU 卡與壓桿,用 2 顆螺絲將壓桿固定在主機殼和 CPU 板卡上 ( 如圖 2.7 安裝 CPU 卡在底板上的 PICMG 插槽 )。 另外再取出附件盒內的另一顆特殊大圓頭螺絲,固定住 CPU 卡支架的另一端在 壓桿上 ( 如圖 2.8 鎖固 CPU 卡與支架 )。 Figure 2.6 Installing a CPU card bracket/ 安装 CPU 卡支架 / 安裝 CPU 卡支架 ACP-4020 User Manual/ 用户手册... -
Page 28: 安装 Cpu 卡在底板上的 Picmg 插槽/安裝 Cpu 卡在 底板上的 Picmg 插槽
Figure 2.7 Inserting the CPU card to the PICMG slot on the backplane / 安装 CPU 卡在底板上的 PICMG 插槽 / 安裝 CPU 卡在底板上的 PICMG 插槽 ACP-4020 User Manual/ 用户手册... -
Page 29: 固定 Cpu 卡和支架/鎖固 Cpu 卡與支架
Figure 2.8 Fastening the CPU card and bracket / 固定 CPU 卡和支架 / 鎖固 CPU 卡與支架 ACP-4020 User Manual/ 用户手册... -
Page 30: Installing Disk Drives/安装磁盘驱动器/安裝磁碟機
Do not loosen the four rubber cushions from the drive bay). 移除和安装驱动托架时请勿遗失托架上的四个橡胶垫 (如图 2.9 请勿遗 失托架上的四个橡胶垫) 。 移除和安裝驅動托架時請勿遺失托架上的四個橡膠墊 (如圖 2.9 請勿遺 失托架上的四個橡膠墊) 。 Figure 2.9 Do not loosen the four rubber cushions on the drive bay / 请勿遗失托架上的四个橡胶垫 / 請勿遺失托架上的四個橡膠墊 ACP-4020 User Manual/ 用户手册... -
Page 31: Installing Hdd Or Slim-Type Optical Disk Drive/安装硬盘或薄型光 驱/安裝硬碟或薄型光碟機
Please ensure the direction of the PCB side is correct as shown on the figure 2.10 while installing the 3.5" HDD. 安装 3.5 " HDD 时,请按照 2.10 图示确认 PCB 侧方向是否正确。 安裝 3.5 " HDD 時,請按照 2.10 圖示確認 PCB 側方向是否正確。 ACP-4020 User Manual/ 用户手册... - Page 32 Figure 2.11 Installing internal 2.5" HDD/ 安装内置 2.5" 硬盘 / 安裝內裝 2.5" 硬碟 ACP-4020 User Manual/ 用户手册...
- Page 33 Figure 2.12 Installing the slim-type optical disk drive/安装薄型光驱/安装薄型光碟机 ACP-4020 User Manual/ 用户手册...
-
Page 34: Installing Optional Mobile Rack (P/N: Ipc-Dt-3120E)/安装可选移 动支架(P/N: Ipc-Dt-3120E)/安裝可選移動支架(P/N: Ipc- Dt-3120E
DT-3120E) Users may purchase an optional mobile rack (P/N: IPC-DT-3120E) to covert a 3.5" drive bay to dual 2.5" SATA HDD trays. With this optional kit, the ACP-4020 can sup- port up to four 2.5" SATA HDD trays. 用户可选择购买移动支架 (P/N: IPC-DT-3120E) ,将 1 个 3.5" 磁盘托架转换为 2 个... -
Page 35: The Mobile Tray To Install A 2.5" Disk Drive
可選 IPC-DT-3120E 移動支架不支持 SAS HDD,且所能支持的磁碟機的 最大厚度為 9.6 mm。 Slide Rail or Pallet / 滑轨或层板 / 滑軌或層板 Figure 2.15 Install the chassis in the cabinet with the slide rail or pallet supplied / 请务必使用机柜里的层板或滑轨 , 确实将设备稳妥的安装固定在机柜内 / 請務必使用 機櫃裡的層板或滑軌 , 確實將設備穩妥的安裝固定在機櫃內 ACP-4020 User Manual/ 用户手册... - Page 36 ACP-4020 User Manual/ 用户手册...
-
Page 37: Operation 操作
Chapter Operation 操作... -
Page 38: The Front Panel/前面板
Dual USB ports: For connecting a wide range of USB devices for data transfer, backup or input. 电源开关:按下此按钮可开启或关闭系统电源。请使用系统关机或持续按下此按钮数 秒钟以关闭系统 ATX 电源。 系统重启按钮:按下此按钮可重启系统。 警报复位按钮:当系统发生故障时 (比如:风扇故障或者机箱过热) ,会响起警报声。 按下此按钮可停止警报声,并请检视整体系统有何异常状况。 双 USB 接口:此接口可连接各种 USB 设备用于数据传输、备份或输入。 電源開關:按下此按鈕可開啟或關閉系統電源。請使用系統關機或持續按下此按鈕數 秒鐘以關閉系統 ATX 電源。 系統重啟按鈕:按下此按鈕可重啟系統。 警報重置按鈕:當系統發生故障時 (比如:風扇故障或者機箱過熱) ,會響起警報聲。 按下此按鈕可停止警報聲,並請檢視整體系統有何異常狀況。 雙 USB 接頭:此接頭可連接各種 USB 設備用於資料傳輸、備份或輸入。 ACP-4020 User Manual/ 用户手册... -
Page 39: Led Indicators For System Status/系统指示灯/系統指示燈
LAN1 & LAN2 状态 正常 不亮 LAN1 & LAN2 狀態 Data transmit through LAN Blinking 通过 LAN 数据传输 闪烁 通過 LAN 資料傳輸 閃爍 Remark: LED lit-up status would be various with different motherboard built-in sys- tem. ACP-4020 User Manual/ 用户手册... -
Page 40: The Rear Panel/后面板/後面板
Figure 3.4 Rear panel for motherboard version / 后面板 (母板版本)/ 後面板 ( 主機板版本 ) Replacing the Cooling Fan/ 更换风扇 / 更換風扇 Figure 3.5: Replacing the system cooling fan (without removing the top cover)/ 更换系统风扇 (无需打开上盖)/ 更換系統風扇 (無需打開上蓋) ACP-4020 User Manual/ 用户手册... -
Page 41: Cleaning The Filters/清洗过滤器/清洗濾網
Cleaning the Filters/ 清洗过滤器 / 清洗濾網 Figure 3.6: Removing the filters/ 取出过滤器 / 取出濾網 ACP-4020 User Manual/ 用户手册... -
Page 42: Replacing The Power Supply/更换电源/更換電源
Replacing the Power Supply/ 更换电源 / 更換電源 Figure 3.7: Replacing the single power supply/ 更换單电源 / 更換單電源 ACP-4020 User Manual/ 用户手册... -
Page 43: Intelligent System Module 智能系统模块 智能系統模組
Chapter Intelligent System Module 智能系统模块 智能系統模組... -
Page 44: Getting Started/入门指南/入門指南
Getting Started/ 入门指南 / 入門指南 Configuring the Intelligent System Module An Intelligent System Module comes pre-installed inside your system chassis. The hardware switch will be fine tuned according to your system layout. With different system layouts, we can configure Intelligent System Module by H/W switch. Please refer to “Switch Settings”... -
Page 45: Dimensions/尺寸
一個 10 pin 的硬體跳線開關 , 用於系統的告警設定 一個 SMbus 接頭 , 連接主機版以監控系統狀態 至多接受四個溫度感應感應器 至多接受七個系統風扇 一個外接 IMPI 模組接頭 一個內建蜂鳴器 , 用於系統狀態監控 智能風扇自動控制 PCB 佈局上預留重力和濕度感測器 4.2.2 Dimensions/ 尺寸 Kernel module (9692S20000E): 115 x 55 mm (4.5 x 2.1 in) ... -
Page 46: System Status Monitoring & Management/系统状态监控和管理/系 統狀態監控與管理
4.2.4 System Status Monitoring & Management/ 系统状态监控和管理 / 系統狀態監控與管理 Real-time health status monitoring: Realtime system/main board FAN speed, temperature monitoring Remote system monitoring through WISE-DeviceOn Alarm on-board buzzer and LED signal 实时健康状态监控:实时系统 / 主机板风扇转速、温度监控 通过 WISE-DeviceOn 远程监控系统 ... -
Page 47: Alarm Notification/报警通知/各功能警示狀態
4.2.6 Alarm Notification/ 报警通知 / 各功能警示狀態 Table 4.1: LED & Beeping Meanings Item Status Criteria Beep 项目 状态 条件 蜂鸣器 項目 狀態 條件 蜂鳴示警 Normal Normal 正常 正常 电源 Redundant power Continuous beeps 電源 Warm module fail 持续警示音 报警 冗余电源模块故障 持續警示音... -
Page 48: Connectors And Switch Setting/接口和开关设置/接口與開關設定
4.2.7 Power Consumption/ 功耗 / 功耗 12 V @ 5.25 A Connectors and Switch Setting/接口和开关设置/ 接口與開關設定 Table 4.2: Hardware switch/ 硬件开关 / 硬體開關 Label/ 标签 / 標籤 Function/ 功能 / 功能 SW1 ~ 10 Hardware Switch/ 硬件开关 / 硬體開關 Table 4.3: Connectors/ 接口... - Page 49 Note! Please connect the fan connectors in the correct sequence: If two fans are being connected. The correct method is to connect them into FAN1 and FAN2. If fans are connected out of sequence the alarm will not func- tion correctly. 请按照顺序连接风扇接口。如果有一个以上风扇,请从...
-
Page 50: Board Layout/板卡布局/板卡佈局
Table 4.7: SW10 SW1.Pin10 Smart FAN/ 智能风扇 / 智能風扇 Enable/ 启用 / 啟用 Disable/ 禁用 / 關閉 Board Layout/ 板卡布局 / 板卡佈局 Figure 4.1 Connector locations for the intelligent system module/ 智能系统模块接口位置 / 智慧系統模組接口位置 Pin Define/ 针脚定义 / 針腳定義 Table 4.8: SMB_MB1 Pin 1 I2C_SCLK Pin 2... - Page 51 Table 4.12: SMB_3V_2 Pin 1 +V_SMB Pin 3 M_SDAT_R Pin 2 M_SCLK_R Pin 4 Table 4.13: LEDBOARD1 Pin 1 Pin 9 T-G_LED Pin 2 +V5_R Pin 10 T-F_LED Pin 3 +V12_R Pin 11 F-G_LED Pin 4 -V5_R Pin 12 F-F_LED Pin 5 -V12_R Pin 13...
- Page 52 Table 4.21: DEBUG2 Pin 1 EC_SCLK0 Pin 2 EC_SDAT0 Table 4.22: PWR1 Pin 1 +V12 Pin 4 Pin 2 Pin 5 ACP-2020 User Manual/ 用户手册 / 用戶手冊...
- Page 53 Appendix Exploded Diagram & Parts List 分解图 & 部件列表 分解圖 & 零件表...
- Page 54 Exploded Diagram & Parts List/ 分解图 & 部件列表 / 分解圖 & 零件表 Figure A.1 Exploded diagrams & parts list/ 分解图 & 部件列表 / 分解圖 & 零件表 ACP-4020 User Manual/ 用户手册...
- Page 55 鉸鍊 (右 / 左) 緩衝墊 擋片 Handle R/L Drives cage Chassis body 手柄 (右 / 左) 驱动器框架 机箱本体 把手 (右 / 左) 驅動器框架 機箱本體 Outer door frame Rubber cushion Alarm board 外门框 橡胶垫 报警板 外門框 橡膠墊 報警板 ACP-4020 User Manual/ 用户手册...
- Page 56 No part of this publication may be reproduced in any form or by any means, such as electronically, by photocopying, recording, or otherwise, without prior written permission from the publisher. All brand and product names are trademarks or registered trademarks of their respective companies. © Advantech Co., Ltd. 2022 www.advantech.com.cn 使用前请检查核实产品的规格。本手册仅作为参考。 产品规格如有变更,恕不另行通知。 未经研华公司书面许可,本手册中的所有内容不得通过任何途径以任何形式复制、翻...
Need help?
Do you have a question about the ACP-4020 and is the answer not in the manual?
Questions and answers