
Related Manuals for Kabuto FLAIR


Summary of Contents for Kabuto FLAIR
- Page 1 2018年02月版 FLAIR (フレアー) ・ 取扱説明書 保存用 ご使用になる前に この取扱説明書は、 ご使用になる前に 必ずお読みください。 また、 お読みの後は、 保管してくださいますようお願いいたします。...
-
Page 2: ご使用になる前に/当製品の使用素材について
■ご使用になる前に このたびは、 弊社製品をお買い上げいただき、 誠にありがとうございます。 この取扱説明書は、 ヘルメットの正しい取扱方法について説明しております。 ご使用前には必ず最後までこの説明書をお読みいただき、 お読みの後は、 当説明書を大切に保管し ていただきますよう、 お願いいたします。 ヘルメットは、 いかなる事故にも絶対安全という訳ではなく、 万一の際に危険の度合いを減らす装備 の一つで、 安全の一要素としてご理解のうえご使用ください。 安全快適なバイシクルライフを楽しむためにも、 以下の注意事項をよくご理解いただきますようお 願いいたします。 警 告: ●このヘルメットは 「自転車専用」 です。 オートバイやその他の用途には絶対に使用しないでください。 ●国で定められている交通規則に必ず従ってください。 ■当製品の使用素材について 汗を素早く蒸散し、 いつもサラッと快適。 「MOFF 」 は、 従来とは全く異なる新しい消臭方法 (ナノテク技術) により、 悪 ® 臭の元を中和、 無臭化します。 その効果は活性炭と比べ、 「悪臭の吸着速度は 10倍※」... -
Page 3: Table Of Contents
●別売 「 XF-7アジャスター」 および 「SLW-1アジャスター」 について インナーパッ ドについて ●フロン トパッ ドの脱着 ● 「ノーマルインナーパッ ド」 および 「A.Iネッ ト の取付位置 (Anti Insect Net) 」 ●各インナーパッ ドのお手入れについて ● (別売 ・ 補修用) インナーパッ ド各種について 正しい位置でヘルメッ トを装着する ●ヘルメ ッ トの正しいかぶり方 警 告 ( 必ずお読みください。 ) FLAIR INSTRUCTION MANUAL [ English Version ]... -
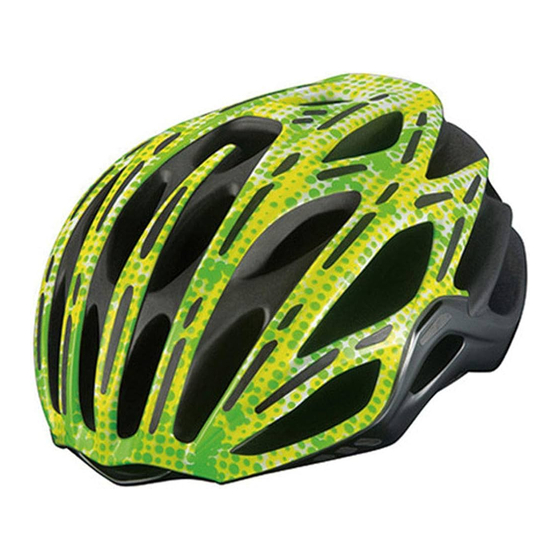
Page 4: 部位名称
■部位名称 Front ライナー シェル あごひも(MOFF ) ® ワンタッチバックル Raer ライナー シェル (付属品) XF-7 アジャスター ※1 SLW-1アジャスター ※1 (付属品) Inside ノーマルインナー パッド A.I ネット (7mm 厚) ※2 A.I.ネット ※2... -
Page 5: あごひもについて
あごひもについて あごひもは万一転倒などアクシデントの際に、 ヘルメットが容易に脱落しないようにする重要なパー ツです。 ヘルメット本来の性能を発揮させるためにも、 「あごひもの長さ」 や 「アジャストロックの位 置」 を適切に調整し、 「ワンタッチバックル」 を正しく留めてください。 ワンタッチバックルの着脱 ワンタッチバックルは、 あなたの頭にしっかりヘルメッ トを固定するための重要な装置です。 あごひもの両先端に付いている 「ワンタッチバックル」 を確実にとめましょう。 ワンタッチバックルの留め方 警 告 ワンタッチバックルをとめるときは、 お肌を挟まないようご注意ください。 顔などケガをするおそれがあります。 ワンタッチバックル ワンタッチバックルの外し方 : リリースボタンを押すと、 ワンタッチバックルが外れます。 押す リリース ボタン 押す ワンタッチバックル 外れる 警 告 : ●あごひもは正しくしっかり締めてください。 締めないままの走行は、 万一転倒した際に大変 危険ですので、... -
Page 6: アジャスターについて
アジャスターについて アジャスターは、 ヘルメットのズレやブレを抑えるために、 ヘルメット後頭部に装備されたサイ ズ調整機構の事です。 頭にぴったりフィットさせ、 しっかりホールドするようにアジャスターを調整しましょう。 また当製品には、 2種類のアジャスターを予め設定しております。 お使いいただく用途に合わせてお好みで交換することができます。 XF-7アジャスター SLW-1アジャスター ※標準装備 ※同梱 一般的なダイヤルでの 超軽量設計で簡素化 調整方式。 された調整方式。 普段使いに最適。 レース等の決戦用に最適。 XF-7アジャスターの調整方法 アジャスターを適度に緩めてからかぶり、 ヘルメットの前部分を押さえながら、 ダイヤルを適度に締めてください。 XF-7 アジャスターの調整方法 前を押さえながらダイヤルを回す ダイヤル ヘルメット前部を押さえなが ダイヤルを左へ回す ダイヤルを右へ回す ら、ダイヤルを回して適度に 緩めるとき 締めるとき アジャスターが広がる アジャスターが締まる 締めます。 ご注意 : アジャスターを調整する際は、 ダイヤルなどに毛髪が絡まないよう十分にご注意ください。... -
Page 7: Slw-1アジャスターの調整方法
SLW-1アジャスターの調整方法 アジャスターを適度に緩めてからか ぶり、 スライダーを操作してアジャ スターを適度に締めて ください。 ご注意 : スライダー ●アジャスターを調整する際は、 ス ライダーなどに毛髪が絡まないよ う十分にご注意ください。 ●SLW-1アジャスターは調整機 能や耐久性を簡素化した、 「超 外側へ移動 ゆるむ 軽 量・決戦用」を目的とし、 可 内側へ移動 しまる 能な限りの軽量化を目的として 設 計 されて おりま す。この た め、 使用頻度や用途・使用状況 等により、 耐久性が著しく低下 両手でスライダーをつまみながら、 する場合がありますので、 予め スライダーを操作してください。 ご了承ください。 アジャスターの 高さを変える... -
Page 8: アジャスターの脱着
SLW-1アジャスターの耐久性について あごひも 当製品には、 XF-7アジャスターよりさらに軽さを追求し た超軽量設計の 「SLW-1アジャスター」 を付属していま す。 SLW-1アジャスターは調整機能や耐久性を簡素化し た、 「超軽量・決戦用」 を目的とし、 可能な限りの軽量化 を目的として設計されております。 このため、 使用頻度や 用途・使用状況等により、 耐久性が著しく低下する場合 XF-7 がありますので、 予めご了承ください。 アジャスター 図 5 (別売) 「XF-7アジャスター」 および 「SLW-1アジャスター」 について XF-7アジャスターおよびSLW-1アジャスターは、 補修用としてもご用意しております。 詳しくは、 当製品掲載のカタログもしくはホームページに掲載のパーツリストをご覧ください。 Kabuto 検索 ご注意 : 弊社製品のアジャスター各種は、 各モデルの専用設計となっております。 補修用をお買い求めの際には、 ご使用のヘルメットに適合した部品をお買い求めください。... -
Page 9: インナーパッドについて
インナーパッドについて フロントパッ ドの脱着 フロントパッドのお手入れや交換の際は下記の要領で取り外してください。 取り外しかた フロントパッドは、 アジャスターと同様の固定方法 (スナップ方式) で装着されています。 図1の○印部分にある固定部の根元をしっかり持って、 手前に引っ張って固定部から取り外し て下さい。 (図2) (固定部は4カ所あります。 ) フロ ン ト パッ ド 固定部 (4 カ所) 固定部 図 1 図 2 取り付けかた 固定部 フロントパッドが取り付けられていた場所 (4 カ所) に取り付けて下さい。 (図3 ○印部分) ※両サイドについては、 後側の取り付け部 に装着してください。 図 3 ご注意 ●フロン トパッ ドを取り外す際は、 必ず固定部付近を持って取り外してください。 ねじったり無理に引っ張ったりすると破損の原因となります。... -
Page 10: ノーマルインナーパッ ド」 および 「A.iネッ ト (Anti Insect Net) 」 の取付位置
この製品には、 用途やフィッティングに合わせて使い分けができる 「2種類」 の内装が付属されてい ます。 お好みによりパッドを取り替えてください。 ※標準は 「ノーマルインナーパッド」 が装着 「ノーマルインナーパッ ド」 および 「A.Iネッ ト 」 の取付位置 (Anti Insect Net) 下図のようにそれぞれのパッドをヘルメット本体内部にある マジックテープに押し付けて貼り付けます。 ※フロントパッドは、 ノーマルインナーパッド、 A.I.ネットのいずれでも使用します。 ノーマルインナーパッ ド ※標準装備 前 フロ ン トパッ ド ノーマルインナーパッドセット (7mm 厚のみ) ●SLW-1アジャスターとの 組合せで、 より 「軽量仕様」 としてお使いいただく場合に。 ●エア導入効果を イ ンナーパッ ド (サイ... -
Page 11: 各インナーパッ ドのお手入れについて
で陰干しを行ってください。 ※MOFF 素材のお手入れについては4ページをご覧ください。 ® (別売 ・ 補修用) インナーパッ ド各種について インナーパッドは消耗品です! 常日ごろより使用されているヘルメット内部のインナーパッドは消耗品です。 傷んだインナーパッド をそのまま使い続けると破れてしまい、 フィット感などに悪影響をおよぼしかねません。 古くなったインナーパッドは、 早期に交換されることをお薦めします。 別売・補修用各インナーパッド各種について詳しくは、 当製品掲載のカタログもしくはホームページに掲載のパーツリストをご覧ください。 Kabuto 検索 ご注意 別売のインナーパッドセットをお買い求めの際は、 お使いのヘルメットのモデルを よくご確認のうえ、 販売店などへご注文ください。 正しい位置でヘルメットを装着する ヘルメットを前から後ろにかけて水平になるように着用してください。 このときにヘルメットの先端 がまゆ毛のすぐ上にない場合は、 正しく装着できていません。 (装着の際は鏡を見ながら調整してく ださい) また、 あごひもの長さやアジャストロックの調整もヘルメットを正しく装着するうえで大変重 要な部分です。 当説明書の該当項目をよくお読みのうえ、 正しく装着してください。 ヘルメッ トの正しいかぶり方 正しい... -
Page 12: 警 告 ( 必ずお読みください
警 告 : 下記の内容は必ずお読みください。 「あごひもは必ずしっかり締めてください。 」 あごひもを締めなかったり、 締め方が緩かったりすると、 万一転倒した時などに脱げてしまい、 頭を守ることができず非常に危険です。 また、 ヘルメットの下に、 帽子・ フード・バイザー・ヘッ ドフォン等を着用しないでください。 ヘルメットがずれたり、 落ちるおそれがあります。 「大きな衝撃を受けたヘルメッ トは外観上に損傷がなくても、 ご使用にならないでください。 」 ヘルメットはシェル及び衝撃吸収ライナーが潰れることで、 衝撃エネルギーを吸収します。 大きな 衝撃を受けたヘルメットは、 既にライナーが潰れていることが多く、 そのまま使用すると、 再度衝撃 エネルギーを吸収できず非常に危険です。 外観に傷がなくても、 使用しないでください。 「ヘルメ ッ トの改造および分解は絶対にしないでください。 」 ヘルメットに穴を開けたり、 内部の衝撃吸収材を削ったり、 また、 あごひもなどは絶対に改造し ないでください。 ヘルメット本来の性能が発揮できなくなり非常に危険です。 「ヘルメ... -
Page 13: Flair Instruction Manual [ English Version ]
FLAIR INSTRUCTION MANUAL NOTES BEFORE USE BE SURE TO READ THIS MANUAL BEFORE USING THE HELMET. KEEP THE MANUAL IN A SAFE PLACE FOR FUTURE REFERENCE. - Page 14 ■NOTES BEFORE USE Thank you for purchasing the Kabuto helmet. This manual explains how to use your Kabuto helmet correctly. Please take time to read this instruction manual before using the helmet, and keep the manual in a safe place for future reference. No helmet can protect the user 100% in any case of accidents, but it can reduce the risk of injury. Please make sure you understand the following warnings and enjoy riding your bicycle safely. Warning! ●This helmet is for bicycle use only. Do not use this helmet for motorcycle riding or any other activities. ●Please obey all traffic rules. ■Features of materials: "MOFF " is developed with a new odour elimination ® nanotechnology. Instant deodorization with an environment- friendly nature as well as safety characteristics. for Chinstrap It neutralizes the source of offensive odour and make it odourless with superbly greater. MOFF features: ® * Neutralize as well as adsorb stench, enabling the suppressing effect to stay longer. * Capable of responding to alkaline stench. * Neutralize stench which is the low molecular mass substances 10 times quicker than charcoal. * Neutralize stench 100 times greater amount than charcoal does. * Does not remove good flagrance, which is a high molecular mass substance. * Prevent bacteria that cause the stench from proliferating. *MOFFⓇ is a registered marks of PROJE JAPAN CORP. COOLMAX for quick sweat evaporation and constant dry ®...
- Page 15 ■INDEX NOTES BEFORE USE / Features of materials INDEX Part Names Chinstraps ●Fastening the strap buckle ●Adjusting the length of the strap Adjuster ●How to adjust the XF-7 Adjuster ●How to adjust the SLW-1 Adjuster ●Changing the adjuster height (3-levels up and down) ●Detach/Attach adjuster ●(Replacement) XF-7 Adjuster and SLW-1 Adjuster Linings ●Detach/Attach front pad ●Replacing normal inner pads and A.I. Net (Anti Insect Net) ●How to clean linings ●(Replacement) Linings Wearing Helmet Properly Warning! (Be sure to read these instructions.)
- Page 16 ■Part Names Front Liner Shell Chinstrap (MOFF®) Strap Buckle Rear Liner Shell (Packaged) XF-7 Adjuster ※1 SLW-1 Adjuster ※1 (Packaged) Inside Normal Inner Pads (7mm) ※2 ※2 A.I. Net...
- Page 17 Chinstraps Chinstraps play an important role in an accident, preventing the helmet from coming off. In order to maintain the original performance of the helmet, make sure to adjust "Chinstraps length" and "Adjustment locks positions" properly and fasten "Strap buckle" correctly. Fastening the strap buckle The strap buckle is important for secure fitting. Make sure to fasten the strap buckle firmly. How to fasten the strap buckle WARNING! Strap buckle Be careful not to pinch your skin when fastening the strap buckle.
- Page 18 Adjuster Adjuster is the mechanism at the rear of the helmet to hold the helmet from wobbling and moving on your head. Fit the helmet onto your head, and adjust the mechanism so that the helmet holds your head securely. FLAIR has two types of adjuster packaged as standard accessories. Use the one that fits your usage better. XF-7 Adjuster SLW-1 Adjuster *Attached at factory. *Packaged Regular dial Ultra light and simple adjustment type. adjustment type. Good for everyday Designed for special use. occasion such as racing. How to adjust the XF-7 Adjuster First, loosen the XF-7 Adjuster dial, and then put on the helmet. Then, hold the front side of the helmet against your head and tighten the adjuster dial. (See below) Hold the front part and turn the dial. Adjuster Dial Hold the front side of the helmet and tighten the XF-7 Adjuster using...
- Page 19 How to adjust the SLW-1 Adjuster First, loosen the adjuster, then wear the helmet. Adjust the fit by tightening the adjuster with the slider. CAUTION! Slider ●Be careful with your hair, not to get it tangled in the slider at the adjustment procedure. ●SLW-1 Adjuster is ultra light, squeeze Loosen and move intended to be used at special outward occasion such as racing. As squeeze Tighten and move such, it is designed to simplify its inward adjustment function and enhance its durability by cutting down its Pinch and squeeze the slider with both weight to the limit. Please be hands to operate. aware the adjuster durability may be deteriorate significantly by frequency, application, and condition of usage. Changing the adjuster height (3-levels up and down) XF-7 Adjuster XF-7 Adjuster Hold near the base of Adjuster and slide it up or Mounting part Mounting part down (low, mid or high) to adjust the angle. (Fig. 1) ...
- Page 20 XF-7 condition of usage. Adjuster Fig. 5 (Replacement) XF-7 Adjuster and SLW-1 Adjuster XF-7 Adjuster and SLW-1 Adjuster are available as replacement parts. Please refer to Parts List on our website for more information about replacement. http://www.ogkkabuto.com/ CAUTION! Kabuto’s helmet adjusters are developed exclusively to each models. Please confirm the model at purchasing the replacement.
- Page 21 Linings Detach/ Attach front pad To clean and exchange the front pad, please follow the procedures below. To Detach Front pad is attached on the helmet with the same fixing method (snap) of the adjuster. Hold the root of the fixing part indicated by circle in Fig.1, then pull it out to detach. (Fig.2) (Four points of fixed part) Front Pad Four points of fixed part Fixing part Fig. 1 Fig. 2 To Attach Four points Attach the front pad at the front side. of fixed part (Fig.3 circled part) *Attach both side of the front pad to the rear side fixing holes on the helmet. Fig. 3 CAUTION! ●To detach the front pad, make sure to hold the root of the fixing part. Pulling or twisting it by force will lead to the breakage. ●Make sure to remove the front pad once before attaching or detaching the A.I. Net.
- Page 22 2 types of interior are packaged as standard accessory. *normal inner pad set is attached at shipment. Replacing normal inner pads and A.I. Net (Anti Insect Net) Attach the inner pad on the hook-and-loop fasteners properly. *Use the front pad together with normal inner pad or A.I. Net. Normal Inner Pads FRONT FRONT Front Pad Normal Inner Pad Set (7mm) ●Use in combination with SLW-1 adjuster will make lighter specification. ●Best Air Introduction Inner Pad (Side) Inner Pad (Top) A.I. Net *Packaged Front Pad 前 Adjuster fixing hole (Basket) Attachment hole Hole on the A.I. Net A.I. Net ●Protection against Pass the edge insects from Air ...
- Page 23 How to clean linings Linings are removable and washable. Keep linings clean by washing periodically. Use warm water (35ºC/95ºF or cooler) with small amount of hair shampoo or ph-neutral detergent. Hand wash them gently and rinse thoroughly. Dry linings with a dry cloth after washing, and leave them in a shaded and well-ventilated place.
- Page 24 WARNING Be sure to read these instructions. ●This helmet is designed for bicycle use only. Never use the helmet for purposes or activities other than bicycle riding. ●The helmet should be worn in a way that it protects your forehead, with the edge just above your eyebrows, and never pushed far over the back of your head. Wear the helmet so it is level from front to back. ●No helmet can protect the wearer against all injuries or foreseeable impacts. ●Before riding a bicycle, make sure to adjust the helmet so it fits your head correctly. The strap should be positioned not to cover the ears, the buckle positioned away from the jawbone, and the strap and buckle adjusted to be both comfortable and secure. ●Your helmet is effective as protection only when it is worn properly. You should try different sizes to choose the size which feels secure and comfortable on your head at time of purchase. ●Please handle the helmet with care. The helmet is designed to absorb shock by partial destruction of the liner and its damage may not be visible. DO NOT sit on it, drop it on the floor or otherwise cause impact. ●If subjected to a severe impact, the helmet should be discarded and destroyed. ●Wipe the helmet with common ph-neutral detergent diluted with clear water. Never use any petroleum, thinner, benzine, hot water above 50° C/122ºF or saline water. ●Do not leave the helmet in the direct sunlight or where the temperature may surpass 50ºC/122ºF such as in a car or near a heater, and/or avoid leaving in a humid place for a long time. Doing so will affect the materials and the performance of the helmet will diminish. ●Do not paint the helmet. Paints may reduce the original protective performance of the helmet considerably. ●Do not modify the helmet. In order to fully maintain the performance of the helmet, do not attempt to take it apart or change it in any manner that involves making holes in it or cutting it (or any of its parts) other than as recommended by the manufacturer. ●This helmet should not be used by children while climbing or doing other activities when there is a risk of strangulation/hanging if the child gets trapped with the helmet. THE EFFECTS OF THE DIRECT SUNLIGHT Do not leave the helmet in the direct sunlight.
- Page 25 株式会社 オージーケーカブ ト 〒 5 7 7-0 0 1 6 大阪府東大阪市長田西6丁目3-4 TEL : 0 6-6 7 4 7-8 0 3 1 ホームペー ジ : Kabuto 検索 No.JFRAIR-18A/KA...
Need help?
Do you have a question about the FLAIR and is the answer not in the manual?
Questions and answers