Advertisement
Quick Links
General Instructions
02DTSHOA0705LFD3WBF-V1-PEFC
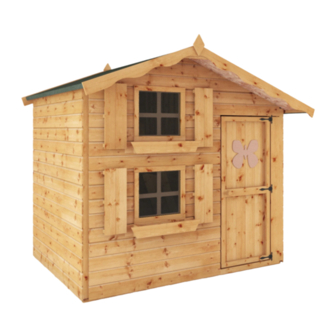
7x5 Double Storey Playhouse
BEFORE YOU START PLEASE READ THE INSTRUCTIONS CAREFULLY
- Check the pack and make sure you have all the parts listed in the parts list provided.
- When you are ready to start, make sure you have the right tools at hand (not supplied) including a
Phillips screwdriver, Flathead screwdriver, Stanley knife, Wood saw, Step ladder, Hammer, Spirit level and
a Drill with 2mm bit.
- Ensure there is plenty of space and a clean dry area for assembly.
- Ensure you have enough time to build the product to ensure the building is water tight.
TIMBER
As with all natural materials, timber can be a ected during various weather conditions. For the duration
of heavy or extended periods of rain, swelling of the wood panels may occur. Warping of the wood may
also occur during excessive dry spells due to natural processes. Unfortunately, these processes cannot be
avoided but can be helped. It is suggested that the outdoor building is sprayed with water during
extended periods of hot weather and sheltered as much as possible during rain or snow.
Once your garden building has been installed it will need to be treated as soon as possible and annually
to prevent the timber from deteriorating and to waterproof it. This is required to maintain the anti-rot
guarantee.
Dip Treated buildings - Require a preservative treatment to protect against rot and decay and a water-
proof treatment to prevent water ingress. Pressure Treated buildings - Require a waterproof treatment to
prevent water ingress. Log Cabins - Are supplied untreated and require a preservative and waterproo ng
treatment.
We also recommend treating the building prior to construction.
POSITIONING YOUR PLAYHOUSE
When thinking about where the building and base is going to be constructed:
Ensure that there will be access to all sides for maintenance work and annual treatment.
We recommend a minimum space of 2m around a playhouse, away from any structure or obstructions
such as fences, garages, houses, overhanging branches, washing lines or electrical wires.
It is recommended that the position of the Playhouse is not in direct sunlight.
Activity toys such as swings and slides for towers shall not be installed over concrete, asphalt or
any hard surface.
BUILDING A BASE
Ensure the base is level and is built on rm ground, to prevent distortion, checking with a spirit level.
Refer to diagrams for the base dimensions. The base should be slightly smaller than the external
measurement of the building, i.e. The cladding should overlap the base, creating a run o for water. It is
also recommended that the oor be at least 25mm above the surrounding ground level to avoid
ooding.
TYPES OF BASE
- Concrete 75mm laid on top of 75mm hard-core.
- Slabs laid on 50mm of sharp sand.
- Wooden base.
WARNING: Only for domestic use
Not suitable for children under 36 months due to
small gaps and danger of falling from heights.
Please retain product label and instructions for future reference
WARNING
•
ONLY SUITABLE FOR DOMESTIC USE.
!
•
TO BE USED UNDER DIRECT SUPERVISION OF AN ADULT.
•
THIS PRODUCT SHOULD NOT BE MODIFIED IN ANY WAY. ANY MODIFICATIONS SHOULD BE
DETERMINED BY THE MANUFACTURER AND CARRIED OUT ACCORDING TO THE INSTRUCTIONS.
•
DO NOT ALLOW YOUR CHILD TO PLAY WITH ANY COMPONENT PARTS PRIOR TO ASSEMBLY.
•
MAX AGE OF 14 YEARS.
•
THIS TOY IS FOR OUTDOOR USE ONLY.
•
USE A WATER BASED TREATMENT THAT IS EN71 TESTED
CAUTION
Wood is a natural product and can change post manufacture. So despite every e ort being
made to ensure the material used are cut and machined to a clean and smooth nish, care
must be taken when handling the product and preparing for use by your child.
Any areas of concern, in the play areas, can be rubbed over with sandpaper to achieve a
smoother nish. Alternatively, call the customer service department who will be happy to
arrange replacement panels/parts.
All buildings should be erected by
x2
atleast two adults.
DO NOT ALLOW
CHILDREN TO ASSIST.
To prevent damage during
assembly, you MUST pilot
drill all screw holes and
ensure all screw heads are
2mm Drill bit
countersunk.
12mm CSK
Whilst all products manufactured are made to the highest standards of Safety and in the case of childrens products
independently tested to EN71, we cannot accept responsibility for your safety whilst erecting this product.
**Protim Aquatan T5 (621)**
Your building has been dip treated with Aquatan.
Aquatan is a water-based concentrate which is diluted with water, the building has been treated by the
correct application of Aquatan solution and then allowed to dry.
Aquatan is a decorative nish to colour the wood, which is applied industrially to timber fence panels
and garden buildings.
Aquatan undiluted contains: boric acid, sodium hydroxide 32% solution, aqueos mixture of sodium
dioctyl sulphosuccinat and alcohols: 2, 4, 6-trichlorophenol.
In all instances for assistance with your product, please contact customer care on :
01636 821215 or customerservice@merciagp.co.uk
Mercia Garden Products Limited,
Sutton On Trent,
Newark,
Nottinghamshire,
NG23 6QN
Winter = High Moisture = Expansion
Summer = Low Moisture = Contraction
For ease of assembly, you will
need a tape measure to check
dimensions of components.
www.merciagardenproducts.co.uk
P1
Advertisement

Related Manuals for Mercia Garden Products 02DTSHOA0705LFD3WBF-V1-PEFC


Summary of Contents for Mercia Garden Products 02DTSHOA0705LFD3WBF-V1-PEFC
- Page 1 In all instances for assistance with your product, please contact customer care on : ooding. 01636 821215 or customerservice@merciagp.co.uk TYPES OF BASE Mercia Garden Products Limited, - Concrete 75mm laid on top of 75mm hard-core. Sutton On Trent, - Slabs laid on 50mm of sharp sand.
-
Page 2: Product Codes
Take a look at the di erent playhouse options below which refers to the product code combinations used to create each playhouse. Model Product Codes 7x5 Playhouse 02DTSHOA0705LFD3WBF-V1-PEFC (Playhouse) SI-002-001-0015 7x6 Playhouse With Veranda 02DTSHOA0705LFD3WBF-V1-PEFC (Playhouse) 02DTOAVP0701-V1-PEFC (Veranda Pack) SI-002-001-0107... - Page 3 02DTSHOA0705LFD3WBF-V1-PEFC Please retain product label and instructions for future reference Look for the symbols and follow the safety guidlines below. Ensure screw heads are sub ush and Ensure the screws are 12mm gap sand down any xed squarely and do surrounding the splinters created.
- Page 4 Please retain product label and instructions for future reference 7x6 Playhouse With Veranda Overall Dimensions: Gable Block C - 28x28x570mm QTY 2 Width = 2327mm FS2828-590mm (angled) 02DTSHOA0705LFD3WBF-V1-PEFC Depth = 1824mm 02DTOAVP0701-V1-PEFC Height = 2042mm Wooden Door Handle QTY 1 Gable Cover Trim A - 12x28x630mm QTY 2...
- Page 5 Please retain product label and instructions for future reference Please retain product label and instructions for future reference Step 1 Pre Assembly Parts needed - & & 2 & Before assembling remove the transportation Pre drill hole Fix the Window Blocks (No. 39) to the Windows (No. 12) as shown with 1x30mm screw. blocks from the bottom of each panel.
- Page 6 Please retain product label and instructions for future reference Step 2 Step 3 Parts needed - & & Parts needed - & & Pre drill Pre drill hole hole Place the Door Panel (No.2) and Back Panel Keep the assembled Door and Back Panels (No.3) on a at level surface, with the framing (No.2 &...
- Page 7 Please retain product label and instructions for future reference Step 5 Step 4 Parts needed - Parts needed - & 1 & & Pre drill Pre drill hole hole Place the Floor (No.1) on a rm and level Flip the assembled Door Panel (No. base, ensure the base has suitable drain- 2 &...
- Page 8 Please retain product label and instructions for future reference Step 7 Step 9 Parts needed - & Parts needed - Pre drill Pre drill hole hole Place the assembled Door Panel (No.2) Locate the Bunk Floor Support Bar and the Window Panel (No.4) on top of (No.13) onto the Door Panel (No.2) at a the oor, ensuring the panels are posi- height of 1010mm from the top of the...
- Page 9 Please retain product label and instructions for future reference Step 11 Step 13 Parts needed - 6 & Parts needed - Pre drill Pre drill hole hole Locate two Bunk Floor Block C’s (No.17) Place the Bunk Floor (No. 9) on top of ush to the Door panel framing.
- Page 10 Please retain product label and instructions for future reference Step 14 Step 16 Parts needed - Parts needed - Pre drill Pre drill hole hole Locate the Safety Rail (No.10) on top of Place Roof 1 (No.6) onto the shorter the bunk oor, ensure the safety rail is ush side of the building, ensuring the roof 50kg...
- Page 11 Please retain product label and instructions for future reference Step 18 Step 19 Parts needed - & & & Pre drill Pre drill Once the roof is tted and the building hole hole is square, secure the building to the Fix Gable Cover Trim B (No.
- Page 12 Please retain product label and instructions for future reference Step 20 Parts needed - Pre drill hole Cut the felt (No. 40) into 3 sheets measuring: 1900mm (L) X 1000mm (W) aand lay onto roof. Start at the bottom of the roof and work your way up so that rain pours over the top of the laps and not under them.
- Page 13 Please retain product label and instructions for future reference Step 22 Step 21 Parts needed - & Parts needed - & & Pre drill Pre drill hole hole Locate a Window Box (No.31) below Fix the Fascias (No. 25 & 26) to the each window on the Door Panel.
- Page 14 Please retain product label and instructions for future reference Step 23 Parts needed - & & & Pre drill hole It is ESSENTIAL that you apply wood Place a Window Frame Cross treatment immediately after the building (No. 37) against the inside of each has been assembled.
- Page 15 Please retain product label and instructions for future reference 7x1 Veranda add on Pack B steps: Step 22a Parts needed - & Pre drill Step 20a hole Position Support Rail B (No. 46) on Parts needed - top of the Veranda Floor (No. 42) Pre drill hole and ush to the Left Side Rail (No.
-
Page 16: Internal View
Please retain product label and instructions for future reference Step 24a Step 25a Parts needed - Parts needed - Pre drill Pre drill hole hole Cut felt (No. 40) into 3 sheets Position Support Rail A (No. 45) on top of the Veranda Floor (No. - Page 17 Please retain product label and instructions for future reference Step 27a Step 26a Parts needed - & Parts needed - & & Pre drill Pre drill hole hole Locate a Window Box (No.31) onto Fix the Fascias (No. 25 & 26) to the the Front Rail (No.43) of the Veranda.
- Page 18 Please retain product label and instructions for future reference Step 28a Parts needed - & & & Pre drill It is ESSENTIAL that you apply wood hole Place a Window Frame Cross treatment immediately after the building (No. 37) against the inside of each has been assembled.
- Page 20 REGISTER FOR YOUR PLEASE SCAN HERE: ANTI-ROT GUARANTEE TODAY...
Need help?
Do you have a question about the 02DTSHOA0705LFD3WBF-V1-PEFC and is the answer not in the manual?
Questions and answers