Advertisement
Available languages
Available languages
Quick Links
Advertisement

Subscribe to Our Youtube Channel
Related Manuals for Nivel System EL-32


Summary of Contents for Nivel System EL-32
- Page 3 1. Features and Functions This product is a new type of digital level with the latest digital readout which helps users both read the result efficiently and reduce visual measurement errors. The digital level meets the requirements of various kinds of construction surveying,topographic surveying,...
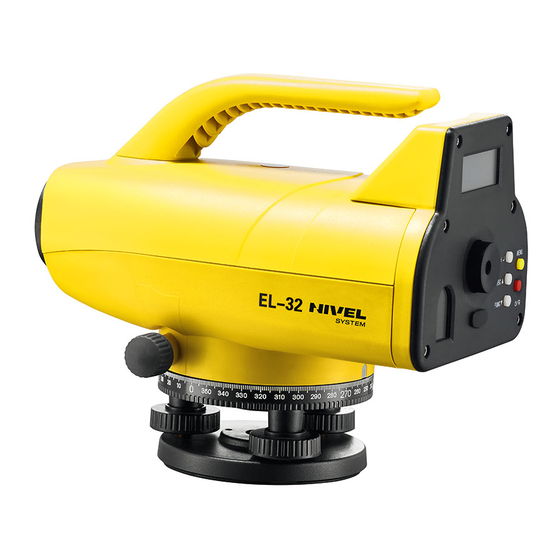
- Page 4 3. Instrument Description 3.1、Parts of the Instrument 1.Coarse Sight 2.Lifting handle 3.Objective lens 4.Trigger Key 5.Focusing hand wheel 6.Horizontal tangent hand wheel 7.Graduated circle 8.Footscrews 9. Tribrach 10.Graduated circle indicator 11.Power/Communication connector 12.Keys 13.Reticule adjusting window 14.Circular bubble adjusting screw 15.Window for circular bubble 16.Eyepieces 17.Display...
- Page 5 : Comments 1、Press and hold the key for two second to turn on or off the instrument; press and hold the key for less than two second to turn on or off the LCD backlight. 2、When the LCD backlight mode is on, the instrument will turn off the LCD backlight automatically after a five-minute inactivity.
- Page 6 Horizontal Angle Measurement 4.5、Leveling Surveying a. Press the power key to switch the instrument on. Observe through the coarse sight and approximately sight the barcode on the leveling staff. b. Turn the focusing hand wheel until there is no parallax and the staff is sharply defined.
- Page 7 4.6、Leveling Surveying with Certain Benchmark To use this mode, set a benchmark first and measure several points (nine points at most). The height differences between the points and the benchmark point will be calculated. Press the Rh:0.0000m Press power key MENU Hd:...
- Page 8 point and the display of the sighting distance of the current measuring point. 2: Under this mode the record cannot be stored. The record will be automatically deleted after exiting. 5. Parameter Settings 5.1、Auto shutdown When the auto shutdown mode is switched on, the instrument will shut down automatically after a thirty-minute inactivity.
- Page 9 Parameters Press MENU Press FUNC AUTO PWR: key for three key twice times Parameters Parameters Press △ H INV Staff: off INV Staff: On key to switch Press MENU Rh↓ 0.0000m (In this mode there is a ↓ Key twice Hd:...
- Page 10 Press the Rh:0.0000m Press MENU Power key Hd: 0.000m key twice Sight Staff 1 with the Reticle Reticle instrument at Station A→R1:1.3868m A→R1:30m A and press MEAS key (Press FUNC key to confirm) Sight Staff 2 with the Reticle Reticle instrument at Station A→R2:15m A→R2:1.3864m...
- Page 11 displayed. Press the [H] key according to the instruction on the screen, and the data will be deleted. 7.3 Data export manual for Digital Level: 1. connect to the computer using USB cable. 2. Execute "level_data_manage" on PC. Press [Read] button to retrieve saved data from Digital Level. Instruction: [Save]: export and save data as Excel Document [Cope]: copy displayed data into clipboard...
-
Page 12: Terms And Conditions Of Warranty
Court with jurisdiction over the Warrantor’s registered office. 5. When the warranty services provided by the service centre are needed, please do not hesitate to contact your seller or a Nivel System service centre directly e-mail: service@nivelsystem.com ... - Page 13 1. Opcje i funkcje: Niniejszy produkt to nowy rodzaj niwelatora elektronicznego z najnowszym elektronicznym układem odczytowym, który pomaga użytkownikom zarówno odczytać wyniki a przede wszystkim zredukować ilość błędów pomiarowych związanych z odczytem manualnym. Niwelator elektroniczny spełnia wymagania różnego rodzaju branż takich jak geodezja i budownictwo. Instrument ten jest całkowicie zamknięty.
- Page 14 2.2 Ładowanie i korzystanie z baterii a. Podłącz ładowarkę do złącza zasilania/komunikacji z boku urządzenia i podłącz ładowarkę do gniazdka AC 220 Volt. b. Mrugający symbol Przycisk Pierwsza funkcja Druga funkcja Pokazuje przewyższenie baterii oznacza, Potwierdzenie że bateria jest pomiędzy mierzonym ładowana;...
- Page 15 4. Informacje o przycisku wyzwalania pomiaru: Przycisk wyzwalający pomiar to klawisz na górze obudowy. Jest to przycisk dotykowy. Dotknij przycisk, aby wyzwolić pomiar. 2.4 Łata kodowa W celu prawidłowego działania elektronicznego układu odczytowego wysokości należy stosować dedykowane łaty niwelacyjne. Należy pamiętać, że dokładność pomiaru przez niwelator elektroniczny zależy również...
- Page 16 Pomiar kąta poziomego 3.5 Niwelacja a. Naciśnij przycisk, aby włączyć urządzenie. Przy pomocy kolimatora wyceluj zgrubnie na łatę niwelacyjną. b. Obróć pokrętło ostrości do momentu, gdy nie ma paralaksy, a kod na łacie niwelacyjnej jest ostry. Przy pomocy leniwki koła poziomego doprowadź pionową kreskę...
- Page 17 3.6 Niwelacja względem reperu – stałego punktu Aby skorzystać z tego trybu, należy najpierw ustawić punkt odniesienia - reper a następnie wykonać pomiar kilku punktów (maksymalnie dziewięciu). Obliczone zostaną różnice wysokości między punktami i punktem odniesienia. Naciśnij przycisk Naciśnij Rh: 0.0000 m przycisk MENU Hd: 0.000 m zasilania...
- Page 18 5. Zmiana parametrów 5.1 Automatyczne wyłączanie Po włączeniu trybu automatycznego wyłączania, niwelator zostanie automatycznie wyłączony po trzydziestu minutach bezczynności w celu oszczędzania akumulatora Naciśnij przycisk Naciśnij przycisk △H aby Parameters MENU trzy razy zmienić AUTO PWR: ON Naciśnij przycisk Powrót do trybu MENU dwa razy pomiaru 5.2 Podświetlenie ekranu LCD...
- Page 19 5.3 Odwrócona łata W tym trybie, łata może być odwrócona tak aby wykonywać pomiaru np. w odniesieniu do sufitu Wykonaj poniższe czynności, aby uruchomić tryb pomiaru do łaty odwróconej. Naciśnij dwa razy przycisk Parameters Naciśnij przycisk FUNC MENU trzy razy AUTO PWR: ON Parameters Parameters...
- Page 20 6. Sprawdzenie i rektyfikacja 6.1 Libella pudełkowa Po rozstawieniu statywu i zamontowaniu na nim niwelatora przy pomocy śrub nastawczych umieszczonych w spodarce doprowadź pęcherzyk libelli do górowania. Obrócić niwelator o 180 stopni i jeśli pęcherzyk libelli oddala się od pozycji środkowej, wymagana będzie rektyfikacja.
- Page 21 Reticle Reticle Ze stanowiska A wykonaj pomiar A R1: 30 m AR1: 1.3868m na łatę 1 Naciśnij FUNC aby zatwierdzić Reticle Reticle Ze stanowiska A wykonaj pomiar A R2: 15 m AR2: 1.3864m na łatę 2 Naciśnij FUNC aby zatwierdzić Reticle Ze stanowiska B Reticle...
- Page 22 7 Zapis, kasowanie i eksport danych 7.1 Zapis danych Przycisk [REC] musi zostać wciśnięty każdorazowo jeżeli dane z pomiaru mają zostać zapisane w przeciwnym razie dane po wyświetleniu zostaną utracone. 7.2 Kasowanie danych: Naciśnij przycisk [Menu] kilkukrotnie aż na ekranie pojawi się słowo "upload". Następnie naciśnij przycisk [FUNC] aż...
- Page 23 9. Specyfikacja Powiększenie 32 X Obraz Prosty Odchylenie standardowe Odczyt elektroniczny +/- 1.0 mm/km na km podwójnej Odczyt optyczny +/- 1.5 mm/km niwelacji Dokładność odczytu D < 10m < +/- 10mm odległości 10 m < D < 50 m < +/- 0.1%D D >...
-
Page 24: Warunki Gwarancji
Gwaranta. W przypadku potrzeby skorzystania z usług serwisu gwarancyjnego prosimy o kontakt ze sprzedawcą lub bezpośrednio z serwisem Nivel System e-mail: service@nivelsystem.com ... -
Page 25: Certificate Of Calibration
Type of the instrument Electronic level Trade mark Nivel System Model EL-32 Serial number The date of the check Instrument checked and calibrated Calibration technician EC declaration of conformity We declare that products Nivel System EL-32 conform to: EN 61326-1:2013, EN 61326-2-6:2013... - Page 26 WARNING: The device contains a rechargeable batteries which must be recycled and should be disposed in accordance with the requirements...
Need help?
Do you have a question about the EL-32 and is the answer not in the manual?
Questions and answers