
Related Manuals for Void Cyclone Bass


Summary of Contents for Void Cyclone Bass
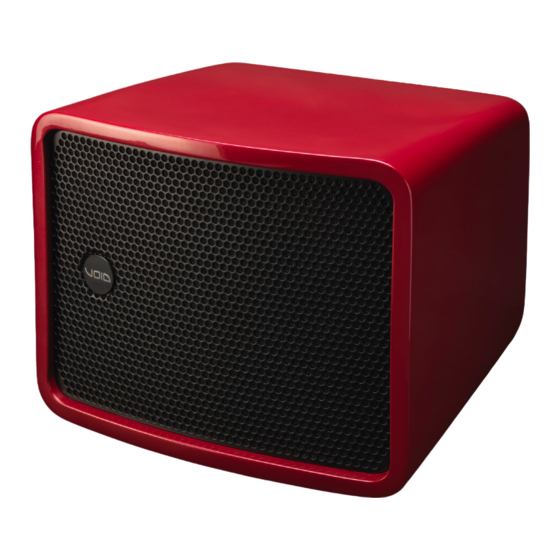
- Page 1 Cyclone Bass Premium Power, Exceptional Style U S E R G U I D E V 2 . 0...
- Page 2 For the latest online version, visit: www.voidacoustics.com Void Acoustics and the Void logo are registered trademarks of Void Acoustics Research Ltd. in the United Kingdom, USA and other countries; all other Void trademarks are the property of Void Acoustics Research Ltd.
-
Page 3: Table Of Contents
Cyclone Glanded Connector Wiring Cyclone Bass Wiring Diagram Bias D1/Q1/Q2 Phoenix wiring Bias Q3/Q5 speakON™ wiring Mounting Installation Safety Wall Mounting Ceiling Mounting Service Return Authorisation Shipping and Packing Considerations Appendix UG10589-2.0 - Cyclone Bass User Guide V2.0 Page 3... -
Page 4: Safety And Regulations
Void Acoustics Research Ltd for such as when the power-supply cord or plug is damaged, liquid reprocessing. -
Page 5: Unpacking And Checking
2 Unpacking and Checking All Void Acoustics products are carefully manufactured and thoroughly tested before being despatched. Your dealer will ensure that your Void products are in pristine condition before being forwarded to you but mistakes and accidents can happen. -
Page 6: About
In buying this product, you are now part of the Void family and we hope using it brings you years of satisfaction. This guide will help you both use this product safely and ensure it performs to its full capability. -
Page 7: Cyclone Bass Specifications
Enclosure Fibreglass IP Rating IP-55 (BS EN 60529:1992 +A2:2013) Rigging Type 75 plate Finish Smooth cellulose Measured in half space AES2 - 1984 compliant Calculated Frequency (Hz) Figure 3.1: Impedance graph UG10589-2.0 - Cyclone Bass User Guide V2.0 Page 7... -
Page 8: Cyclone Bass Dimensions
3 About 3.5 Cyclone Bass dimensions Figure 3.2: Dimensions UG10589-2.0 - Cyclone Bass User Guide V2.0 Page 8... -
Page 9: Cable And Wiring
Figure 4.1 shows the rear panel of a Cyclone Series loudspeaker with the polarity of the Phoenix connector labelled. When viewed from the rear the connectors are negative, positive, negative, positive, from left to right. Figure 4.1: Phoenix connector diagram UG10589-2.0 - Cyclone Bass User Guide V2.0 Page 9... -
Page 10: Cyclone Glanded Connector Wiring
Figure 4.3: Glanded connector removal • Insert the cable through the glanded connectors and tighten. Figure 4.4: Cable connection UG10589-2.0 - Cyclone Bass User Guide V2.0 Page 10... -
Page 11: Cyclone Bass Wiring Diagram
M6 bolts. Figure 4.5: Phoenix attachment 4.5 Cyclone Bass wiring diagram 12” LF Figure 4.6: Wiring diagram Phoenix pins 1-/1+ Phoenix pins 2-/2+ LF (12”) Link/out UG10589-2.0 - Cyclone Bass User Guide V2.0 Page 11... -
Page 12: Bias D1/Q1/Q2 Phoenix Wiring
Max parallel units 4.7 Bias Q3/Q5 speakON wiring Figure 4.10: Bias Q3 Figure 4.11: Bias Q5 Bias Q3/Q5 Out 1 Output LF (12”) 4 (2 Ω load to amplifier) Max quantity per channel UG10589-2.0 - Cyclone Bass User Guide V2.0 Page 12... -
Page 13: Mounting
• Use only Void-approved mounting equipment and accessories • Secondary safeties should be provided in all instances where cabinets are flying or fixing overhead and should conform to local regulations UG10589-2.0 - Cyclone Bass User Guide V2.0 Page 13... -
Page 14: Wall Mounting
Remove the type 75 plate from the bracket by removing the M10 nut. Figure 5.2: Nut removal Step 2: Remove all four M8 counter sink bolts from the bottom of the loudspeaker Figure 5.3: Bolt removal UG10589-2.0 - Cyclone Bass User Guide V2.0 Page 14... - Page 15 Raise the Cyclone Bass loudspeaker into position and attach the M10 nut. Figure 5.5: Loudspeaker fixing Step 6: Rotate the loudspeaker into the desired position and tighten the M10 bolt. Figure 5.6: Loudspeaker positioning UG10589-2.0 - Cyclone Bass User Guide V2.0 Page 15...
-
Page 16: Ceiling Mounting
Remove the type 75 plate from the Air series ceiling bracket by removing the M10 nut. Figure 5.8: Nut removal Step 2: Remove all four M8 counter sink bolts from the bottom of the loudspeaker Figure 5.9: Bolt removal UG10589-2.0 - Cyclone Bass User Guide V2.0 Page 16... - Page 17 Raise the Cyclone Bass loudspeaker into position and attach the M10 nut. Figure 5.11: Loudspeaker fixing Step 6: Rotate the loudspeaker into the desired position and tighten the M10 bolt. Figure 5.12: Loudspeaker positioning UG10589-2.0 - Cyclone Bass User Guide V2.0 Page 17...
-
Page 18: Service
Before returning your faulty product for repair, please remember to get an R.A.N. (Return Authorisation Number) from the Void dealer who supplied the system to you. Your dealer will handle the necessary paperwork and repair. Failure to go through this return authorisation procedure could delay the repair of your product. -
Page 19: Appendix
RAL colour. External dimensions shall be (H) 370 mm x (W) 490 mm x (D) 455 mm (14.6” x 19.3” x 17.9”). Weight shall be 33.5 kg (73.9 lbs). The loudspeaker system shall be a Void Acoustics Cyclone Bass. UG10589-2.0 - Cyclone Bass User Guide V2.0... - Page 20 H E A D O F F I C E Void Acoustics Research Ltd, Unit 15, Dawkins Road Industrial Estate, Poole, Dorset, BH15 4JY United Kingdom Call: +44(0) 1202 666006 Email: info@voidacoustics.com voidacoustics.com Void Acoustics Research Limited is a company registered in England and Wales registration number 07533536...
Need help?
Do you have a question about the Cyclone Bass and is the answer not in the manual?
Questions and answers