Advertisement
Quick Links
Advertisement

Related Manuals for Kogan KATVBKSTNDA


Summary of Contents for Kogan KATVBKSTNDA
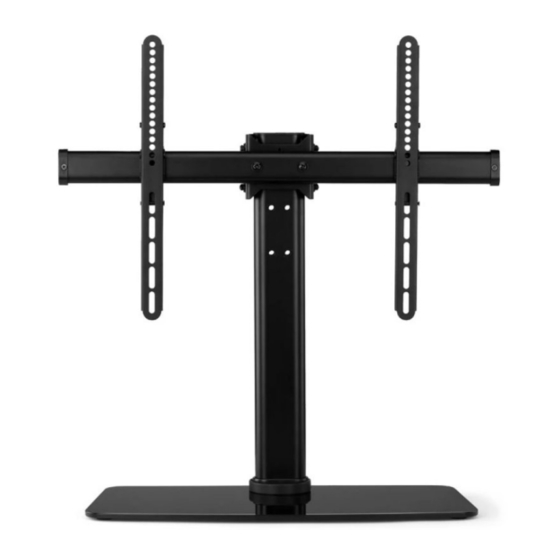
- Page 1 SWIVEL TABLETOP STAND WITH GLASS BASE FOR 32”-70” TVS KATVBKSTNDA...
-
Page 3: Safety And Warnings
SAFETY & WARNINGS Ensure to read all instructions before use and retain this user guide for future reference. Note the following icon when lifting or moving this unit: Lifting with two people is recommended at all times. • Ensure you have located all components before disposing of any packaging materials. - Page 4 DIMENSIONS...
- Page 5 COMPONENTS Parts:...
- Page 6 Hardware: A1 (x4) A2 (x3) A3 (x3) A4 (x2) A5 (x3) A6 (x4) A7 (x2) A8 (x2) A9 (x2) A10 (x1) A11 (x1) A12 (x2) M-A (M5x14) (x4) M-B (M6x14) (x4) M-C (M6x30) (x4) M-D (M8x30) (x4) M-E (M8x50) (x4) M-F (x4) M-G (x8) M-H (x8)
- Page 7 ASSEMBLY Step 1: Add adhesive feet (A1) to the main base (B1). Step 2: Fit the end piece (B5) to the stand (B2).
- Page 8 Step 3: Align the swivel base (B6) with the stand (B2). Using the Allen key (A10), secure with two A4 screws. Step 4: Using the Allen key (A10), secure the main base (B1) to the swivel base (B6) using the three A2 washers, three A3 washers, and three A5 screws.
- Page 9 Step 5: Use the Allen key (A10) to loosen the screws from the stand’s mounting fixture. This will allow you to set it at your ideal TV height. Once determined, refit the mounting fixture with the same screws. Step 6: Use the spanner (A11) to fit two A9 nuts, and a Phillips head screwdriver (not supplied) to fit two A7 screws with two A6 washers.
- Page 10 Step 7: Using a Phillips head screwdriver, secure the support beam (B3) to the mounting fixture with the A8 screws and A6 washers. Step 8: Use a Phillips head screwdriver to remove the locking screws from the two mounting rails (B4). Keep these screws nearby as they will be required at a later step.
- Page 11 Note: To attach the mounting brackets, depending on your TV, refer to either Step 9a or Step 9b. Ensure the screws fixing the mounting rails to your TV fit correctly. • If no spacers are needed, follow Step 9a. • If a combination of spacers (M-G, M-H) are required for a proper fit, follow Step 9b.
- Page 12 Step 9b: Secure the adapters (M-F) with the appropriate screws (M-C, M-D, or M-E) using a Phillips head screwdriver, and the appropriate combination of spacers (M-G, M-H). Take note to use the larger hole on the adapters (M-F).
- Page 13 Step 10: Once the mounting rails are securely fitted to your TV, lift your TV (Lifting with two people is recommended at all times) and align the opening of the mounting rails (B4) with the support beam (B3). Fit the two cable management clips (A12) to the stand.
- Page 14 Step 11: With the TV mounted to the stand, use a Phillips head screwdriver to replace the locking screws from the mounting rails (see Step 8) to secure the TV. Use the spanner (A11) to adjust the angle of the mounting fixture. Use the cable management clips (A12) to secure any cords or cables on your TV.
- Page 15 NOTES...
- Page 16 Need more information? We hope that this user guide has given you the assistance needed for a simple set-up. For the most up-to-date guide for your product, as well as any additional assistance you may require, head online to help.kogan.com...
Need help?
Do you have a question about the KATVBKSTNDA and is the answer not in the manual?
Questions and answers